1. Introduction
This manual provides detailed instructions for the installation, operation, and maintenance of the Mbeysaq JP Hobby ER-200 Alloy Electric Retractable Landing Gear Controller System. This controller is designed for seamless integration with JP Hobby electric retract gear in RC aircraft, offering precise control and automatic voltage detection.
2. Safety Information
- Always ensure the power supply is disconnected before making any electrical connections or adjustments.
- Verify correct wiring polarity to prevent damage to the controller and connected components.
- Operate the system within the specified voltage range (DC 7.4V-8.4V) to avoid malfunction or damage.
- Keep the controller away from moisture, extreme temperatures, and direct sunlight.
- This product is intended for use by experienced RC enthusiasts. Improper use can lead to equipment damage or injury.
3. Product Overview
The ER-200 controller is an advanced system designed to manage electric retractable landing gear in RC models. It features high precision control and automatic power supply voltage detection for reliable operation.
Key Features:
- Seamless integration with JP Hobby ER-200 electric retract gear.
- High-precision control for smooth landing gear operation.
- Automatic power supply voltage detection (DC 7.4V-8.4V).
- Easy to operate with a simple door closing system.
Component Identification:
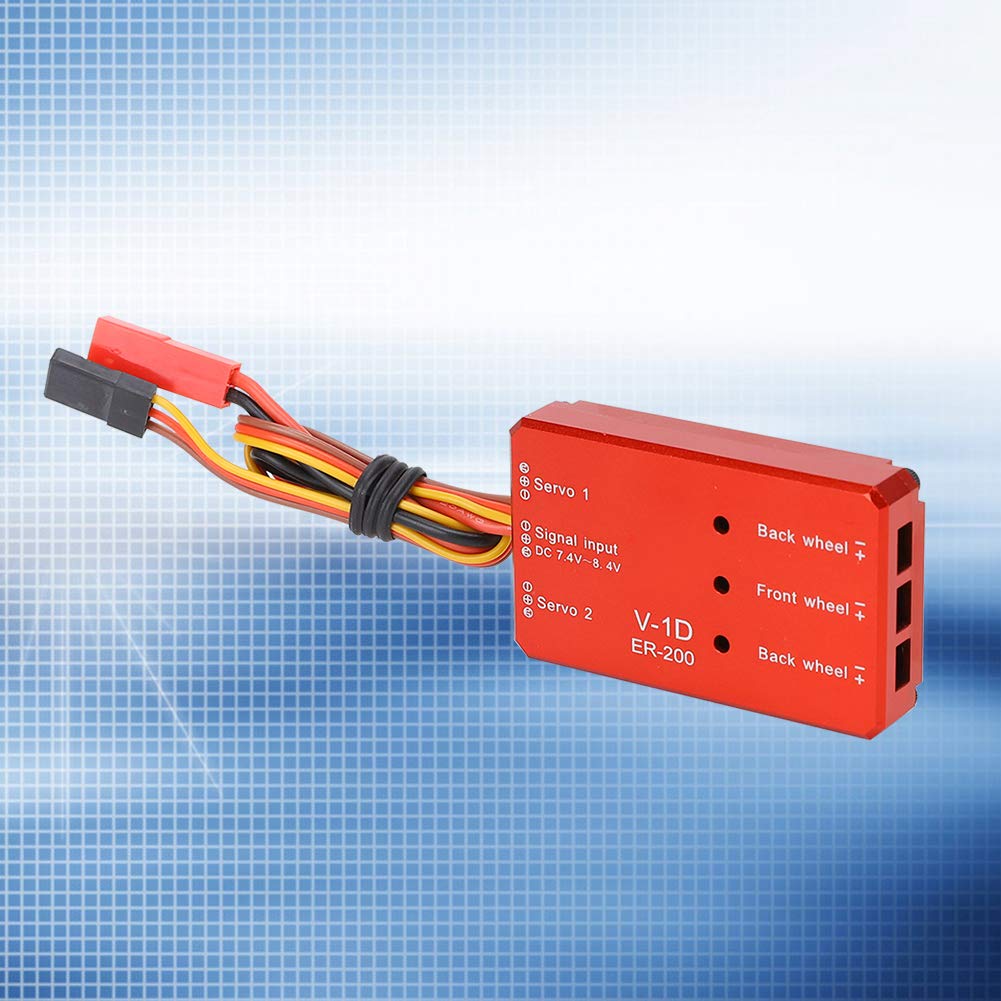
Figure 3.1: ER-200 Controller with Connection Ports. This image displays the top view of the ER-200 controller, highlighting the various connection points for servos, signal input, and landing gear wheels. The ports are clearly labeled for easy identification during setup.
- Servo 1 & Servo 2: Ports for connecting servos that actuate gear doors.
- Signal Input: Connects to the receiver for control signals.
- DC 7.4V-8.4V: Indicates the operating voltage range for the signal input.
- Back Wheel (+/-): Ports for connecting the rear landing gear retract units.
- Front Wheel (+/-): Port for connecting the front landing gear retract unit.
4. Setup and Installation
- Mounting the Controller: Securely mount the ER-200 controller within your RC aircraft using appropriate fasteners or double-sided tape. Ensure it is protected from vibrations and potential impacts.
- Connecting Landing Gear Units:
- Connect the front landing gear retract unit to the "Front wheel" port.
- Connect the rear landing gear retract units to the "Back wheel" ports. Observe polarity (+/-) if indicated on your retract units.
- Connecting Gear Door Servos:
- If your model uses separate servos for gear doors, connect them to "Servo 1" and "Servo 2" ports.
- Ensure the servo direction is correct for opening and closing the gear doors in coordination with the retracts.
- Signal Input Connection: Connect the signal input cable from the ER-200 controller to the designated channel on your RC receiver. This channel will control the landing gear retraction and extension.
- Power Supply: The controller automatically detects the power supply voltage within the range of DC 7.4V-8.4V. Ensure your power source (e.g., flight battery or dedicated BEC) provides voltage within this range.

Figure 4.1: Automatic Voltage Detection. This image highlights the ER-200 controller's capability for automatic power supply voltage detection, ensuring compatibility within the specified range.

Figure 4.2: Servo Voltage Adjustment. This image indicates the ability to adjust the supply voltage for servos actuating the gear doors, allowing for fine-tuning of their operation.
5. Operating Instructions
- Initial Power-Up: After completing all connections, power on your RC receiver and then the ER-200 controller. The system will perform an initial self-check.
- Transmitter Setup: Configure your RC transmitter to assign a switch or lever to the channel connected to the ER-200 controller. This switch will control the landing gear.
- Retract/Extend Operation:
- Move the assigned switch to one position to extend the landing gear. The gear doors will open, the landing gear will deploy, and then the gear doors will close.
- Move the assigned switch to the other position to retract the landing gear. The gear doors will open, the landing gear will retract, and then the gear doors will close.
- Observe Operation: Carefully observe the landing gear and gear door operation during the first few cycles to ensure smooth and correct movement. Adjust servo endpoints or directions on your transmitter if necessary.
6. Maintenance
- Regularly inspect all wiring for signs of wear, fraying, or loose connections.
- Keep the controller clean and free from dust, dirt, and debris. Use a soft, dry cloth for cleaning.
- Ensure the controller is securely mounted and not subject to excessive vibration.
- Periodically check the movement of the landing gear and gear door servos for any binding or stiffness. Lubricate mechanical parts of the landing gear as recommended by their manufacturer.
7. Troubleshooting
| Problem | Possible Cause | Solution |
|---|---|---|
| Landing gear does not move. | No power to controller; loose signal connection; faulty retract unit. | Check power supply and connections. Ensure signal cable is securely plugged into receiver. Test retract units directly if possible. |
| Landing gear moves slowly or binds. | Low voltage; mechanical obstruction; damaged retract unit. | Verify power supply voltage is within 7.4V-8.4V. Check for any physical obstructions. Inspect retract units for damage. |
| Gear doors do not open/close correctly. | Incorrect servo direction; binding in gear door mechanism; faulty servo. | Adjust servo direction on transmitter. Check gear door hinges for smooth movement. Test or replace gear door servos. |
| Intermittent operation. | Loose connections; radio interference. | Secure all electrical connections. Check for sources of radio interference. |
8. Specifications
- Model: ER-200
- Brand: Mbeysaq
- Operating Voltage: DC 7.4V - 8.4V (Automatic Detection)
- Compatibility: JP Hobby Electric Retract Gear
- Control: High-precision, seamless integration
- UPC: 703850526088
- ASIN: B0FL8P9XTS
9. Warranty and Support
This product is covered by a standard manufacturer's warranty against defects in materials and workmanship. For warranty claims or technical support, please contact Mbeysaq customer service through the retailer where the product was purchased. Please retain your proof of purchase.
For additional resources and product information, you may visit the Mbeysaq Store on Amazon.