1. Introduction
This manual provides essential information for the proper installation, operation, and maintenance of your Jungle Leopard 9.16 Inch LCD Mini Secondary Monitor. This compact display is designed to enhance your PC experience by providing real-time system information, customizable themes, and flexible connectivity options. Please read this manual thoroughly before using the product.
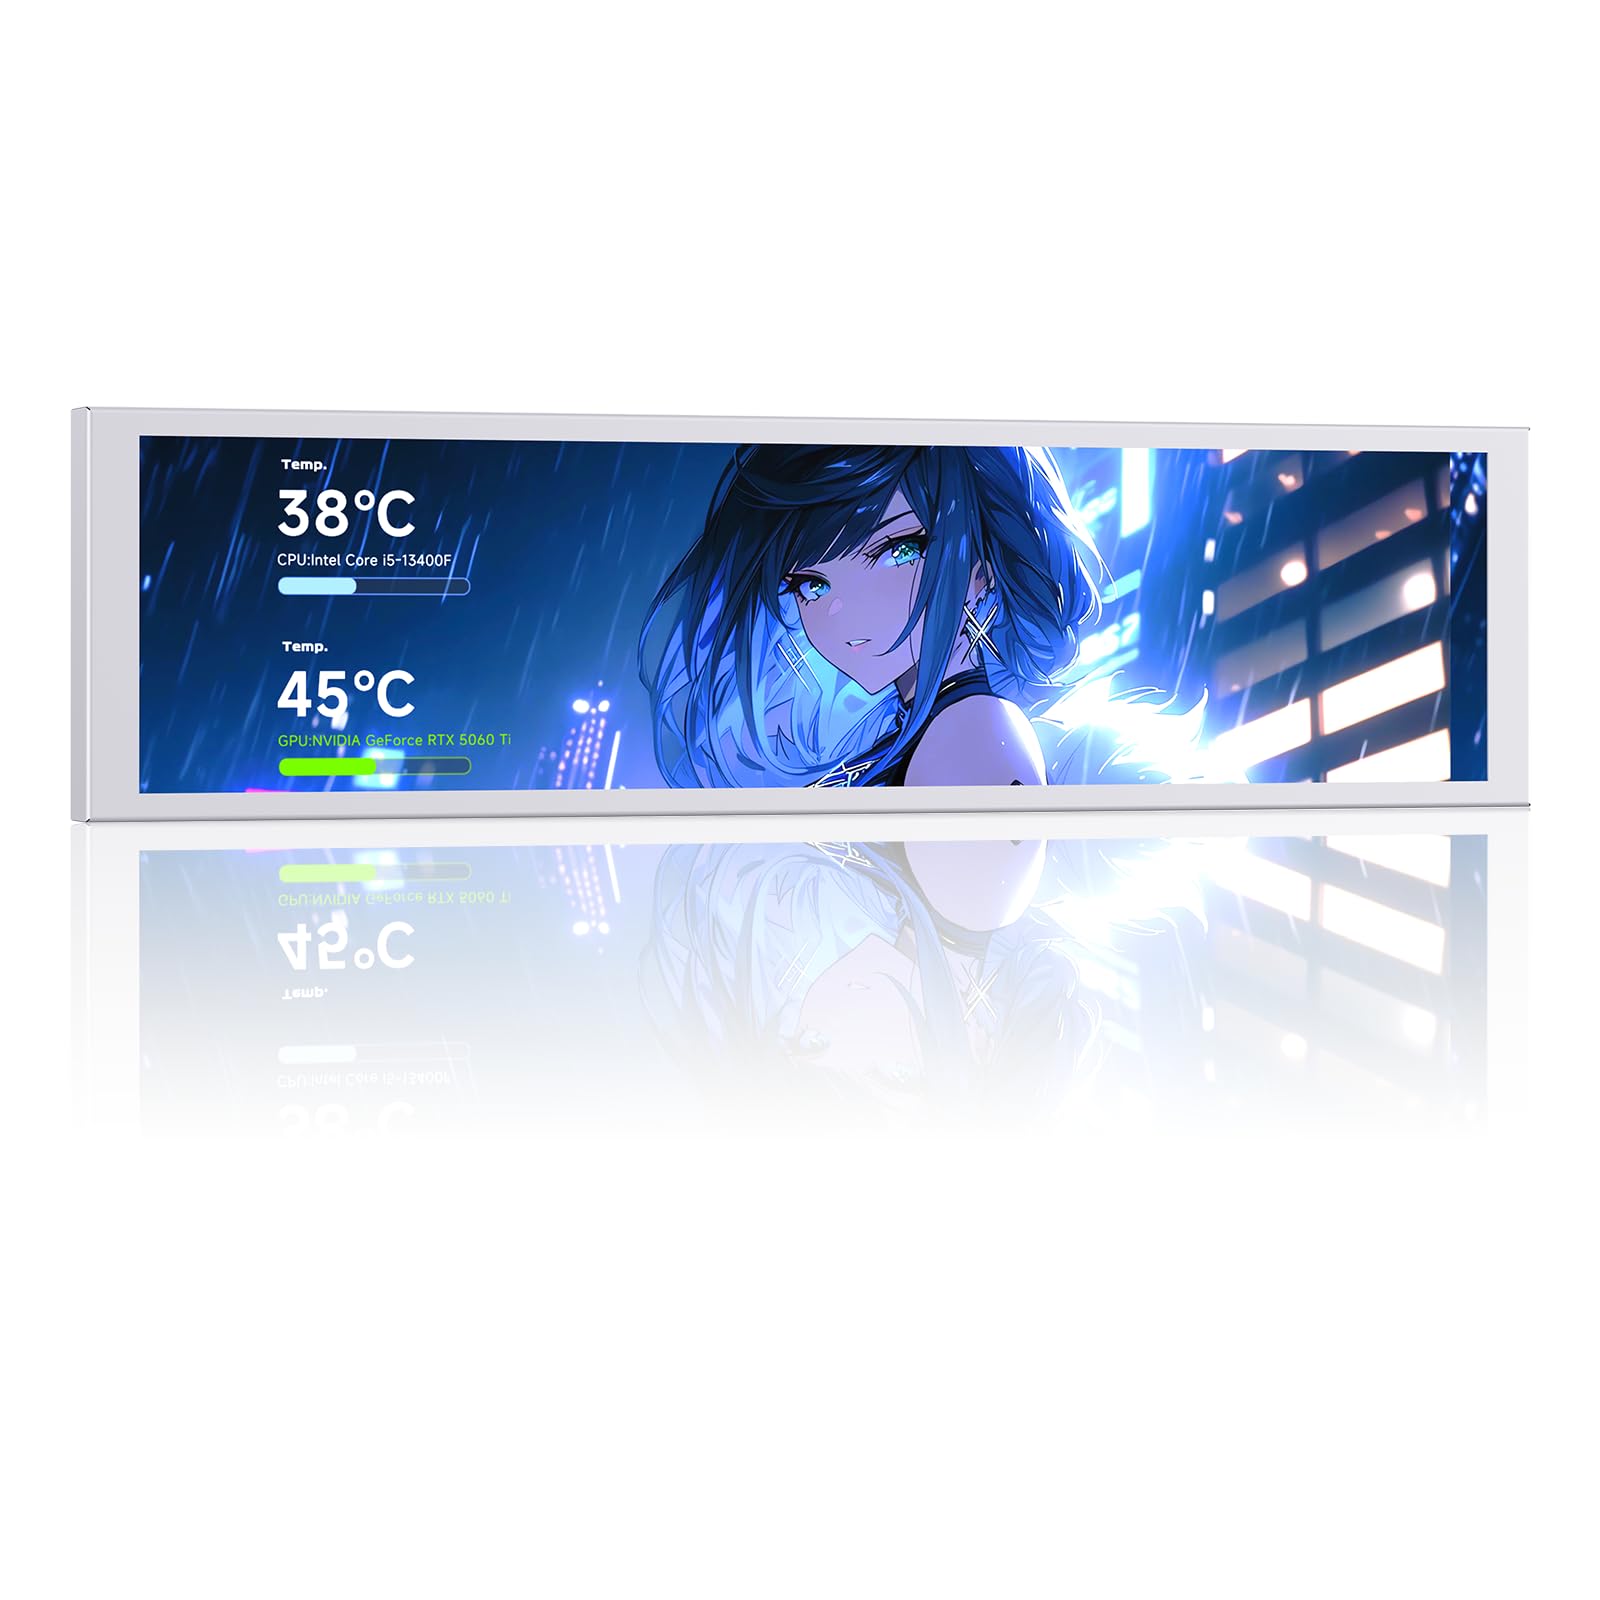
Figure 1: The Jungle Leopard 9.16 Inch LCD Mini Secondary Monitor in operation, displaying system temperatures.
2. Product Features
- High-Definition Display: 9.16-inch LCD screen with a resolution of 1920x480 pixels, offering clear visuals.
- Flexible Connectivity: Supports both USB Type-C and 9-Pin Motherboard connections for versatile integration.
- Efficient Software Control: Exclusive custom software with visual editing operations and a theme editor.
- Customizable Content: Import videos and pictures as backgrounds, with various design options for data display and visualization.
- Real-time Monitoring: Captures and displays data such as CPU, graphics card, memory, hard disk, and temperature.
- Durable Design: Features a metal shell for solid and durable construction.
- Adjustable Brightness: Screen brightness of 350-400 cd/m² for optimal viewing.
- Flexible Installation: Can be adsorbed via a fan-position bracket or magnetic strip, suitable for chassis, desktop, or laptop use.
3. Package Contents
Please verify that all items are present in your package. If any items are missing or damaged, contact customer support.
- Jungle Leopard 9.16 Inch LCD Mini Secondary Monitor
- USB Type-C Cable (for power and data)
- 9-Pin Motherboard Connection Cable
- Magnetic Suction Strip
- Mounting Screws (if applicable)
- User Manual (this document)
4. Setup Guide
4.1 Physical Installation
The monitor offers flexible installation options to suit various environments, including inside a PC chassis, on a desktop, or alongside a laptop.
- Inside PC Chassis: The monitor can be mounted inside your PC case using the provided magnetic suction strip or fan-position bracket. Attach the magnetic strip to the back of the screen and then adhere it to a suitable metal surface inside the chassis. Ensure proper airflow is maintained.
- Desktop/Laptop Use: For external use, position the monitor on a stable surface.
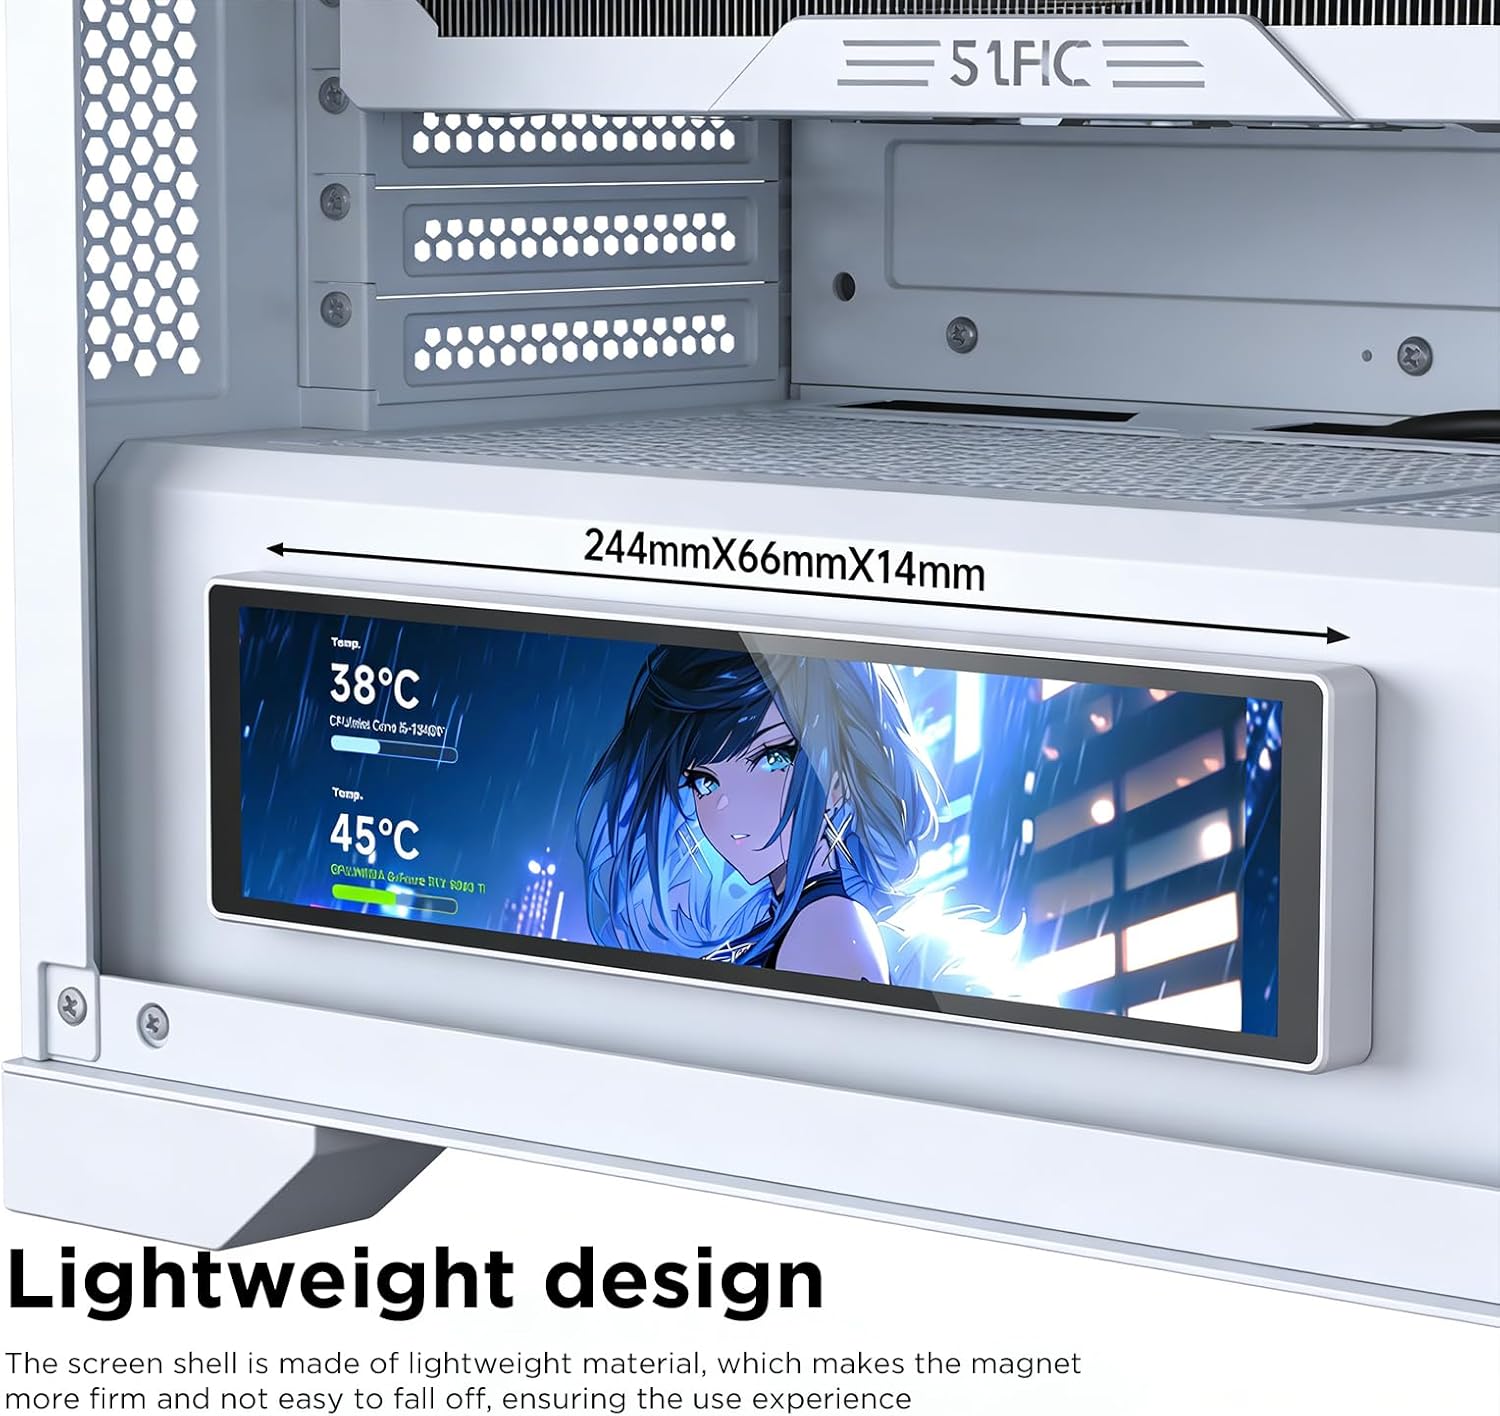
Figure 2: Demonstration of installing the monitor inside a PC chassis using a magnetic strip.
4.2 Connectivity
Connect the monitor to your computer using one of the following methods:
- USB Type-C Connection: Connect one end of the USB Type-C cable to the Type-C port on the monitor and the other end to an available USB Type-C port on your computer. This connection typically provides both power and data.
- 9-Pin Motherboard Connection: For internal chassis installation, connect the 9-Pin USB cable to the 9-Pin USB interface on the monitor and an available 9-Pin USB header on your PC motherboard.

Figure 3: Rear view of the monitor, highlighting the USB Type-C and 9-Pin USB interfaces.
4.3 Software Installation
To utilize the full customization and monitoring features, you must install the dedicated software. Please refer to the manufacturer's official website for the latest software download and installation instructions. Ensure your operating system (Windows) is up to date before installation.
5. Operating Instructions
5.1 Software Overview
The custom software provides a visual editing interface to manage your monitor's display. Upon launching the software, you will find options for:
- Theme Editor: Create and apply custom themes.
- Data Display: Monitor real-time data for CPU, GPU, memory, hard disk, network usage, and temperatures.
- Background Customization: Import images or videos to set as your display background.
- Brightness Adjustment: Fine-tune the screen brightness.
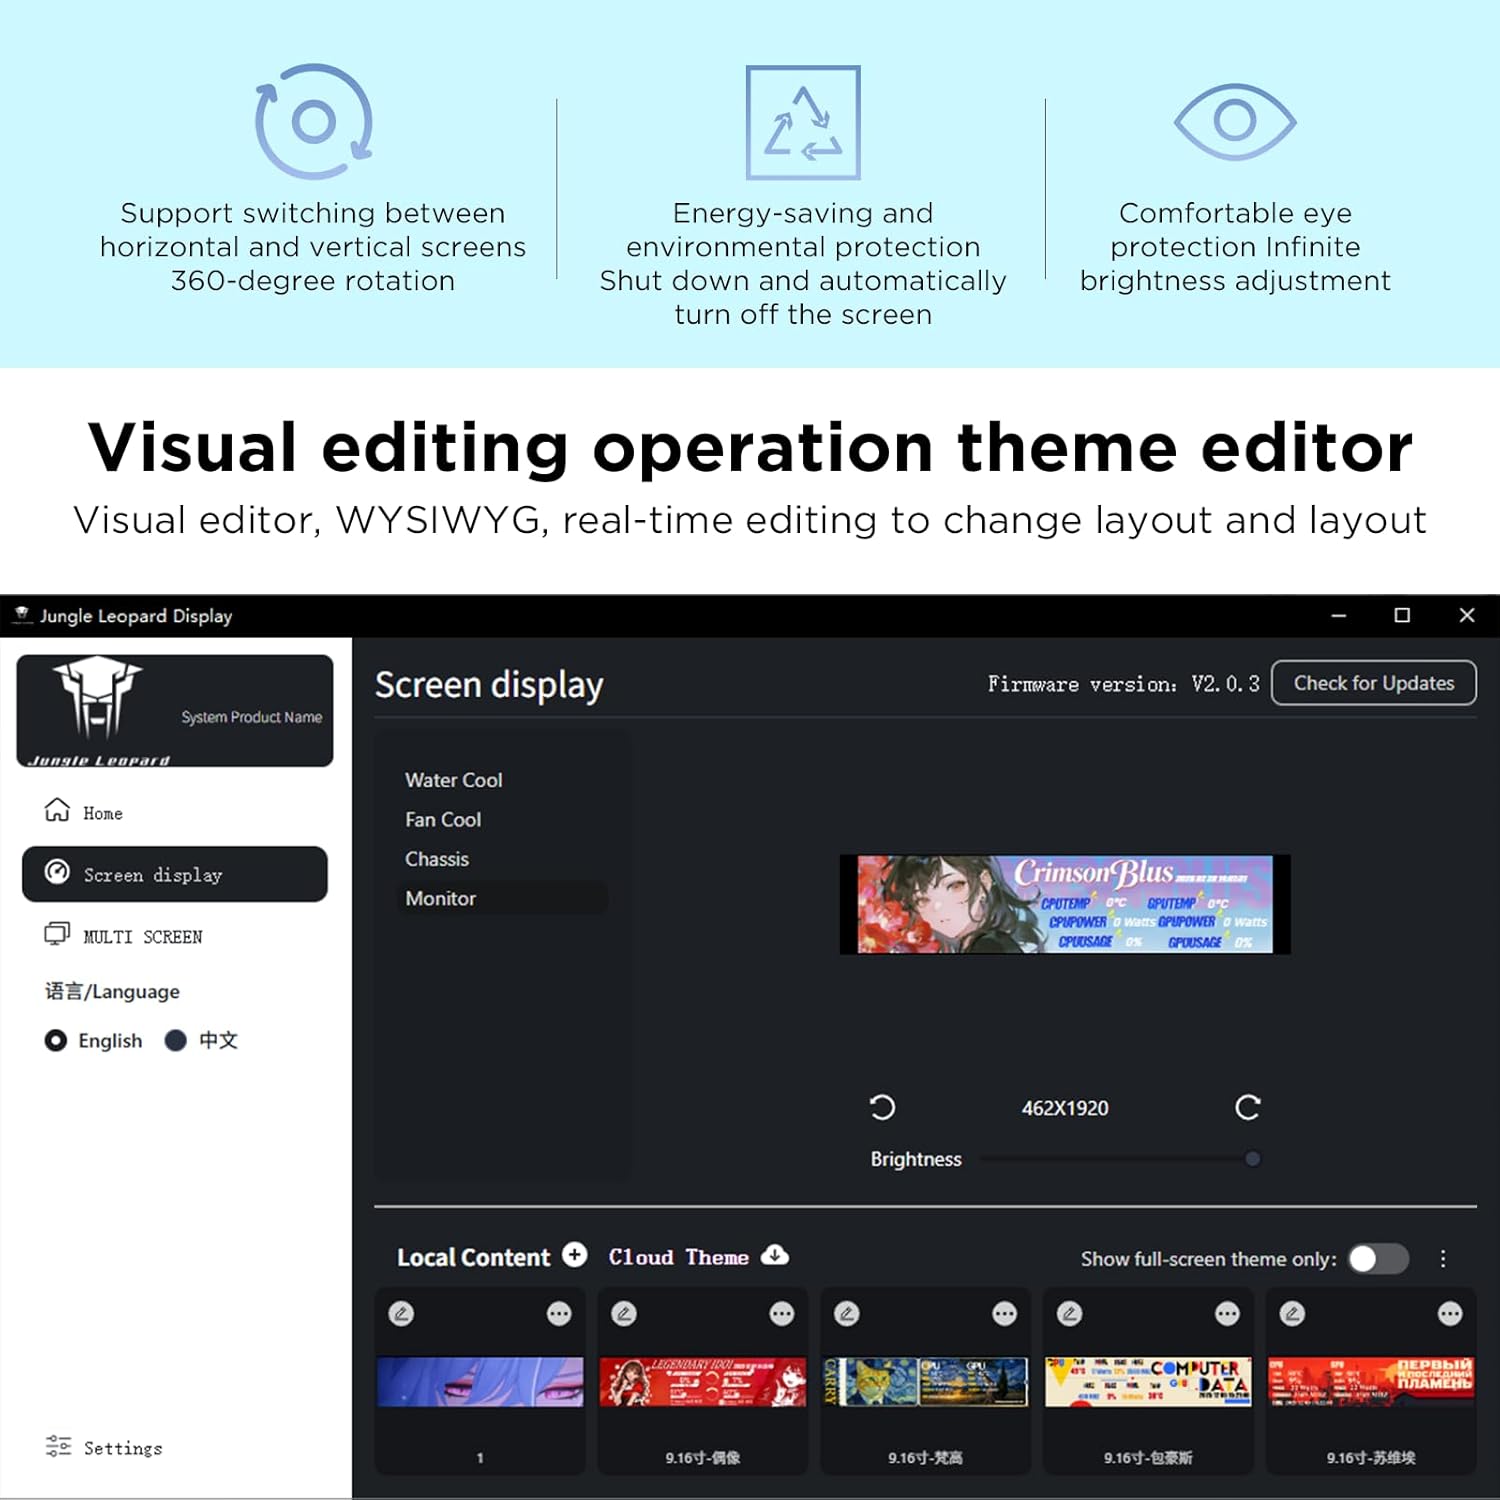
Figure 4: The software interface, demonstrating visual editing and theme customization.
5.2 Customizing Display Content
The software allows extensive personalization:
- Theme Selection: Choose from preset themes or create your own using the theme editor.
- Backgrounds: Navigate to the background settings to import your preferred images or video files.
- Data Widgets: Drag and drop widgets to display system information. Customize their appearance, such as converting temperature data into visual progress bars or arc bars.
5.3 Brightness Adjustment
Use the software interface to adjust the screen brightness to your preference. The monitor supports a brightness range of 350-400 cd/m².
6. Maintenance
To ensure the longevity and optimal performance of your monitor, follow these maintenance guidelines:
- Cleaning: Use a soft, lint-free cloth to gently wipe the screen and exterior. For stubborn marks, slightly dampen the cloth with water or a screen-safe cleaning solution. Avoid harsh chemicals or abrasive materials.
- Storage: When not in use for extended periods, store the monitor in a cool, dry place, away from direct sunlight and extreme temperatures.
- Handling: Avoid dropping or subjecting the monitor to strong impacts.
7. Troubleshooting
If you encounter issues with your monitor, refer to the following common problems and solutions:
- Monitor Not Turning On:
- Ensure the USB Type-C or 9-Pin Motherboard connection is securely plugged in.
- Verify that your computer is powered on and providing power to the USB port.
- Try a different USB port or cable.
- No Display/Incorrect Display:
- Confirm that the dedicated software is installed and running.
- Check software settings to ensure the display is enabled and configured correctly.
- Restart the software and/or your computer.
- Software Not Launching/Crashing:
- Ensure your operating system meets the software's minimum requirements.
- Reinstall the software from the manufacturer's website.
- Check for any conflicting software or antivirus programs.
- Inaccurate Data Display:
- Ensure the software has the necessary permissions to access system sensor data.
- Update the software to the latest version.
If the problem persists after attempting these solutions, please contact customer support.
8. Specifications
Detailed technical specifications for the Jungle Leopard 9.16 Inch LCD Mini Secondary Monitor:
| Feature | Specification |
|---|---|
| Brand | Jungle Leopard |
| Model Number | JL 9.16FP |
| Screen Size | 9.16 Inches |
| Display Type | LCD |
| Resolution | 1920 x 480 Pixels |
| Refresh Rate | 60 Hz |
| Brightness | 350 - 400 cd/m² |
| Screen Surface Description | Glossy |
| Connectivity Technology | USB (USB Type-C, 9-Pin Motherboard) |
| Item Dimensions (D x W x H) | 9.5" x 2.4" x 0.47" (243mm x 63mm x 12mm) |
| Screen Dimensions (L x W) | 226mm x 54.2mm |
| Color | White |
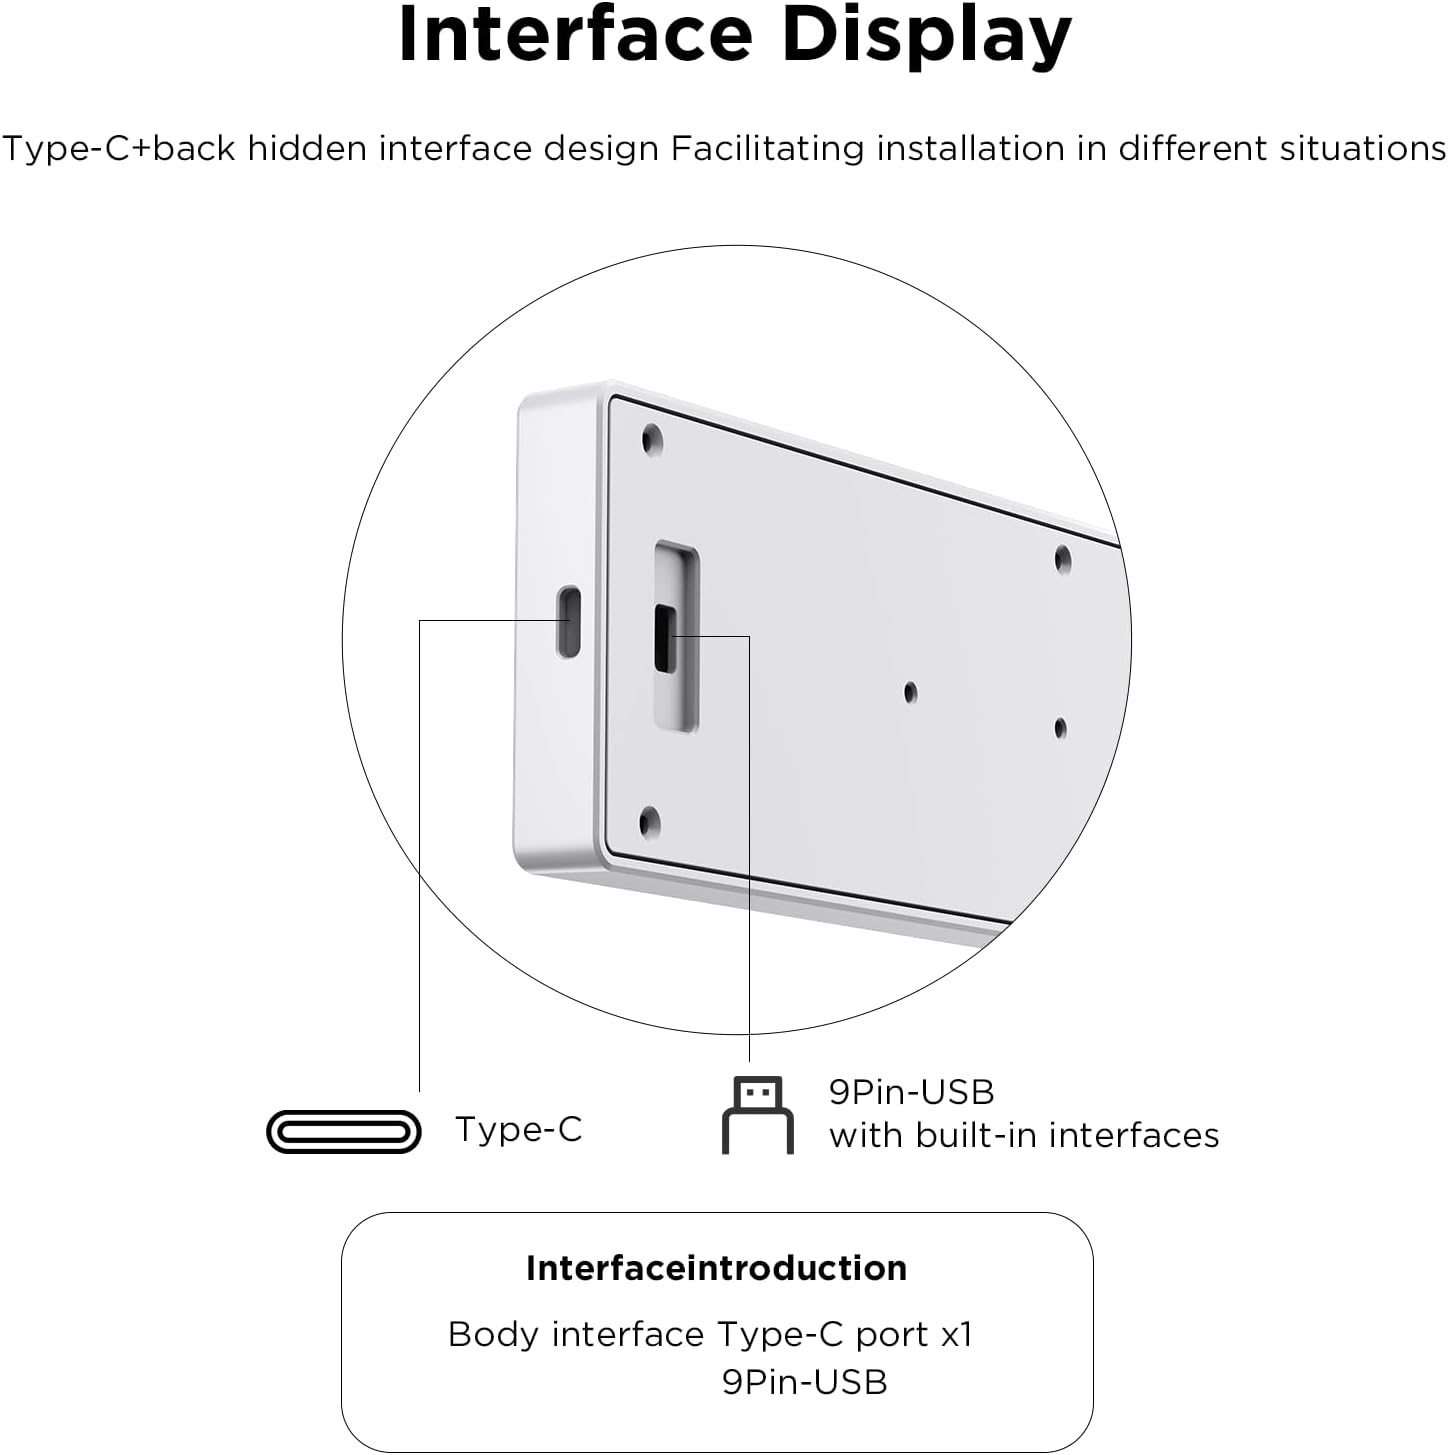
Figure 5: Product dimensions overview.
9. Warranty and Support
The Jungle Leopard 9.16 Inch LCD Mini Secondary Monitor comes with a standard manufacturer's warranty. For specific warranty terms and conditions, please refer to the warranty card included in your product packaging or visit the official Jungle Leopard website. For technical support, troubleshooting assistance, or to inquire about replacement parts, please contact Jungle Leopard customer service through their official channels.


