1. Introduction
This manual provides instructions for the HXVIEW Wireless Security Camera System, which includes a 7-inch touchscreen monitor and two 4MP WiFi solar-powered outdoor cameras. This system is designed for outdoor surveillance, offering features such as PIR human detection, two-way audio, and color night vision. Please read this manual thoroughly before installation and operation.
2. Package Contents
Verify that all items listed below are present in your package:
- 2 x 4MP Solar Battery Powered Cameras
- 1 x 7" Touchscreen Monitor (4CH NVR)
- 2 x Solar Panels
- 1 x 64GB Micro SD Card (pre-installed in monitor)
- 2 x Camera Screw Packs (for mounting)

Image: Complete HXVIEW Wireless Security Camera System components.
3. Product Overview
3.1. 7-inch Touchscreen Monitor (NVR)
- Display: 7-inch touchscreen for intuitive operation.
- Storage: Pre-installed 64GB Micro SD card for local storage, supporting up to 120 days of loop recording for 4 cameras.
- Connectivity: Pre-paired with cameras for plug-and-play setup. Features enhanced antennas for stable connection up to 100 feet.
- Audio: Built-in microphone and speaker for two-way audio communication.
- Network: Operates without an Internet connection via its own hotspot for local monitoring. Remote access available via EseeCloud APP when connected to the internet.
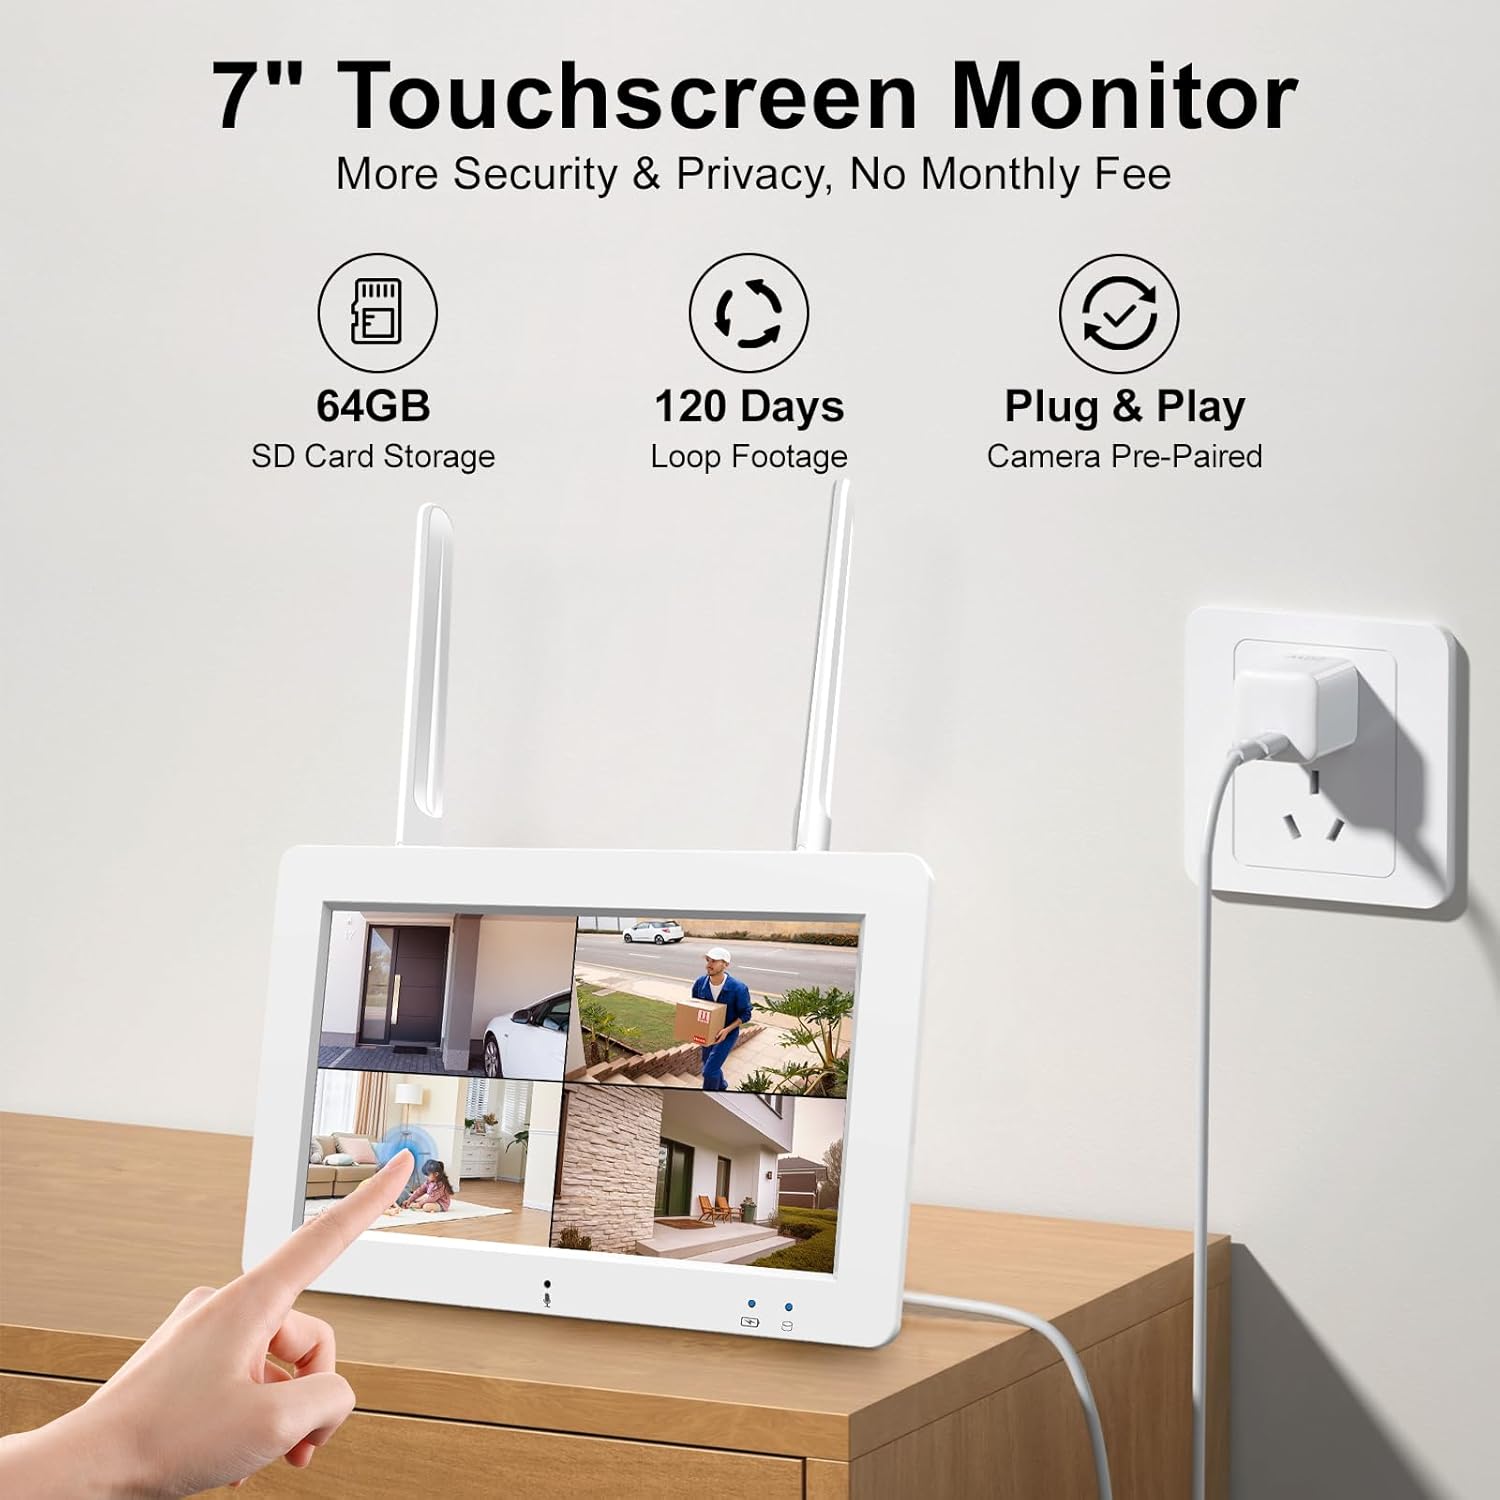
Image: The 7-inch touchscreen monitor in use, showing its display and touch functionality.
3.2. 4MP Solar Powered Camera
- Resolution: 4MP HD (2560x1440) for clear video quality.
- Power: 100% wireless, powered by an efficient solar panel and built-in rechargeable battery, ensuring continuous operation with 3 hours of direct sunlight daily.
- Detection: Sensitive PIR sensor and advanced AI algorithm for intelligent human motion detection, reducing false alarms.
- Night Vision: Built-in floodlight for color night vision up to 65 feet.
- Audio: Built-in microphone and speaker for two-way audio.
- Durability: IP66 waterproof rating, suitable for various weather conditions (-4°F to 122°F).
- Field of View: 120° wide-angle lens.

Image: A solar-powered camera mounted outdoors, highlighting its self-sustaining power feature.
4. Setup
4.1. Initial Charging and Powering On
- Camera: Ensure the camera's built-in battery is sufficiently charged. While solar power maintains charge, an initial charge via a 5V 1A power adapter (not included) is recommended for optimal performance.
- Monitor: Connect the 7-inch touchscreen monitor to a power source using the provided adapter.
4.2. Camera and Monitor Pairing
The security camera and monitor are pre-paired at the factory for immediate use. No manual pairing is typically required for the initial setup.
4.3. Camera Installation
- Location Selection: Choose an outdoor location for the camera that provides the desired surveillance coverage and receives adequate direct sunlight for the solar panel. Ensure the location is within the monitor's signal range (up to 100 feet).
- Mounting: Use the provided screw packs to securely mount the camera and its solar panel to a wall or other stable surface. Adjust the solar panel angle to maximize sun exposure.
- Connection: Connect the solar panel cable to the camera.

Image: Illustration of a wireless camera and solar panel installation, emphasizing no wiring requirements.
4.4. Network Connection (Optional for Remote Access)
To enable remote viewing and control via the EseeCloud APP, connect the monitor to your home Wi-Fi network. The monitor itself creates a local hotspot for direct viewing without internet.

Image: The monitor operating locally, demonstrating that no external network is required for basic functionality.
5. Operating Instructions
5.1. Monitor Operation
The 7-inch monitor features a touchscreen interface. Navigate menus and view camera feeds by tapping and swiping on the screen. Refer to the on-screen prompts for specific functions.
5.2. EseeCloud APP
Download the EseeCloud APP from your device's app store to access remote viewing, two-way audio, alerts, and system settings.
- Remote Access: View live feeds from up to 4 cameras simultaneously from anywhere.
- Two-Way Audio: Communicate through the camera's built-in speaker and microphone.
- Alerts: Receive instant push notifications on your smartphone when motion is detected.
- Customizable Settings: Adjust motion detection sensitivity and schedule working times to optimize battery life and reduce false alarms.

Image: Multi-view remote access via the EseeCloud APP on a smartphone.
5.3. Motion Detection and Alerts
The camera utilizes a PIR sensor and AI algorithm to detect human motion. When an event is triggered, the camera will:
- Start recording.
- Activate the built-in spotlight (if enabled).
- Trigger a 120dB siren (if enabled).
- Send a push notification to your EseeCloud APP.

Image: Smart PIR detection and alerts in action, showing a person detected at night.
5.4. Night Vision
The camera provides 4MP color night vision. The built-in floodlight automatically activates when an alarm is triggered or during live view in low-light conditions to capture full-color details.

Image: Full color night vision with spotlight enabled versus standard black and white night vision.
5.5. Two-Way Audio
Utilize the built-in microphones and speakers on both the camera and monitor to engage in real-time conversations with individuals in the camera's field of view or to deter intruders.

Image: Two-way audio functionality demonstrated with children playing outdoors.
5.6. Recording Modes
The system supports two primary recording modes:
- Solar Power Supply Mode: Records only when an alarm is triggered, conserving battery power.
- Power Adapter Supply Mode: Enables 24/7 continuous recording when the camera is connected to a 5V 1A power adapter (not included). To enable continuous recording, ensure the camera battery is above 80%, then navigate to Monitor menu > Alarm Setup > Power Management > select the camera channel > set to "Keep Recording".

Image: Comparison of solar power and power adapter recording modes.
5.7. Privacy Protection
You can customize privacy blocking areas within the camera's field of view to exclude specific zones from recording, protecting personal space.

Image: Privacy area customization to protect specific zones.
5.8. Alexa Integration
The system supports integration with Alexa. Use voice commands to view live camera feeds on compatible Alexa devices (e.g., Echo Show).

Image: Alexa integration for voice-controlled viewing.
6. Maintenance
6.1. Solar Panel Care
Regularly clean the surface of the solar panels to ensure maximum efficiency in charging the camera's battery. Dust, dirt, or debris can reduce charging performance.
6.2. Battery Management
While solar-powered, prolonged periods of low sunlight may require manual charging of the camera battery using a 5V 1A power adapter (not included). Monitor battery levels via the EseeCloud APP or the monitor.
6.3. SD Card Management
The pre-installed 64GB SD card supports loop recording. When the storage is full, the oldest footage will be overwritten by new recordings. Regularly back up important footage if needed.
7. Troubleshooting
- No Image on Monitor:
- Ensure the monitor is powered on and connected to a power source.
- Verify cameras are powered on and within signal range.
- Check if cameras are properly paired (though usually pre-paired). - Camera Not Charging:
- Ensure the solar panel is clean and receiving direct sunlight.
- Check the connection between the solar panel and the camera.
- If prolonged low sunlight, manually charge the camera with a 5V 1A adapter. - False Motion Alarms:
- Adjust the PIR detection sensitivity in the EseeCloud APP.
- Ensure the camera is not pointed at areas with frequent non-human motion (e.g., swaying branches, busy roads). - Poor Signal/Connectivity:
- Reduce the distance between the camera and the monitor.
- Remove any obstructions (thick walls, metal structures) between devices.
- Ensure both devices have clear line of sight if possible. - No Remote Access:
- Ensure the monitor is connected to your home Wi-Fi network.
- Verify your smartphone has an active internet connection.
- Check EseeCloud APP settings and ensure the monitor is added correctly.
8. Specifications
| Feature | Specification |
|---|---|
| Model Name | BU-WP-8002 |
| Brand | HXVIEW |
| Indoor/Outdoor Usage | Outdoor |
| Power Source | Solar Powered |
| Connectivity Protocol | Wi-Fi |
| Video Capture Resolution | 4MP (2560x1440) |
| Night Vision Range | 65 Feet |
| Water Resistance Level | IP66 Waterproof |
| Flash Memory Installed Size | 64 GB (Micro SD) |
| Flash Memory Supported Size Maximum | 128 GB |
| Number of Channels | 4 |
| Special Features | 2-Way Audio, App Control, HD Resolution, Night Vision, Weather Proof |
| Operating Temperature | -4°F to 122°F (-20°C to 50°C) |
9. Warranty and Support
For warranty information and technical support, please refer to the official HXVIEW website or contact their customer service directly. Keep your purchase receipt for warranty claims.
Contact Information:
- Website: Visit the HXVIEW Store on Amazon
- Refer to product packaging or the HXVIEW website for direct support contact details.