1. Introduction
This manual provides essential information for the safe and efficient installation, operation, and maintenance of your APUS 27kW Electric Tankless Water Heater. Please read all instructions carefully before installation and use. Retain this manual for future reference.
Important Safety Information
- Installation must be performed by a qualified electrician and plumber in accordance with all local and national electrical and plumbing codes.
- Ensure the power supply is disconnected before performing any installation, maintenance, or service.
- Do not operate the water heater if it is damaged or malfunctioning.
- This appliance is designed for heating water only. Do not use it for any other purpose.
- Maintain proper clearances around the unit as specified in the installation section.
2. Package Contents
Verify that all items are present in the package:
- Water heater x1
- Instruction manual x1
- Rubber x5
- Screw x5
- Installation guide card x1
- φ24×3 sealing ring x2
3. Specifications
| Feature | Specification |
|---|---|
| Brand | APUS |
| Model Number | AP- ADSK-270G13 |
| Power Source | Hard Wiring Required |
| Product Dimensions (W x H x D) | 11.42"W x 17.72"H x 3.54"D |
| Wattage | 27000 watts |
| Voltage | 240 Volts |
| Maximum Temperature | 140 Degrees Fahrenheit |
| Efficiency | 99.8% Thermal Efficiency |
| Mount Type | Wall Mount |
| Material Type | Sheet Metal with Insulating Paint |
| Item Weight | 18.96 Pounds |
| Special Features | Demand Hot Water, High Efficiency, Water-Electricity Separation, ±1°F Stable Temperature Control |
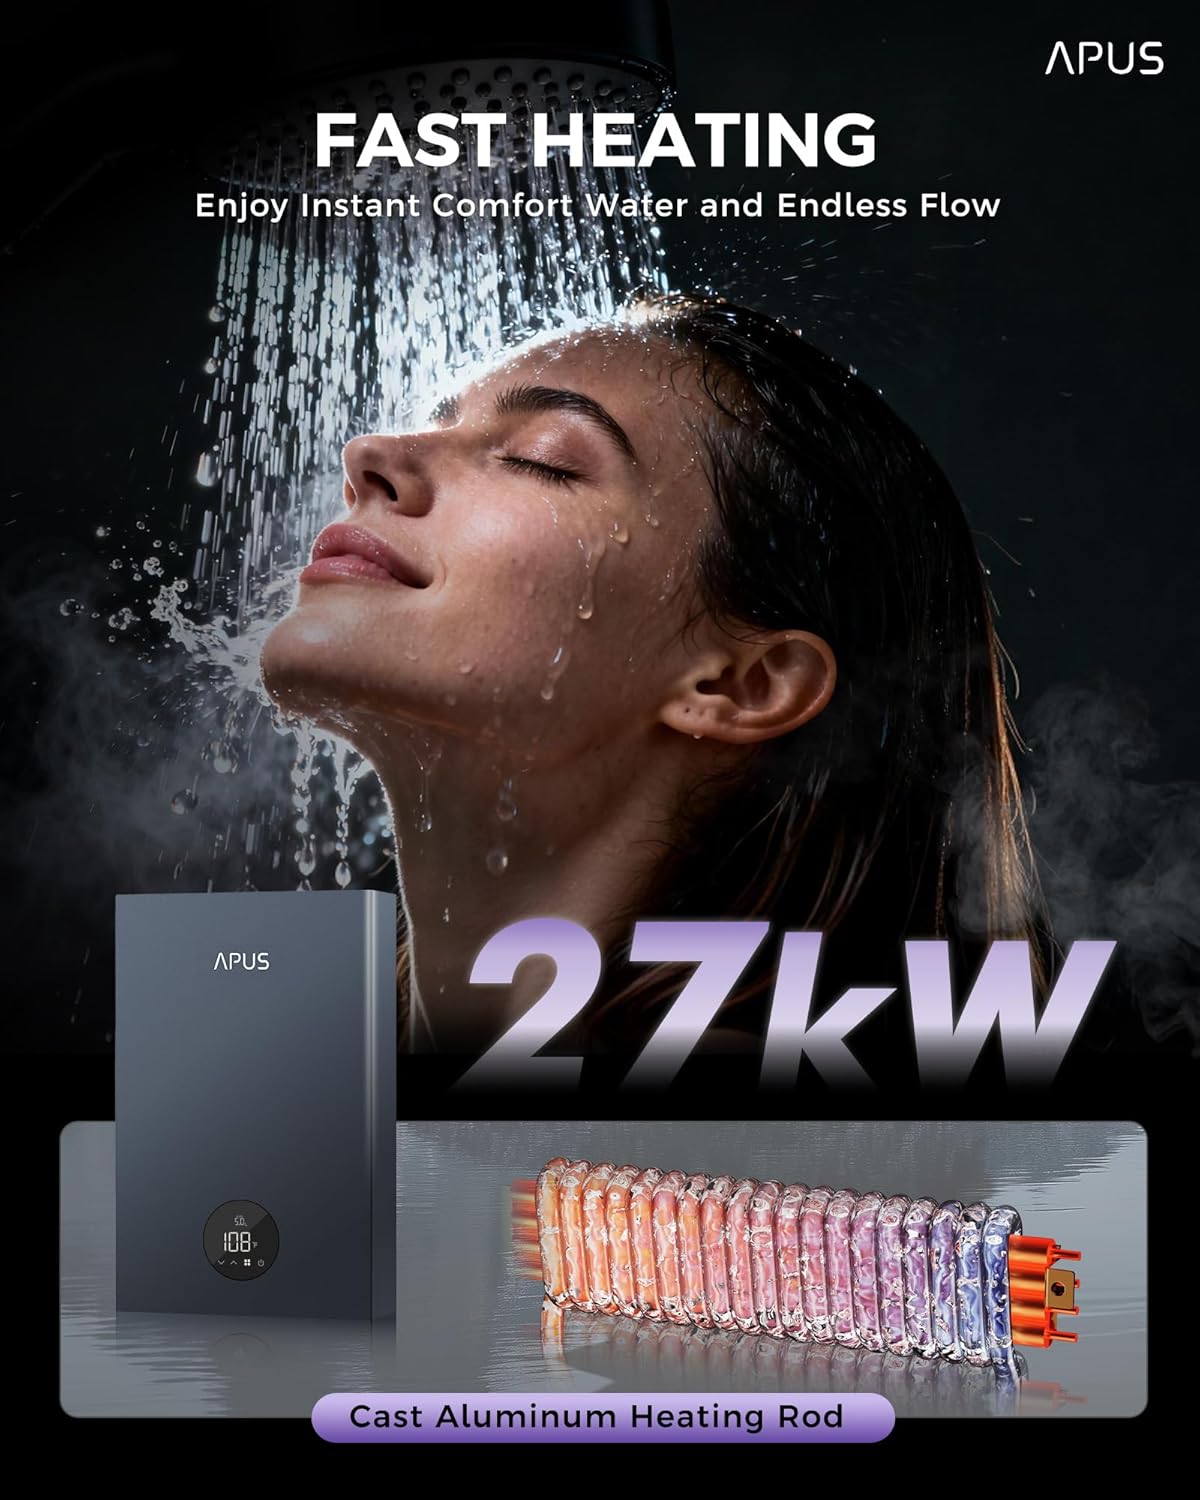
This 27kW model is designed to deliver up to 6.5 GPM, suitable for 3-4 simultaneous uses.
4. Setup & Installation
Professional installation is highly recommended for this electric tankless water heater due to electrical and plumbing requirements.
Installation Video Guide
Official installation guide video for APUS 18kW and 27kW tankless water heaters. This video demonstrates the unboxing, mounting, wiring, and water connection steps.
Step-by-Step Installation
- Unboxing and Initial Preparation:
Carefully open the product packaging. Remove the water heater unit and all accessories. Keep the user manual and installation guide card handy.
The APUS 27kW Electric Tankless Water Heater unit.
- Removing the Front Cover:
Use a screwdriver to remove the five screws located on the top and bottom of the unit. Carefully slide open the front cover and disconnect the display cable from the heater's power panel. This provides access for mounting and wiring.
- Marking Drilling Positions:
Place the installation guide card on the desired wall location. Ensure it is level and mark the drilling positions clearly. The unit dimensions are 11.42"W x 17.72"H x 3.54"D.
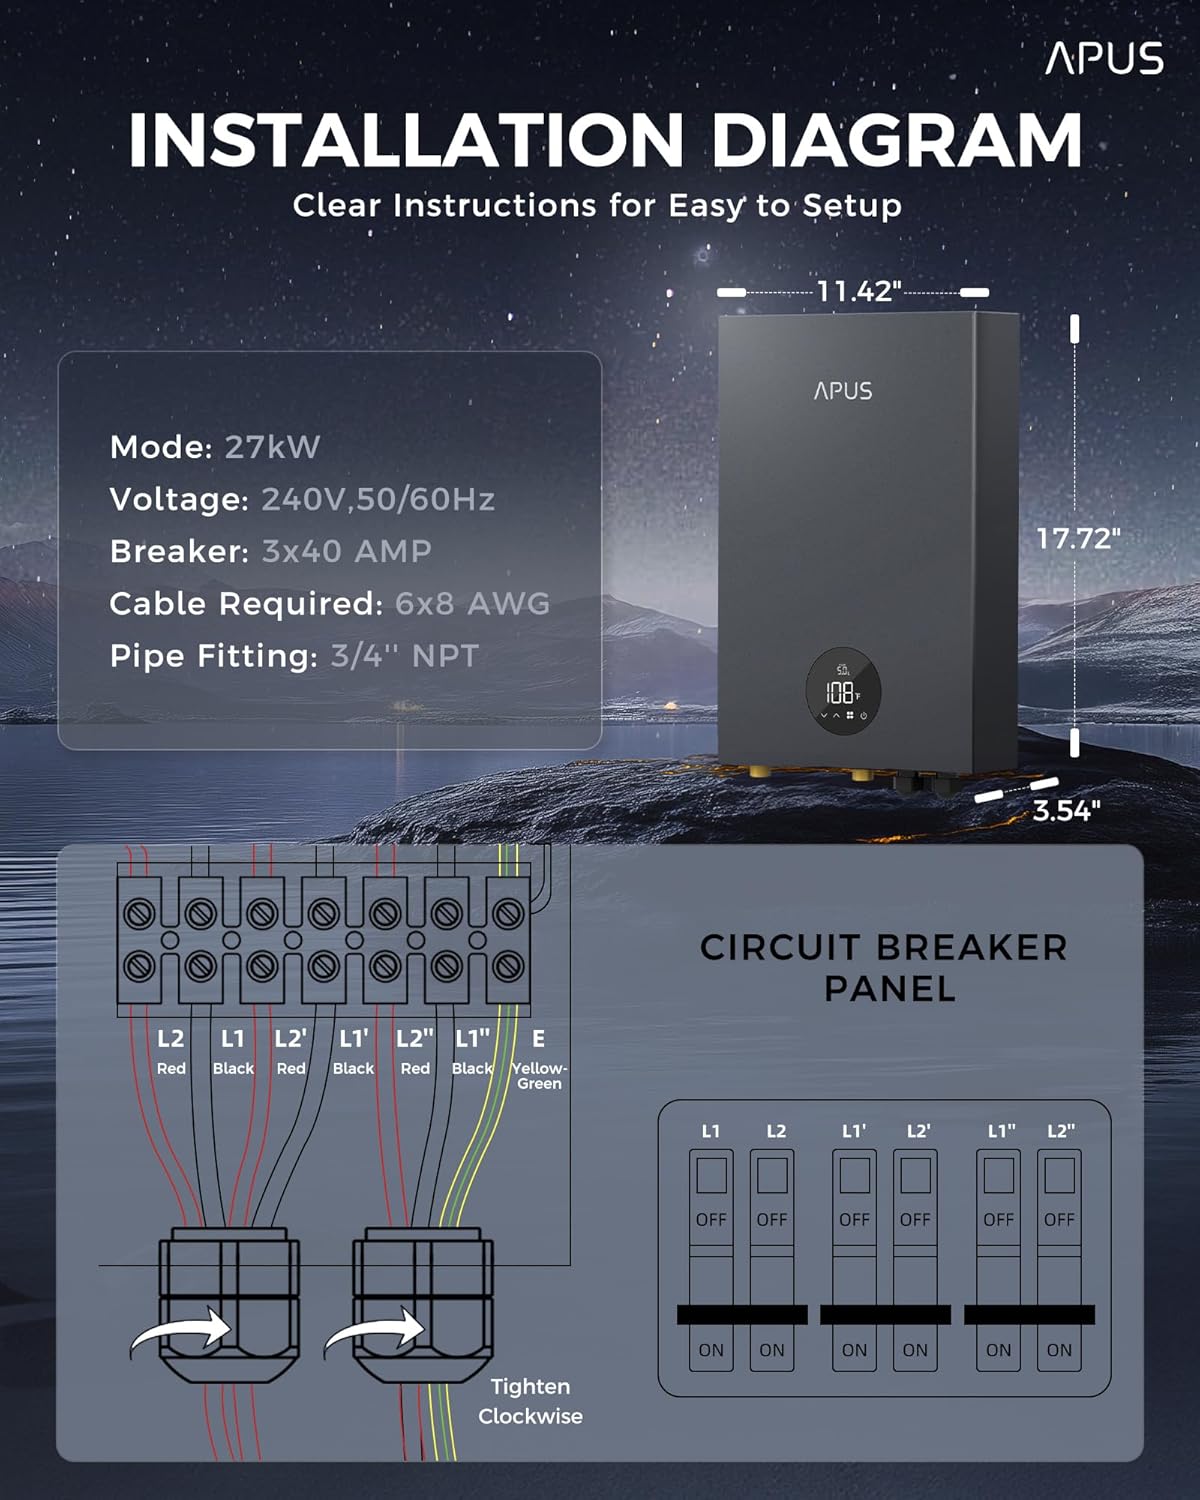
Detailed installation diagram with dimensions and electrical connections.
- Drilling Holes and Inserting Rubbers:
Drill holes into the wall at the marked positions. Insert the provided rubber anchors into the drilled holes.
- Mounting the Unit:
Partially install two screws into the top holes. Secure the water heater unit onto these screws, then install and fully tighten the two lower screws. Finally, fully tighten all four screws to ensure the unit is securely fastened to the wall.
- Connecting Electrical Wiring:
This 27kW model requires 3 x 40A breakers and 6 x 8 AWG cable. Connect the three L2 wires (typically red) to the L2 terminals and the three L1 wires (typically blue) to the L1 terminals on the internal terminal block. Ensure all connections are tight and secure. Connect the ground wire (yellow/green) to the designated ground terminal.
Electrical Requirements:
- Voltage: 240V, 50/60Hz
- Breaker: 3 x 40 AMP
- Cable Required: 6 x 8 AWG
- Connecting Water Lines:
Wrap PTFE tape around the water outlet and water inlet threads. Connect the appropriate hoses to the water inlet (cold water) and water outlet (hot water) ports. Ensure the sealing rings are included and connections are hand-tightened, then secured with a wrench to prevent leaks.
Pipe Fitting: 3/4" NPT
- Reconnecting Display Cable:
Reconnect the display cable to the panel, ensuring it is firmly seated.
- Reinstalling the Front Cover:
Place the panel cover back on the unit. Reinstall the five screws and tighten them securely. Double-check that the water heater is securely fastened to the wall and all connections are tight.
5. Operating Instructions
Power On and Initial Setup
- After installation, ensure all water connections are leak-free and the unit is filled with water before turning on the electrical power.
- Turn on the circuit breakers supplying power to the water heater. The LED display will illuminate.
Temperature Adjustment
- Use the touch controls on the LED display to set your desired water temperature. The temperature range is 86°F to 140°F (30°C to 60°C).
- Adjustments can be made in 1°F increments for precise comfort.
- The unit features a memory function that saves your preferred temperature settings even after power cycles.
Self-Modulating Technology
The APUS tankless water heater incorporates self-modulating technology. This feature automatically adjusts the power consumption based on the hot water demand, ensuring efficient energy use and consistent water temperature, even across multiple outlets.

The unit maintains a stable temperature with minimal fluctuation (±1°F).

The water heater can supply hot water to multiple points simultaneously.
6. Maintenance
Regular maintenance ensures optimal performance and longevity of your water heater.
General Cleaning
- Wipe the exterior of the unit with a soft, damp cloth. Do not use abrasive cleaners or solvents.
- Ensure the air vents are clear of dust and debris to maintain proper airflow.
Descaling (Professional Service Recommended)
While the cast aluminum heating element is designed to be anti-scale, in areas with hard water, mineral buildup can occur over time. It is recommended to have the unit professionally descaled periodically to maintain efficiency. Consult a qualified technician for this service.

High thermal efficiency helps reduce energy costs.
7. Troubleshooting
If you experience issues with your water heater, refer to the following common troubleshooting steps. For complex problems, contact customer support.
| Problem | Possible Cause | Solution |
|---|---|---|
| No hot water / Unit not turning on | No power, tripped breaker, water supply off | Check circuit breakers. Ensure water supply valve is open. Verify electrical connections. |
| Water not hot enough | Temperature setting too low, insufficient flow rate, cold incoming water temperature | Increase temperature setting on the display. Reduce water flow. Consult specifications for minimum incoming water temperature. |
| Water flow is weak | Clogged aerator, kinked hose, low home water pressure | Clean faucet aerators. Check water hoses for kinks. Consult a plumber for home water pressure issues. |
| Leakage | Loose water connections, damaged seals | Tighten water connections. Inspect seals and replace if damaged. If leakage persists, turn off water and power and contact support. |
| Error code on display | Internal malfunction or sensor issue | Note the error code and contact customer support for assistance. |
8. Warranty & Support
APUS provides a warranty for this product. For specific warranty details, please refer to the warranty card included in your package or contact APUS customer service.
For any inquiries, technical support, or warranty claims, please contact APUS customer service. We offer 24/7 customer service to assist you.
Contact Information: Please refer to the contact details provided on the installation guide card or the official APUS website.