Introduction
The Karlxtom CYD17 is a versatile emergency tool designed for automotive and outdoor use. It integrates a powerful 4500A car jump starter, a 190 PSI air compressor, an 88Wh portable power bank, and a 500-lumen LED light. This manual provides essential information for the safe and effective operation, maintenance, and troubleshooting of your device.
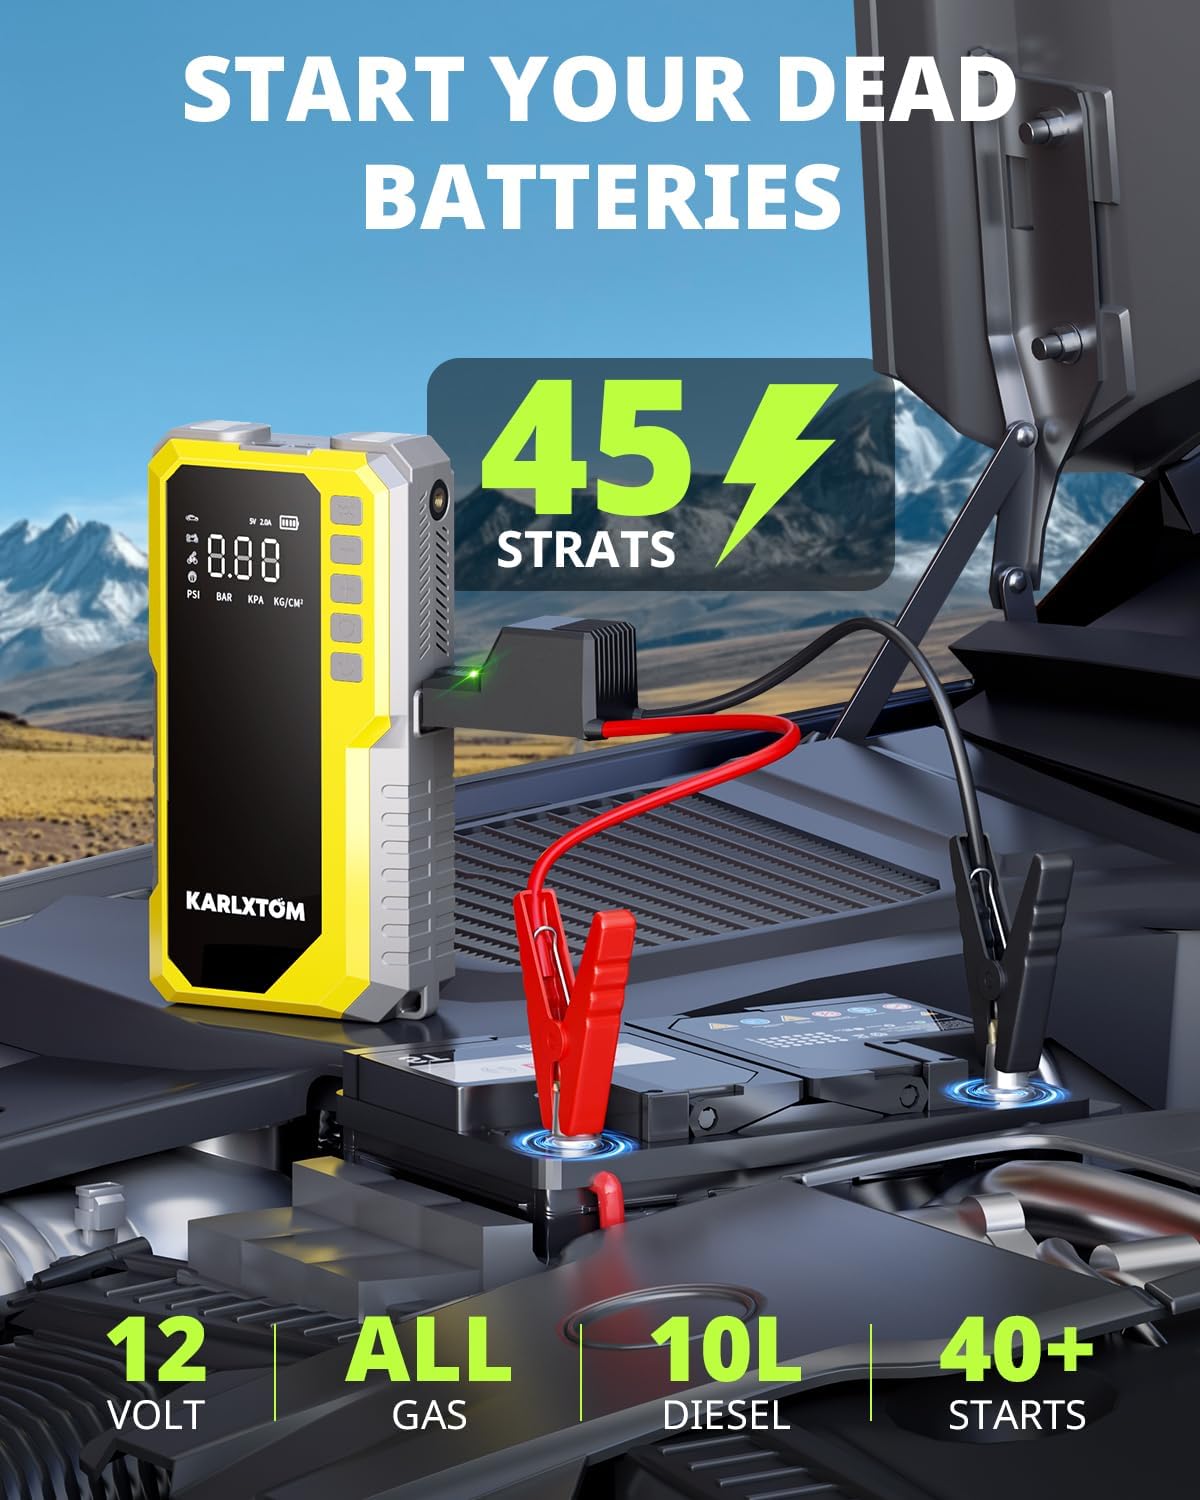
Image: The Karlxtom CYD17 unit, showcasing its compact design and integrated features.
Safety Information
Always read and understand all safety instructions before using this product. Failure to follow these instructions may result in electric shock, fire, or serious injury.
General Safety Precautions:
- Do not operate the unit if it is damaged.
- Keep out of reach of children.
- Use in a well-ventilated area.
- Do not expose to rain or extreme temperatures outside the operating range (-20°C to 60°C).
- Do not disassemble the unit. Contact customer support for service.
- Ensure proper polarity when connecting to a vehicle battery.
Integrated Safety Protections:
The Karlxtom CYD17 is equipped with 10 layers of safety protection to ensure safe operation:
- Over Voltage Protection
- Over Current Protection
- Low Voltage Protection
- Zero Damage Protection
- Short-Circuit Protection
- Over-Load Protection
- Reverse Connection Protection
- Reverse Polarity Protection
- Spark-proof Safeguards
- High Temperature Protection

Image: Visual representation of the 10 safety protection features integrated into the device.
Package Contents
Verify that all items are present in the package:
- Karlxtom CYD17 Jump Starter Unit
- Smart Jumper Cable
- Tire Pump Tube
- USB-C Charging Cable
- Multiple Valve & Nozzle Adaptors
- Storage Case
- User Manual (this document)

Image: All components included in the Karlxtom CYD17 product package.
Product Overview
Familiarize yourself with the main components and controls of the Karlxtom CYD17 unit.

Image: Detailed diagram of the Karlxtom CYD17 unit, highlighting its LED light, USB output, Type-C input, tire inflation hose connection port, 12V car jump-start output port, LED light button, decrease/increase preset tire pressure buttons, mode switch button, power button, and display screen.
Key Components:
- Display Screen: Shows battery level, pressure readings, and operational status.
- Power Button: Turns the unit on/off.
- Mode Switch Button: Cycles through pressure units (PSI/BAR/KPA) or LED light modes.
- Increase/Decrease Buttons (+/-): Adjusts preset tire pressure.
- LED Light Button: Activates and cycles through LED light modes.
- 12V Car Jump-Start Output Port: Connects to the smart jumper cables.
- Tire Inflation Hose Connection Port: Connects the air compressor hose.
- USB Output (5V/2.1A): For charging external devices.
- Type-C Input (5V/2A): For charging the jump starter unit.
Specifications
| Feature | Specification |
|---|---|
| Model | CYD17 |
| Peak Amperage | 4500 Amps |
| Voltage | 12 Volts |
| Battery Type | Lithium Ion (4 included) |
| Battery Capacity | 88Wh |
| Air Compressor Pressure | Up to 190 PSI |
| LED Light Brightness | 500 Lumens |
| USB Output | 5V/2.1A |
| Type-C Input | 5V/2A |
| Product Dimensions | 4.9 x 11 x 21.8 cm |
| Item Weight | 950 g |
| Operating Temperature | -20°C to 60°C |
| Vehicle Service Type | Passenger Car, SUV (All gas engines, diesel engines under 10.0L) |
Setup
Initial Charging:
- Before first use, fully charge the Karlxtom CYD17 unit.
- Connect the provided USB-C charging cable to the Type-C input port on the unit.
- Connect the other end of the USB-C cable to a compatible USB power adapter (not included, 5V/2A recommended).
- The display screen will indicate the charging status. Charge until the battery indicator shows full.
It is recommended to fully charge the unit every 3-6 months to maintain battery health, even when not in use.
Operating Instructions
1. Jump Starting a Vehicle
This unit is suitable for jump-starting 12V vehicles with all petrol engines and diesel engines under 10.0 liters.
- Prepare the Unit: Ensure the jump starter is sufficiently charged (at least 50% recommended).
- Connect Smart Jumper Cable: Insert the blue end of the smart jumper cable into the 12V car jump-start output port on the unit. Ensure a firm connection. The indicator light on the smart cable will flash red/green.
- Connect to Car Battery: Attach the red clamp to the positive (+) terminal of the car battery and the black clamp to the negative (-) terminal. If connected correctly, the indicator light on the smart cable will turn solid green. If it turns solid red with beeps, check for reverse polarity or other issues.
- Start Vehicle: Once the smart cable indicator is solid green, start your car engine.
- Remove Cables: After the engine starts, immediately remove the smart jumper cables from the car battery, then disconnect from the jump starter unit.

Image: Step-by-step guide for connecting the jump starter to a car battery and starting the engine.

Image: The Karlxtom CYD17 unit with smart jumper cables connected to a vehicle battery.
2. Using the Air Compressor
The integrated air compressor can inflate tires and other inflatables up to 190 PSI.
- Connect Air Hose: Screw the tire pump tube onto the tire inflation hose connection port on the unit.
- Attach to Tire Valve: Connect the other end of the hose to the tire valve stem. Ensure a secure connection to prevent air leakage. For other inflatables, use the appropriate nozzle adaptor.
- Power On & Set Pressure: Press the Power Button to turn on the unit. The display will show the current pressure. Use the Mode Switch Button to select your desired unit (PSI/BAR/KPA). Use the +/- buttons to set the target pressure.
- Start Inflation: Press the Power Button again to start the compressor. The unit will automatically stop once the preset pressure is reached.
- Disconnect: Remove the air hose from the tire valve and then from the unit.

Image: The Karlxtom CYD17 unit actively inflating a car tire, displaying the pressure on its screen.
3. Using as a Power Bank
The 88Wh capacity allows you to charge various electronic devices.
- Connect Device: Plug your device's USB charging cable into the USB output port (5V/2.1A) on the Karlxtom CYD17 unit.
- Start Charging: The unit will automatically begin charging your device. The display may show charging status.
- Disconnect: Once your device is charged, disconnect it from the unit.

Image: The Karlxtom CYD17 unit functioning as a portable power bank, charging multiple electronic devices.
4. Using the LED Light
The 500-lumen LED light offers three modes for various situations.
- Activate Light: Press the LED Light Button to turn on the light in Constant-on mode.
- Change Modes: Press the LED Light Button repeatedly to cycle through the modes: Constant-on > Flashing > SOS > Off.
- Constant-on Mode: Provides steady illumination for general use, repairs, or camping.
- Flashing Mode: Used to alert others or increase visibility in low-light conditions.
- SOS Mode: Emits an international distress signal.

Image: A person utilizing the bright LED light of the Karlxtom CYD17 to inspect a car engine at night.
Maintenance
Proper maintenance ensures the longevity and optimal performance of your Karlxtom CYD17.
- Charging: Recharge the unit fully after each use. If stored for extended periods, recharge every 3-6 months to prevent battery degradation.
- Cleaning: Wipe the unit with a dry, soft cloth. Do not use harsh chemicals or abrasive cleaners. Ensure all ports are free of dust and debris.
- Storage: Store the unit in its protective case in a cool, dry place, away from direct sunlight and extreme temperatures.
- Cable Care: Inspect jumper cables and air hose for any damage before each use. Replace if frayed or damaged.
Troubleshooting
If you encounter issues with your Karlxtom CYD17, refer to the following common problems and solutions:
| Problem | Possible Cause | Solution |
|---|---|---|
| Unit does not turn on | Low battery or unit is off. | Charge the unit fully. Press and hold the Power Button for a few seconds. |
| Smart jumper cable indicator is solid red and beeping | Reverse polarity connection. | Disconnect clamps and re-attach with correct polarity (Red to +, Black to -). |
| Vehicle does not jump start | Unit battery too low; vehicle battery severely discharged; poor connection. | Ensure unit is fully charged. Check clamp connections for tightness. Wait 30 seconds and try again. If vehicle battery is completely dead, it may require more time or professional assistance. |
| Air compressor not inflating or slow inflation | Hose not securely connected; low unit battery; puncture in tire/inflatable. | Ensure air hose is tightly screwed on and connected to valve. Charge the unit. Check tire/inflatable for leaks. |
| Display shows incorrect pressure | Sensor calibration or external factors. | While the unit provides accurate readings for emergency use, for precise measurements, use a calibrated tire gauge. |
If the problem persists after attempting these solutions, please contact Karlxtom customer support.
Warranty and Support
Karlxtom products are designed for reliability and performance. For warranty information, technical support, or any inquiries regarding your CYD17 unit, please refer to the contact information provided on the product packaging or the official Karlxtom website. Keep your purchase receipt as proof of purchase for warranty claims.