1. Introduction
The 3DMakerpro Seal is a compact, high-precision 3D scanner designed for consumer use. It offers exceptional accuracy, capable of capturing details down to 0.01mm, making it suitable for scanning small to medium-sized objects. This manual provides essential information for setting up, operating, maintaining, and troubleshooting your 3DMakerpro Seal 3D scanner.
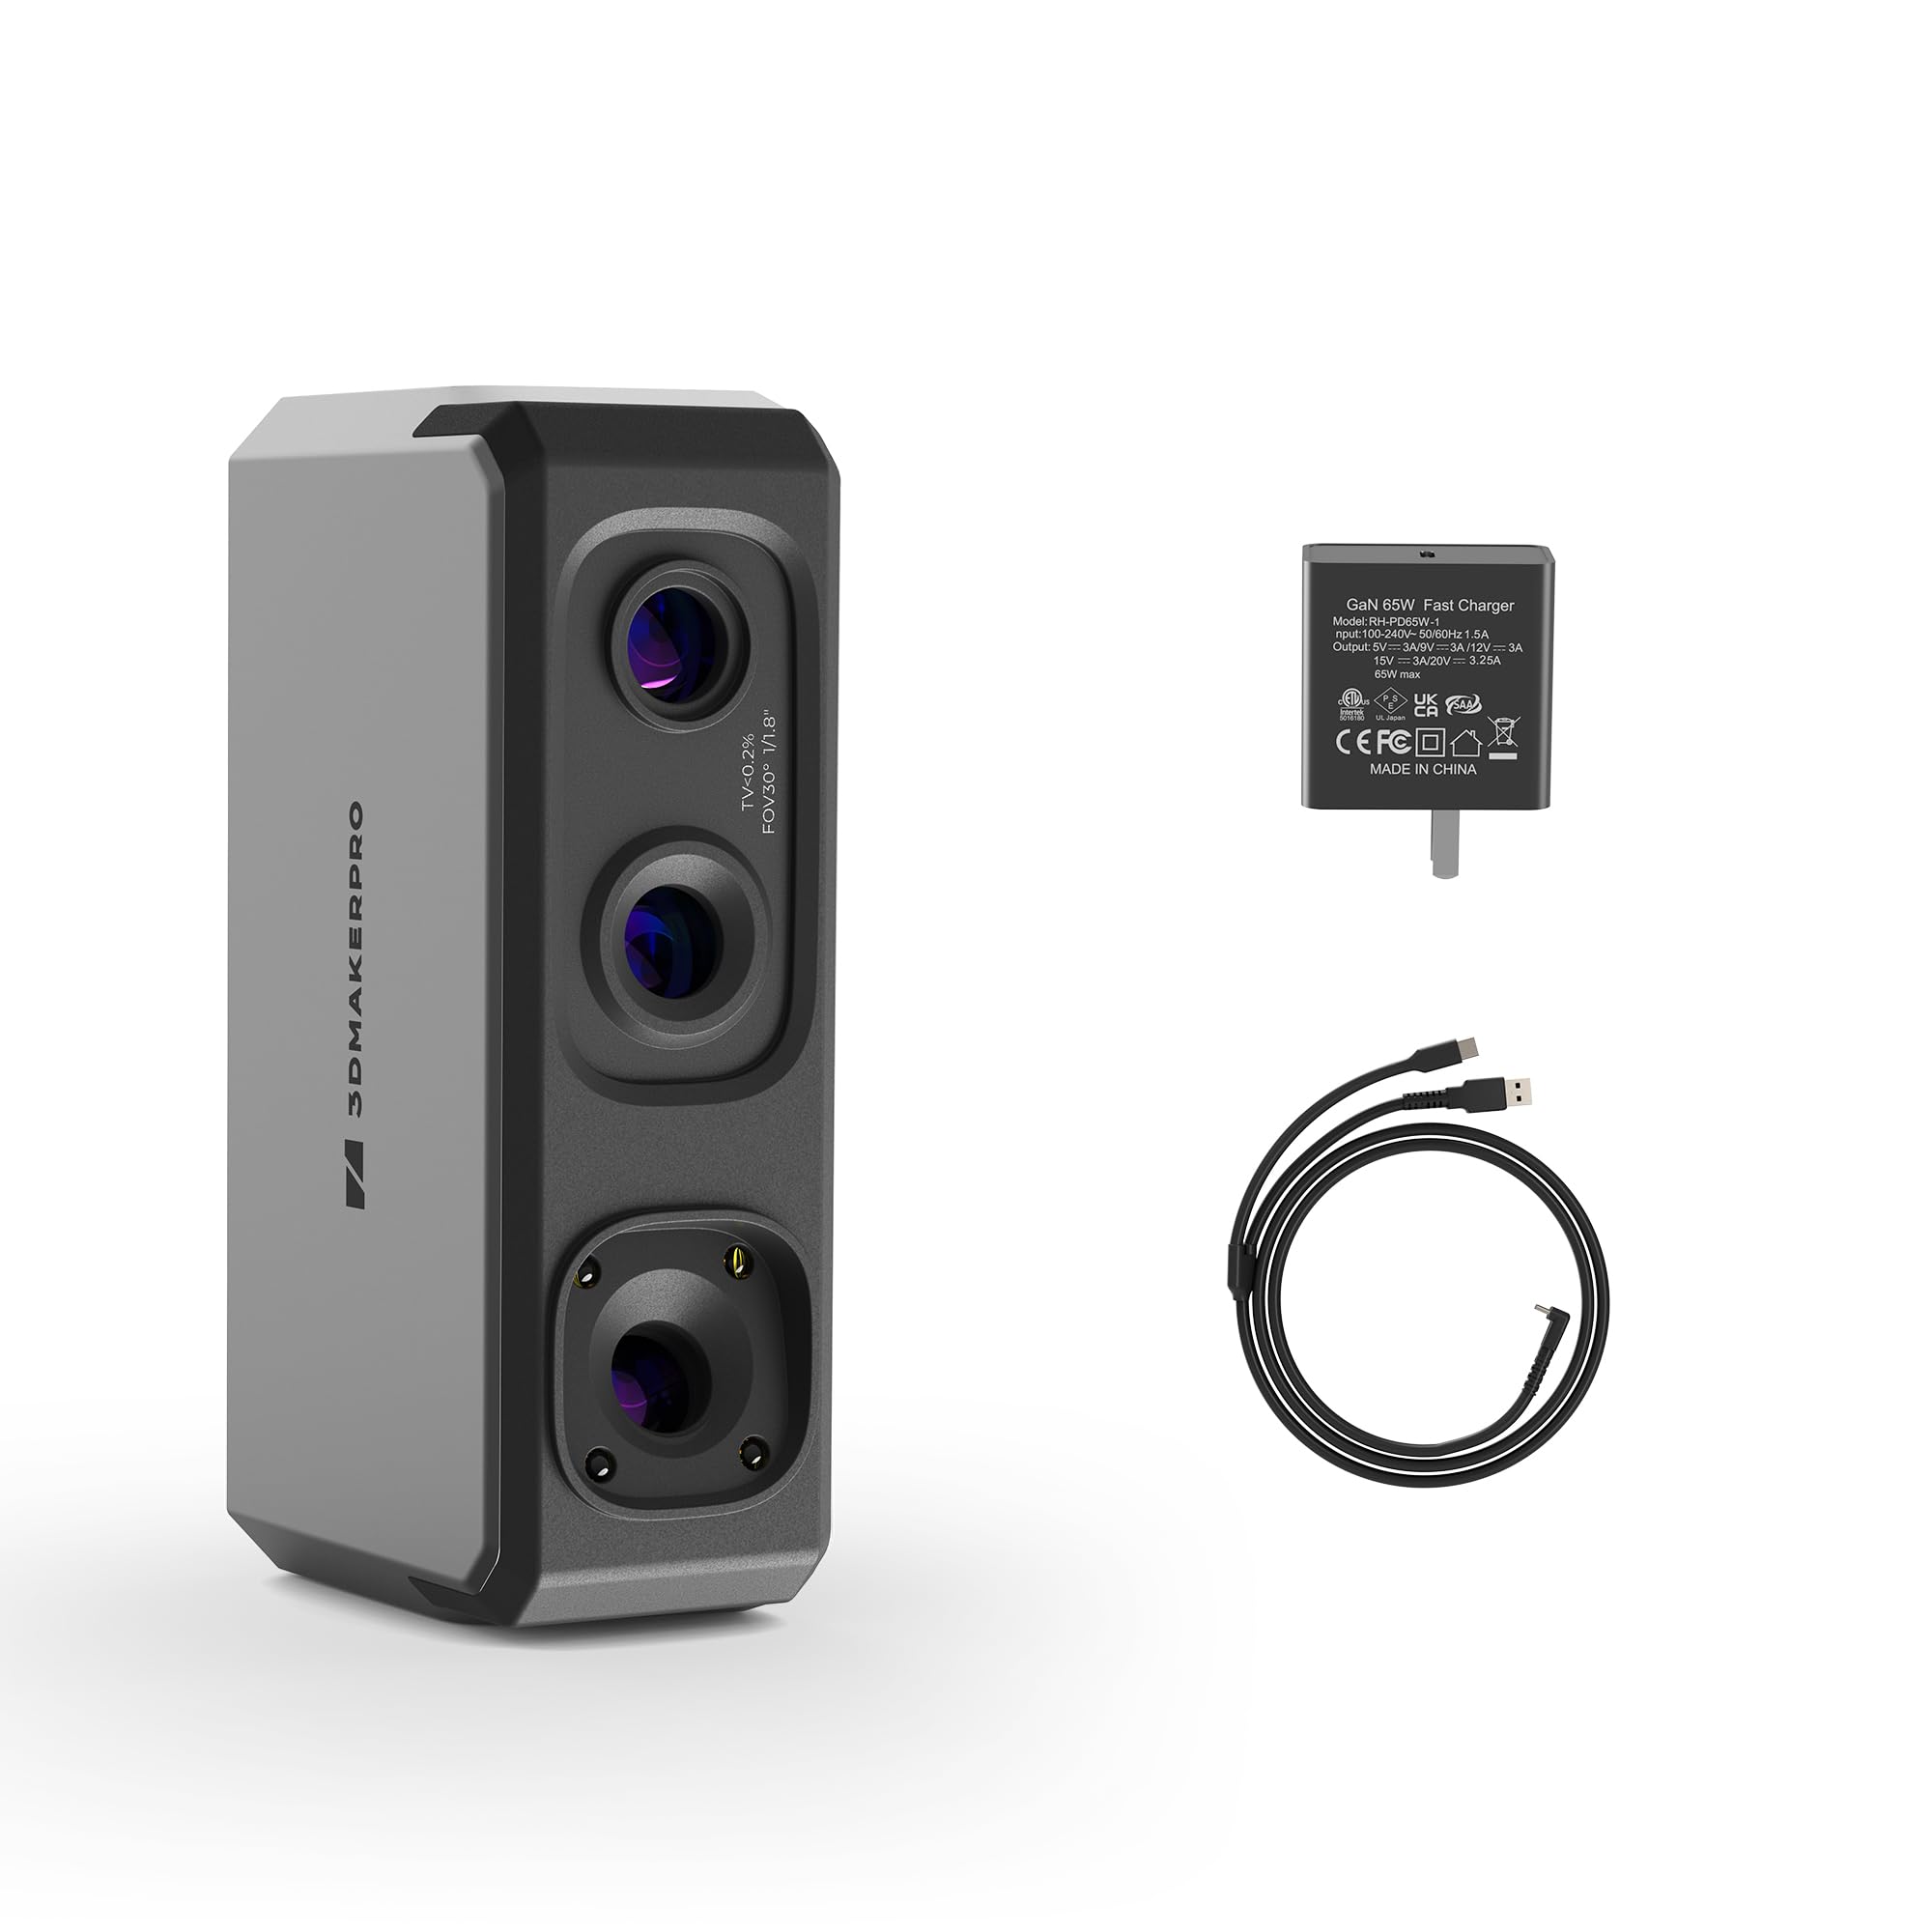
Image 1.1: The 3DMakerpro Seal 3D Scanner, a compact device for high-precision 3D scanning.
2. Safety Information
Please read and understand all safety instructions before using the 3DMakerpro Seal 3D scanner to prevent injury or damage to the device.
- Eye Safety: Do not look directly into the scanner's light source during operation. While the light is generally safe, prolonged direct exposure should be avoided.
- Power Supply: Use only the provided power adapter or a compatible power source that meets the scanner's specifications (e.g., 65W). Insufficient power can lead to improper operation or damage.
- Ventilation: Ensure the scanner has adequate ventilation during use to prevent overheating.
- Environment: Operate the scanner in a clean, dry environment. Avoid exposure to dust, moisture, and extreme temperatures.
- Handling: Handle the scanner with care. Avoid dropping or subjecting it to strong impacts.
- Children: Keep the device out of reach of children.
3. Package Contents
Verify that all items are present in your package. If any items are missing or damaged, please contact your retailer or 3DMakerpro support.
- 3DMakerpro Seal 3D Scanner
- USB Connection Cable
- Power Adapter (if included with your bundle)
- Calibration Board
- Quick Start Guide
Note: Optional accessories such as a Smart Grip, tripod, or turntable are sold separately and may not be included in all bundles.
4. Setup
4.1 Software Installation
- Visit the official 3DMakerpro website or refer to the Quick Start Guide for instructions on downloading the latest JMStudio software.
- Install the software on a compatible computer. Ensure your computer meets the minimum system requirements for optimal performance. A powerful computer, such as a gaming laptop, is recommended for smoother scanning and processing.
4.2 Hardware Connection
- Connect the 3DMakerpro Seal 3D scanner to your computer using the provided USB cable.
- Ensure the scanner receives adequate power. The Seal scanner requires approximately 65W of power. Depending on your computer's USB ports, you may need to connect the scanner to an external power source via the power adapter to ensure stable operation. The scanner may turn on and be recognized by your computer with insufficient power, but it will not scan correctly.
- If using optional accessories like a Smart Grip or tripod, attach them according to their respective instructions.

Image 4.1: The 3DMakerpro Seal 3D Scanner, highlighting its compact dimensions (4.33 inches length, 2.36 inches width, 1.38 inches height) and components including the White LED, Projector, Texture Camera, and Point Cloud Camera.
5. Operating Instructions
5.1 Preparing for Scanning
- Object Size: The Seal scanner is optimized for small-format scanning, typically objects ranging from 10mm to 300mm.
- Surface Preparation: For shiny, transparent, or very dark objects, apply a scanning spray or a matte, non-reflective coating to improve tracking and data capture.
- Lighting: Ensure consistent, diffuse lighting in your scanning environment. Avoid direct sunlight or strong spotlights that can create harsh shadows or reflections.

Image 5.1: The 3DMakerpro Seal 3D Scanner demonstrating its capability for small-format scanning, shown next to a 6cm tall dinosaur toy.
5.2 Scanning Process
- Launch the JMStudio software on your computer.
- Follow the on-screen prompts for initial calibration, if required.
- Position the object to be scanned.
- Begin scanning, moving the scanner slowly and steadily around the object. Maintain an optimal distance as indicated by the software.
- Monitor the software interface for real-time feedback on tracking, distance, and scan quality. If tracking is lost, slowly return the scanner to a previously scanned area to reacquire tracking.
- The Seal scanner features a Blue LED light source (400-500nm wavelength) for precise capture of tiny details and edge textures. It also supports 24-bit full-color scanning with its RGB camera, adding vibrant color and realism to your 3D models.

Image 5.2: The 3DMakerpro Seal 3D Scanner in operation, highlighting its Blue LED Light Source which enables 0.01mm precision.

Image 5.3: The 3DMakerpro Seal 3D Scanner demonstrating 24-bit full-color scanning capabilities, capturing vibrant colors from objects. Note: Seal supports color scanning, while Seal Lite only supports monochrome scanning.
5.3 Post-Scanning Processing
The JMStudio software provides tools for processing your 3D scans:
- Smart Error Correction: AI-powered feature to eliminate flawed or misaligned point cloud data while retaining accurate points.
- Auto Align: Automatically stitches multiple scans of the same object together, ensuring seamless connections. Manual alignment is also available for challenging objects.
- Export Formats: Export your 3D models in various formats including OBJ, STL, PLY, or ASC.

Image 5.4: The JMStudio software interface, showing features like Smart Error Correction and Auto Align for processing 3D scan data.

Image 5.5: The 3DMakerpro Seal 3D Scanner used with an optional tripod, demonstrating how accessories can enhance scanning capabilities.
6. Maintenance
- Cleaning: Use a soft, dry, lint-free cloth to gently clean the scanner's lenses and body. Do not use abrasive cleaners or solvents.
- Software Updates: Regularly check the 3DMakerpro website for software updates to ensure optimal performance and access to new features.
- Storage: When not in use, store the scanner in its original packaging or a protective case in a cool, dry place away from direct sunlight and dust.
7. Troubleshooting
- Scanner Not Recognized/Not Scanning:
- Ensure the USB cable is securely connected to both the scanner and the computer.
- Verify that the scanner is receiving adequate power (65W). If using a laptop, ensure it's plugged into a wall outlet or use an external power source for the scanner if necessary. - Lost Tracking During Scan:
- Move the scanner more slowly and steadily.
- Ensure there are enough unique features on the object for the scanner to track. Add markers if needed.
- Return the scanner to a previously scanned area to reacquire tracking. - Poor Scan Quality/Missing Details:
- Objects that are very shiny, transparent, or extremely dark may be difficult to scan. Apply a matte scanning spray to these surfaces.
- Ensure proper lighting conditions, avoiding harsh shadows or reflections.
- Maintain the recommended scanning distance as indicated by the software. - Software Issues:
- Ensure your JMStudio software is up to date.
- Restart the software and/or your computer.
- Check for driver updates for your scanner.
8. Specifications
| Feature | Specification |
|---|---|
| Manufacturer | 3DMakerpro |
| Model Name | Seal |
| Part Number | Seal |
| Item Weight | 635 g (1.4 lbs) |
| Package Dimensions | 22.1 x 15.24 x 7.11 cm (8.7 x 6 x 2.8 inches) |
| Included Components | 3D Scanner |
| Accuracy | 0.01mm |
| Scanning Range | 10mm - 300mm (Small-format scanning) |
| Light Source | Blue LED (400-500nm) |
| Color Scanning | Yes (24-bit full-color) |
| Software Support | JMStudio |
9. Warranty and Support
For warranty information, please refer to the warranty card included with your product or visit the official 3DMakerpro website. Warranty terms may vary by region and retailer.
For technical support, software downloads, and frequently asked questions, please visit the 3DMakerpro support page or contact their customer service directly. Ensure you have your product model and serial number ready when seeking support.
The JMStudio software is developed and supported by 3DMakerpro. For software-related inquiries, please refer to the JMStudio documentation or contact 3DMakerpro support.


