
1. Introduction
The Meshnology Wio Tracker L1 Development Board is an all-in-one solution designed for IoT projects, offering robust features for wireless communication and tracking. This kit includes the Wio Tracker L1 board, a 3000mAh battery, and an N37 case, providing a compact and portable device with pre-installed Meshtastic firmware for immediate use.
Key features include:
- All-in-One Kit: Wio Tracker L1 Development Board with 3000mAh battery and N37 case, featuring a strap hole for easy deployment.
- Pre-Configured for Ease of Use: Equipped with pre-installed Meshtastic firmware for seamless setup and instant connectivity.
- Versatile Power Options: Supports Type-C fast charging, solar input, and lithium-ion battery power for flexible deployment.
- Enhanced Interactive Display: Features a 1.3-inch OLED screen for real-time feedback and system monitoring.
- High Expandability: Compatible with the Grove ecosystem and includes PTH connectors and SWD debugging interface for custom hardware expansions.
2. Setup and Assembly
Follow these steps to assemble your Meshnology Wio Tracker L1 kit:
- Prepare the Case: Open the N37 case.
- Install Buttons: Place the three small buttons into their designated slots on the case.
- Insert Development Board: Carefully position the Wio Tracker L1 development board into the case. Ensure the OLED screen aligns with the case opening.
- Secure with Screws: Use the provided nuts and screws to secure the development board within the case.
- Connect Antennas: Connect the LoRa antenna and the GPS antenna to their respective ports on the board.
- Install Battery: Place the 3000mAh battery into its compartment and connect its cable to the battery connector on the board.
- Close the Case: Carefully close the two halves of the N37 case, ensuring all components are properly seated and cables are not pinched.
- Final Screws: Secure the case with the remaining screws.
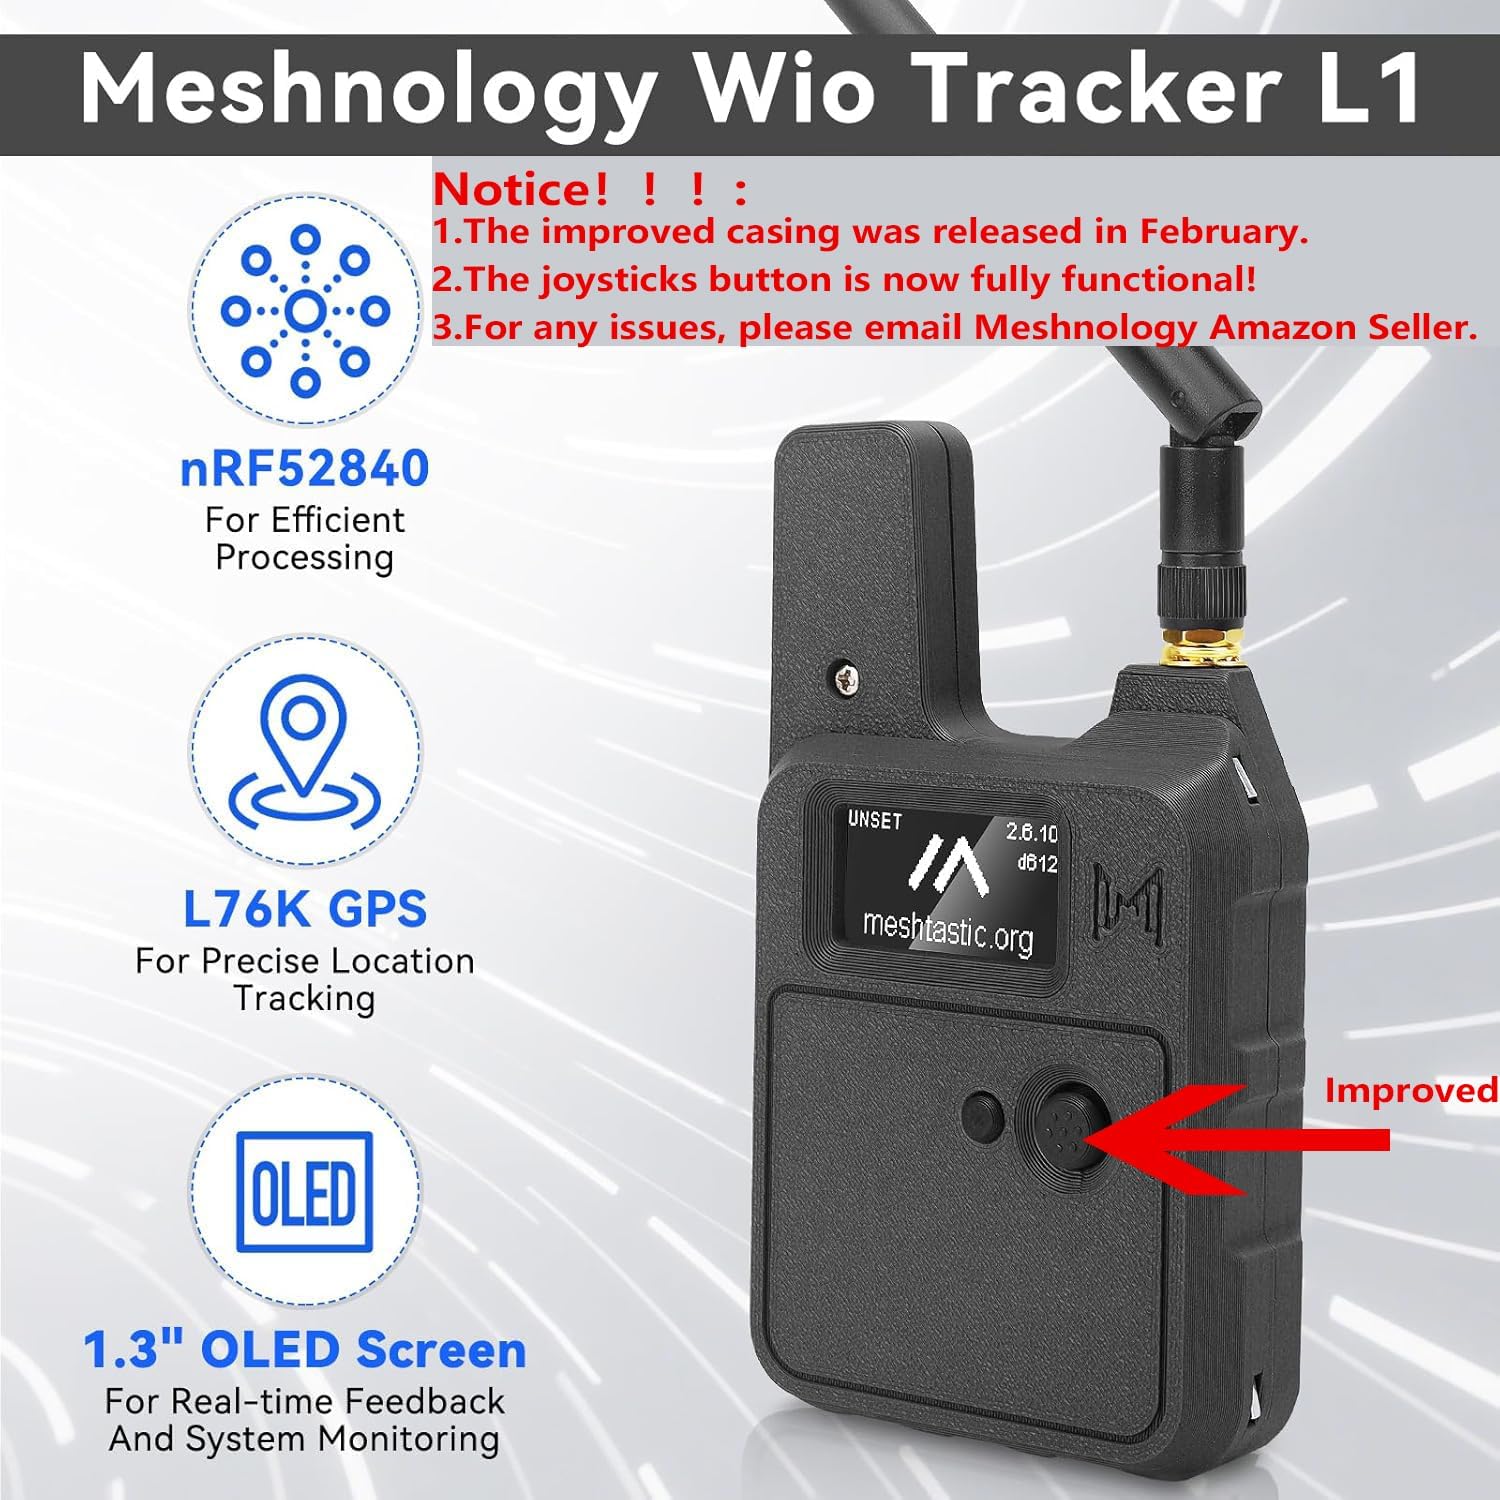
Figure 1: Overview of the Meshnology Wio Tracker L1 highlighting key components like the nRF52840 processor, L76K GPS, and 1.3" OLED screen.

Figure 2: Step-by-step visual guide for installing the components into the N37 case, including buttons, board, antennas, and battery.
Video 1: Detailed assembly guide for the N37 Kit, demonstrating how to install the board, battery, and antennas into the case.
Firmware Flashing
The Wio Tracker L1 comes with pre-installed Meshtastic firmware. However, for updates or custom configurations, you may need to flash new firmware. Refer to the official Meshtastic documentation for detailed instructions.

Figure 3: Screenshot of the Meshtastic Flasher interface, showing how to select the Wio Tracker L1 device and flash new firmware.
3. Operating Instructions
The Wio Tracker L1 is designed for ease of use with its 1.3-inch OLED display and integrated joystick for navigation. It operates on the Meshtastic network, enabling off-grid communication.
Device Overview
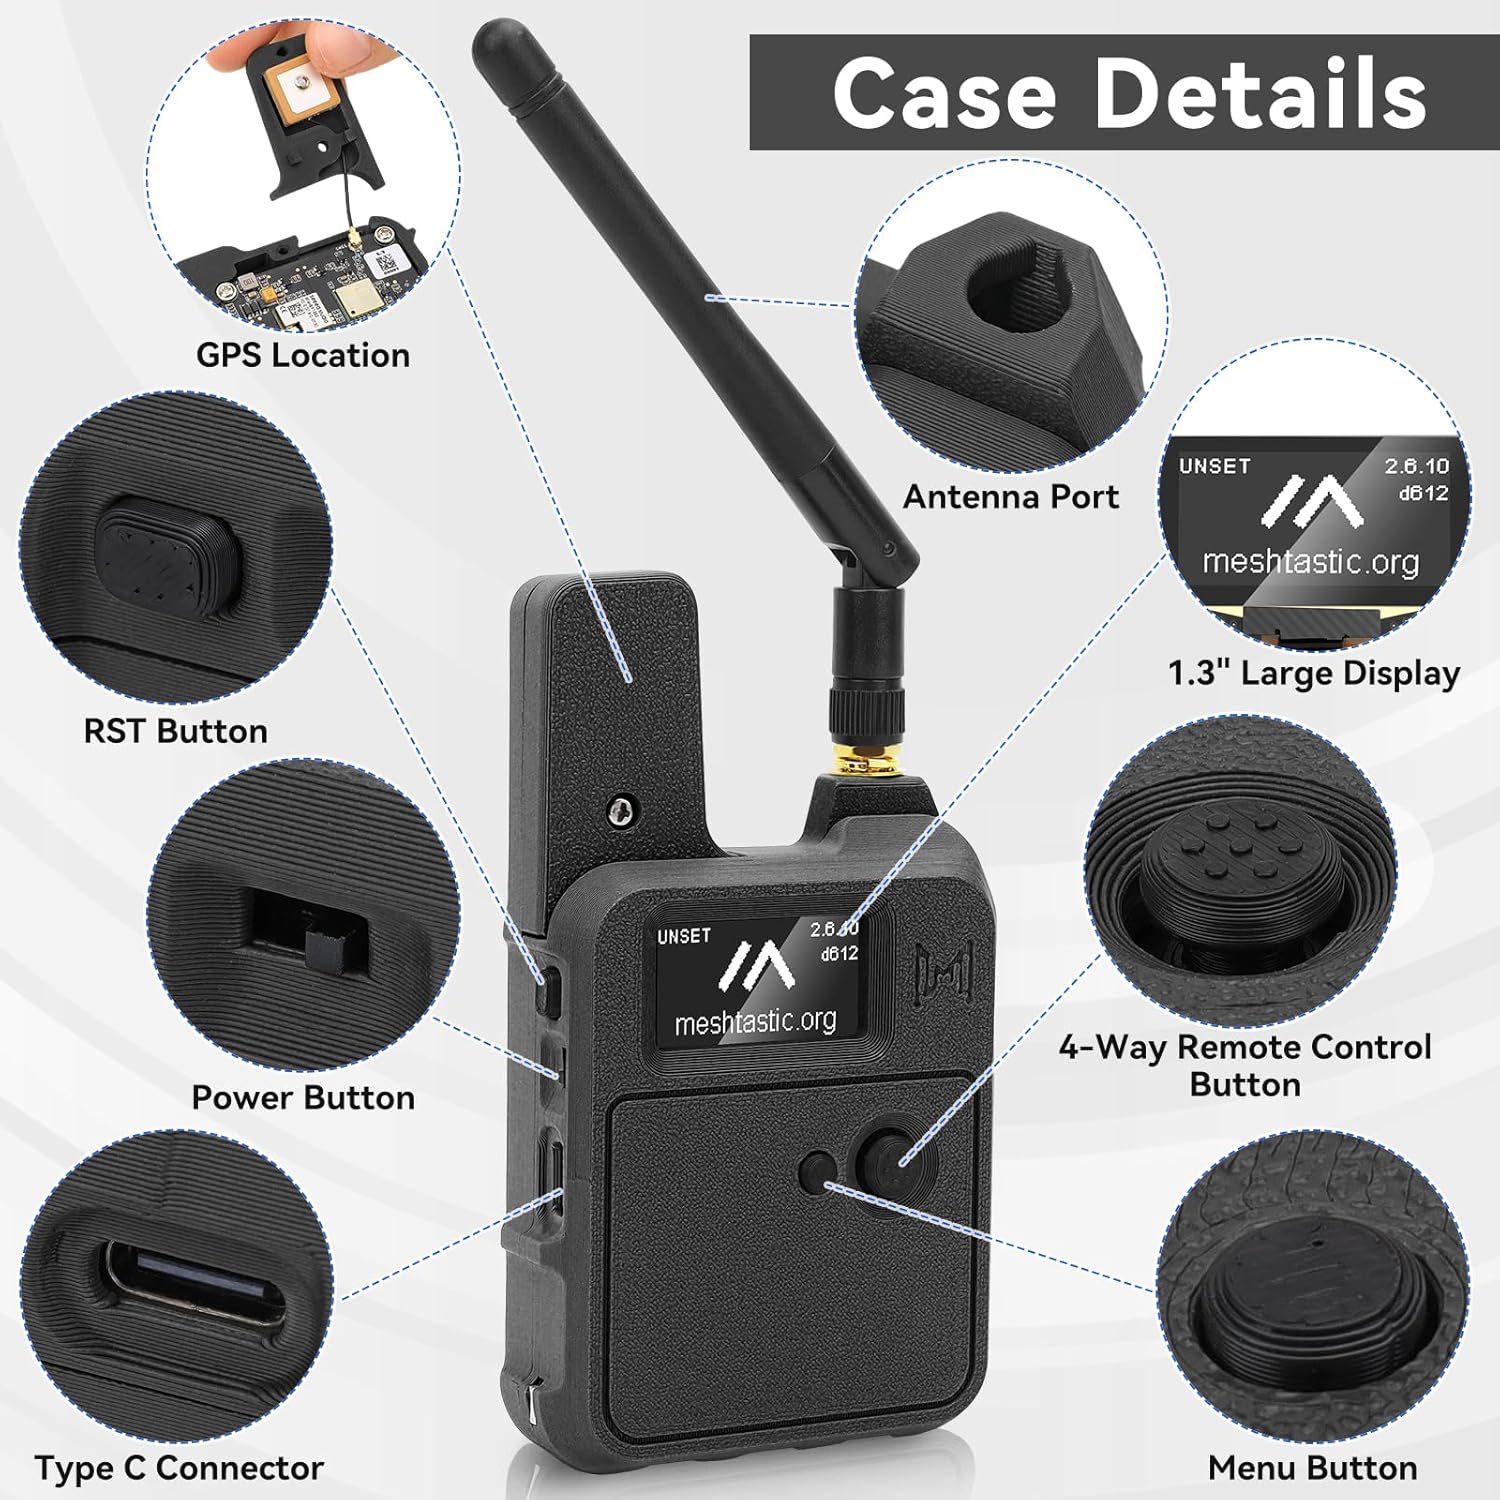
Figure 4: Close-up of the Wio Tracker L1 case, detailing the GPS location, RST button, Power button, Type-C connector, Antenna Port, 1.3" Large Display, 4-Way Remote Control Button, and Menu Button.

Figure 5: Diagram of the Wio Tracker L1 board, showing the 1.3 inch OLED Display, GPS Antenna Connector, RST Button, Power Switch, USB Type-C, Solar Panel Connector, Grove Connector, 4-Way Joystick, Menu Button, LoRa Antenna, Buzzer, and Battery Connector.
Basic Navigation and Messaging
The device features a joystick for navigating menus and a select button for confirming actions. With updated firmware (version 2.7 or higher), you can send free-text messages directly from the device using an on-screen QWERTY keyboard, eliminating the need for a paired smartphone in emergencies.
- Use the 4-Way Joystick to scroll through menu options on the OLED display.
- Press the center of the joystick (select button) to confirm a selection.
- The Power Button controls the device's on/off state.
- The RST Button is used for resetting the device.
Video 2: Demonstrates the Wio Tracker L1 N37 Set in operation, showcasing its display and basic functionality.
Video 3: Explains the advantages of the Wio Tracker L1, particularly its standalone messaging capabilities via the joystick and display, which is crucial when a smartphone is unavailable.
4. Maintenance
Battery Charging
The Wio Tracker L1 supports multiple power options to ensure continuous operation:
- Type-C Charging: Connect a standard USB Type-C cable to the device for fast charging.
- Solar Input: The device is equipped with a solar panel connector, allowing it to be charged using a compatible solar panel (5V – 1A).
- Lithium-Ion Battery: The included 3000mAh lithium-ion battery provides extended operational time.
Regularly check the battery indicator on the OLED screen to monitor power levels and ensure timely recharging.
5. Troubleshooting
If you encounter issues with your Wio Tracker L1, consider the following:
- Device Not Responding: Press the RST button to perform a soft reset.
- Connection Issues: Ensure the LoRa and GPS antennas are securely connected. Verify Bluetooth pairing with your smartphone if using the Meshtastic app.
- Firmware Related Problems: If the device behaves unexpectedly or the UI is not fully functional, consider updating the firmware to the latest stable version using the Meshtastic Flasher tool. Refer to the official Meshtastic Wiki for detailed flashing instructions.
- Battery Draining Quickly: Check for any background processes or excessive GPS usage. Ensure the battery is fully charged.

Figure 6: Screenshot of the Meshtastic Wiki, providing resources for getting started and troubleshooting the Wio Tracker L1.
6. Specifications
| Feature | Detail |
|---|---|
| Product Name | Wio Tracker L1 |
| Processor | Nordic nRF52840 |
| LoRa Module | Wio-SX1262 (supports 862-930MHz) |
| Bluetooth | Bluetooth 5.0 |
| GPS | L76K (GPS, BeiDou, GLONASS, QZSS) |
| Display | 1.3-inch OLED, 128 x 64 pixels (Active Area: 34.5 x 23.0 mm) |
| On-chip Memory | 1 MB flash, 256 KB RAM |
| Power Input | USB Type-C: 5V – 1A, Solar Panel: 5V – 1A, Lithium Battery: 3.7V – 1A |
| Battery Capacity | 3000mAh |
| Interfaces | Grove (UART/I2C/GPIO), Plated Through Hole (PTH) connectors, SWD debugging pads |
| Certifications | FCC, CE, RoHS |
| Dimensions (approx.) | 11cm (height) x 6.6cm (width) x 2.4cm (thickness) |
| Weight (approx.) | 123.2g |
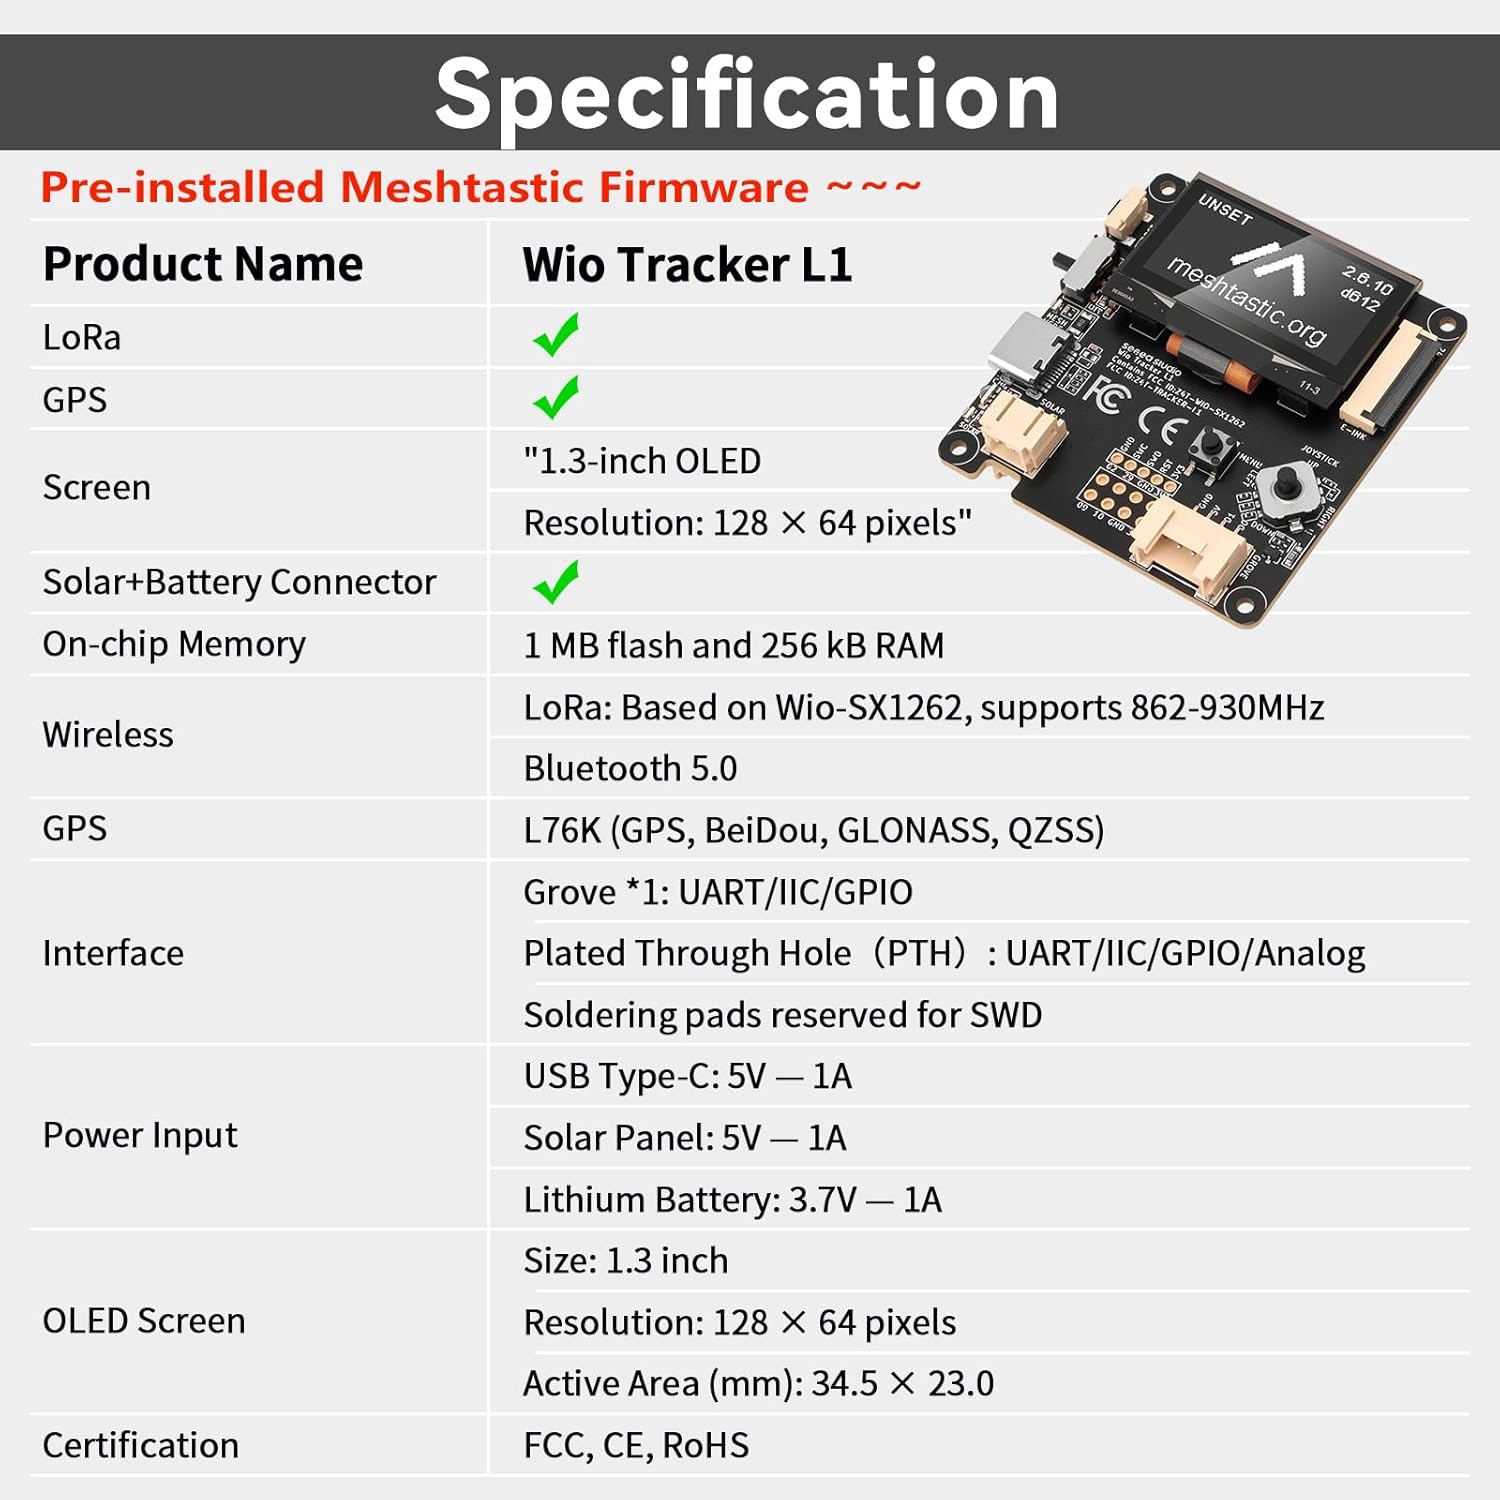
Figure 7: Detailed specifications of the Wio Tracker L1, including LoRa, GPS, screen, memory, and power inputs.

Figure 8: Visual representation of the Wio Tracker L1's dimensions and weight, including the battery size.
7. Warranty Information
This product comes with a 15-day warranty. For specific details regarding warranty claims or returns, please refer to the seller's return policy or contact customer service.
8. Customer Support
For after-sales issues, technical assistance, or any inquiries, please email our brand customer service. You can find contact information on the product packaging or the official Meshnology store page.
Additional resources:
- Meshtastic Wiki: For comprehensive guides and community support, visit the official Meshtastic Wiki.
- Discord: Join the Meshtastic Discord channel for real-time discussions and assistance.

Figure 9: Product packaging displaying QR codes for the Meshtastic Wiki and Discord, along with customer support email.