1. Introduction
Thank you for choosing the Antarctic Star Commercial Ice Maker Machine. This manual provides essential information for the safe and efficient operation, installation, and maintenance of your ice maker. Please read it thoroughly before use and keep it for future reference.
This ice maker is designed for commercial and home use, capable of producing up to 80 lbs of ice per day with a storage capacity of 24 lbs. It features an intuitive LCD display and a self-cleaning function for convenience.
2. Safety Information
Always follow basic safety precautions when using electrical appliances to reduce the risk of fire, electric shock, and injury.
- Read all instructions before operating the appliance.
- Ensure the appliance is properly grounded.
- Do not operate the appliance with a damaged cord or plug.
- Keep ventilation openings clear of obstructions.
- Do not store explosive substances such as aerosol cans with a flammable propellant in this appliance.
- Use only potable water for ice production.
- Unplug the appliance before cleaning or performing any maintenance.
3. Package Contents
Verify that all items are present in the package:
- Ice Maker (1 unit)
- Water Inlet Pipe (1 unit)
- Water Outlet Pipe (1 unit)
- User Manual (1 unit)
4. Setup and Installation
4.1 Placement
The ice maker can be used as a freestanding unit or installed under a counter. Ensure adequate clearance around the unit for proper ventilation. The dimensions are approximately 15.28"D x 14.57"W x 23.11"H.
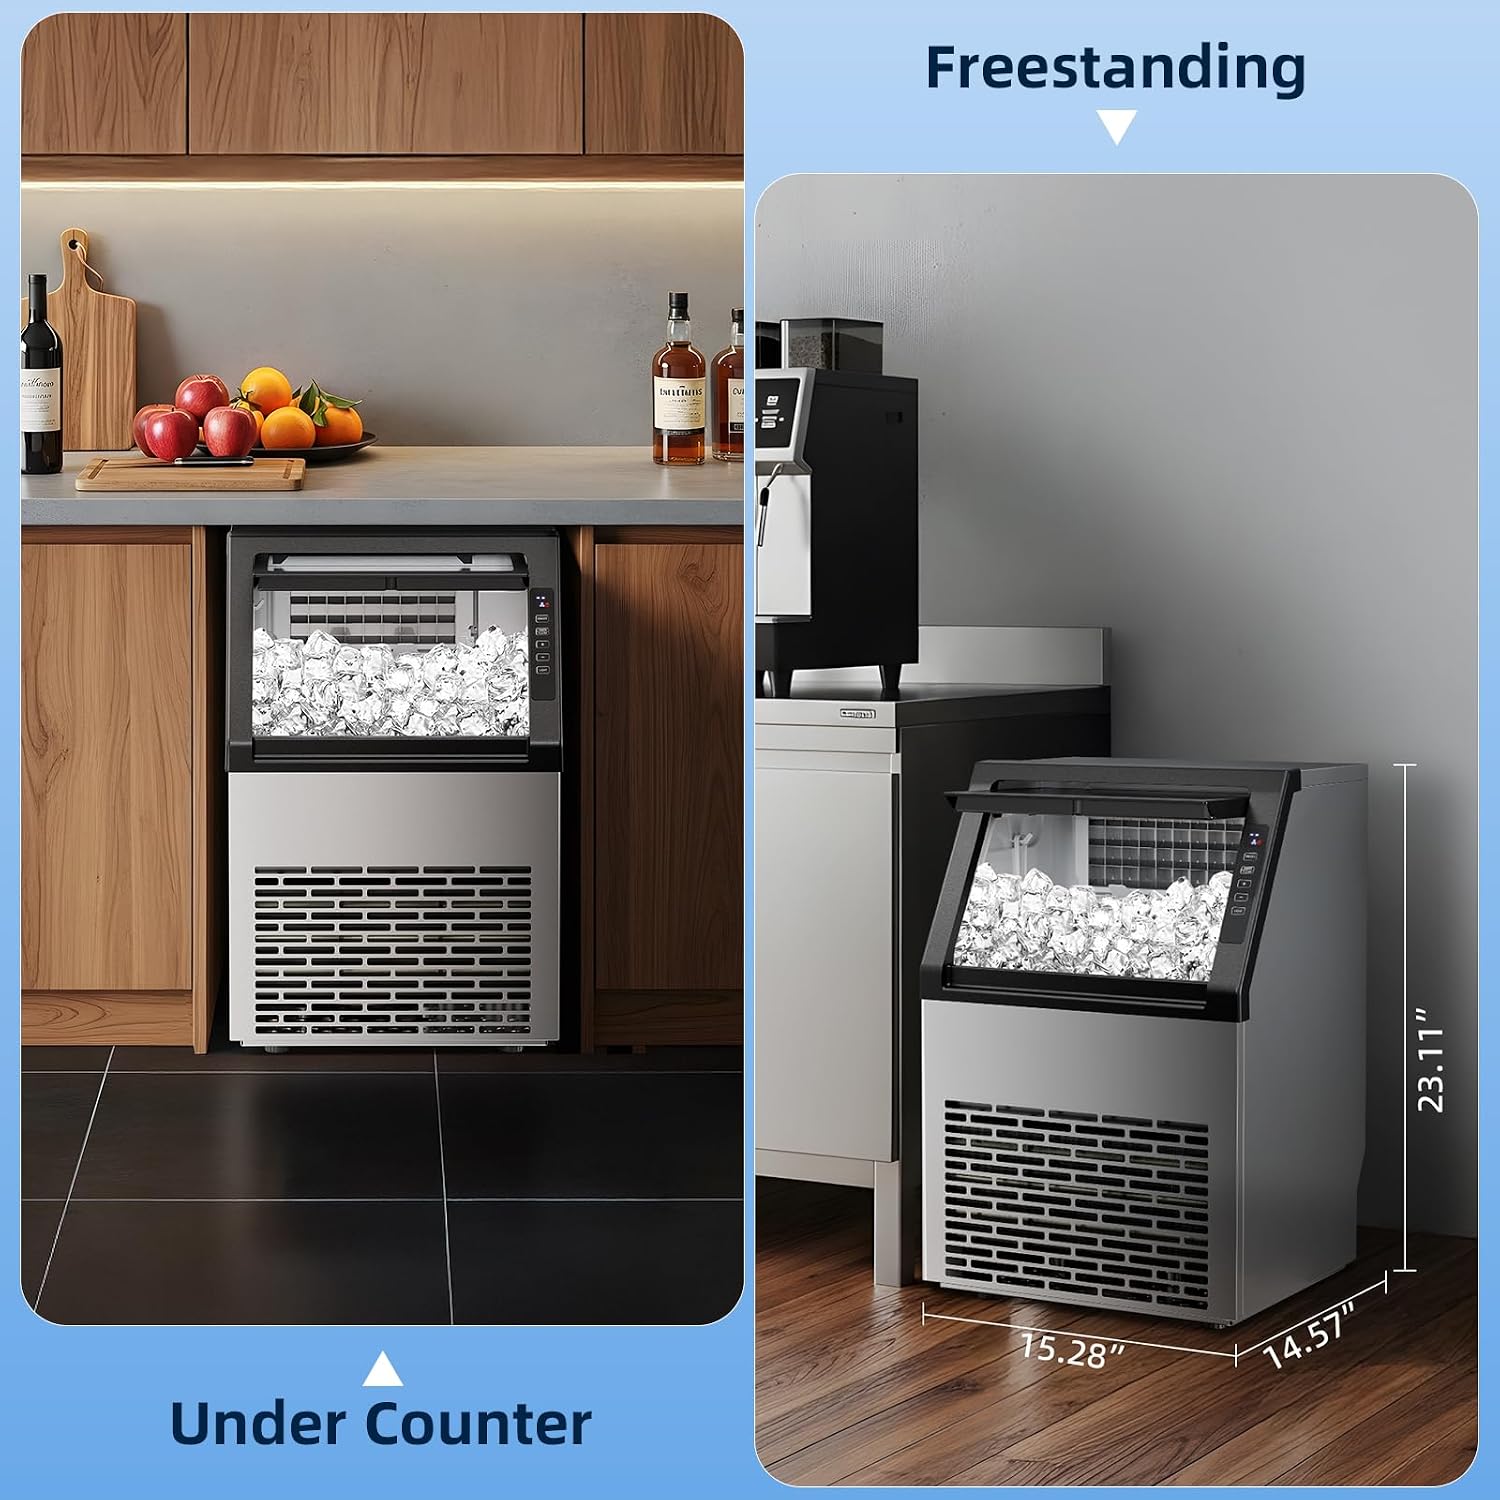
Image: The ice maker shown as a freestanding unit and installed under a counter, illustrating flexible placement options.
4.2 Connections
Connect the ice maker to a potable water supply, a power outlet, and ensure the water outlet pipe is properly routed for drainage.
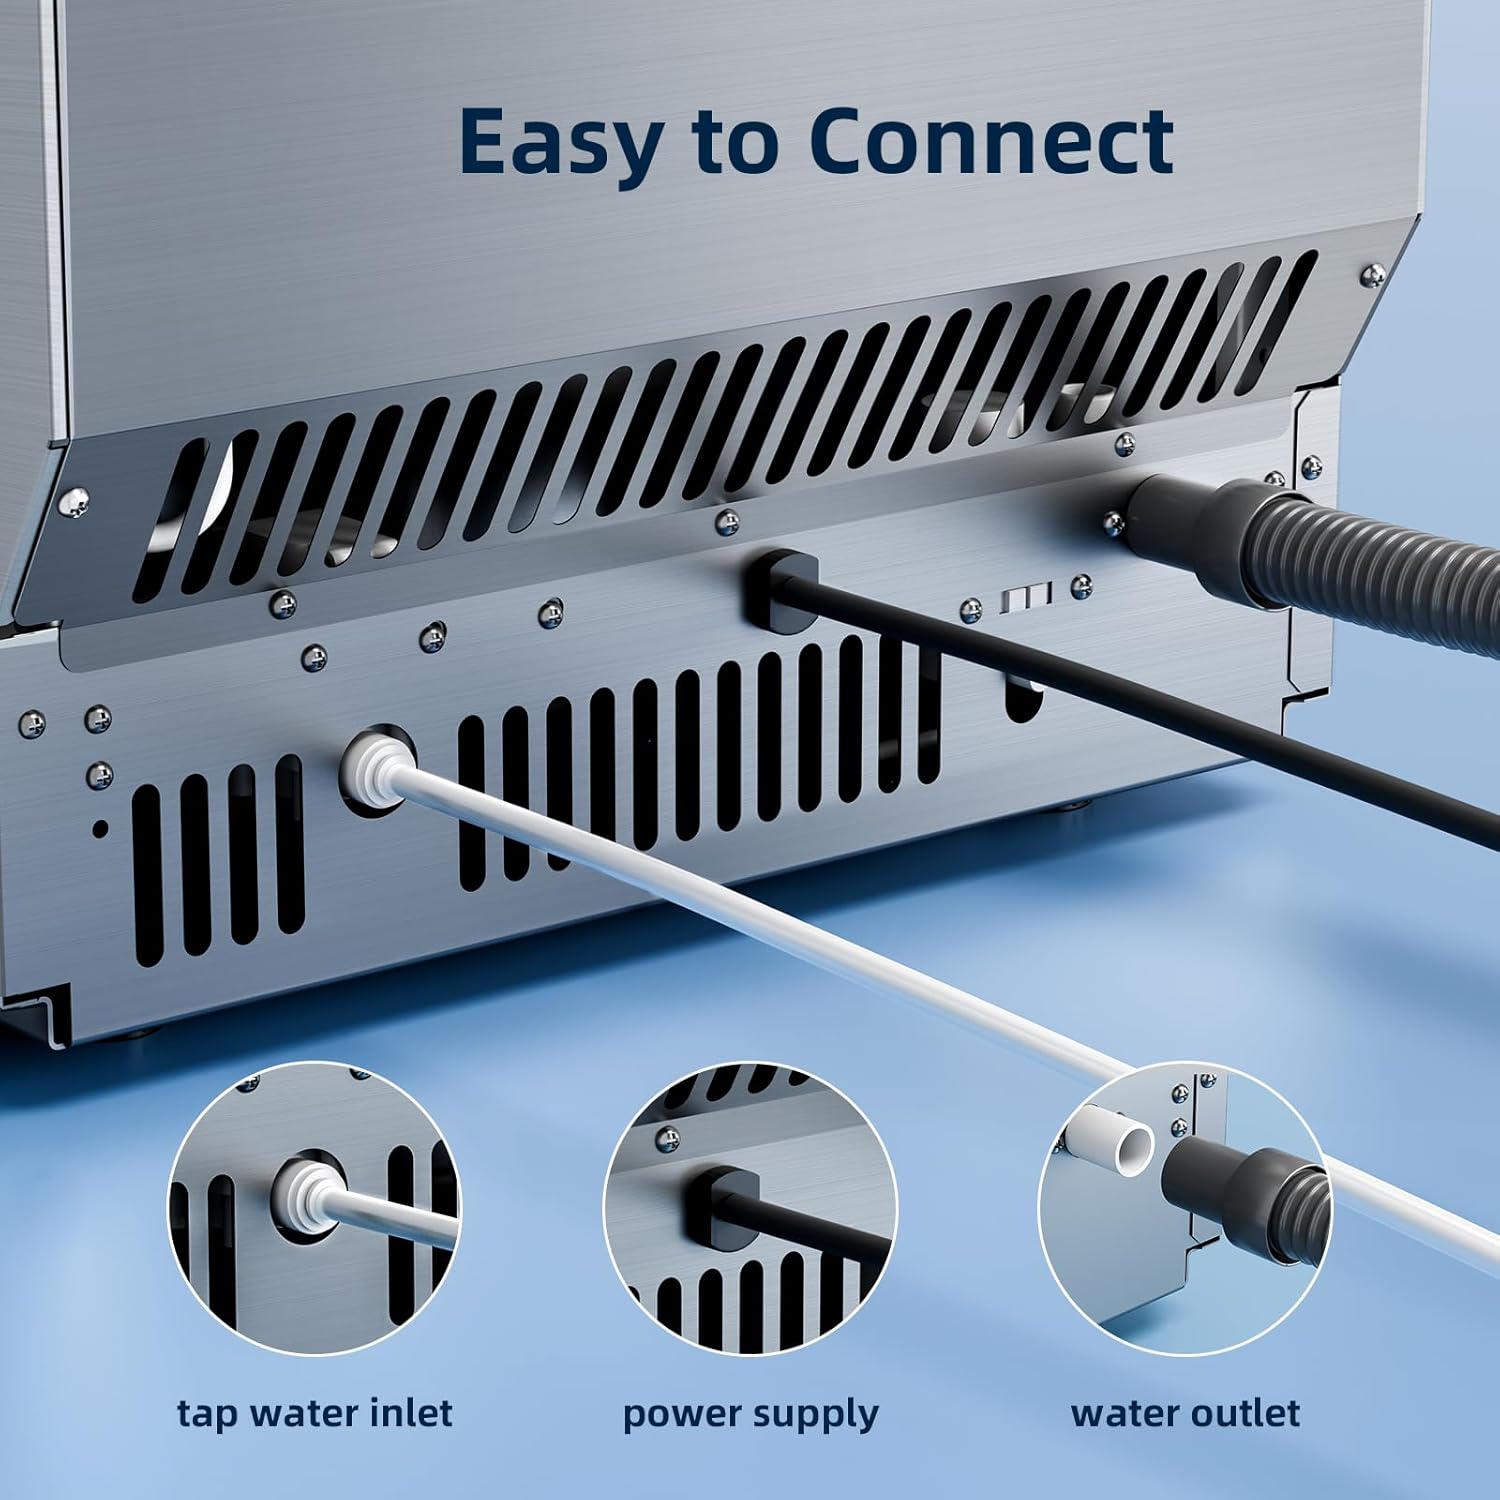
Image: A detailed view of the rear connections, highlighting the tap water inlet, power supply, and water outlet.
Video: An official product video demonstrating the setup and features of the Antarctic Star Commercial Ice Maker Machine.
5. Operating Instructions
5.1 Control Panel Overview
The ice maker features an intuitive LCD control panel with several buttons and indicators:
- ON/OFF: Powers the unit on or off.
- TIMER CLEAN: Activates the self-cleaning mode or sets a timer.
- +/-: Adjusts ice thickness or timer settings.
- LIGHT: Controls the internal LED light.
Indicators on the display show when ice is being made, the ice basket is full, or there is a water shortage.

Image: A detailed view of the LCD control panel, showing buttons for ON/OFF, Timer/Clean, +/- for adjustment, and Light, along with indicators for ice making, full ice, and water shortage.
5.2 Ice Making Process
Once connected to water and power, press the ON/OFF button to start ice production. The unit will automatically begin making ice. The ice maker produces 36 cubes in approximately 11 minutes.

Image: The ice maker actively producing ice cubes, demonstrating its fast and continuous ice-making capability.
5.3 Adjusting Ice Thickness
You can control the thickness of the ice cubes using the +/- buttons on the control panel. This adjusts the ice-making cycle time:
- Thin: Approximately 12 minutes per cycle.
- Medium: Approximately 15 minutes per cycle.
- Thick: Approximately 18 minutes per cycle.

Image: Visual representation of ice cubes with varying thicknesses (thin, medium, thick) and their corresponding production times.
6. Maintenance
6.1 Self-Cleaning Function
The ice maker features a one-touch self-cleaning mode. To activate, press and hold the "TIMER CLEAN" button for 5 seconds. The unit will automatically perform a cleaning cycle.

Image: An illustration of the ice maker's internal components during the automatic cleaning cycle, showing water circulation.
6.2 General Cleaning and Drainage
Regularly clean the exterior with a soft, damp cloth. For internal cleaning beyond the self-cleaning cycle, unplug the unit and manually clean the ice storage area. The ice storage bin is not a freezer; ice will melt over time. Ensure the drain hose at the back of the unit is properly positioned to drain melted water into a suitable container or floor drain to prevent water accumulation.
7. Troubleshooting
| Problem | Possible Cause | Solution |
|---|---|---|
| Ice maker not producing ice. | No water supply, power issue, or internal malfunction. | Check water connection and supply. Ensure unit is plugged in. If an error code (e.g., E2) appears, unplug the unit for 30 seconds and plug it back in. |
| Ice is melting in the storage bin. | The storage bin is not a freezer. | This is normal operation. The unit is designed to make ice, not store it frozen long-term. Remove ice promptly or ensure the drain hose is functioning to remove melted water. |
| Unit is noisy during ice drop. | Normal operation. | Some noise is expected when ice cubes are released into the storage bin. This is part of the normal ice-making cycle. |
| Error Code E2 displayed. | Temporary sensor or system glitch. | Unplug the ice maker from the power outlet, wait for approximately 30 seconds, then plug it back in. This often resets the system. |
8. Specifications
- Brand: Antarctic Star
- Model Name: Commercial Ice Maker
- Model Number: HZB-36B
- Product Dimensions (D x W x H): 15.28" x 14.57" x 23.11"
- Ice Production per Day: 80 lbs (approx. 79 lbs)
- Storage Capacity: 24 lbs
- Refrigerant: R600a
- Ice Cube Cycle Time: 11-20 minutes (adjustable)
9. Warranty and Support
For warranty information, please refer to the documentation included with your purchase or contact the retailer. If you encounter any issues or require technical assistance, please contact Antarctic Star customer support. Our service team is available to provide timely and dependable support for your commercial ice maker.