YOSUDA PRO Magnetic Exercise Bike
YOSUDA PRO Magnetic Exercise Bike User Manual
Model: PRO Magnetic Exercise Bike
Introduction
Thank you for choosing the YOSUDA PRO Magnetic Exercise Bike. This manual provides essential information for the safe and effective use of your new indoor cycling bike. Please read it thoroughly before assembly and operation, and retain it for future reference.
The YOSUDA PRO Magnetic Exercise Bike is designed for indoor cycling, featuring a silent belt drive, comfortable seat cushion, and a robust 350 lbs weight capacity. It offers a hyper-quiet magnetic drive system and 100 micro-adjustable resistance levels for a personalized workout experience.
Safety Information
Before beginning any exercise program, consult with your physician. It is important to ensure you are physically able to perform the exercises described in this manual.
- Always place the exercise bike on a flat, stable surface.
- Ensure adequate space around the bike for safe operation.
- Keep children and pets away from the bike during use.
- Wear appropriate athletic footwear and clothing.
- Inspect the bike for loose or damaged parts before each use. Do not use if any parts are damaged.
- Do not exceed the maximum weight capacity of 350 lbs.
- Adjust the seat and handlebars to a comfortable and safe position before starting your workout.
- Use the emergency brake knob to stop the flywheel immediately if needed.
Components List
Please verify that all components are present before beginning assembly. If any parts are missing or damaged, contact YOSUDA customer support.
| Part No. | Description | Quantity |
|---|---|---|
| 1 | Main Frame | 1 |
| 2 | Front Stabilizer | 1 |
| 3 | Rear Stabilizer | 1 |
| 4 | Handlebar Post | 1 |
| 5 | Handlebar | 1 |
| 6 | Seat Post | 1 |
| 7 | Seat | 1 |
| 8 | Left Pedal | 1 |
| 9 | Right Pedal | 1 |
| 10 | Monitor | 1 |
| 11 | Tablet Holder | 1 |
| 12 | Tool Kit (Wrenches, Screws, Washers) | 1 Set |
Setup and Assembly
Follow these steps carefully to assemble your YOSUDA PRO Magnetic Exercise Bike. All necessary tools are included in the package.
- Attach Stabilizers: Attach the front and rear stabilizers to the main frame using the provided bolts and washers. Ensure they are securely tightened.
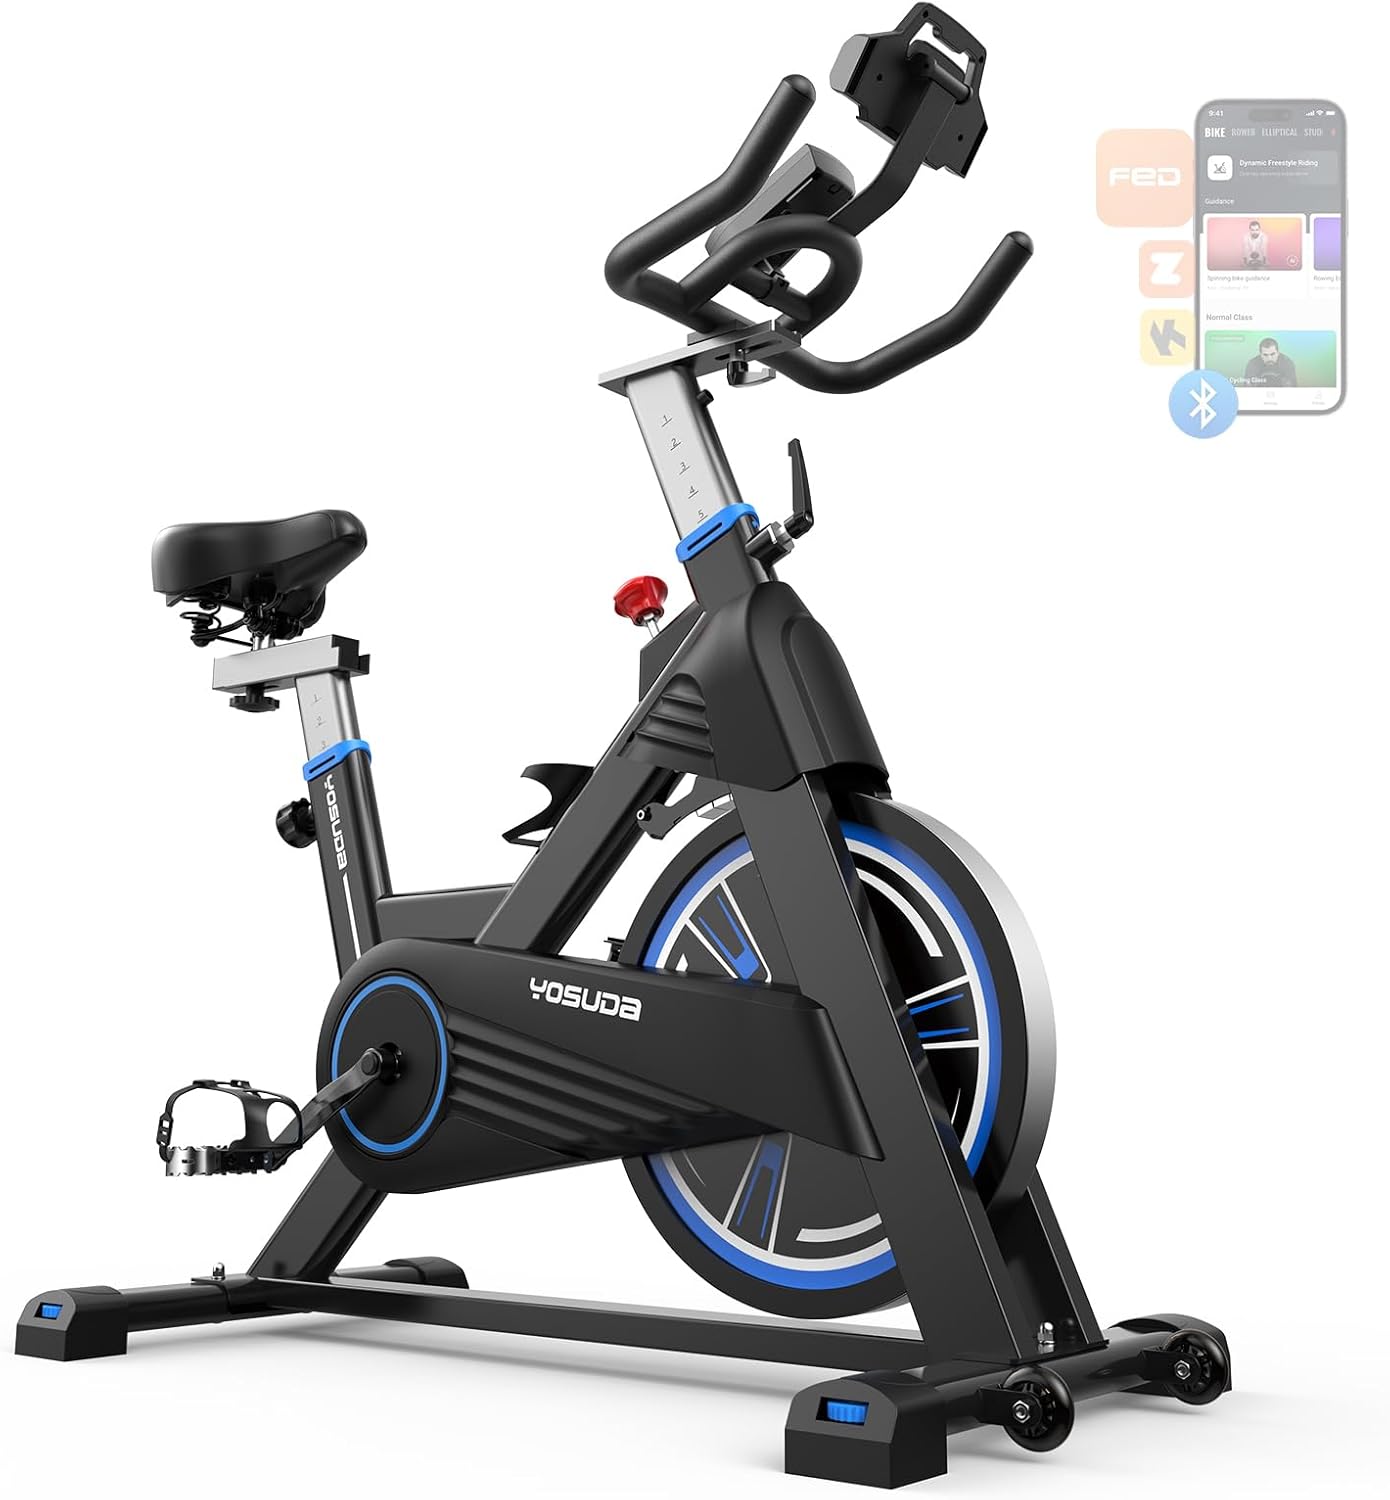
Image: Main view of the YOSUDA PRO Magnetic Exercise Bike, showing the overall structure including stabilizers.
- Install Pedals: Identify the Left (L) and Right (R) pedals. The left pedal screws counter-clockwise, and the right pedal screws clockwise. Thread them into the crank arms and tighten firmly with a wrench.
- Attach Seat Post and Seat: Insert the seat post into the main frame and secure it at your desired height using the adjustment knob. Attach the seat to the seat post and tighten the nuts underneath.

Image: Illustration of the 4-way adjustment for seat and handlebars, demonstrating how to customize fit for different user heights.
- Install Handlebar Post and Handlebar: Insert the handlebar post into the main frame and secure it. Attach the handlebar to the handlebar post and tighten the bolts.
- Mount Monitor and Tablet Holder: Connect the monitor cables to the main frame. Slide the monitor onto its bracket. Attach the universal tablet holder to the handlebar.

Image: Close-up of the upgraded backlight monitor and adjustable tablet holder, showing its placement and functionality.
- Final Check: Before first use, double-check all bolts and nuts to ensure they are securely tightened.
Operating Instructions
Adjusting the Bike
- Seat Adjustment: The seat can be adjusted 4 ways (up/down, forward/backward) to fit users with an inseam height of 27-35 inches. Loosen the adjustment knob, slide the seat to the desired position, and tighten the knob securely.
- Handlebar Adjustment: The handlebar can also be adjusted up/down to optimize your riding posture. Loosen the adjustment knob, move the handlebar to the desired height, and tighten the knob.
- Pedal Straps: Adjust the straps on the toe-caged pedals to secure your feet firmly.
Using the Resistance System
The YOSUDA PRO features 100 micro-adjustable magnetic resistance levels.
- Increase Resistance: Turn the resistance knob clockwise to increase the magnetic resistance, making pedaling harder.
- Decrease Resistance: Turn the resistance knob counter-clockwise to decrease the magnetic resistance, making pedaling easier.
- Emergency Stop: Press down firmly on the resistance knob to engage the emergency brake and stop the flywheel immediately.

Image: Visual representation of the 100 micro-adjustable magnetic resistance levels and the 40 lbs flywheel.
Using the Monitor
The super large screen monitor displays key workout data:
- RPM: Revolutions Per Minute (cadence).
- TIME: Duration of your workout.
- SPEED: Current speed in miles per hour.
- DISTANCE: Total distance covered in miles.
- CALORIES: Estimated calories burned.
- ODOMETER: Total accumulated distance since first use.
The monitor is battery-powered. Replace batteries when the display becomes dim or unresponsive. The unique design of the tablet holder prevents it from blocking the display screen.
Image: Close-up of the monitor displaying various metrics like RPM, time, speed, distance, calories, and odometer.
Maintenance
Regular maintenance ensures the longevity and optimal performance of your YOSUDA PRO Magnetic Exercise Bike.
- Cleaning: Wipe down the bike with a damp cloth after each use to remove sweat and dust. Avoid using abrasive cleaners or solvents.
- Lubrication: The magnetic resistance system and belt drive are designed to be low-maintenance and do not require lubrication.
- Check Connections: Periodically check all bolts, nuts, and screws to ensure they are tight. Re-tighten if necessary.
- Pedal Inspection: Inspect pedals and straps for wear and tear. Replace if damaged.
- Stabilizer Feet: Ensure the stabilizer feet are level to prevent wobbling during use. Adjust if needed.
Troubleshooting
| Problem | Possible Cause | Solution |
|---|---|---|
| Bike is wobbly during use. | Uneven floor or loose stabilizer feet. | Adjust the leveling feet on the stabilizers until the bike is stable. Ensure all assembly bolts are tight. |
| Resistance feels inconsistent or too loose/tight. | Resistance knob not properly adjusted or internal mechanism issue. | Turn the resistance knob fully clockwise and then counter-clockwise to reset. If issue persists, contact customer support. |
| Monitor display is blank or dim. | Low battery or loose connection. | Replace the batteries in the monitor. Check that the monitor cable is securely connected. |
| Pedals make noise or feel loose. | Pedals not tightened sufficiently. | Re-tighten the pedals, ensuring the left pedal is tightened counter-clockwise and the right pedal clockwise. |
Specifications
- Brand: YOSUDA
- Model: PRO Magnetic Exercise Bike
- Resistance Mechanism: Magnetic
- Flywheel Weight: 40 lbs
- Resistance Levels: 100 Micro-adjustable
- Weight Capacity: 350 lbs
- Product Dimensions: 40"D x 8"W x 46"H (approximate)
- Item Weight: 86 Pounds
- Material: Alloy Steel
- Adjustments: 4-way adjustable handlebar and seat (inseam height 27-35 inches)
- Monitor Display: RPM, Time, Speed, Distance, Calories, Odometer
- Power Source (Monitor): Battery (not specified, typically AA or AAA)
- Special Features: Silent Belt Drive, Universal Tablet Holder
Warranty and Support
YOSUDA provides comprehensive customer support for your product. For any questions, concerns, or warranty claims, please contact us through the following channels:
- Technical Service: YOSUDA offers 24/7 technical support.
- Contact Information: Refer to the contact details provided on the YOSUDA official website or your purchase documentation.
- Warranty: Specific warranty terms and conditions may vary. Please retain your proof of purchase for warranty service.
For more information, visit the official YOSUDA store: YOSUDA Store on Amazon
Ask a question about this manual
Ask about setup, troubleshooting, compatibility, parts, safety, or missing instructions. Manuals+ will review the question and use this page’s manual context to help answer it.