
1. Safety Information
Always follow basic safety precautions when installing and using this product to reduce the risk of injury or property damage.
- Ensure the installation area can support the weight of the bathtub filled with water and a person.
- All plumbing and electrical work (if applicable) must be performed by qualified professionals and comply with local codes.
- Do not use abrasive cleaners or tools that could scratch the acrylic surface.
- Avoid standing in the bathtub during installation to prevent damage or injury.
2. Product Overview
The Elementool 59-inch Freestanding Acrylic Bathtub is designed for comfort and durability, offering a deep soaking experience. Its ergonomic shape provides back support, and the double-walled insulation helps maintain water temperature.
Key Features:
- Ergonomic Design: Contours to the body for enhanced relaxation and deeper water immersion.
- Double-Walled Insulation: Helps keep bath water warm for extended periods.
- Durable Acrylic Construction: High-quality, glossy acrylic resists fading, cracking, and stains.
- Integrated Overflow and Drain: Pre-installed for simplified setup.
- Sleek Aesthetic: Modern, freestanding design suitable for various bathroom styles.

Image 2.1: The Elementool 59-inch Freestanding Acrylic Bathtub, showcasing its sleek design and glossy white finish.
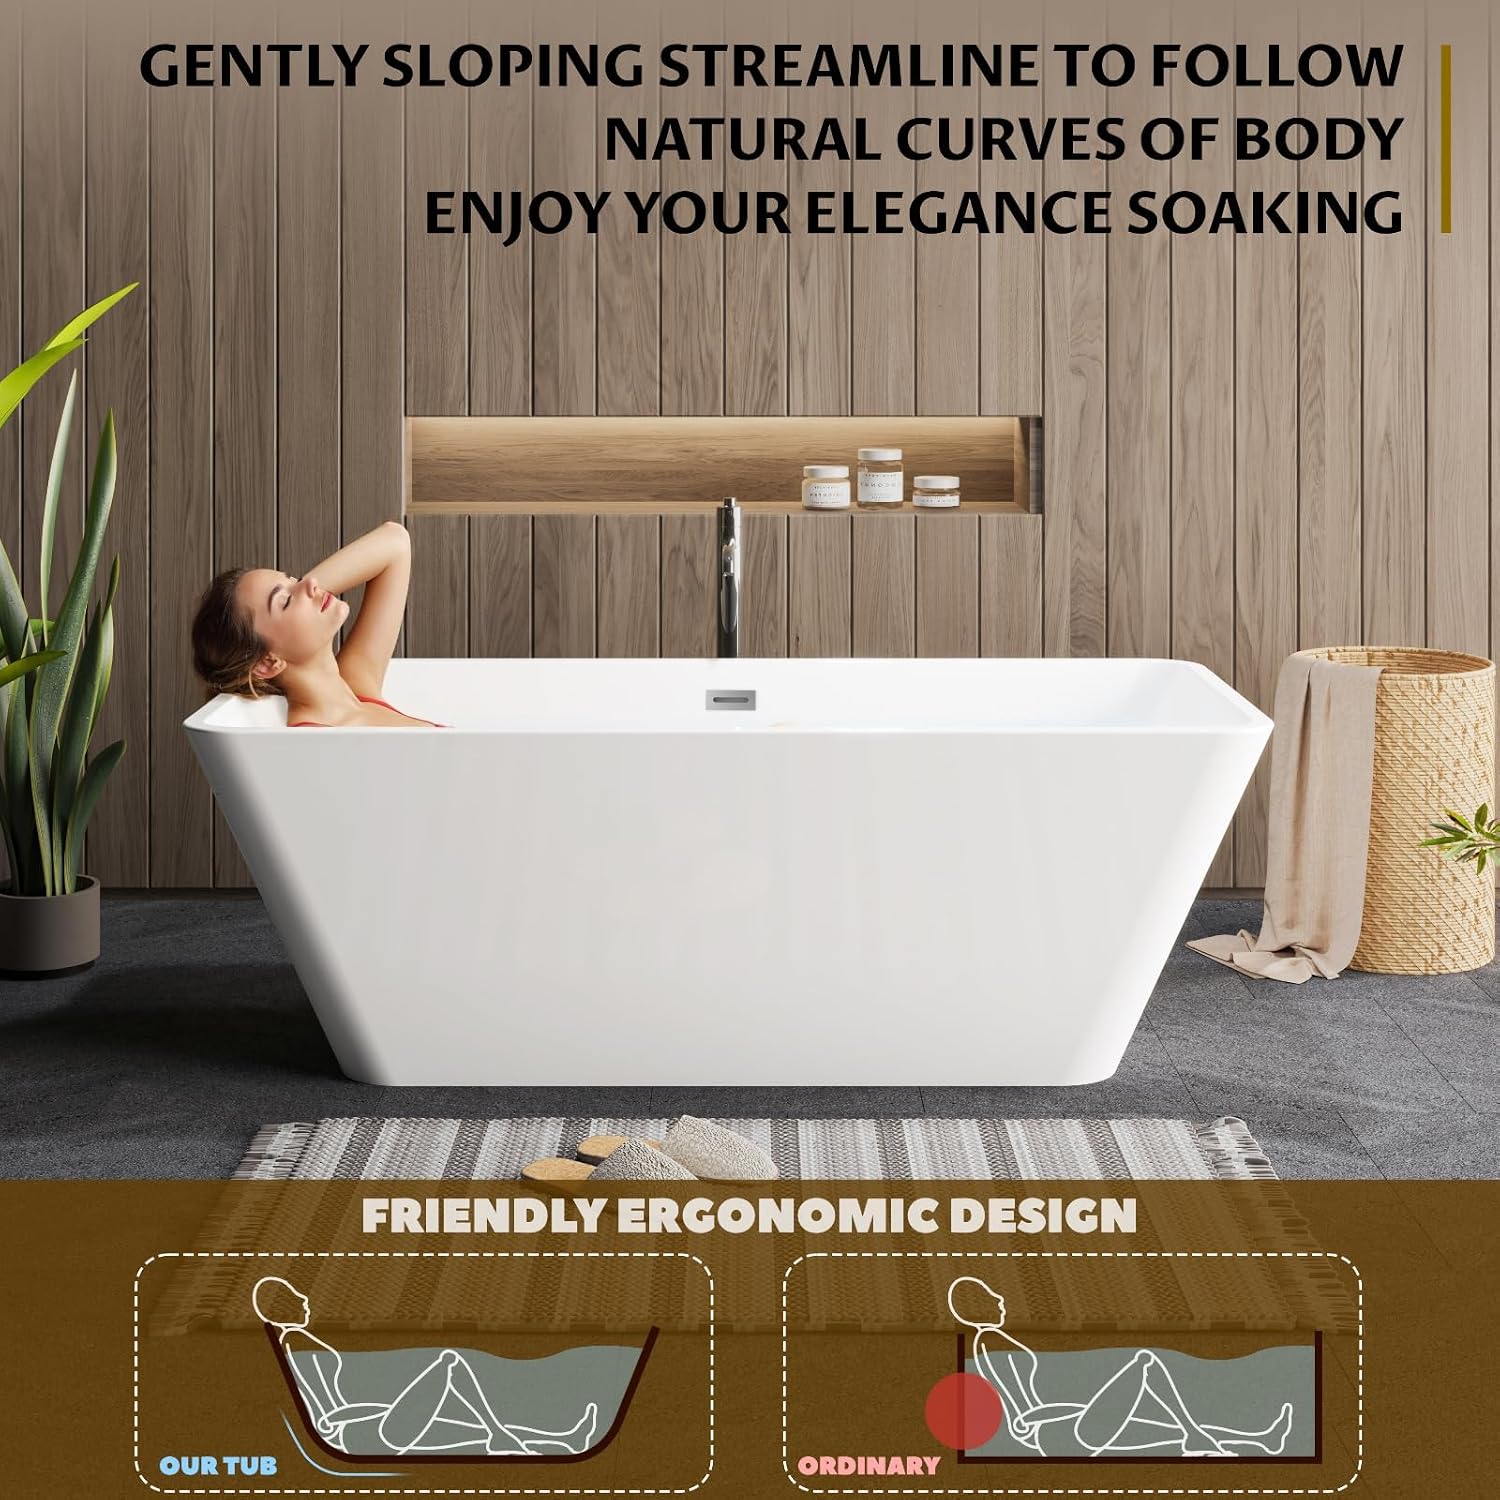
Image 2.2: Illustration of the bathtub's ergonomic shape, designed to provide optimal back support and a comfortable soaking experience.

Image 2.3: The bathtub filled with water, demonstrating the benefit of double-walled insulation for heat retention.
3. Specifications
Detailed specifications for the Elementool Freestanding Bathtub.
| Feature | Detail |
|---|---|
| Brand | Elementool |
| Model Number | 0YiXCNWxUNqQuLhNg5Wg_AjDXar |
| Product Dimensions (L x W x H) | 63.39 x 34.13 x 26.77 inches |
| Item Weight | 105 pounds |
| Size | 59 Inch |
| Color | Harmony (Glossy White) |
| Material | Acrylic |
| Included Components | Bathtub, Instruction Manual, Pre-installed Drain and Overflow |
| UPC | 199641453020 |

Image 3.1: Detailed dimensions of the bathtub, including length, width, and depth.
4. Setup and Installation
4.1 Pre-Installation Checklist
- Verify all components are present and undamaged.
- Ensure the floor is level and structurally sound to support the bathtub's weight when filled.
- Confirm plumbing connections (hot/cold water supply and drain) are correctly positioned according to the bathtub's specifications.
- Have necessary tools ready: level, silicone sealant, adjustable wrench, measuring tape, safety glasses.
4.2 Installation Steps
- Positioning: Carefully place the bathtub in its desired location. Ensure there is adequate space for maintenance and cleaning around the tub.
- Leveling: Use a level to check if the bathtub is perfectly horizontal. Adjust the leveling feet (if present) as needed to achieve a stable and level position.
- Drain Connection: Connect the pre-installed drain assembly to your floor drain. Apply plumber's putty or silicone sealant as required to ensure a watertight seal.
- Overflow Connection: Ensure the overflow pipe is securely connected to the main drain assembly.
- Water Supply (if applicable): If using a deck-mounted or wall-mounted tub filler, ensure it is installed according to its manufacturer's instructions and connected to the hot and cold water lines.
- Leak Test: Fill the bathtub with water up to the overflow level and check for any leaks around the drain and overflow connections. Allow the water to sit for at least 10 minutes.
- Sealing: Once satisfied with the installation and leak test, apply a bead of silicone sealant around the base of the bathtub where it meets the floor. This prevents water from seeping underneath and provides additional stability.
5. Operating Instructions
5.1 Filling the Bathtub
- Ensure the drain stopper is closed.
- Turn on the water supply to the desired temperature and fill the bathtub. Do not overfill past the overflow opening.
5.2 Draining the Bathtub
- Open the drain stopper to allow water to flow out.
- Ensure the drain is clear of debris to prevent slow drainage.
6. Maintenance and Cleaning
Proper care will ensure the longevity and appearance of your Elementool bathtub.
6.1 General Cleaning
- Clean the bathtub regularly with a soft cloth or sponge and a non-abrasive, mild liquid cleaner.
- Rinse thoroughly with clean water after cleaning to remove all cleaner residue.
- For stubborn stains, a diluted solution of white vinegar and water can be used, followed by a thorough rinse.
6.2 Avoiding Damage
- Do not use abrasive cleaners, scouring pads, wire brushes, or harsh chemicals (e.g., acetone, paint thinner) as these can damage the acrylic surface.
- Avoid dropping heavy or sharp objects into the tub, which could cause chips or cracks.
- Do not expose the bathtub to extreme heat sources.
6.3 Drain Maintenance
- Periodically remove the drain stopper and clean any hair or debris to prevent clogs.
- If a clog occurs, use a plastic drain snake or a non-corrosive drain cleaner specifically designed for acrylic tubs.
7. Troubleshooting
Common issues and their potential solutions.
| Problem | Possible Cause | Solution |
|---|---|---|
| Slow Drainage | Clogged drain with hair or debris. | Remove drain stopper and clear obstruction. Use a plastic drain snake if necessary. |
| Leaks around Drain/Overflow | Loose connections or insufficient sealant. | Tighten connections. Apply additional silicone sealant or plumber's putty as needed. |
| Surface Scratches | Abrasive cleaning or sharp objects. | For minor scratches, use an acrylic repair kit. Avoid abrasive materials for cleaning. |
| Bathtub Not Level | Uneven floor or improperly adjusted feet. | Adjust the leveling feet at the base of the tub until it is stable and level. |
8. Warranty and Support
8.1 Warranty Information
Please refer to your purchase documentation or the Elementool website for specific warranty details regarding your 59-inch Freestanding Acrylic Bathtub. Warranty terms typically cover manufacturing defects for a specified period from the date of purchase.
8.2 Customer Support
For further assistance, technical support, or to inquire about replacement parts, please contact Elementool customer support through the retailer where the product was purchased or visit the official Elementool website.