1. Introduction
Thank you for choosing the EROMMY 8' x 5' Grill Gazebo. This hardtop BBQ gazebo is designed to provide a dedicated and protected space for your outdoor grilling activities. Featuring a double galvanized steel arc roof and convenient side shelves, it offers both functionality and durability for various outdoor environments. Please read this manual thoroughly before assembly and use to ensure proper installation and safe operation.

Figure 1.1: EROMMY 8' x 5' Grill Gazebo in an outdoor setting. This image displays the gazebo with a grill and accessories, highlighting its functional design and aesthetic appeal on a patio.
2. Safety Instructions
Adherence to these safety guidelines is crucial for preventing injury and damage to the product.
- Assembly: Always assemble the gazebo with at least two adults. Ensure all parts are present and undamaged before beginning assembly.
- Anchoring: Securely anchor the gazebo to the ground using the pre-drilled base holes. Expansion screws are not included and must be purchased separately based on your ground type.
- Placement: Position the gazebo on a level surface. Avoid placing it near overhead power lines or other obstructions.
- Weather Conditions: While designed for various weather conditions, extreme weather such as severe storms, heavy snow accumulation, or high winds may require additional securing or temporary disassembly to prevent damage.
- Grill Safety: Ensure proper ventilation when using a grill under the gazebo. Maintain adequate clearance between the grill and the gazebo structure to prevent fire hazards. Never leave a hot grill unattended.
- Children and Pets: Keep children and pets away from the assembly area and hot grilling equipment.
- Maintenance: Regularly inspect the gazebo for loose connections or damaged parts. Address any issues promptly.
3. Package Contents
The EROMMY Grill Gazebo is shipped in two separate boxes. Please ensure both boxes are received before starting assembly. Refer to the detailed parts list in the included assembly instructions for all components.

Figure 3.1: Product Dimensions and Packaging Information. This diagram illustrates the overall dimensions of the gazebo and indicates that the product is packed in two separate boxes, with individual package dimensions shown.
4. Assembly Instructions
Detailed step-by-step assembly instructions are provided in a separate manual included with your package. Please follow those instructions carefully. Below are general guidelines:
- Unpack: Carefully unpack all components from both boxes and verify against the parts list.
- Tools: Gather necessary tools as specified in the assembly manual.
- Frame Assembly: Begin by assembling the main aluminum frame structure. Ensure all connections are secure.
- Roof Installation: Attach the double galvanized steel arc roof panels, ensuring they are properly aligned for optimal smoke circulation and weather protection.
- Side Shelves: Install the two side shelves onto the frame.
- Anchoring: Once fully assembled, anchor the gazebo securely to your patio, deck, lawn, or backyard using appropriate hardware for your ground type.
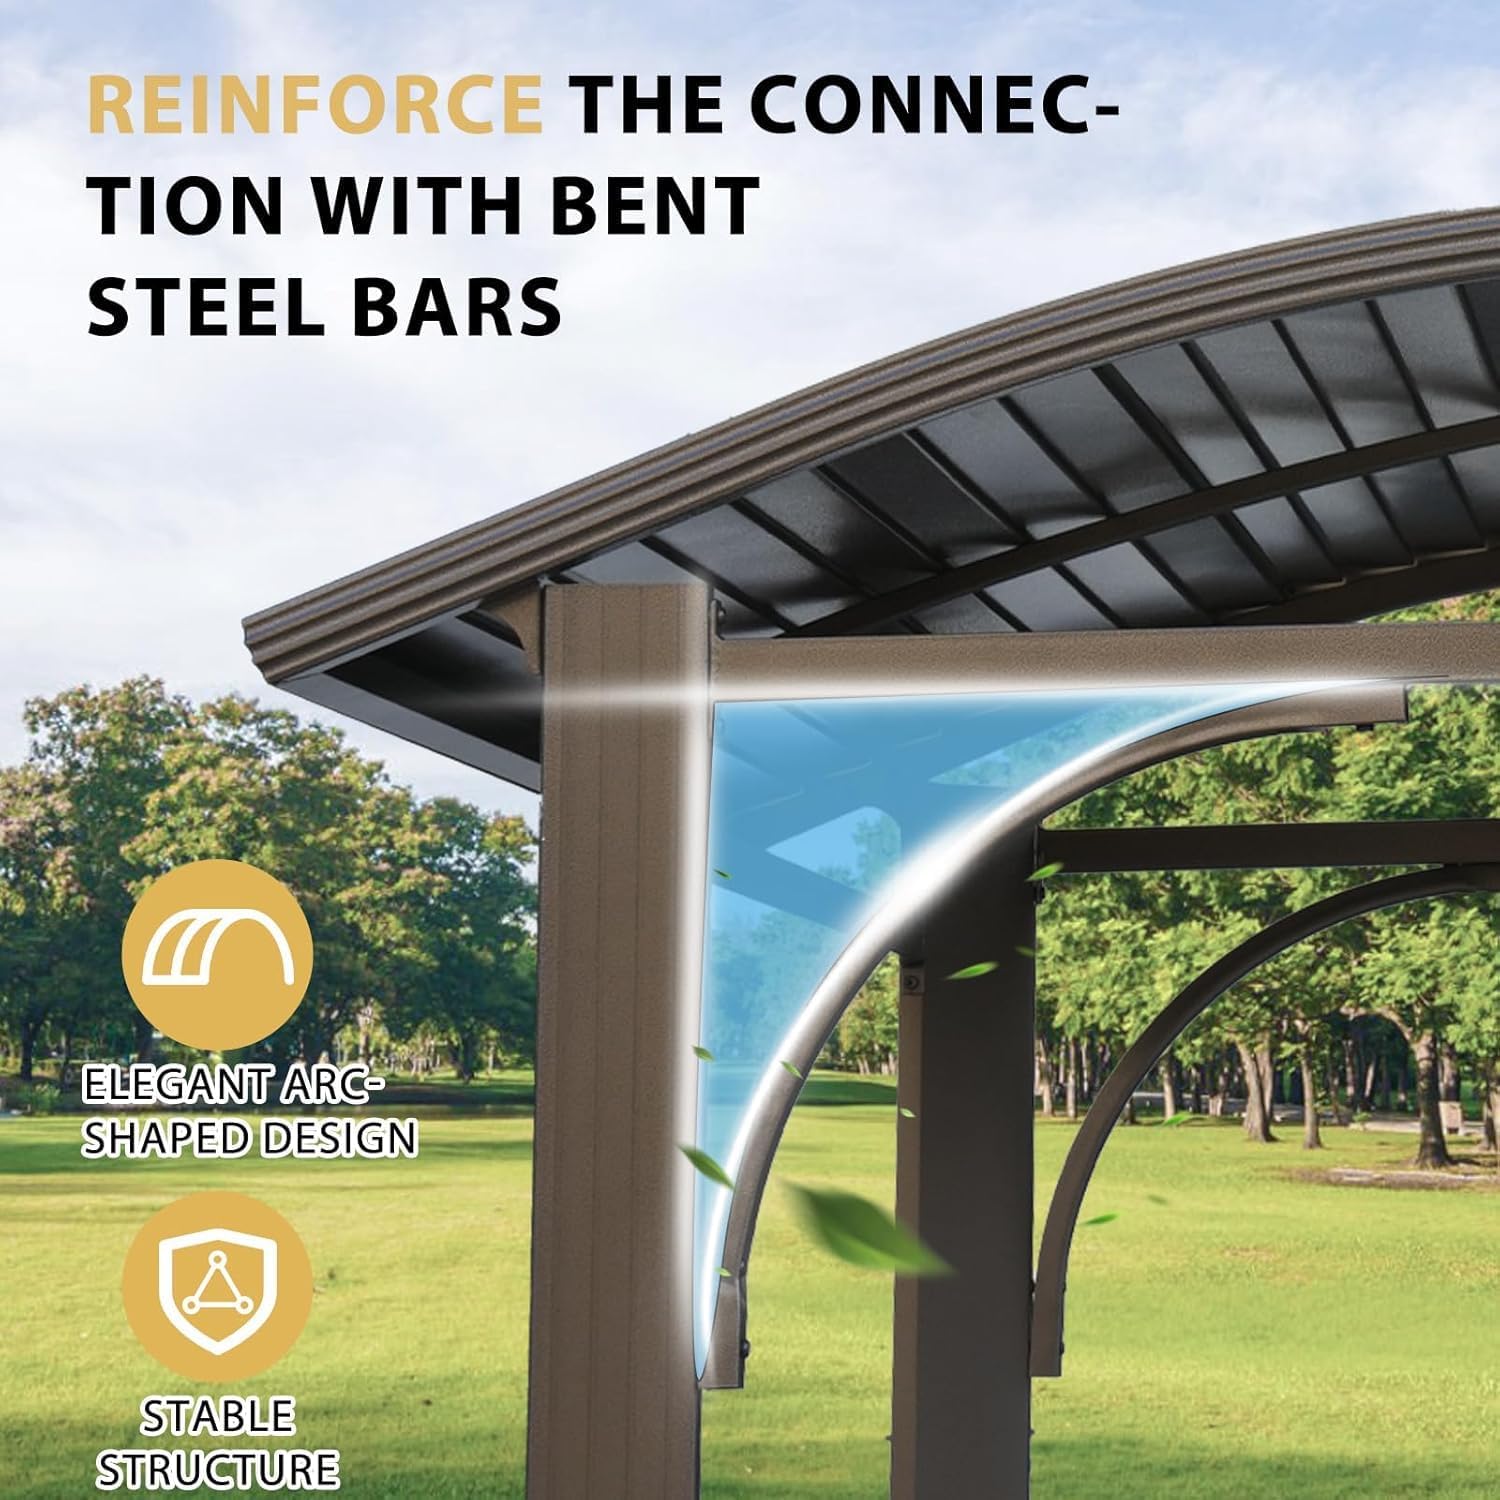
Figure 4.1: Reinforced Frame Connection. This image shows a close-up of the gazebo's structural connection, featuring bent steel bars for reinforcement, contributing to its elegant arc design and overall stability.
5. Operating Instructions
The EROMMY Grill Gazebo is designed to enhance your outdoor grilling experience.
- Grill Placement: Position your standard-sized grill (gas, charcoal, or smoker) centrally under the gazebo. Ensure adequate space around the grill for safe operation and heat dissipation.
- Side Shelves: Utilize the two integrated steel side shelves for convenient placement of grilling tools, plates, seasonings, and beverages. These shelves expand your workspace and keep essentials within reach.
- Ventilation: The interactive sloped roof design facilitates quick circulation of BBQ smoke and wind, providing a comfortable grilling environment.
- UV Protection: The roof offers 99% UV-proof protection with a UPF 50+ rating, shielding you from harmful sun rays during daytime use.

Figure 5.1: Functional Side Shelves. This image demonstrates the practical use of the gazebo's two side shelves, displaying various items such as food, drinks, and grilling tools, highlighting their utility for outdoor entertaining.

Figure 5.2: Roof Ventilation and UV Protection. This diagram highlights the double roof design, explaining its function in blocking UVA and UVB rays and promoting air circulation for effective ventilation.
6. Maintenance
Regular maintenance will extend the lifespan and preserve the appearance of your gazebo.
- Cleaning: Clean the aluminum frame and steel roof panels with a mild soap solution and water. Rinse thoroughly and dry with a soft cloth. Avoid abrasive cleaners or harsh chemicals.
- Inspection: Periodically check all bolts and connections to ensure they remain tight. Re-tighten if necessary. Inspect the frame for any signs of damage or corrosion.
- Winter Care: While the gazebo is designed for all-weather use, consider removing heavy snow accumulation from the roof to prevent structural stress. In areas with extreme winter conditions, temporary disassembly or additional bracing may be advisable.
- Anchoring: Verify that the gazebo remains securely anchored, especially after strong winds or heavy rain.

Figure 6.1: All-Weather Performance. This image showcases the gazebo's resilience in various weather conditions, including sunny, rainy, and snowy environments, emphasizing its suitability for year-round outdoor use.
7. Troubleshooting
- Gazebo feels unstable:
- Ensure all bolts and connections are tightened securely.
- Verify that the gazebo is placed on a level surface.
- Confirm that the gazebo is properly anchored to the ground.
- Missing parts during assembly:
- Check both shipping boxes thoroughly, as the product is shipped in two packages.
- Refer to the parts list in the assembly manual to confirm missing items.
- Contact EROMMY customer support for assistance.
- Roof panels do not align:
- Review the assembly instructions for correct orientation and sequence of roof panel installation.
- Loosen connections slightly, adjust alignment, and then re-tighten.
8. Specifications
| Model Number | 202TN-03 |
| Brand | EROMMY |
| Product Dimensions | 95.5"L x 60.8"W x 93.2"H (8' x 5' Arc Roof) |
| Frame Material | Aluminum |
| Roof Material | Galvanized Steel |
| Color | Brown |
| Water Resistance Level | Waterproof |
| UV Protection | 99% UV-proof, UPF 50+ |
| Assembly Required | Yes |
9. Warranty and Customer Support
For warranty information, missing parts, or any questions regarding your EROMMY Grill Gazebo, please refer to the warranty card included in your package or contact EROMMY customer support directly. Contact details can typically be found on the product packaging or the EROMMY official website.