1. Introduction
This manual provides detailed instructions for the installation, operation, and troubleshooting of your ANXQQ KVM203DH HDMI + 2 DisplayPort KVM Switch. This device allows two computers to share three monitors and four USB 3.0 devices, streamlining your workspace and enhancing productivity.
2. Product Overview
The ANXQQ KVM203DH is designed to manage multiple computers with a single set of peripherals. It supports high-resolution video output and fast data transfer rates.
2.1 Key Features
- Triple Monitor Support: Connects 2 computers to 3 monitors (1x HDMI, 2x DisplayPort per computer).
- High Resolution: Supports DisplayPort resolutions up to 8K@30Hz/4K@144Hz and HDMI resolutions up to 8K@60Hz/4K@120Hz.
- USB 3.0 Connectivity: Features 4 USB 3.0 ports for data transfer speeds up to 5Gbps, compatible with USB 2.0 devices.
- Dual Switching Methods: Switch between computers using a physical button on the device or a 1.5m wired remote control.
- Broad Compatibility: Plug-and-play functionality with Windows, Mac OS, Chrome OS, Linux, PS4, Raspberry Pi, and DVR systems.
2.2 Package Contents
- 1x ANXQQ KVM Switch (KVM203DH)
- 2x USB 3.0 Cables (1.5m each)
- 1x Wired Remote Control (1.5m)
- 1x Power Adapter
- 1x User Manual (this document)
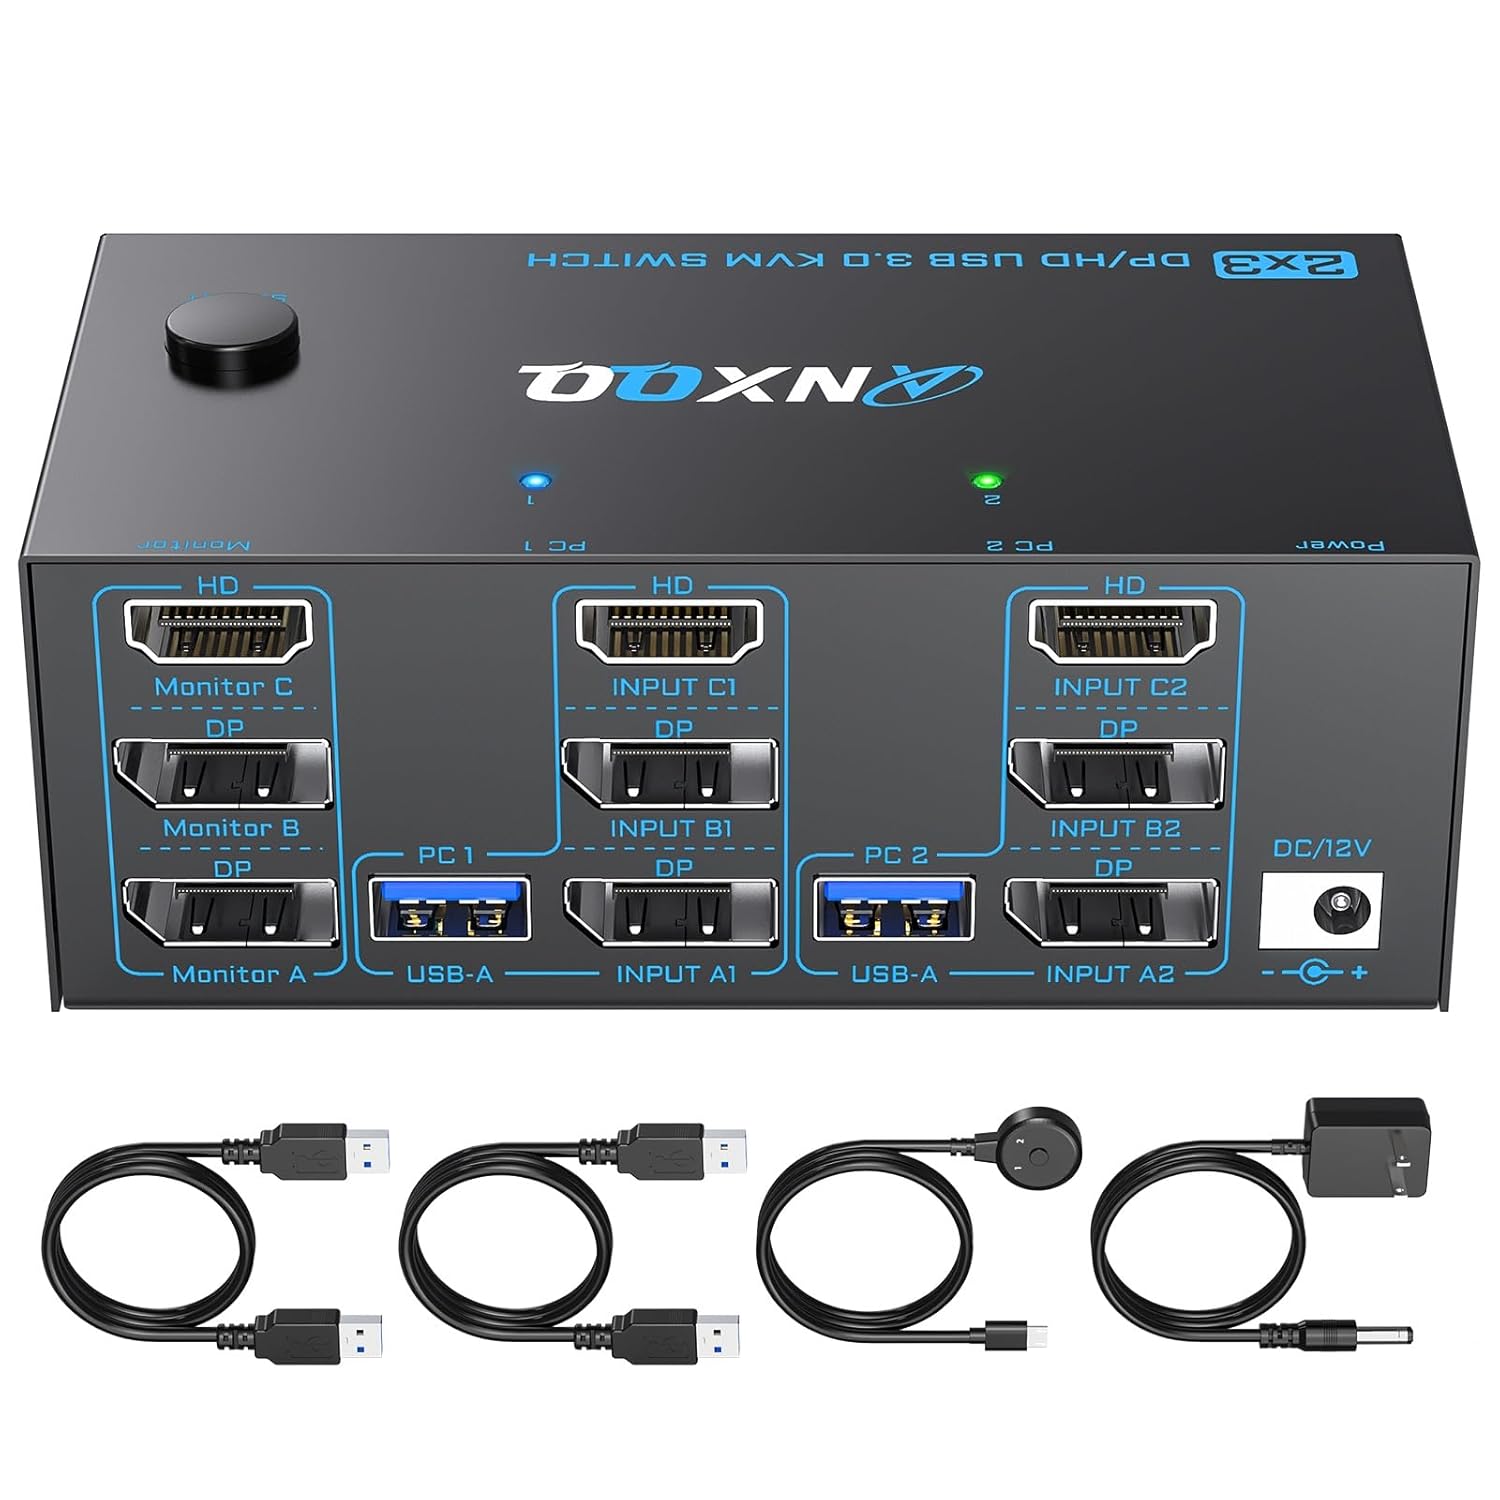
Image: The ANXQQ KVM203DH KVM Switch and its included accessories: two USB 3.0 cables, a wired remote, and a power adapter.
3. Setup Instructions
Follow these steps to connect your KVM switch:
- Power Off Devices: Ensure both computers and all monitors are powered off before making any connections.
- Connect Monitors to KVM: Connect your three monitors to the KVM switch's output ports (Monitor A, Monitor B, Monitor C). Ensure you use the correct port types (1x HDMI, 2x DisplayPort).
- Connect Computers to KVM:
- For PC 1: Connect 1x HDMI, 2x DisplayPort, and 1x USB 3.0 cable from PC 1 to the corresponding "PC 1" input ports on the KVM switch.
- For PC 2: Connect 1x HDMI, 2x DisplayPort, and 1x USB 3.0 cable from PC 2 to the corresponding "PC 2" input ports on the KVM switch.
Note: Each computer requires 1 HDMI, 2 DisplayPort, and 1 USB connection to the KVM switch for full functionality. If your computer lacks any of these ports, a reliable adapter or docking station may be required.
- Connect USB Peripherals: Connect your keyboard, mouse, printer, USB drive, or other USB 3.0 devices to the USB 3.0 ports on the front of the KVM switch.
- Connect Wired Remote (Optional): Plug the wired remote control into the dedicated port on the KVM switch if you intend to use it for switching.
- Connect Power Adapter: Plug the provided 12V power adapter into the DC/12V port on the KVM switch, then connect it to a power outlet.
- Power On: Power on the KVM switch, then power on your monitors, and finally, power on your computers.
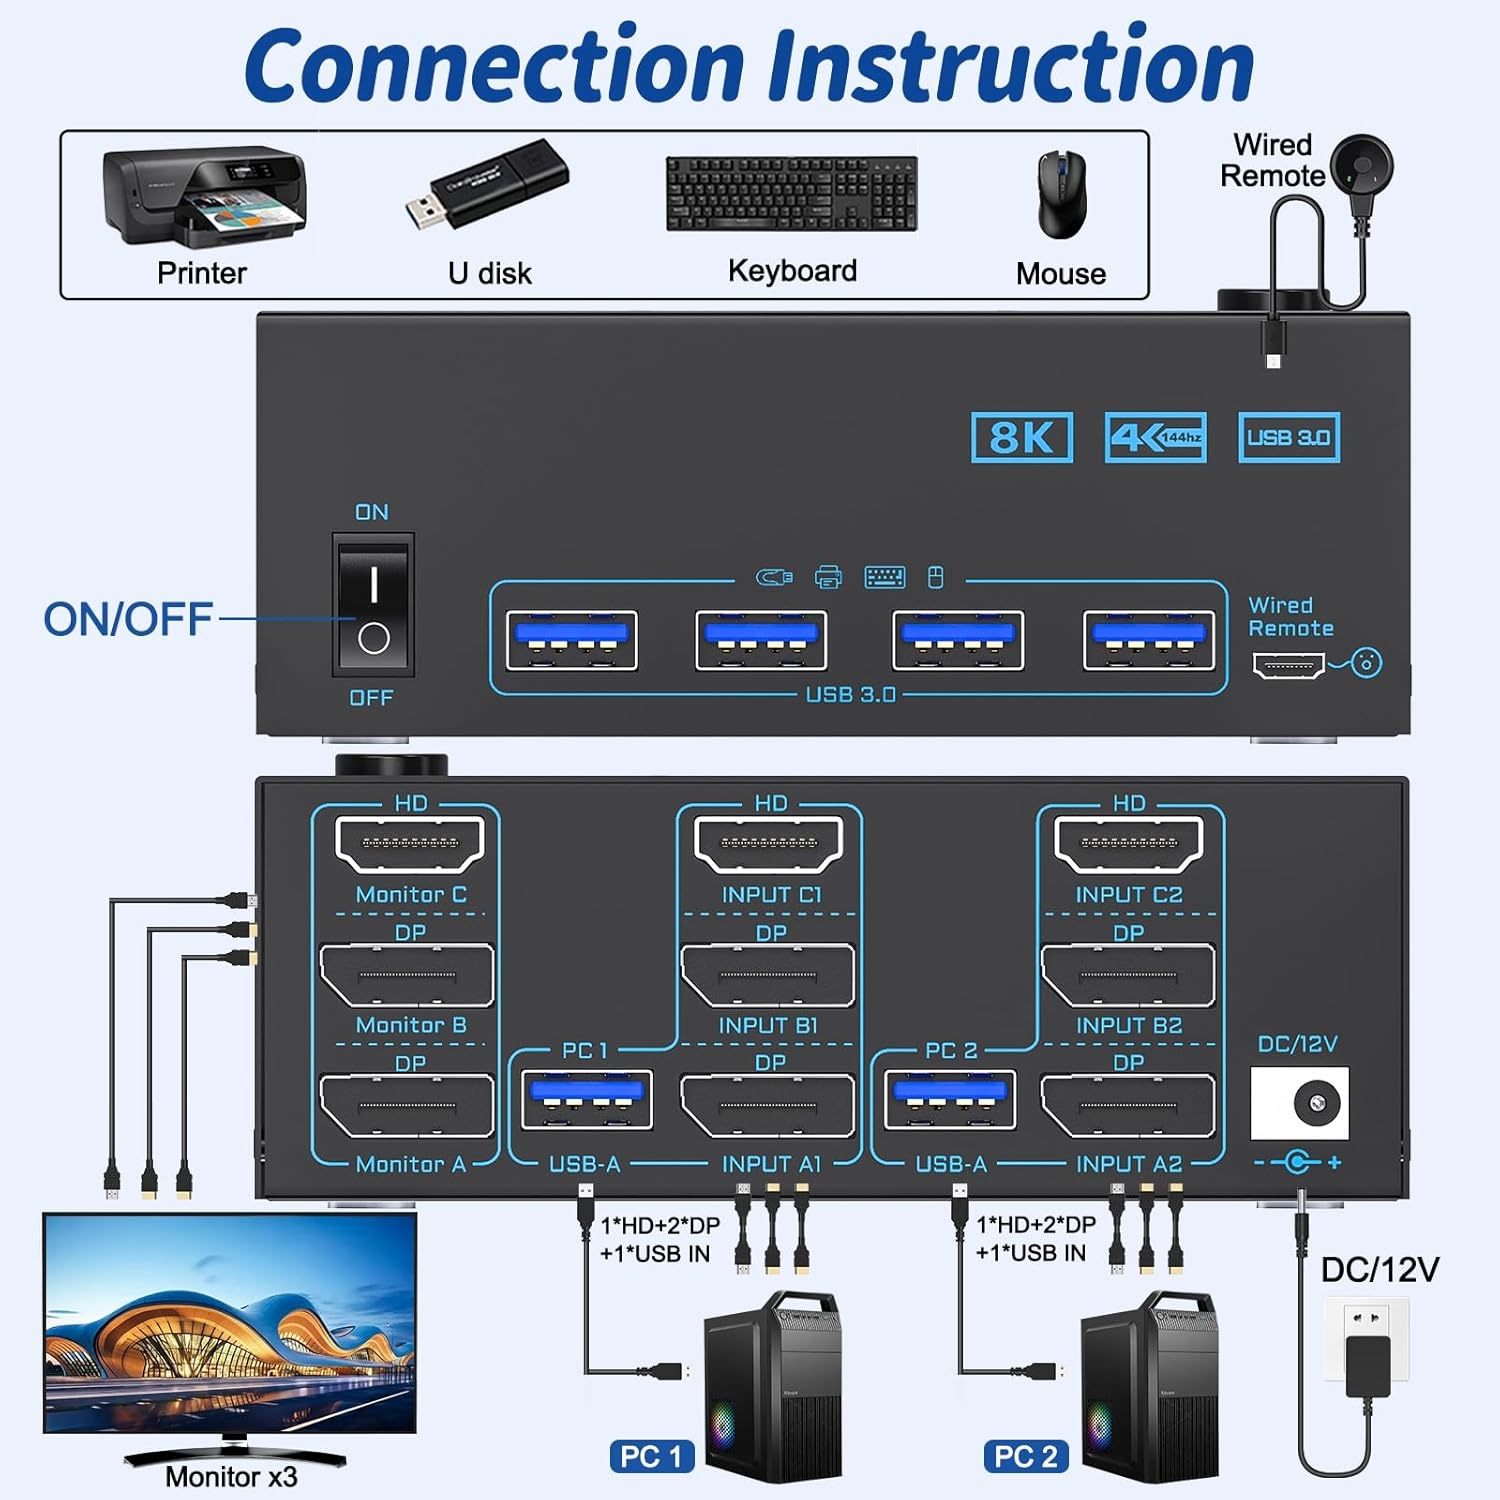
Image: A detailed diagram illustrating how to connect two PCs and three monitors to the KVM switch, along with USB peripherals and power.
4. Operating Instructions
4.1 Switching Between Computers
The KVM switch offers two methods for switching between connected computers:
- Button Switch: Press the "SELECT" button on the front panel of the KVM switch to toggle between PC 1 and PC 2.
- Wired Remote Control: Press the button on the wired remote control to switch between PC 1 and PC 2.
Note: This KVM switch does not support keyboard hotkey control.

Image: Demonstrates the two switching methods: the physical button on the KVM unit and the wired remote control.
4.2 Display Modes
After connecting, you can configure your display settings on your computer. Pressing "Windows" + "P" on your keyboard allows you to choose between Mirror (Duplicate) or Extended display modes, depending on your preference.

Image: Illustrates the difference between Mirror Mode (all monitors show the same content) and Extended Mode (monitors act as a single, larger desktop).
5. Compatibility
The ANXQQ KVM203DH KVM Switch is designed for broad compatibility:
- Operating Systems: Windows, Mac OS, Chrome OS, Linux.
- Devices: Laptops, desktops, PS4, Raspberry Pi, DVR, and other devices with compatible video and USB outputs.

Image: Icons representing various compatible operating systems including Windows, Chrome OS, Mac OS, Vista, and Linux.
6. Specifications
| Feature | Specification |
|---|---|
| Model Number | KVM203DH |
| Product Dimensions (L x W x H) | 6.38 x 2.6 x 1.3 inches (16.2 x 6.6 x 3.3 cm) |
| Weight | 1.46 Pounds (0.66 kg) |
| DisplayPort Resolution | Up to 8K@30Hz / 4K@144Hz |
| HDMI Resolution | Up to 8K@60Hz / 4K@120Hz |
| USB Data Transfer Speed | USB 3.0 (5Gbps), backward compatible with USB 2.0 |
| USB Ports | 4x USB 3.0 |
| Switching Methods | Physical Button, Wired Remote Control |
| Power Supply | DC 12V Power Adapter |
| Operation Mode | ON-ON |
| Current Rating | 1 Amps |
| Operating Voltage | 12 Volts |
7. Troubleshooting
If you encounter issues, please refer to the following common troubleshooting steps:
- No Display on Monitors:
- Ensure all video cables (HDMI, DisplayPort) are securely connected between computers, KVM, and monitors.
- Verify that the KVM switch is powered on and the correct input (PC 1 or PC 2) is selected.
- Confirm that your computers and monitors support multi-screen output by connecting them directly (bypassing the KVM) before using the switch.
- Check monitor input sources to ensure they are set to the correct HDMI/DisplayPort input.
- USB Devices Not Responding:
- Ensure the USB 3.0 cables are securely connected from both computers to the KVM switch.
- Try connecting the USB device directly to the computer to confirm it functions correctly.
- Some high-power USB devices may require external power or a powered USB hub.
- Incorrect Resolution or Refresh Rate:
- Ensure you are using high-quality cables, especially for 8K/4K resolutions (e.g., 8K one-meter cables for best results).
- Adjust display settings on your computer (e.g., Windows Display Settings, Mac System Preferences) to select the desired resolution and refresh rate.
- Switching Delay:
- A brief delay during switching is normal as the KVM re-establishes connections. Significant delays might indicate a cable issue or a need to restart the KVM and connected devices.
- Cross Output Not Supported:
- The KVM signal is transmitted in a single layer (e.g., Input A1 to Monitor A, Input C2 to Monitor C). Cross output (e.g., Input B2 to Monitor C) is not supported.
8. Maintenance
To ensure the longevity and optimal performance of your KVM switch:
- Keep the device in a cool, dry place, away from direct sunlight and excessive heat.
- Avoid exposing the device to moisture or liquids.
- Clean the exterior with a soft, dry cloth. Do not use harsh chemicals or abrasive cleaners.
- Ensure proper ventilation around the device to prevent overheating.
9. Warranty and Support
ANXQQ provides 12 months of after-sales service for this KVM switch. If you encounter any issues or require assistance, please contact ANXQQ customer support. Technical products can sometimes have compatibility errors, and our support team is available to provide comprehensive assistance.
For support, please refer to the contact information provided with your product packaging or visit the official ANXQQ website.