Introduction
Welcome to the user manual for your new Sellrich 10-inch Android Car Stereo. This guide provides detailed instructions for installation, setup, operation, and troubleshooting to ensure you get the most out of your device. Please read this manual thoroughly before installation and use.
Safety Information
- Ensure the vehicle's engine is off and the parking brake is engaged before beginning installation.
- Disconnect the vehicle's battery to prevent electrical shorts or damage.
- If you are unsure about any installation steps, seek professional assistance.
- Do not operate the device in a way that distracts you from driving.
- Keep all cables and connections secure to prevent interference or malfunction.
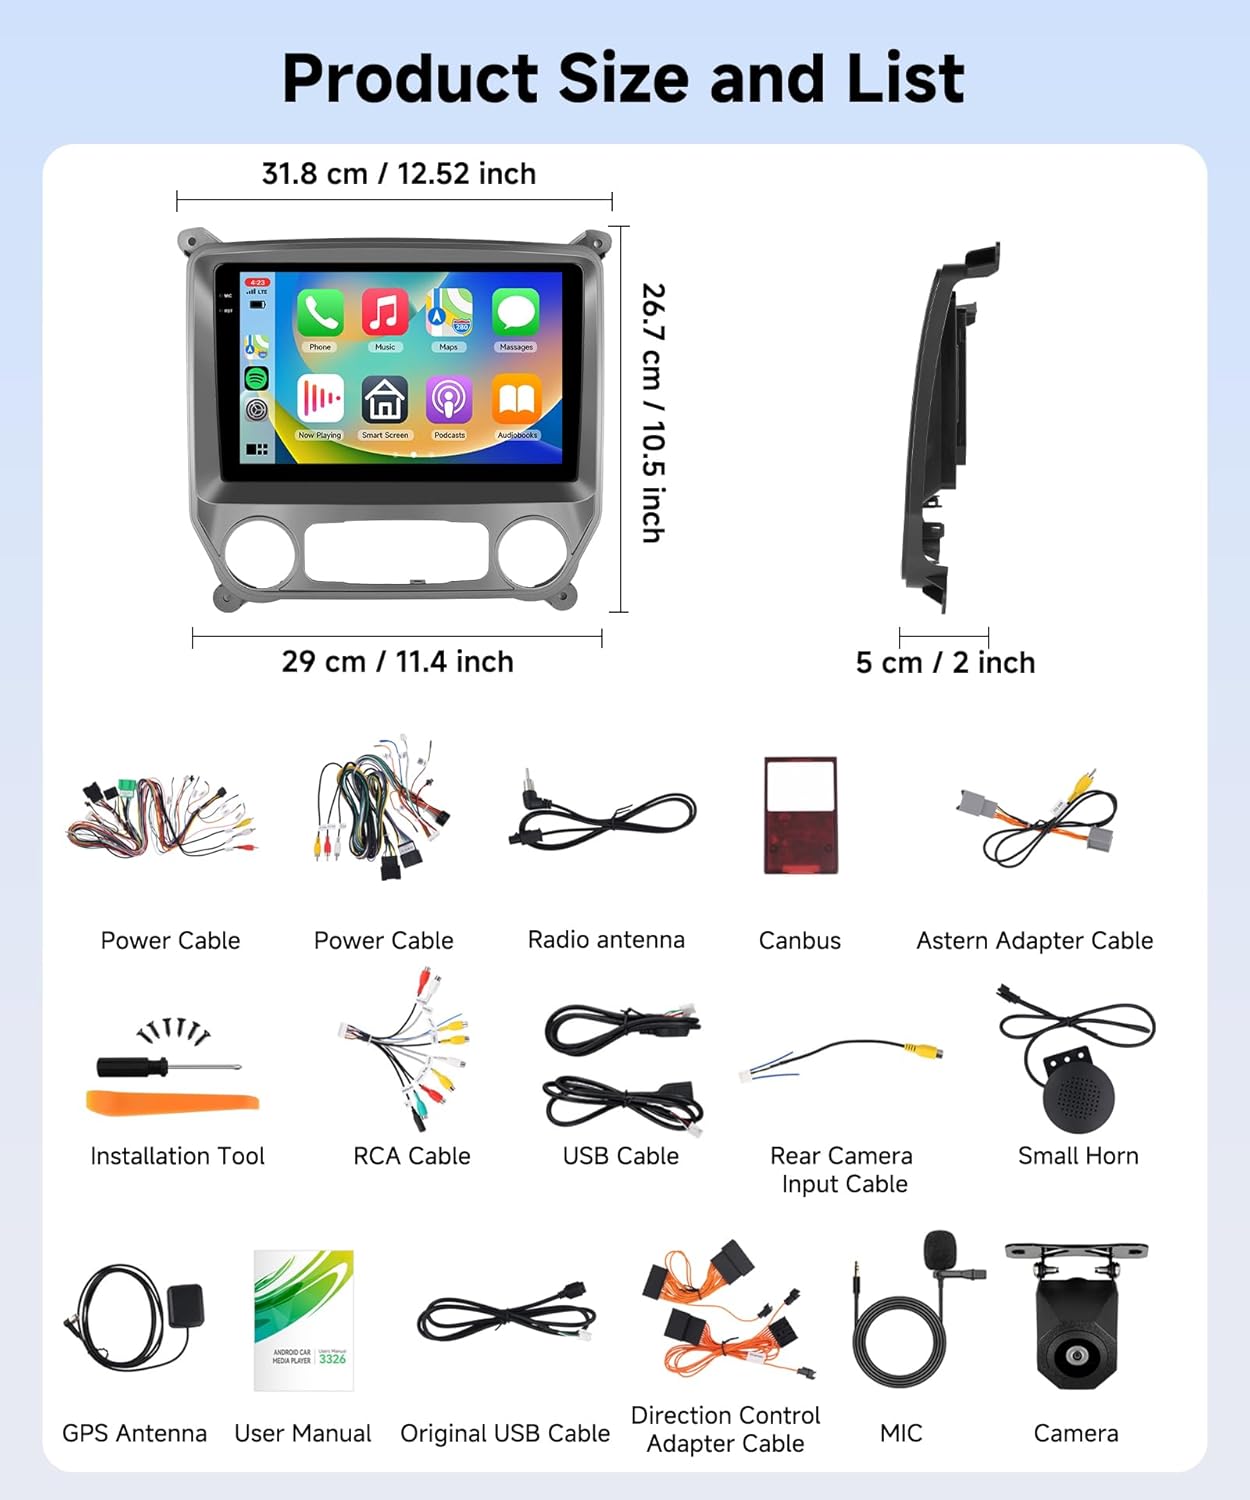
Package Contents
- Car Stereo
- Backup Camera
- Canbus
- External Mic
- GPS Antenna
Visual Guide to Components
Installation Guide
Step 1: Prepare the Dashboard
Carefully remove the plastic decorative strip around the original radio unit using a frame removal tool. Then, use a 7mm socket wrench to remove the screws securing the radio. Gently pull out the cables and remove the air conditioning control panel.
Video demonstrating how to remove the main frame and air conditioning control panel from the Chevy Silverado dashboard.
Step 2: Connect Wiring Harnesses
Unplug the OEM power cable and the CANBUS cable from the vehicle. Connect the OEM power interface on the device's power cable to the corresponding vehicle connector. Connect the OEM CANBUS cable. If your vehicle has a CD player, connect the OEM CD cable to the provided adapter.
Video guide on connecting the wiring harness to the car radio.
Step 3: Install Decoder Box (if applicable)
If your original car radio does not have a Bose sound system, you can skip this step. Otherwise, connect the decoder box as shown in the video. This is crucial for proper audio functionality with Bose systems.
Video tutorial for installing the decoder box, specifically for vehicles with Bose sound systems.
Step 4: Steering Wheel Control Wiring
Remove the steering wheel cover and the OEM steering wheel control cable. Then, connect the provided steering wheel control cable according to the video instructions. Ensure all connections are secure.
Video guide on wiring steps for using the original car steering wheel controls.
Step 5: Microphone Installation
Route the external microphone cable along the A-pillar and secure the microphone in a suitable location, such as near the rearview mirror or sun visor, for optimal voice pickup.
Video demonstrating the installation of the external microphone.
Step 6: USB Cable Installation
Connect the 4-pin and 6-pin USB cables to the designated ports on the car stereo. Route these cables to a convenient location, such as the glove compartment or center console, for easy access.
Video showing how to install the 4-pin and 6-pin USB cables.
Step 7: GPS Antenna Installation
Connect the GPS antenna to the car stereo and place it on the dashboard or another location with a clear view of the sky for optimal signal reception. Secure the antenna to prevent movement.
Video demonstrating the installation of the GPS antenna.
Step 8: Reversing Camera Connection
Connect the reversing camera cable to the car stereo's video input. Route the cable to the rear of the vehicle and install the backup camera according to the provided instructions. Ensure the camera is securely mounted and properly aimed.
Video tutorial for installing the reverse radar (backup camera).
Step 9: Final Assembly
Once all cables are connected, carefully place the new Android car stereo into the dashboard opening. Secure it with the screws removed earlier. Reattach the decorative trim and air conditioning control panel. Test all functions before fully reassembling the dashboard.
Video showing the complete connection of radio cables and the final installation result.

Setup and Initial Configuration
Wi-Fi Connection
Navigate to Settings > Network & Internet > Wi-Fi. Select your desired network and enter the password to connect. This enables online features like maps and app downloads.
Video demonstrating how to connect the car stereo to Wi-Fi.
Bluetooth 5.0 Pairing
Go to Settings > Connected devices > Pair new device. On your mobile device, search for the car stereo's Bluetooth name and pair. This allows for hands-free calls and music streaming.

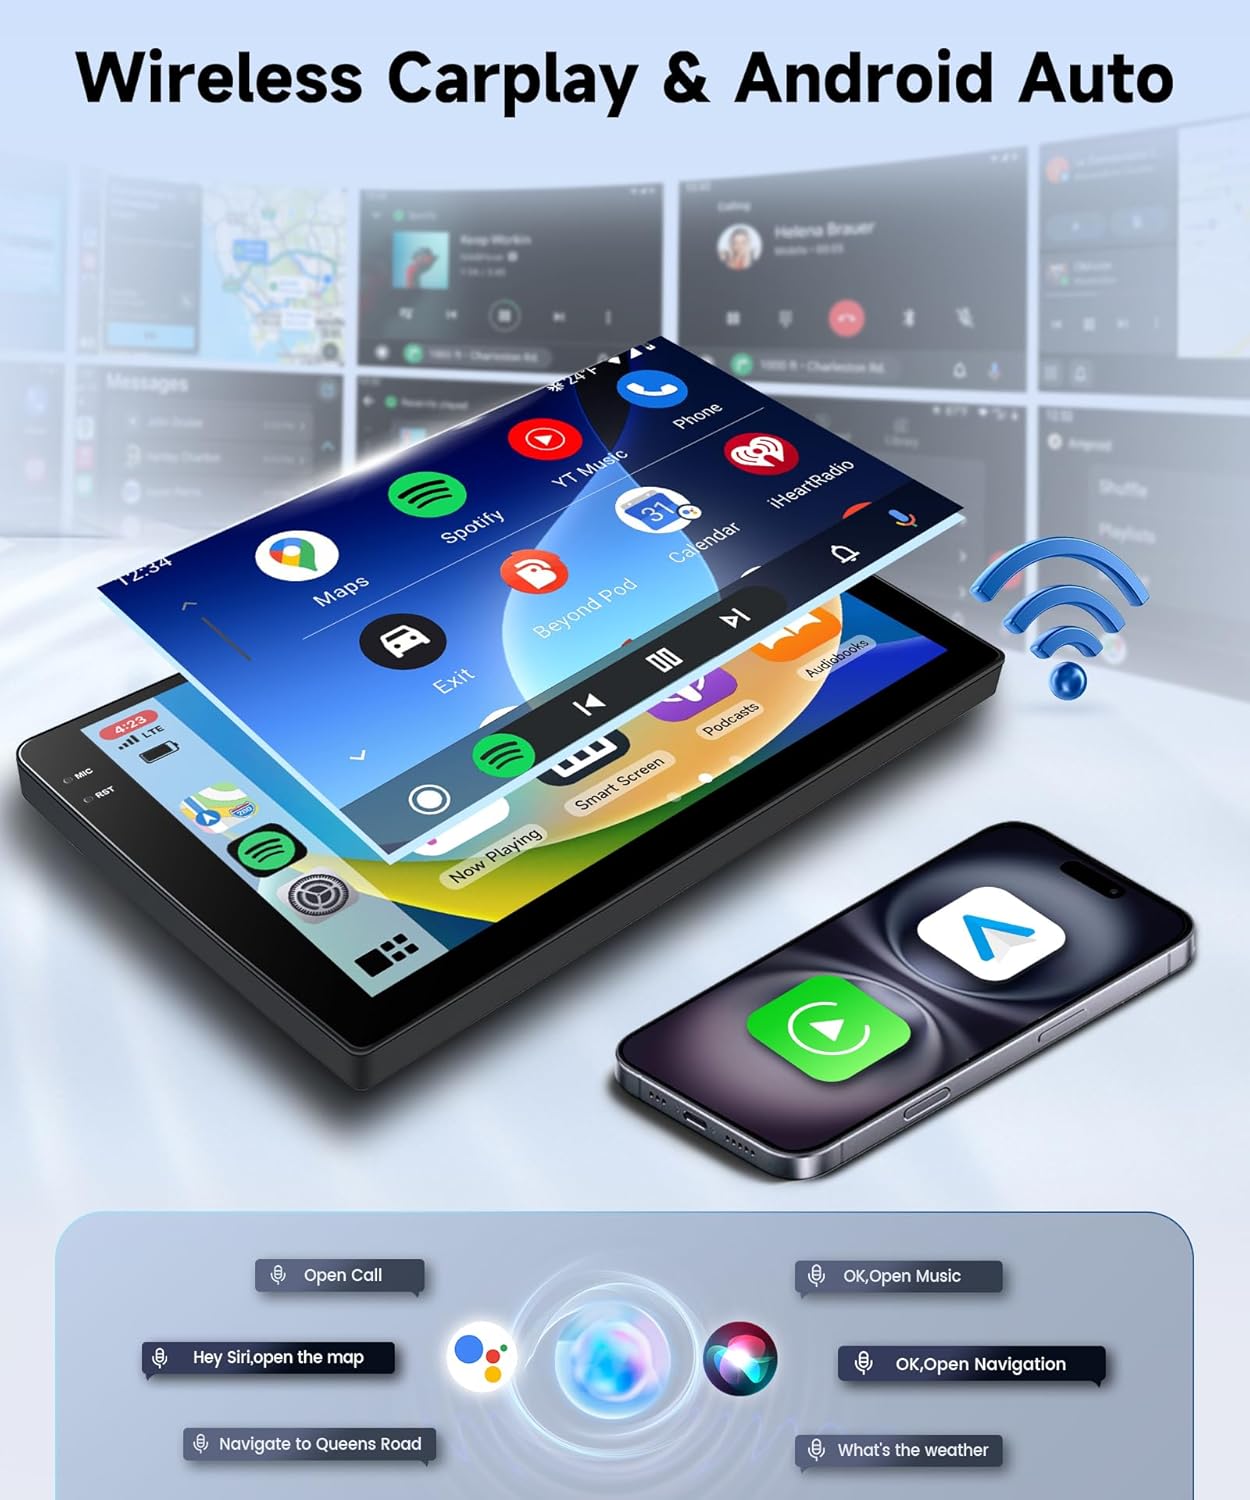
Wireless Carplay & Android Auto
Connect your iPhone or Android device wirelessly to access Carplay or Android Auto. This integrates your phone's navigation, music, and messaging apps directly onto the stereo screen.
UI Themes and Customization
Long-press on the blank space of the homepage to access various UI desktop themes. Select your preferred theme to personalize the interface.

DSP and EQ Settings
Access the DSP (Digital Sound Processor) and 32-band EQ settings to fine-tune your audio experience. Adjust sound fields, bass, and other parameters to match your preferences.

Operating Instructions
GPS Navigation
The stereo supports both offline and online maps. Connect to Wi-Fi to download online maps or use pre-installed offline maps for navigation. Access navigation apps from the main menu.

FM/RDS Radio
Select the Radio app from the main menu. You can manually tune to stations or use the scan function to find available FM/RDS stations. The RDS feature displays station and song information where available.
Steering Wheel Controls (SWC)
After proper wiring, use your vehicle's steering wheel buttons to control basic functions of the stereo, such as volume, track skipping, and mode selection, for safe and convenient operation.
Mirror Link
Use the Mirror Link function to project your smartphone screen onto the car stereo display. This allows you to view and interact with your phone's content directly from the stereo.
Maintenance
- Regularly clean the screen with a soft, lint-free cloth. Avoid harsh chemicals.
- Keep the software updated to ensure optimal performance and access to new features.
- Avoid exposing the unit to extreme temperatures or direct sunlight for prolonged periods.
Troubleshooting
If you encounter any issues, refer to the troubleshooting guide below. Many common problems can be resolved with simple steps.
Video guide on fixing common issues and essential troubleshooting steps.
Specifications
| Feature | Detail |
|---|---|
| Operating System | Android 15 |
| Processor | Quad Core |
| RAM | 4GB |
| ROM | 64GB |
| Screen Size | 10 inches |
| Resolution | 1280*720 Incell Touch Screen |
| Bluetooth | Bluetooth 5.0 |
| Connectivity | Wi-Fi, FM/RDS |
| Special Features | DSP, Wireless Carplay, Android Auto, SWC, Backup Camera Support |
| Compatible Devices | Chevrolet Chevy Silverado 2014-2018 |
| Output Power | 45 Watts |
Warranty and Support
This product comes with a standard manufacturer's warranty. For warranty claims, technical support, or any questions not covered in this manual, please contact Sellrich customer service through your purchase platform. Keep your purchase receipt as proof of purchase.