Introduction
This instruction manual provides detailed guidance for the Weilim Pottery Wheel Kit, Model PAMT711. Designed for children aged 6 and above, this kit offers a creative and educational experience in pottery making and painting. Please read this manual thoroughly before use to ensure safe and enjoyable operation.
Important Safety Information
- Adult Supervision Required: Always ensure an adult supervises children during the use of this pottery wheel kit.
- Not for Consumption: Clay and paints are not edible. Keep them away from mouth and eyes. Wash hands thoroughly after use.
- Electrical Safety: Use only the provided USB charger. Do not immerse the pottery wheel in water. Keep away from liquids to prevent electric shock.
- Choking Hazard: Small parts and tools may pose a choking hazard for young children. Keep out of reach of children under 3 years old.
- Proper Ventilation: Use in a well-ventilated area.
- Clean-up: Clean the pottery wheel and tools immediately after use to prevent clay from hardening and damaging components.
Package Contents
Verify that all items listed below are included in your Weilim Pottery Wheel Kit:
- Pottery Wheel with Detachable Turntable
- Foot Pedal
- 3 packs of Air-Dry Clay
- 14 vibrant Water Colors
- 2 Paintbrushes
- Sculpting Tools (2 carving tools, 1 cutting line)
- Sponge
- Paint Palette
- Apron
- USB Charger
- Instruction Booklet (this manual)

Figure 1: All components included in the Weilim Pottery Wheel Kit.
Setup
- Unpack Components: Carefully remove all items from the packaging.
- Place Pottery Wheel: Set the pottery wheel base on a stable, flat surface. Ensure there is enough space around it for comfortable use.
- Attach Turntable: Place the detachable turntable onto the spindle on the machine base. It should fit securely.
- Connect Foot Pedal: Plug the foot pedal cable into the designated port on the pottery wheel base.
- Connect Power: Plug the USB charger into the DC charging port on the pottery wheel. Connect the other end to a suitable USB power source (e.g., wall adapter, power bank). The pottery wheel has a built-in rechargeable battery, allowing for cordless use once charged.
- Prepare Workspace: Lay down a protective covering on your workspace to manage potential mess. Have a small container of water ready for working with clay and cleaning tools.

Figure 2: Key components of the Weilim Pottery Wheel.
Video 1: An overview of the Weilim Pottery Wheel for Kids, demonstrating unboxing and initial setup.
Operating Instructions
- Prepare the Clay: Take a pack of air-dry clay. Knead it thoroughly with your hands to make it soft and pliable. Form it into a ball.
- Place Clay on Turntable: Center the clay ball firmly on the turntable. Ensure it is well-adhered to prevent it from flying off during rotation.
- Turn On and Adjust Speed: Locate the power switch on the side of the pottery wheel. Switch it to '1' for low speed or '2' for high speed. You can also use the foot pedal to control the speed by applying pressure.
- Shape the Pottery: With wet hands, gently apply pressure to the rotating clay to begin shaping it. Use the provided sculpting tools to refine the shape, create openings, and trim excess clay. Keep your hands and the clay moist with water as you work.
- Dry the Pottery: Once you are satisfied with your creation, carefully remove it from the turntable. Allow the air-dry clay to dry completely, which may take 24-72 hours depending on thickness and humidity.
- Paint and Decorate: After the clay is fully dry, use the included paints and paintbrushes to decorate your pottery. The paint palette can be used to mix colors.
- Final Touches: Allow the paint to dry completely. Your unique pottery artwork is now ready!

Figure 3: Steps for creating pottery with the Weilim kit.
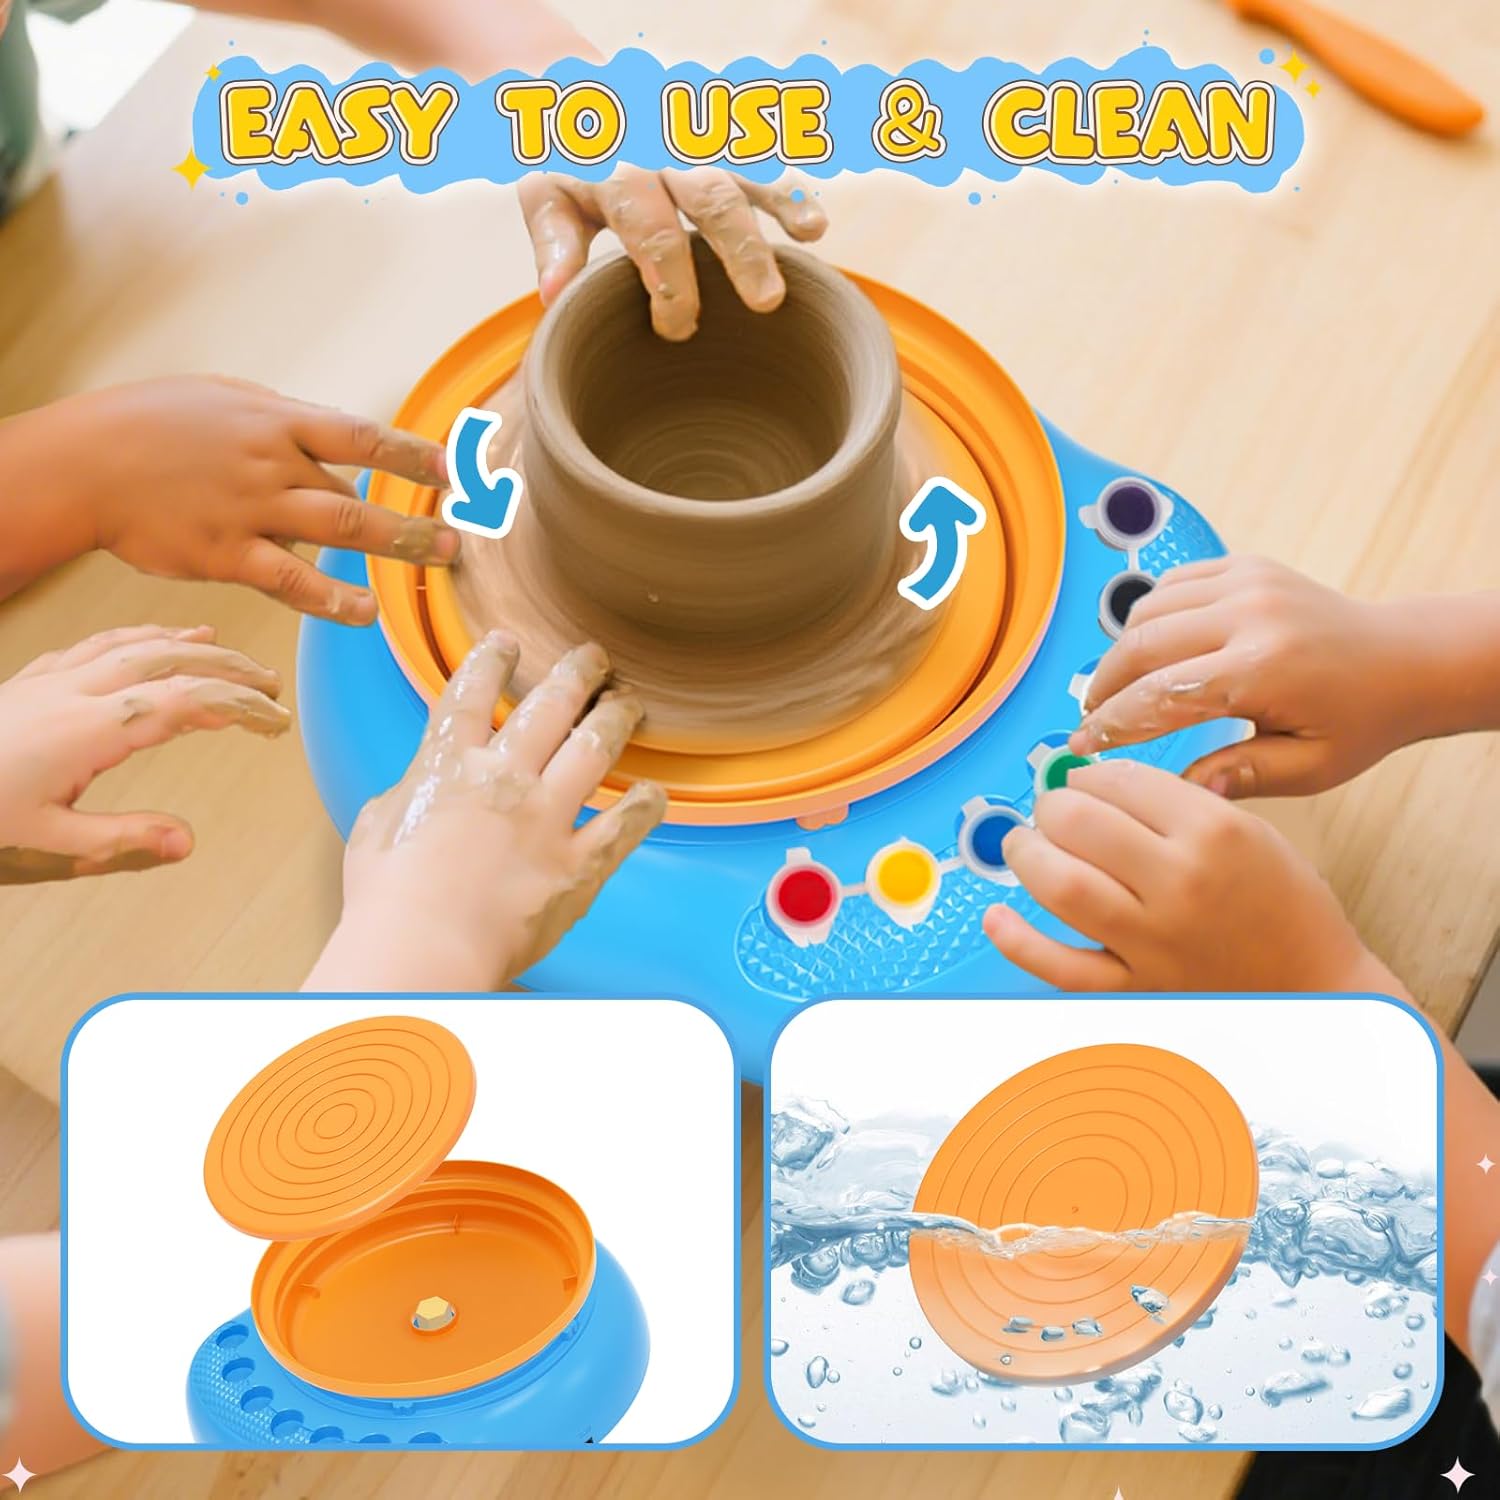
Figure 4: The pottery wheel in action, highlighting its user-friendly design.
Maintenance
- Cleaning the Turntable: The turntable is detachable for easy cleaning. Remove it from the base and wash it with water and a soft sponge immediately after use to prevent clay residue from hardening.
- Cleaning Tools: Wash all sculpting tools, paintbrushes, and the paint palette with water immediately after use.
- Wipe Down Base: Use a damp cloth to wipe any clay or paint residue from the pottery wheel base. Ensure no water enters the electrical components.
- Store Properly: Store the pottery wheel and all accessories in a dry, cool place away from direct sunlight. Ensure clay packs are sealed tightly to prevent premature drying.
Troubleshooting
- Pottery Wheel Not Turning:
- Ensure the USB charger is properly connected to both the wheel and a power source.
- Check if the power switch is in the '1' or '2' position.
- If using the foot pedal, ensure it is pressed down.
- The internal battery might be depleted. Charge the unit for a few hours.
- Clay is Too Hard/Dry:
- Knead the clay thoroughly. If it's still too hard, add a very small amount of water and knead until pliable.
- Ensure unused clay is stored in airtight containers or bags.
- Clay is Too Soft/Sticky:
- Allow the clay to air dry slightly before working with it.
- Avoid adding too much water during shaping.
- Pottery Collapses During Shaping:
- Ensure the clay is properly centered on the turntable.
- Apply gentle, even pressure. Excessive force can destabilize the clay.
- Work slowly and patiently. Pottery requires practice.
Specifications
| Feature | Detail |
|---|---|
| Brand | Weilim |
| Model Name | PAMT711 |
| Age Range | Kid (6+ Years Old) |
| Color | Blue |
| Item Dimensions (L x W x H) | 6.69 x 4.13 x 6.61 inches |
| Material | Clay |
| Item Weight | 3.85 pounds (1.75 Kilograms) |
| Power Source | USB Charger (Built-in rechargeable battery) |
| Paint Type | Tempera |
| Included Components | Pottery wheel, foot pedal, 3 clay packs, 14 colors, 2 paintbrushes, sculpting tools, sponge, paint palette, apron, USB charger, instruction booklet |
Warranty and Support
For any questions, concerns, or warranty information regarding your Weilim Pottery Wheel Kit, please contact the manufacturer directly through their official support channels. Refer to the product packaging or the seller's information for contact details.