1. Introduction
This manual provides essential instructions for the safe and effective operation, setup, and maintenance of your NEXPEAK NC315 or NC215 15Amp Battery Charger. These chargers are designed for 12V and 24V LiFePO4 and lead-acid batteries, including AGM, GEL, SLA, and Flooded types, commonly found in cars, trucks, SUVs, motorcycles, lawnmowers, and marine applications. Please read this manual thoroughly before using the device.
2. Important Safety Information
Always prioritize safety when working with electrical devices and batteries. Failure to follow these instructions may result in electric shock, fire, or serious injury.
- Read All Instructions: Before operating the charger, read all instructions and cautionary markings on the charger, the battery, and the vehicle or device using the battery.
- Ventilation: Ensure the charging area is well-ventilated. Batteries can produce explosive gases during charging.
- Eye and Skin Protection: Always wear eye protection and protective clothing when working with batteries. Avoid touching eyes while working near batteries.
- Avoid Sparks and Flames: Do not smoke or allow a spark or flame in the vicinity of the battery or engine.
- Disconnect Power: Always disconnect the AC power cord from the outlet before making or breaking the connections to the battery.
- Proper Voltage: Ensure the charger is set to the correct voltage (12V or 24V) for the battery being charged.
- Damaged Equipment: Do not operate the charger if it has received a sharp blow, been dropped, or otherwise damaged.
- Children: Keep the charger and batteries out of reach of children.
- Non-Rechargeable Batteries: Do not attempt to charge non-rechargeable batteries.
3. Product Overview
The NEXPEAK NC315 and NC215 battery chargers are advanced, multi-stage smart chargers designed for efficiency and safety. They feature a large LCD screen for clear visualization of charging status and multiple protection mechanisms.
3.1 Key Features
- Versatile Charging: Supports 12V 15-Amp and 24V 8-Amp charging for LiFePO4 and lead-acid batteries (AGM, GEL, SLA, Flooded).
- 9-Stage Smart Charging: An optimized charging process for enhanced battery life and performance.
- Large LCD Screen: Displays real-time charging status, voltage, current, internal temperature, and charge percentage.
- Pulse Repair Function: Automatically detects and repairs battery sulfation and acid stratification to restore performance.
- Multiple Protections: Includes smart control, temperature compensation, reverse polarity protection, cooling system, overcurrent, fireproof material, overvoltage, and short circuit protection.
- Trickle/Float Mode: Automatically maintains batteries after full charge, ideal for long-term storage.
- Temperature Compensation: Adjusts charging parameters based on ambient temperature for optimal charging in various climates.
3.2 Charger Components

Image 1: NEXPEAK NC315 (with handle) and NC215 (compact) Battery Chargers. Both models feature a clear LCD display and robust casing.
- Main Unit: The charger body containing the electronics and display.
- LCD Display: Front panel screen showing charging information.
- Mode Button: Used to select different charging modes.
- Battery Clamps: Red (+) and Black (-) clamps for connecting to the battery terminals.
- AC Power Cord: For connecting the charger to a wall outlet.
4. Specifications
| Feature | Description |
|---|---|
| Input Voltage | 100-240V AC, 50/60Hz |
| Output Voltage | 12V / 24V Auto-sensing |
| Charging Current (12V) | 15 Amps |
| Charging Current (24V) | 8 Amps |
| Trickle Charge Current | 1.75 Amps (approx.) |
| Battery Types | LiFePO4, Lead-Acid (AGM, GEL, SLA, Flooded) |
| Charging Stages | 9-Stage Smart Charging |
| Display | Large LCD Screen |
| Cable Length | 10 ft (approx.) |
| Protections | Reverse Polarity, Overcurrent, Overcharge, Short Circuit, Overvoltage, Temperature Compensation, Cooling System, Fireproof Material |
5. Setup and Connection
Follow these steps to safely connect the battery charger to your battery.
- Prepare the Battery: Ensure the battery terminals are clean and free of corrosion. If charging a battery in a vehicle, ensure the vehicle is turned off and in park/neutral with the parking brake engaged.
- Connect Red Clamp: Connect the RED (+) positive charger clamp to the positive (+) battery terminal.
- Connect Black Clamp: Connect the BLACK (-) negative charger clamp to the negative (-) battery terminal. If connecting to a vehicle battery, connect the black clamp to the vehicle chassis away from the battery and fuel line.
- Connect to Power: Plug the AC power cord into a standard wall outlet. The charger will power on and begin its initial detection process.

Image 2: Proper connection of the NEXPEAK battery charger to a lead-acid battery, showing the red clamp on the positive terminal and the black clamp on the negative terminal.
6. Operating Instructions
Once connected, the charger will automatically detect the battery voltage (12V or 24V). Use the 'MODE' button to select the appropriate charging program.
6.1 Mode Selection
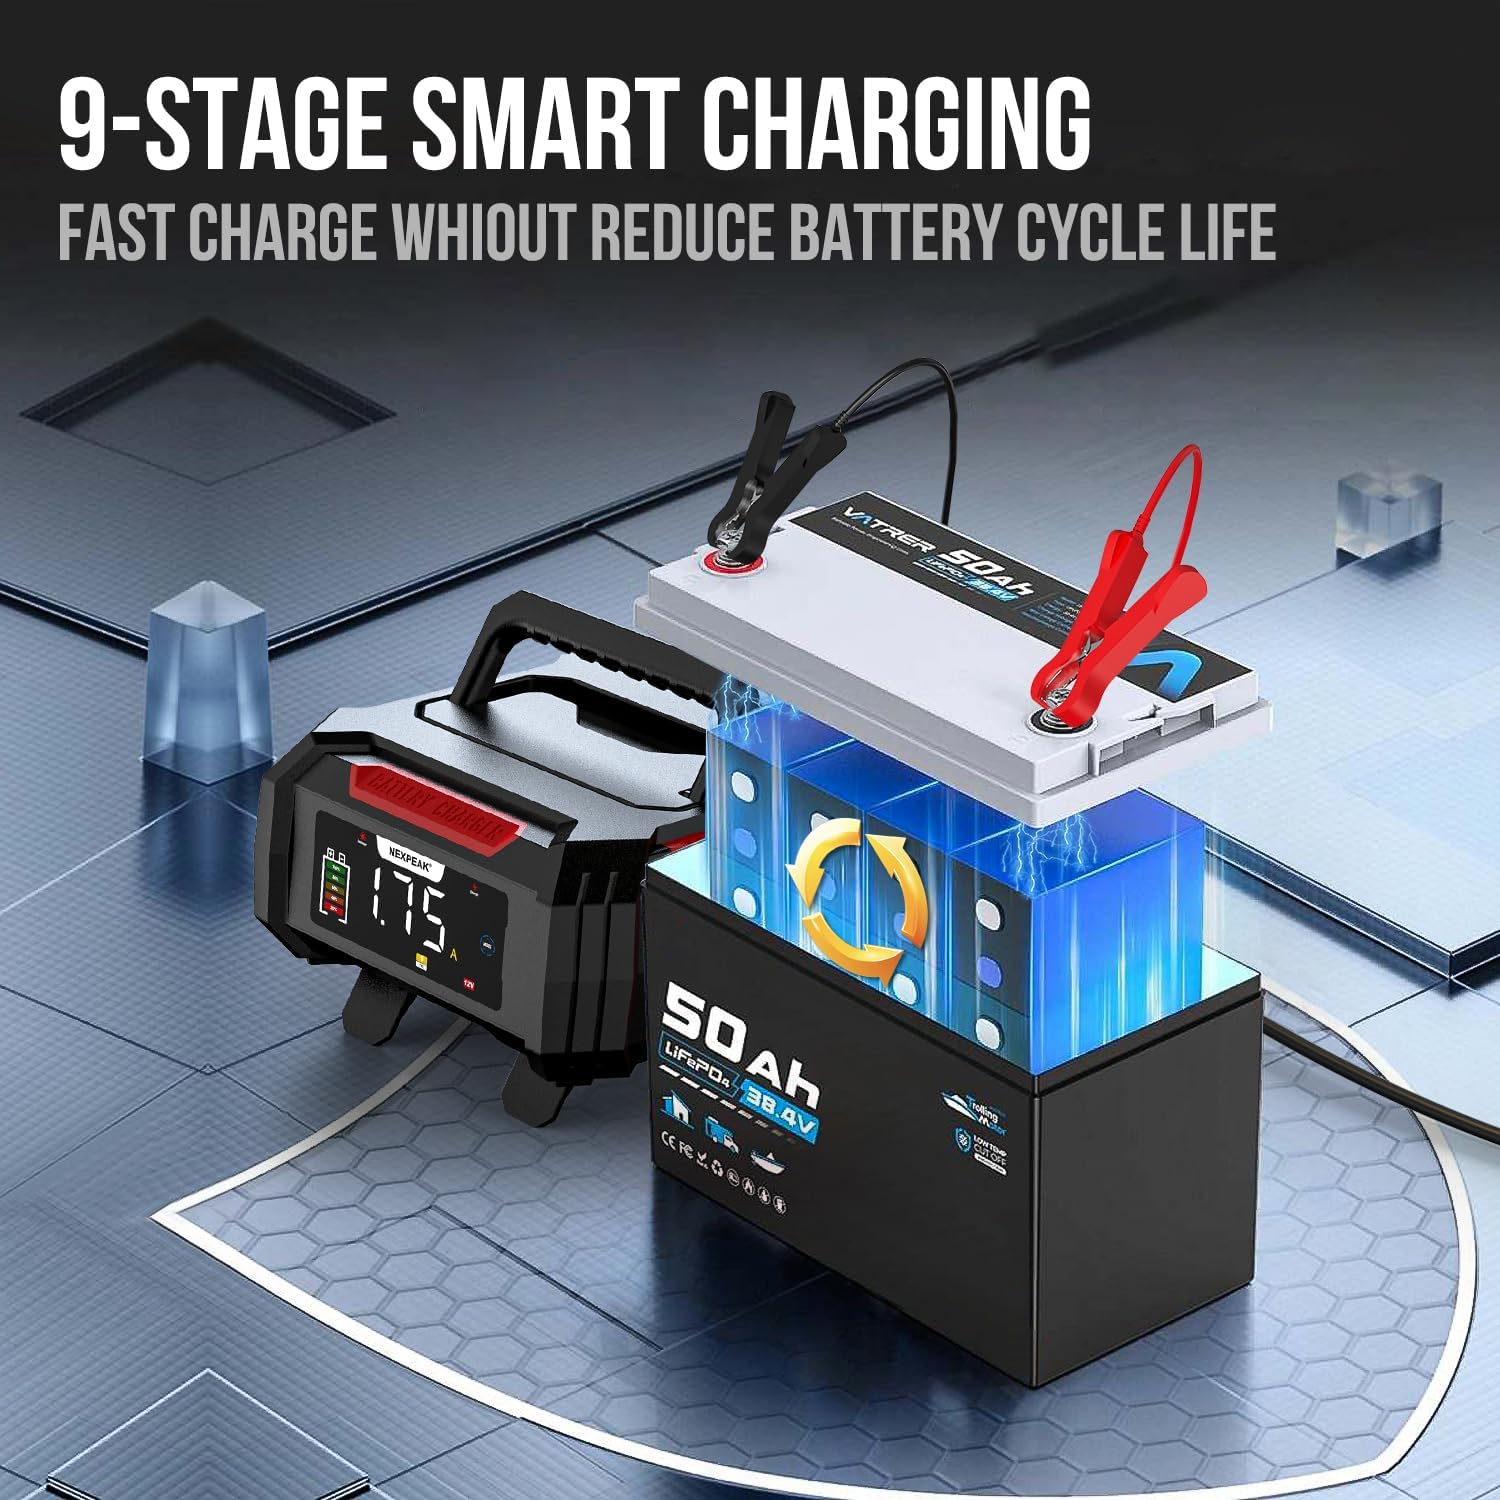
Image 3: The charger's LCD screen displaying various charging modes, including Lead-acid/LiFePO4, Pulse Repair, Summer Mode, and Trickle Charger options.
Press the MODE button to cycle through the available charging programs:
- STD (Standard): For standard 12V/24V lead-acid batteries (Flooded, GEL, SLA, AGM).
- LiFePO4: Specifically for 12V/24V Lithium Iron Phosphate batteries.
- MOTORCYCLE: A lower current charge mode suitable for smaller 12V motorcycle batteries.
- TKL (Trickle Charge): For long-term maintenance of batteries, keeping them at optimal charge.
- REPAIR (Pulse Repair): A specialized mode to desulfate and recondition old or deeply discharged lead-acid batteries. This mode cannot activate completely dead batteries.
The charger also features automatic temperature compensation, adjusting charging parameters for optimal performance in both summer and winter conditions.
6.2 9-Stage Smart Charging Process
The charger employs a sophisticated 9-stage charging process to ensure efficient and safe charging, maximizing battery life.

Image 4: A visual representation of the 9-stage smart charging process, detailing each step from battery detection to monitoring.
- Battery Detection: Analyzes battery condition and type.
- Battery Desulphation: Applies high-frequency pulses to break down lead sulfate crystals.
- Soft Start Charging: Gradually increases current to prevent damage to deeply discharged batteries.
- Bulk Charging: Charges the battery to approximately 80% capacity at maximum current.
- Absorption Charging: Charges the battery to 100% capacity at a decreasing current.
- Battery Test: Checks if the battery can hold a charge.
- Recondition Charging: Further reconditions the battery to improve performance.
- Float & Maintenance Charging: Maintains the battery at full charge with a low current.
- Monitoring Stage: Continuously monitors battery voltage and initiates charging if needed.
6.3 LCD Display Information
The large LCD screen provides real-time feedback on the charging process.

Image 5: The charger's LCD screen displaying key charging metrics: current (Amps), voltage (Volts), and internal temperature (Fahrenheit).
Information displayed includes:
- Charge Current (A): The current flowing into the battery.
- Charge Voltage (V): The voltage of the battery.
- Inside Temperature (°F/°C): The internal temperature of the charger, used for temperature compensation.
- Charge Percentage: An estimate of the battery's charge level.
- Mode Indicators: Icons for selected mode (e.g., STD, LiFePO4, Motorcycle, Trickle, Repair).
- Status Indicators: Icons for summer/winter mode, full charge, error warnings.
7. Maintenance
7.1 Charger Maintenance
- Cleaning: Disconnect the charger from power before cleaning. Wipe the exterior with a soft, damp cloth. Do not use solvents.
- Storage: Store the charger in a cool, dry place when not in use. Keep cables neatly coiled.
- Inspection: Periodically inspect the power cord, output cables, and clamps for any damage. Do not use if damaged.
7.2 Battery Maintenance
- Terminal Cleaning: Keep battery terminals clean and free of corrosion for optimal connection.
- Fluid Levels (Flooded Batteries): For flooded lead-acid batteries, check electrolyte levels regularly and top up with distilled water if necessary (before charging).
- Long-Term Storage: For batteries stored for extended periods, use the Trickle Charge mode to maintain their charge.

Image 6: The NEXPEAK charger operating in trickle charge mode, ideal for maintaining batteries in unused vehicles such as idle cars, boats, or lawnmowers.
8. Troubleshooting
If you encounter issues with your charger, refer to the following common problems and solutions:
| Problem | Possible Cause | Solution |
|---|---|---|
| Charger not turning on | No AC power; Faulty outlet; Damaged power cord. | Check AC power connection; Try a different outlet; Inspect power cord for damage. |
| No charging activity | Incorrect battery connection; Battery too deeply discharged; Incorrect mode selected. | Ensure clamps are securely connected to correct terminals; Battery may be beyond repair (not activated by pulse repair); Select appropriate mode. |
| Error message on LCD | Reverse polarity; Short circuit; Overvoltage/Overcurrent. | Disconnect and reconnect clamps correctly; Check for short circuits in cables/battery; Ensure battery voltage matches charger setting. |
| Charger gets hot | Normal during high current charging; Poor ventilation. | Some heat is normal. Ensure adequate ventilation around the charger. If excessively hot or smoking, disconnect immediately. |
| Pulse Repair mode not working | Battery is completely dead or severely damaged. | The pulse repair function cannot activate totally dead batteries. Consider battery replacement. |
9. Warranty and Support
NEXPEAK products are manufactured to high-quality standards. For warranty information, technical support, or service inquiries, please refer to the contact information provided with your purchase or visit the official NEXPEAK website. Keep your purchase receipt as proof of purchase for warranty claims.