1. Introduction
This manual provides essential information for the safe and effective operation of your QQDETRR Electric Overhead Stirrer, Model OS-10. This laboratory overhead stirrer is designed for stable and efficient mixing of various liquids, featuring a powerful brushed motor and a digital display for precise control. Please read this manual thoroughly before use and retain it for future reference.
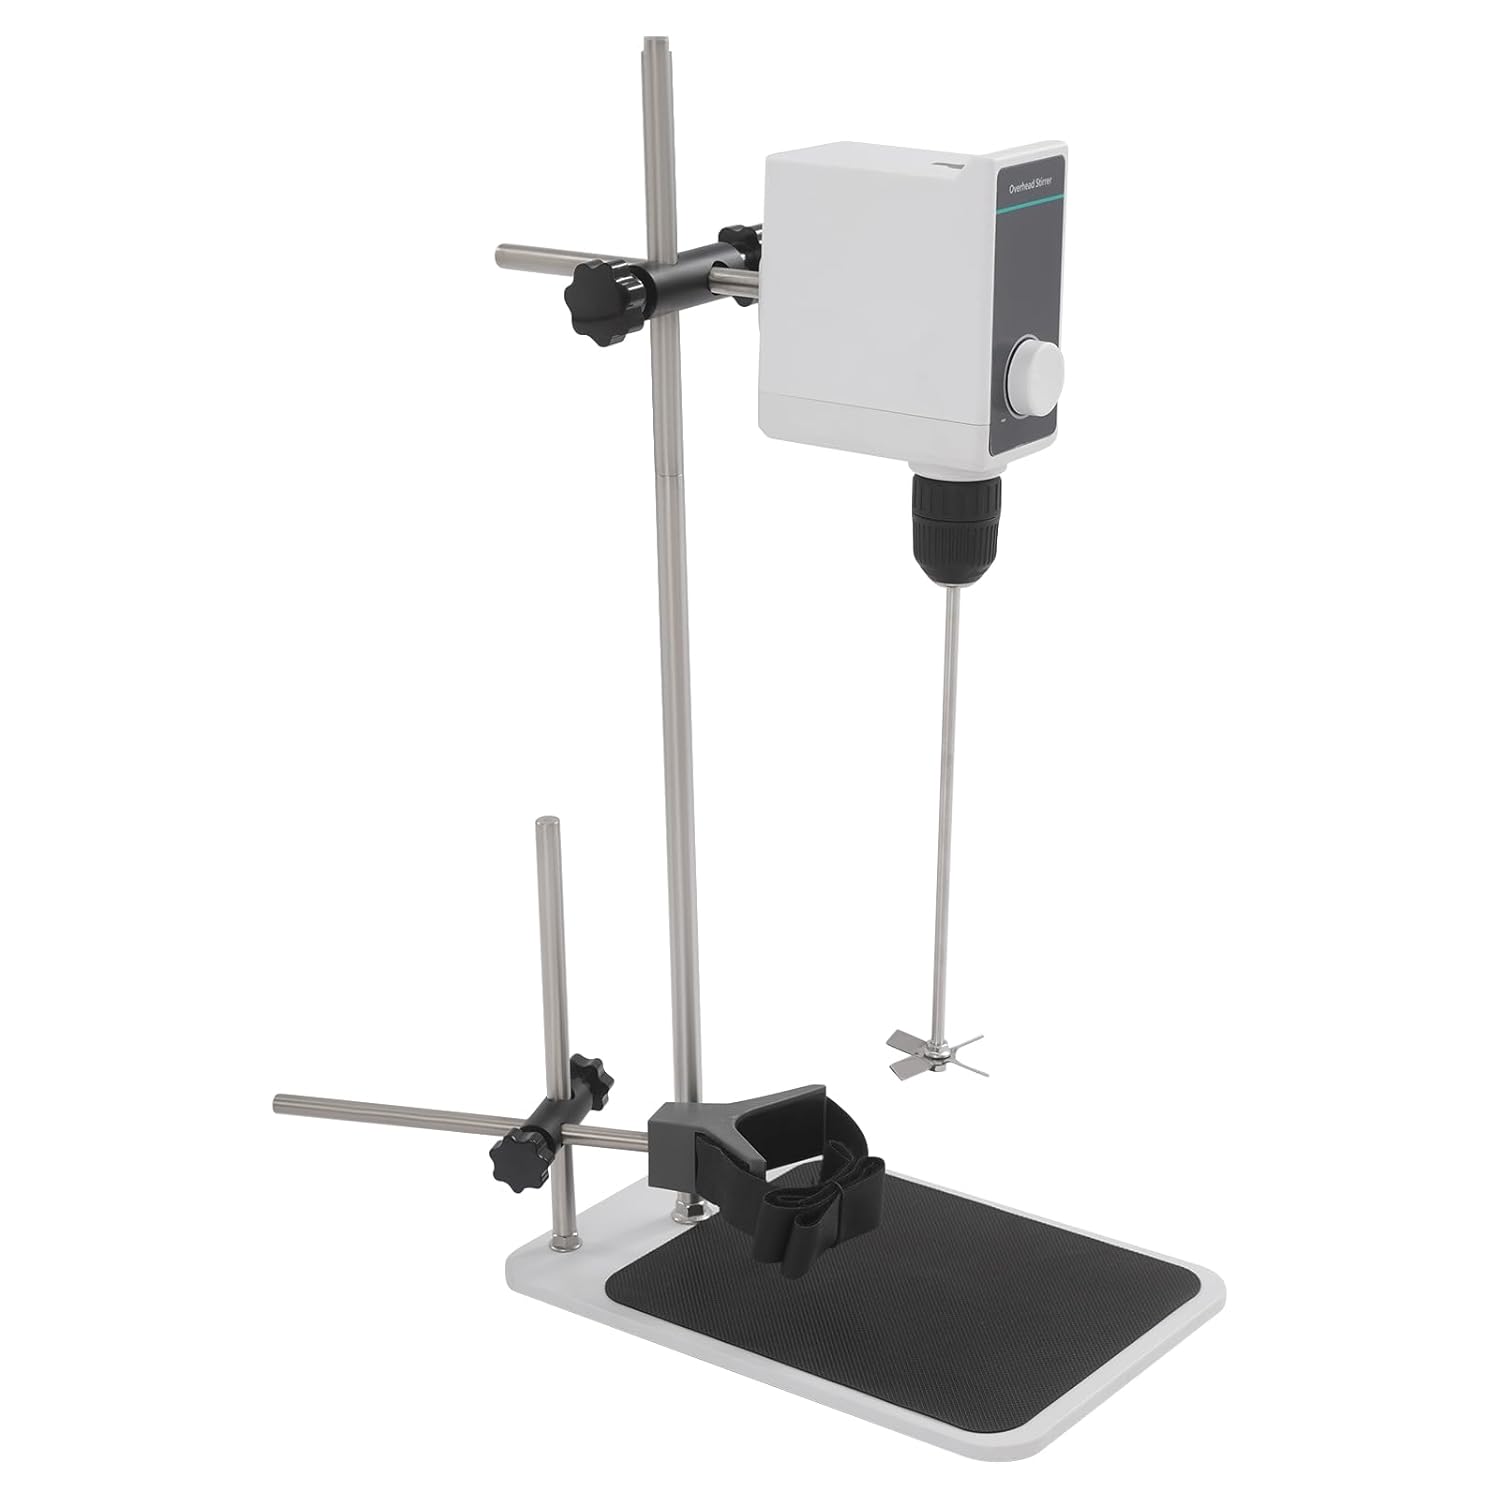
Figure 1: QQDETRR Electric Overhead Stirrer, Model OS-10, fully assembled.
2. Safety Instructions
Observe the following safety precautions to prevent injury and damage to the equipment:
- Always operate the stirrer on a stable, level surface.
- Ensure the power supply matches the specifications (100-240V 50-60Hz).
- Do not operate the stirrer with damaged cords or plugs.
- Keep hands, hair, and loose clothing away from moving parts during operation.
- Securely fasten the mixing rod and container before starting the stirrer.
- Do not exceed the maximum mixing capacity of 10L or maximum viscosity of 10000mPas.
- Wear appropriate personal protective equipment (PPE), such as safety glasses and gloves, when handling chemicals.
- Disconnect power before cleaning or performing maintenance.
- This product is for laboratory and industrial use; do not use for purposes other than its intended function.
3. Package Contents
Carefully unpack the box and verify that all items listed below are present and undamaged:
- 1x Laboratory Overhead Stirrer Unit
- 2x English Manuals
- 1x Power Adapter
- Other Accessories for Assembly (Stand components, stirring rod, clamps, tools)
Note: Beakers are not included and must be purchased separately.

Figure 2: All components included in the package.
4. Assembly Instructions
Follow these steps to assemble your overhead stirrer. Refer to the diagrams for visual guidance.

Figure 3: Key components of the stirrer system.
4.1 Assembling the Stand
- Place the non-slip base on a stable workbench.
- Attach the vertical support rod(s) to the base using the provided fasteners and tools. Ensure they are securely tightened.
- Mount the horizontal support arm(s) to the vertical rod(s) at the desired height using the clamps.
4.2 Attaching the Stirrer Unit
- Slide the stirrer unit onto the horizontal support arm and secure it with the locking mechanism. Adjust its position to ensure the stirring rod will be centered in your mixing container.
- Insert the stirring rod into the chuck of the stirrer unit. Tighten the chuck securely to prevent the rod from slipping during operation. The precision clamp is designed to securely hold mixing rods between 0.04-0.39 inches (1-10mm).

Figure 4: Detail of the precision clamp and stirring rod attachment.
4.3 Securing the Container
- Place your mixing container (e.g., beaker) on the non-slip base.
- Use the container holder and strap to firmly secure the container to the stand. This prevents movement and spillage during mixing.
5. Operating Instructions
Once assembled, follow these steps to operate your QQDETRR Electric Overhead Stirrer.
5.1 Power Connection
- Ensure the stirrer unit is properly mounted and the stirring rod is secured.
- Connect the power adapter to the stirrer unit and then plug it into a suitable electrical outlet.
5.2 Starting and Adjusting Speed
- Turn the rotary knob on the stirrer unit to power it on. The LCD display will illuminate.
- Rotate the knob to adjust the mixing speed. The speed range is 100-1000 RPM. Start at a lower speed and gradually increase to the desired setting to prevent splashing.
- Monitor the mixing process. The powerful brushed motor provides stable and efficient mixing for various liquids.

Figure 5: Stirrer in operation within a laboratory environment.
5.3 Mixing Different Viscosities
The stirrer is capable of mixing high viscosity liquids up to 10000mPas and can handle a maximum mixing capacity of 10 liters (2.64 gallons). Adjust the speed according to the viscosity of the liquid being mixed.

Figure 6: The stirrer effectively mixing paint, demonstrating its versatility.
5.4 Power Off
To stop the stirrer, turn the rotary knob to the 'OFF' position. Disconnect the power adapter from the outlet when not in use.
6. Maintenance
Regular maintenance ensures the longevity and optimal performance of your stirrer.
- Cleaning: After each use, disconnect the power and clean the stirring rod and stirrer unit with a damp cloth. Avoid using abrasive cleaners or solvents that could damage the plastic PV material.
- Storage: Store the stirrer in a clean, dry environment when not in use.
- Inspection: Periodically inspect the power cord, stirring rod, and clamps for any signs of wear or damage. Replace any damaged parts immediately.
7. Troubleshooting
If you encounter issues with your stirrer, refer to the table below for common problems and solutions.
| Problem | Possible Cause | Solution |
|---|---|---|
| Stirrer does not power on. | No power supply; faulty adapter. | Check power connection; ensure outlet is functional; test with another adapter if available. |
| Stirring rod is loose or slips. | Chuck not tightened sufficiently; incorrect rod diameter. | Tighten the chuck firmly; ensure rod diameter is within 0.04-0.39 inches. |
| Excessive vibration or noise. | Unbalanced stirring rod; loose components; unstable surface. | Check if the stirring rod is bent or damaged; ensure all stand components are tightened; place on a stable surface. |
| Mixing is inefficient. | Speed too low; viscosity too high for current speed; incorrect stirring rod. | Increase speed; ensure liquid viscosity is within product limits; use an appropriate stirring rod for the application. |
8. Specifications
| Feature | Specification |
|---|---|
| Brand | QQDETRR |
| Model Number | OS-10 |
| Material | Plastic PV |
| Motor Type | Brushed Motor |
| Operation Method | Rotary Knob |
| Adapter Input | 100-240V 50-60Hz 1A |
| Adapter Output | 24V 1.5A |
| Rated Power | 36W |
| Rated Torque | 20N.cm |
| Speed Range | 100-1000rpm |
| Maximum Viscosity | 10000mPas |
| Clamp Diameter | 1-10mm (0.04-0.39in) |
| Maximum Mixing Capacity | 10L (2.64Gal) |
| Product Size | 145 x 70 x 195mm (5.71 x 2.76 x 7.68in) |
| Net Weight | 3.99kg (8.8lbs) |
9. Warranty and Support
For warranty information or technical support, please refer to the contact details provided with your purchase documentation or visit the official QQDETRR website. Keep your purchase receipt as proof of purchase.