1. Introduction
This manual provides detailed instructions for the installation, operation, and maintenance of your Uckazy 15.8 Inch Android Auto Radio. Please read thoroughly before use to ensure proper functionality and safety.
2. Compatible Vehicle Models
This device is designed for specific BMW models and years with the NBT System. Please verify your vehicle's system before installation.
- BMW 1 Series F20/F21 (2011-2016) with NBT system
- BMW 2 Series F23 (2013-2016) with NBT system
- BMW 3 Series F30/F31/F34 (2013-2016) with NBT system
- BMW 4 Series F32/F33/F36 (2013-2016) with NBT system
Note: Before purchase, please ensure your car system is an NBT system. If unsure, contact support.

Image 2.1: Visual guide for identifying the NBT system (correct) versus EVO system (incorrect) based on the 6pin LVDS Port.
3. Product Features
- 15.8-inch IN-CELL Screen: Ultra-narrow (1920*720 resolution) with full lamination technology for enhanced transparency and reduced reflection (up to 75%). Made of zinc alloy for high strength and wear resistance, absorbing vibration and noise.
- Dual System: One-click switch between the Linux system and the original car system. Retains original car radio, amplifier, steering wheel control, iDrive knob, display of speed, fuel level, oil pressure, safety warnings, and original reverse camera.
- Wireless Connectivity: Supports wireless (wired) Apple CarPlay, wireless (wired) Android Auto, wireless MirrorLink for iOS and Android phones, Bluetooth 5.0, and Wi-Fi.
- Built-in DSP: Features 16 EQ segments for enhanced audio effects, including reverberation, equalization, compression, and delay.
- Voice Assistant Integration: Access map navigation, phone contacts, email, notifications, music, and more through Siri or Google Voice Assistant.

Image 3.1: Overview of the product's key features, including Linux system, 15.8-inch screen, and various connectivity options.
4. Installation Guide
Follow these steps carefully for proper installation. It is recommended to disconnect the car battery before starting any electrical work.
4.1. Disassembly of Original Car Parts
The following steps detail the removal of existing components. Refer to the video for a visual guide.
- Remove Trim Panel: Use an installation tool to carefully pry open the trim panel above the air vents.

Image 4.1.1: Using a pry tool to remove the dashboard trim.
- Disconnect Air Vent Power: Unplug the power cord connected to the air vent assembly.

Image 4.1.2: Disconnecting the power cable from the air vent unit.
- Remove Original Screen Screws: Use a screwdriver to unscrew the two screws securing the original car screen.

Image 4.1.3: Removing the screws that hold the original car screen in place.
- Disconnect Original Screen Power: Unplug the power cord of the original car screen.
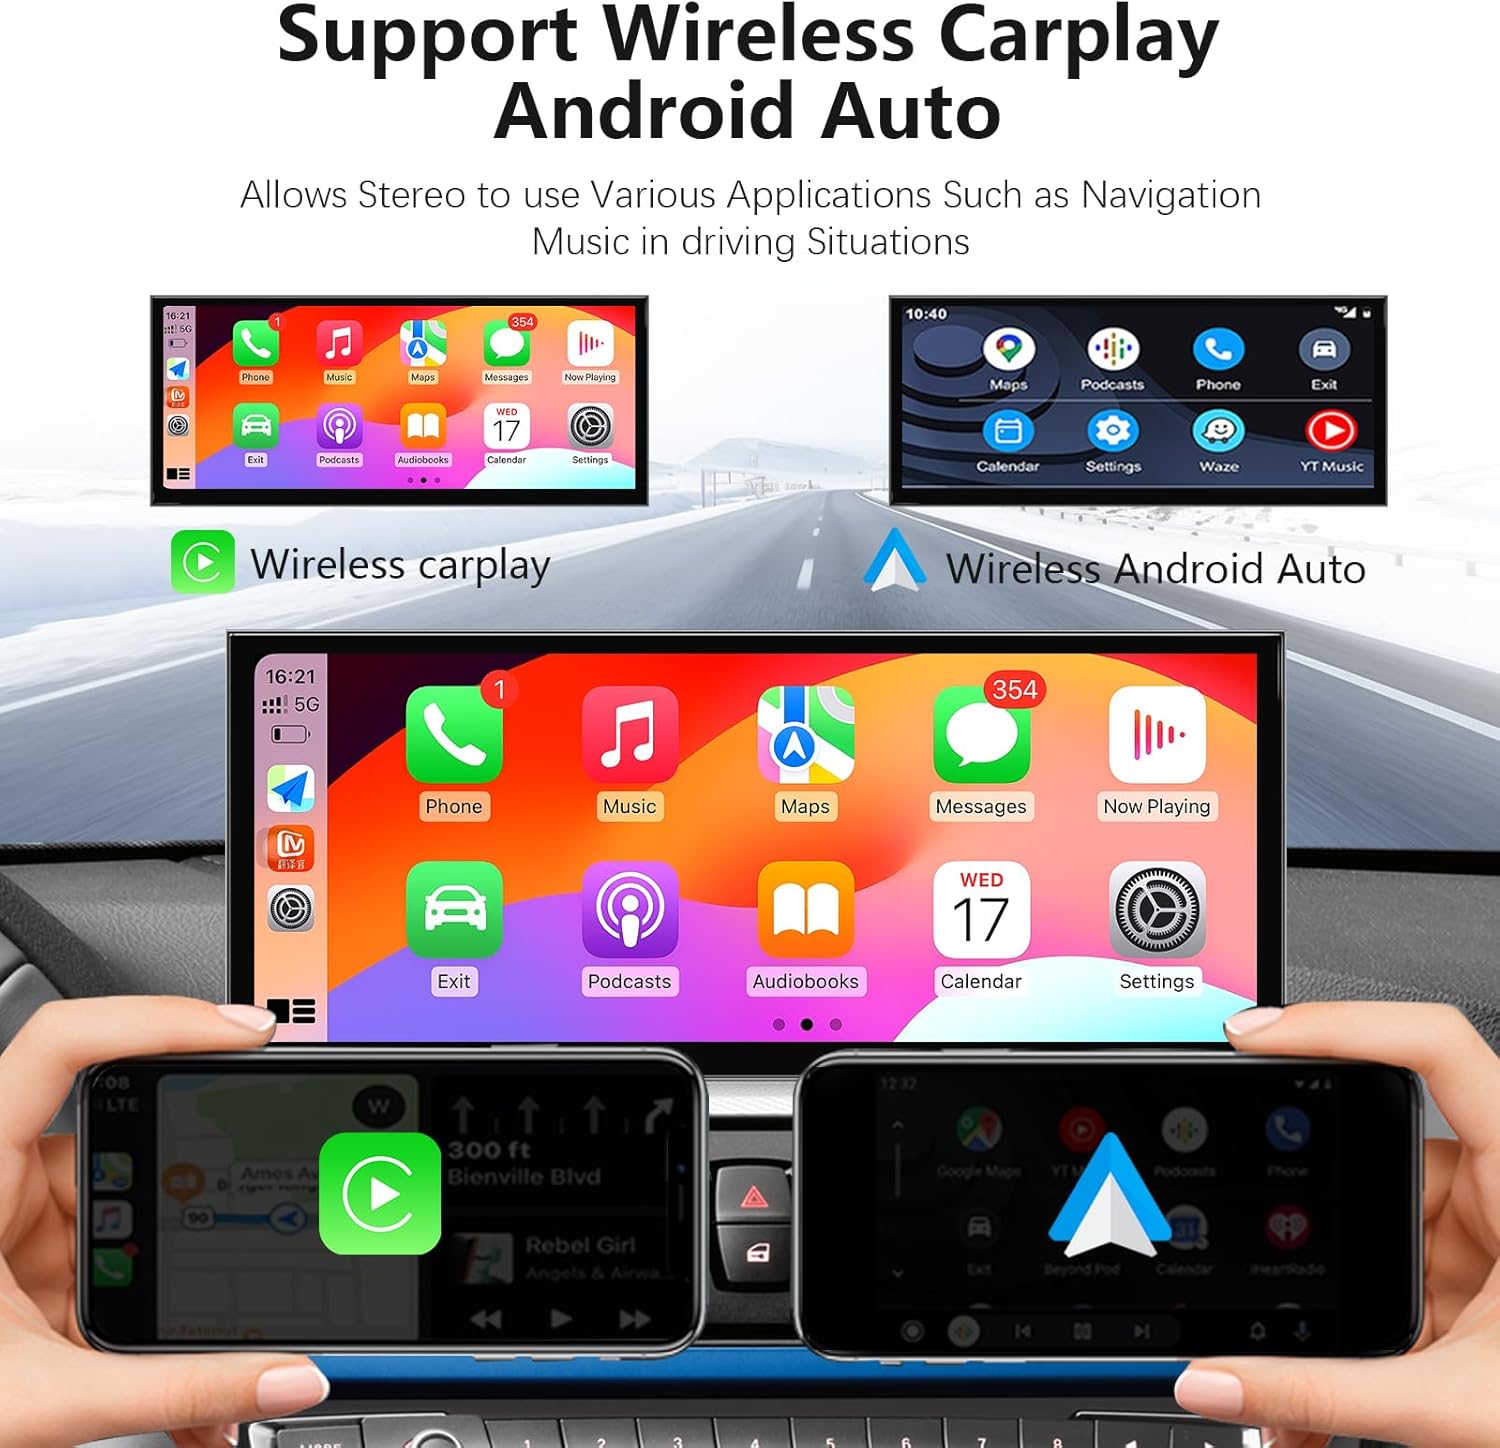
Image 4.1.4: Disconnecting the power cable from the back of the original car screen.
- Remove Center Console Screws: Unscrew the four screws on the original car's center console (CD player/radio unit).

Image 4.1.5: Removing the four screws securing the center console unit.
- Disconnect Center Console Power: Unbutton and pull out the power cord from the center console unit.

Image 4.1.6: Unplugging the main power connector from the center console unit.
4.2. Wiring Connections
- Optical Fiber Cable: Pull out the optical fiber cable from the original power cord and plug it into the new power cord provided with the unit. Ensure it is properly plugged in to avoid sound issues.

Image 4.2.1: Detailed view of connecting the optical fiber cable to the new harness.
- Route Cables: Route the RCA, USB cable, and GPS antenna to their designated positions.

Image 4.2.2: Shows the recommended placement for the RCA, USB, and GPS antenna cables.
- Connect 4G and MIC Cables: Connect the 4G cable to the MIC cable.
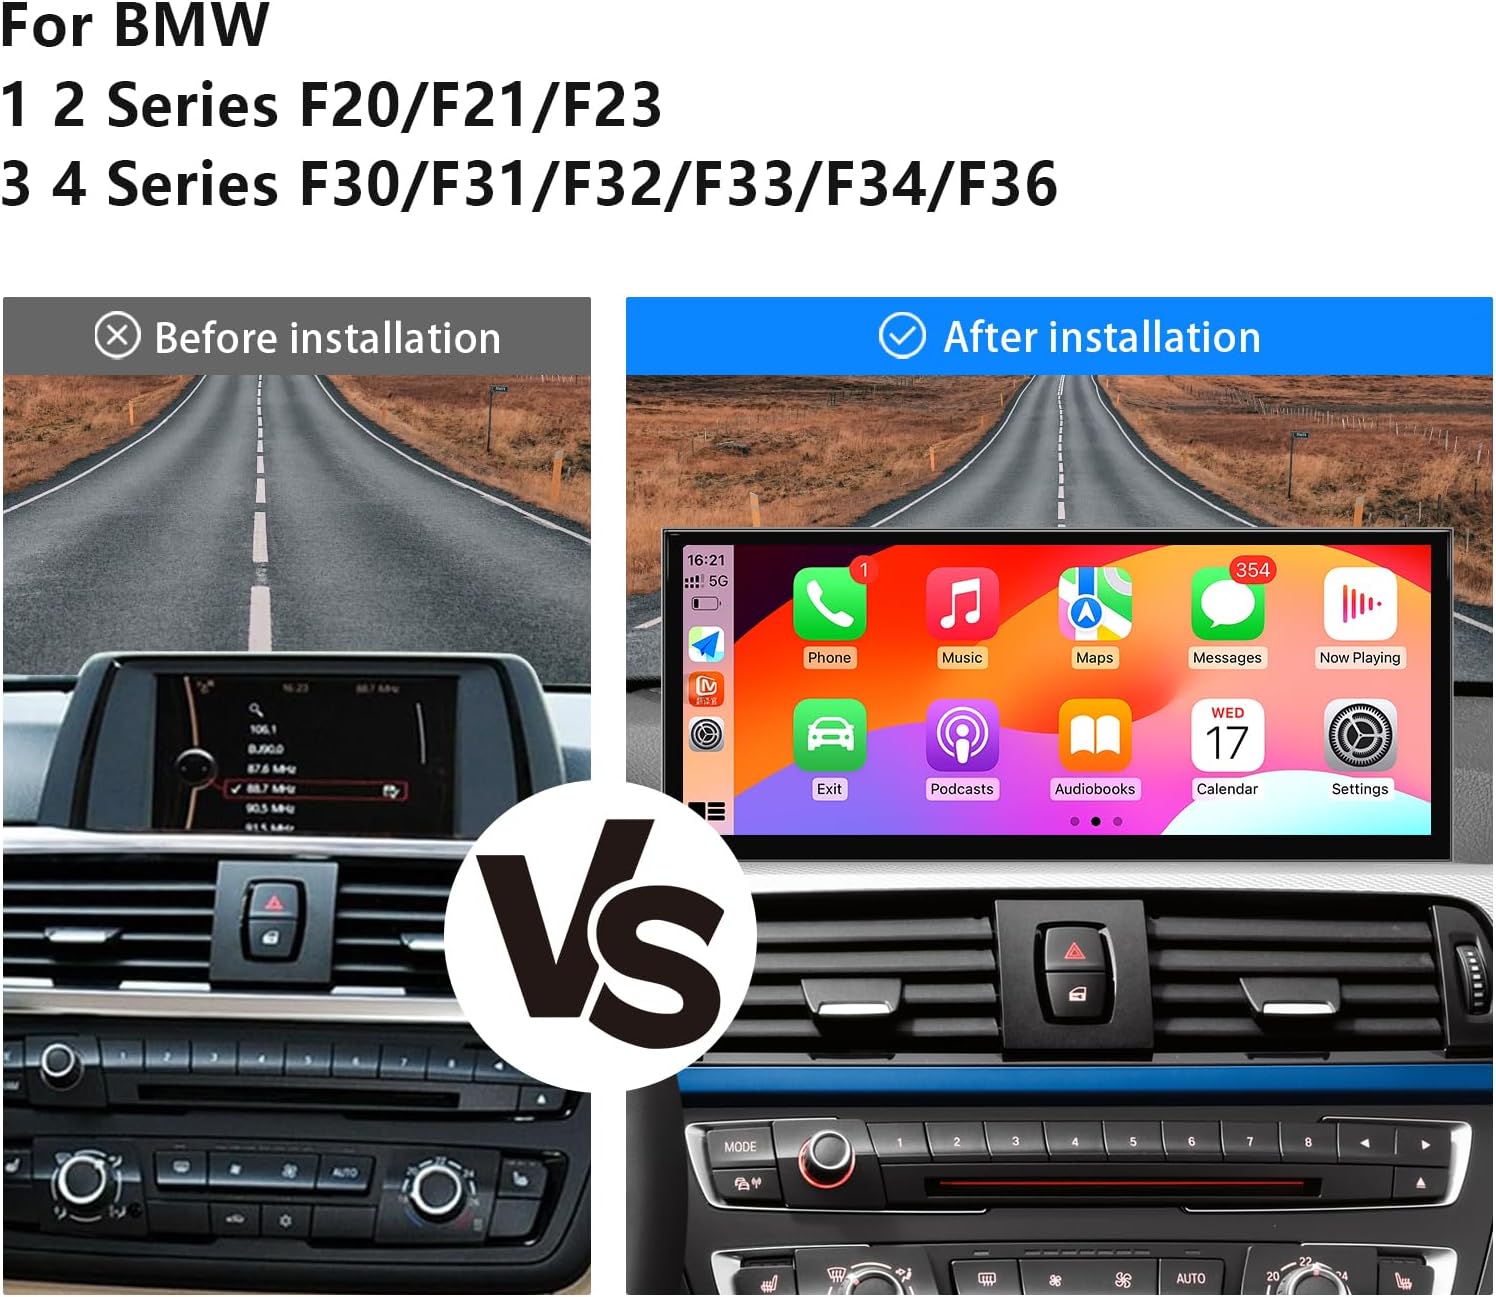
Image 4.2.3: Connecting the 4G antenna cable to the microphone input.
4.3. New Screen Assembly and Reinstallation
- Prepare Screen Frame: Take out the machine frame and stick the provided sticker glue in the designated areas for secure fitting.
- Assemble Screen: Press the new screen unit and the frame together firmly.
- Fasten Screen: Carefully fasten the assembled screen unit into the dashboard opening.
- Hide Cables: Neatly hide all data cables to prevent interference and ensure a clean installation.
- Reinstall Original Parts: Finally, reinstall all original car parts, screws, and data cables in the reverse order of disassembly. Ensure all connections are secure and panels are properly clipped back into place.
4.4. Audio Connection (AUX)
For audio output, ensure the AUX input is correctly configured. This is crucial for sound from the new system.
- Automatic Switch to AUX: Navigate to the setup menu: Car Settings > Auto Switch to AUX > Select Harman or Alpine.
- Manual AUX Setting Method:
- Go to the original car's "Main menu" and select "Multimedia".
- Then select "External devices".
- Long press the number key "8" on the original car's controls until you hear a tone.
- Press "8" every time before entering the new system to ensure CarPlay/Android Auto sound is active.
- Armrest AUX Connection: If your car has direct AUX access to the audio amplifier, plug the audio connection cable (included in the package) into the AUX socket in the armrest compartment. This is often necessary to get sound from CarPlay or Android Auto.

Image 4.4.1: Visual guide for configuring AUX settings for audio output.

Image 4.4.2: Shows connecting the audio cable to the AUX IN in the armrest box.
5. Operating Instructions
5.1. Dual System Switching
The unit supports one-click switching between the Linux system (new interface) and the original car's NBT system.

Image 5.1.1: Depicts the seamless transition between the Linux system and the original car's CCC system.
5.2. Wireless CarPlay / Android Auto
Connect your smartphone wirelessly for access to navigation, music, calls, and more.
- Turn on your phone's Bluetooth and find the Bluetooth connection on the screen.
- Pair your phone with the unit.
- Allow all necessary permissions on your phone and wait for the connection.

Image 5.2.1: Shows the interface for Wireless CarPlay and Android Auto, highlighting navigation, phone, and music functions.
For wired CarPlay/Android Auto, use USB1 (data link) for connection. USB2 is for storage.

Image 5.2.2: Diagram showing the correct USB port (USB1) for wired CarPlay/Android Auto connection.
5.3. Voice Assistant
Utilize voice commands for navigation, calls, messages, and music through Siri or Google Voice Assistant.

Image 5.3.1: Demonstrates using voice commands for navigation and other functions.
5.4. Audio Settings (DSP & EQ)
The built-in DSP allows for detailed audio customization with 16 EQ segments.

Image 5.4.1: Screenshot of the 16-segment EQ settings available through the built-in DSP.
5.5. Camera Functionality
The unit supports both OEM reversing cameras and aftermarket reverse/front view cameras.
- OEM Reversing Camera: Compatible with original equipment reversing camera parking radar.
- Aftermarket Cameras: Supports aftermarket reverse camera and front view camera (CVBS input).
- Settings: Access camera settings via Setup > Car Settings > Reversing Settings to select camera type (Original or Aftermarket) and format (e.g., AHD 720p@25).

Image 5.5.1: Example display of the camera function, showing parking lines and radar.

Image 5.5.2: Interface for setting OEM resolution and camera type/format.
5.6. Day and Night Mode
The screen automatically adjusts brightness and display mode based on ambient light and your car's original headlights.

Image 5.6.1: Illustration of the automatic day and night mode adjustment for optimal visibility.
6. Maintenance
- Screen Cleaning: Use a soft, lint-free cloth to clean the screen. Avoid abrasive cleaners or solvents.
- Software Updates: Periodically check for firmware updates in the system settings to ensure optimal performance and access to new features.
- Cable Management: Ensure all cables are securely connected and not pinched or exposed to excessive heat.
7. Troubleshooting
- No Sound: Ensure the optical fiber cable is properly plugged into the new power cord. Verify AUX settings are correct (refer to Section 4.4).
- Distorted Sound (Noise): If the sound from CarPlay or Android Auto is distorted, connect the AB cable as indicated in the wiring diagram.
- OEM Car Information Not Displayed: Select the correct resolution for OEM displays in the settings (Setup > Car Settings > Original Car's Screen Resolution).
- Reverse Camera Not Working: Ensure the correct camera type and format are selected in Setup > Car Settings > Reversing Settings.
- Installation Issues: If you encounter any problems during installation, please contact customer support.

Image 7.1: General troubleshooting advice and contact information for technical support.
8. Specifications
| Feature | Detail |
|---|---|
| Screen Size | 15.8 inches |
| Resolution | 1920*720 |
| Screen Type | IN-CELL IPS Touch Screen |
| Material | Zinc Alloy |
| Operating System | Linux System |
| Connectivity | Wireless/Wired Apple CarPlay, Wireless/Wired Android Auto, Wireless MirrorLink, Bluetooth 5.0, Wi-Fi |
| Audio Processor | Built-in DSP with 16 EQ segments |
| Compatible Devices | Smartphone |
| Item Weight | 5.63 pounds |
| Package Dimensions | 17 x 8.3 x 7.6 inches |
9. Warranty and Support
Uckazy provides comprehensive after-sales support for this product.
- After-Sales Service: If you encounter any problems during the installation or operation process, please contact Uckazy customer support. Our engineers are available 24 hours a day to assist you.
- Returns: This product is eligible for a 30-day refund/replacement policy.
For direct support, please visit the Uckzay Factory Outlet on Amazon and use the "Ask a question" feature.