
1. Introduction
This manual provides detailed instructions for the installation, operation, and maintenance of your Kakamoden 9.7-inch Touch Screen Car Radio. This unit is designed for Cadillac ATS, XTS, SRX, and CTS models manufactured between 2013 and 2018. It features an Android 13 system, 4GB RAM, 64GB ROM, Wireless CarPlay, Android Auto, Bluetooth 5.0, FM/AM/RDS radio, DSP, SWC support, 5G WiFi, split screen functionality, GPS navigation, and backup camera compatibility. Please read this manual thoroughly before installation and use to ensure proper functionality and safety.
2. Safety Information
- Always ensure the vehicle is turned off and the battery is disconnected before performing any installation or wiring.
- Improper installation can lead to vehicle damage, electrical shorts, or personal injury. If you are unsure about any step, seek professional assistance.
- Do not operate the device in a way that distracts you from driving. Always prioritize road safety.
- Keep the device away from water, moisture, and extreme temperatures.
- Use only approved accessories and parts.
3. Package Contents
Verify that all items listed below are included in your package:
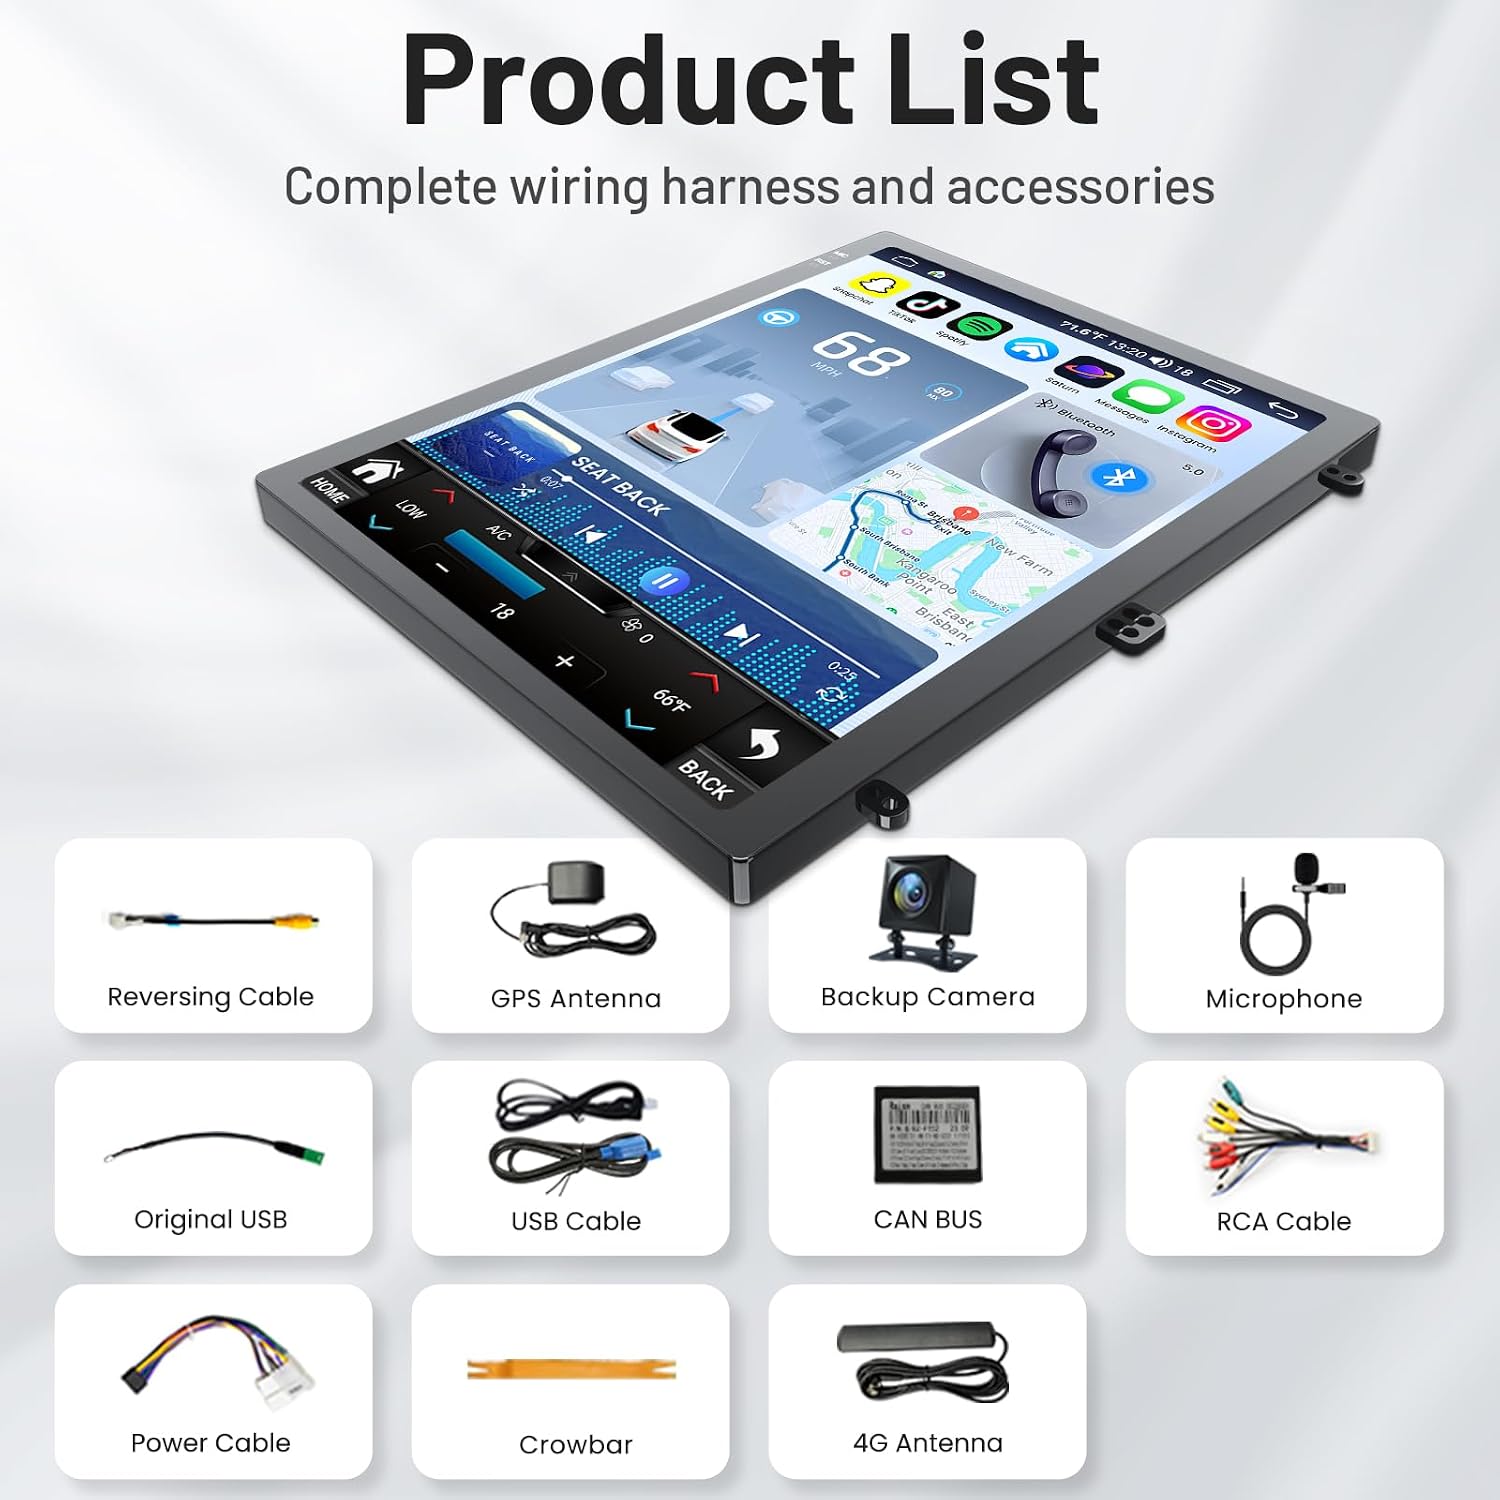
Image: A visual representation of the car radio unit and its accompanying accessories, including cables, antennas, and a backup camera.
- Kakamoden 9.7-inch Car Radio Unit
- Reversing Cable
- GPS Antenna
- Backup Camera (1080P AHD)
- Microphone
- Original USB Cable
- USB Cable
- CAN BUS Decoder
- RCA Cable
- Power Cable
- Crowbar (for trim removal)
- 4G Antenna
4. Installation Guide
4.1. Compatibility Check
Before proceeding with installation, it is crucial to verify compatibility with your vehicle's central control panel. Compare your original car's dashboard with the adaptation diagrams provided. If your vehicle's central control panel does not match the "Fit" examples, this unit may not be compatible.
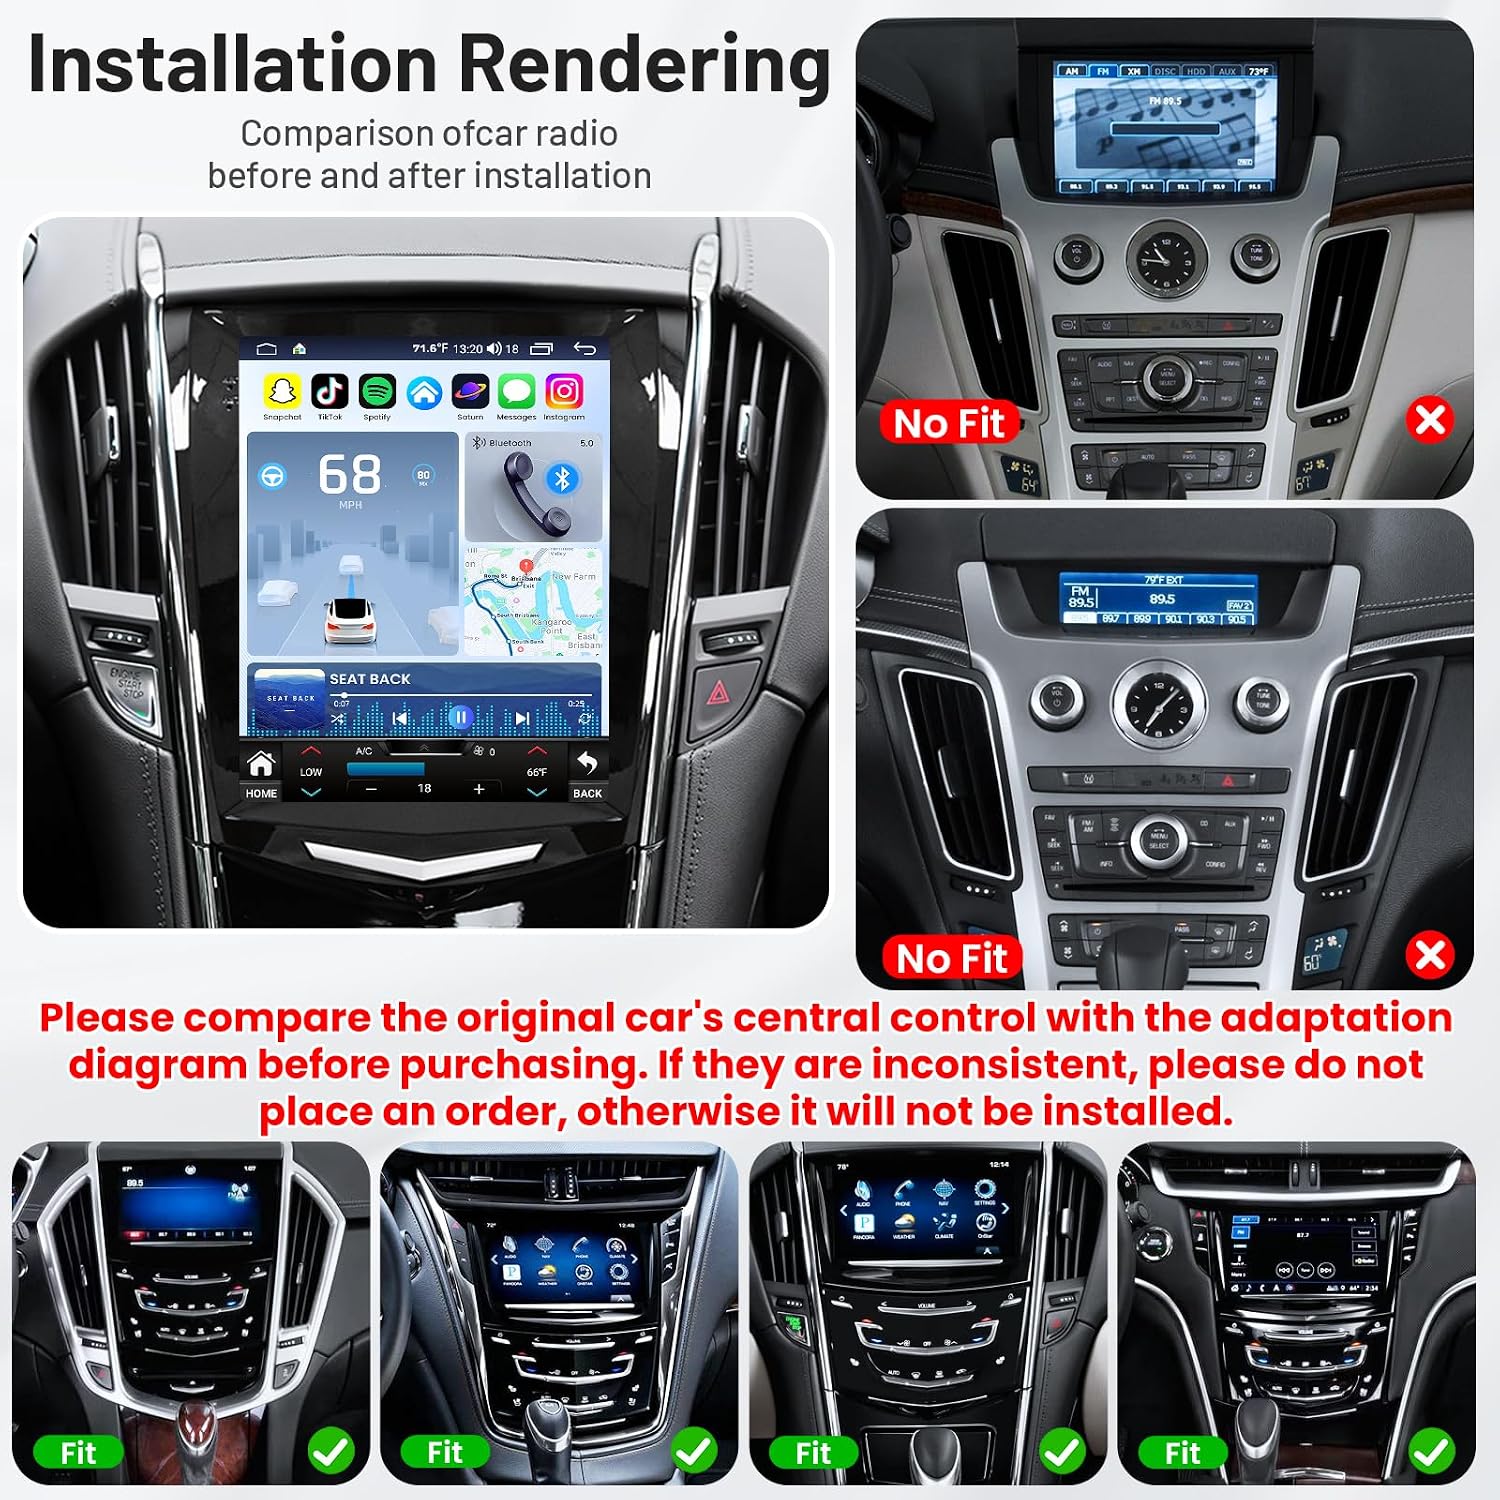
Image: Visual comparison of car radio installation before and after, highlighting compatible Cadillac ATS, SRX, XTS, and CTS models (2013-2018) and incompatible configurations.

Image: A detailed view of the car radio installed in a Cadillac ATS, demonstrating proper fitment.

Image: Another perspective of the car radio installed in a Cadillac, confirming compatibility.

Image: A third image showing the car radio in a Cadillac dashboard, emphasizing correct fitment.
4.2. General Installation Steps
This unit features a plug-and-play design. However, professional installation is recommended. A detailed wiring diagram is available for reference. For a visual guide, please refer to the video linked below:
Wiring Diagram and Installation Video: View Installation Guide
- Preparation: Turn off the vehicle and disconnect the negative terminal of the car battery.
- Remove Original Unit: Carefully remove the original car radio and trim using the provided crowbar tool.
- Connect Wiring: Connect the new car radio's power cable, RCA cables, USB cables, GPS antenna, and 4G antenna to the corresponding ports. Ensure all connections are secure.
- CAN BUS Connection: Connect the CAN BUS decoder as per the wiring diagram. This is crucial for steering wheel controls and other factory features.
- Backup Camera: Install the backup camera and connect its cable to the designated input on the car radio.
- Test Functionality: Before fully reassembling the dashboard, reconnect the car battery and test the basic functions of the new radio (power, sound, touch screen, steering wheel controls, backup camera).
- Secure Unit: Once tested, secure the new car radio unit in place using the brackets and screws.
- Reassemble: Reinstall the trim and any other components removed during the process.

Image: A close-up of the car radio unit, possibly showing connection points or mounting brackets.
5. Operating Instructions
5.1. Power On/Off and Basic Navigation
The unit powers on automatically with the vehicle ignition. To navigate the interface, use the 9.7-inch IPS touch screen. The home screen provides access to various applications and settings.

Image: A clear view of the 9.7-inch IPS touch screen displaying various applications and a map, demonstrating its high-definition visuals and responsive touch control.

Image: A comparison illustrating the superior visual quality of the 1024x768P IPS touch screen compared to a lower resolution display, highlighting better color depth and clarity.
5.2. Wireless CarPlay & Android Auto
Connect your smartphone wirelessly or via USB to access Apple CarPlay or Android Auto. This allows you to use navigation, make calls, send messages, and play music directly from your phone on the car radio's screen. Voice control (Siri or Google Assistant) is supported for hands-free operation.

Image: A visual representation of a smartphone connected to the car radio, displaying the CarPlay and Android Auto interfaces with various app icons and voice command prompts.

Image: Demonstrates the seamless integration of CarPlay and Android Auto, showing various smartphone apps mirrored on the car radio's display for navigation, communication, and entertainment.
5.3. Bluetooth 5.0
Pair your phone via Bluetooth for hands-free calling and wireless audio streaming. Access your phone's contact list and call history directly from the radio interface.

Image: Shows a smartphone connected via Bluetooth to the car radio, illustrating hands-free calling and music playback features with album art displayed on the screen.

Image: Highlights the Bluetooth 5.0 capabilities for hands-free calls and wireless music streaming, showing a phone connected to the car radio and various music and call interfaces.
5.4. FM/AM/RDS Radio
Tune into your favorite FM or AM radio stations. The RDS (Radio Data System) feature provides additional information such as station name, song title, and traffic updates where available.
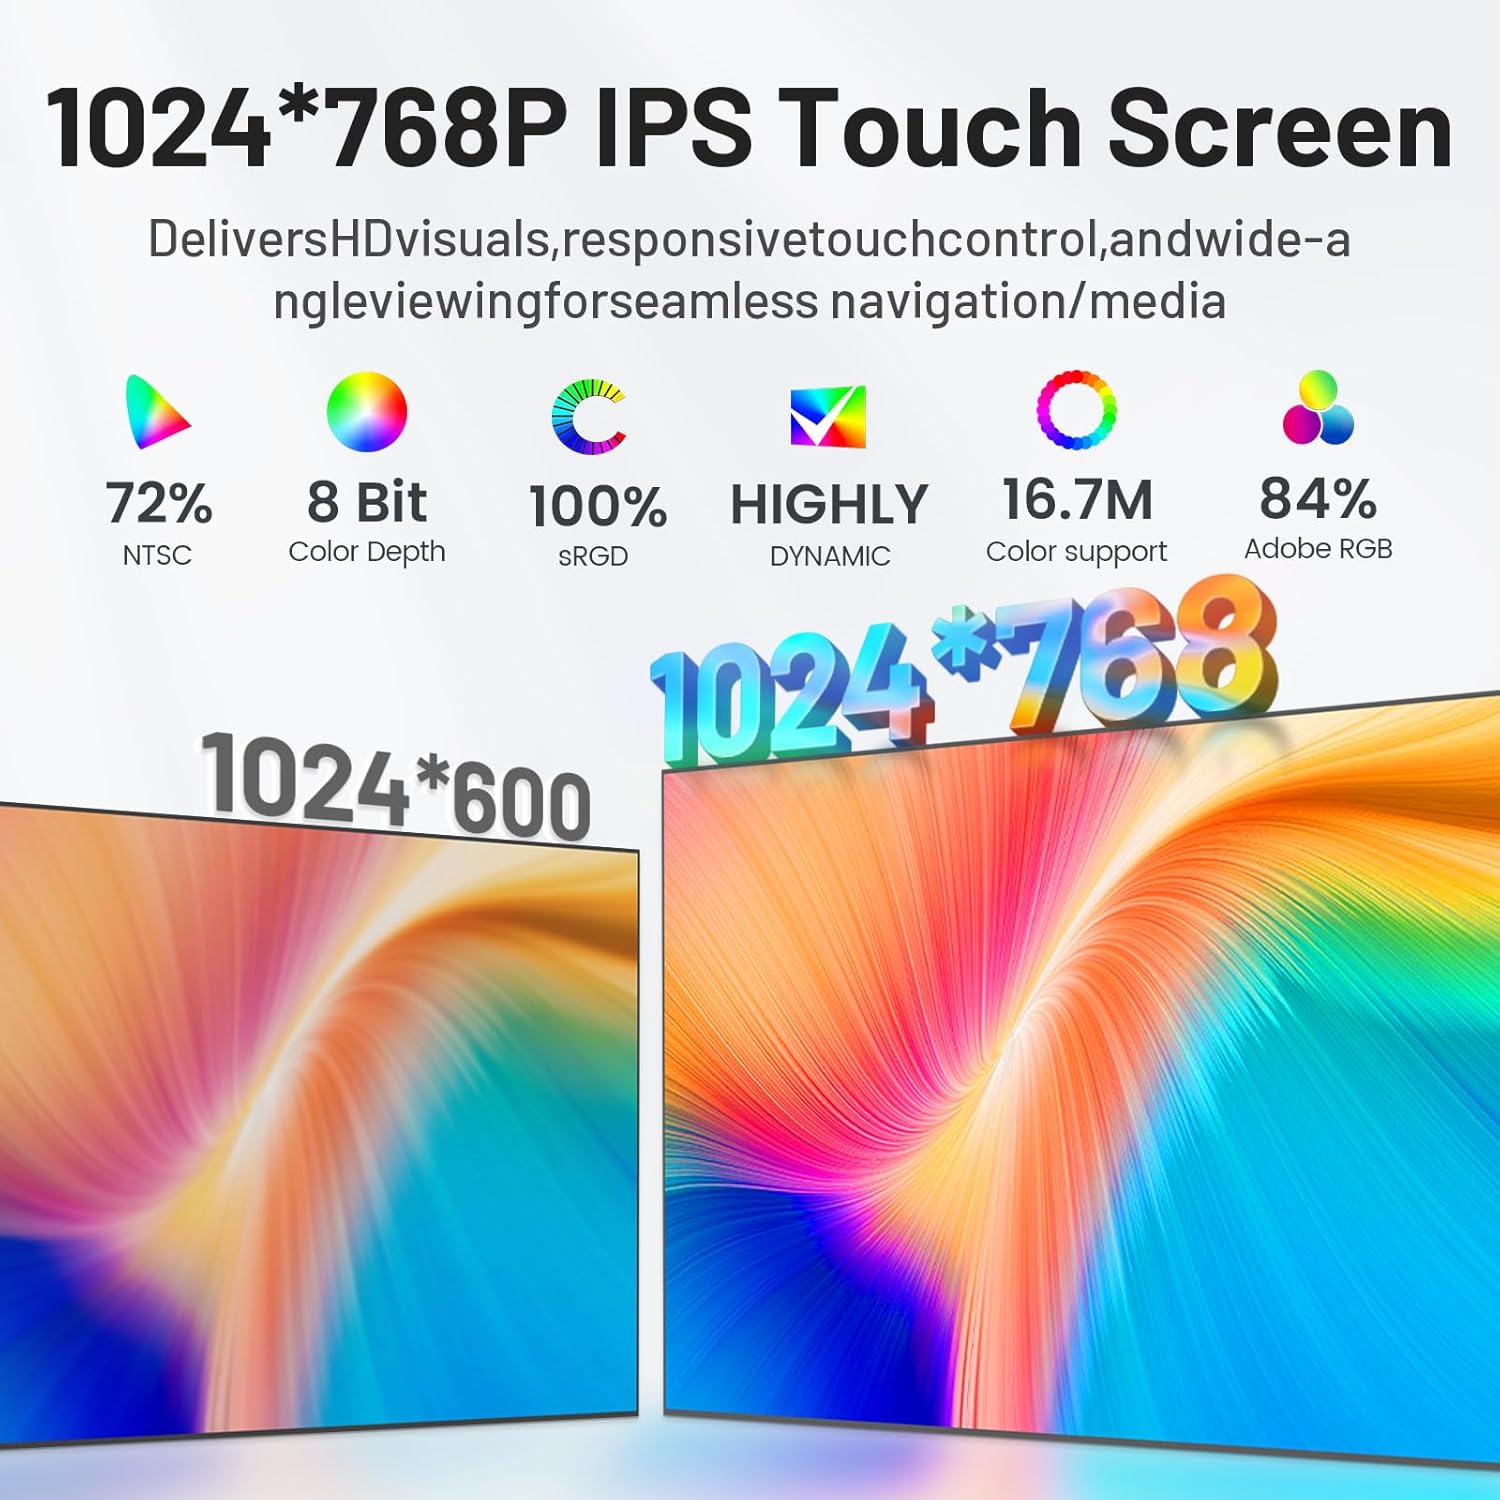
Image: The car radio display showing the FM radio interface with frequency tuning, station information, and visual sound waves.

Image: Illustrates the FM/AM/RDS radio functionality, showing various frequency options and the benefits of RDS for real-time information and enhanced listening experience.
5.5. GPS Navigation
Utilize the built-in GPS for navigation. The unit supports both online and offline maps. Connect to WiFi for real-time traffic updates and map synchronization with apps like Google Maps or Waze. The included GPS antenna ensures accurate positioning.

Image: The car radio screen displaying a GPS navigation map with a planned route, turn-by-turn directions, and various map application icons.

Image: Shows the GPS navigation system in action, providing real-time route planning, offline map access, and multiple route options for enhanced driving convenience and safety.
5.6. Dual-Band WiFi
Connect to 2.4G or 5G WiFi networks for internet access, app downloads, and online services. This ensures stable and fast connectivity for streaming and browsing.

Image: The car radio screen displaying a 5G WiFi connection indicator, illustrating faster internet speeds compared to 2.4G WiFi, with various social media app icons.

Image: Highlights the benefits of dual-band WiFi (2.4G/5G) for stable and lag-free internet connections, showing a car driving with various app icons for online services.
5.7. Split Screen Function
The split screen feature allows you to run two applications simultaneously, such as navigation on one side and music playback on the other. This enhances multitasking and convenience.

Image: Demonstrates the split screen function, showing navigation and media controls displayed simultaneously on the car radio screen, enhancing driving safety and convenience.
5.8. Steering Wheel Control (SWC)
The unit supports your vehicle's original steering wheel controls, allowing you to manage audio, calls, and other functions without taking your hands off the wheel. Ensure the CAN BUS decoder is correctly connected for this feature to work.

Image: Illustrates how the central screen can be operated via controls on the steering wheel, showing icons for volume, track skipping, and call management, promoting safer driving.
5.9. Backup Camera
The included 1080P AHD waterproof backup camera automatically activates when the vehicle is put into reverse. It provides a clear view of the area behind your car, assisting with safer parking and reversing maneuvers. Features include a wide 170° angle, HDR, and night vision.

Image: Shows the car radio display with the backup camera view, including parking guidelines, alongside an illustration of the camera's features like waterproofing, wide angle, HDR, and night vision.
5.10. Wired & Mirror Link
Mirror Link allows you to project your smartphone's screen onto the car radio display via USB connection. This provides a safe and stable way to access apps and content from your phone.

Image: Illustrates the Mirror Link feature, showing a smartphone screen mirrored onto the car radio display via USB, Wi-Fi, or Bluetooth connection, enabling safe in-car app usage.
5.11. DSP Digital Sound Effects
The Digital Sound Processor (DSP) enhances audio quality through frequency adjustment, noise reduction, surround sound simulation, and real-time processing. This allows for a customized and immersive audio experience.
Image: Shows the DSP settings interface on the car radio, with options for frequency adjustment, sound field control, and other audio enhancements, demonstrating customizable sound profiles.
6. Specifications
| Feature | Specification |
|---|---|
| Brand | Kakamoden |
| Model Name | Kakamoden (9.7" Car Radio) |
| Compatible Vehicles | Cadillac ATS, XTS, SRX, CTS (2013-2018) |
| Operating System | Android 13 |
| Processor | 8-Core |
| RAM | 4GB |
| ROM | 64GB |
| Screen Size | 9.7 Inches |
| Display Type | IPS Touch Screen |
| Resolution | 1024x768P |
| Connectivity | Bluetooth 5.0, USB, 5G WiFi |
| Navigation | Built-in GPS (Online/Offline Maps) |
| Radio Tuner | FM/AM/RDS |
| Audio Processing | DSP Digital Sound Effects |
| Backup Camera | 1080P AHD (Included) |
| Special Features | Wireless CarPlay, Android Auto, Split Screen, Steering Wheel Control (SWC), Mirror Link |
| Item Weight | 2.16 Kilograms |
| UPC | 754202010762 |
| ASIN | B0FKB4V71V |
7. Maintenance
- Screen Cleaning: Use a soft, lint-free cloth to gently wipe the touch screen. Avoid abrasive cleaners or solvents.
- Software Updates: Periodically check for software updates via the system settings to ensure optimal performance and access to new features.
- General Care: Keep the unit free from dust and debris. Avoid exposing it to direct sunlight for extended periods or extreme temperatures.
8. Troubleshooting
This section addresses common issues you might encounter. For more complex problems, please contact customer support.
8.1. No Sound from the Radio After Installation
- Ensure the AUX audio cable is properly connected. If your armrest compartment has a USB-A or Type-C port, contact our after-sales service team for the appropriate adapter.
- Using the SEL button (original car function selection button) on the steering wheel, first select Radio Media, then use the scroll up/down buttons to locate AUX input/USB, enable AUX input/USB.
Image: Illustrates the process of selecting AUX input/USB via the steering wheel controls to resolve no sound issues after installation.
8.2. Why the Steering Wheel Control Buttons Do Not Work After Installation?
- Please open the cover above the steering wheel to make sure the steering wheel adapter cable is connected correctly.
- Ensure the CANBUS setting is set correctly in the unit's system settings.

Image: Shows the location of the steering wheel adapter cable connection and highlights the importance of correct CANBUS settings for steering wheel control functionality.
8.3. How to Listen to the FM/AM?
After installing the new head unit, the original factory CD unit remains in place. If you wish to listen to FM/AM radio, please open the "Car UI" application to access the factory system and listen to the broadcast.
8.4. After Installing the Radio, Where Can I Control the Factory Features?
To access and control your vehicle's original factory functions, please follow these steps:
- Ensure all connections are made correctly according to the wiring diagram.
- Select the correct CANBUS type based on the size of your original screen.
- Connect the radio to a stable Wi-Fi network or mobile hotspot. Then open the App Store and update the following apps: Canbus Service, Canbus - List, Canbus, and Canbus - Coral. Be sure to pull down the page to refresh it before updating. Once the updates are complete, please reboot the radio.
- After installation and update, locate and open the "Car UI" app on the system interface. From there, you will be able to control and adjust factory-related functions.
8.5. Why Are Some A/C Buttons Not Working on the Radio?
The air conditioning button is an original factory feature. For vehicles equipped with the 8-inch factory display, please follow the instructions in the "Car UI" app on the head unit. You can operate the A/C functions that are not responding directly within this application.
8.6. How Do I Install and Secure the New Radio?
When installing the new radio, first remove the brackets from both sides of the back of the factory radio. Then attach these brackets to the back of our radio's dash kit to securely mount the unit.

Image: Illustrates the process of removing brackets from the original radio and attaching them to the new unit's dash kit for secure installation.
9. Warranty and Customer Support
Kakamoden products come with a standard manufacturer's warranty. For specific warranty details, please refer to the documentation included with your purchase or contact our customer support team. If you encounter any issues during setup or use, our professional technical support team is always ready to assist you.
Contact Support: For technical assistance or warranty claims, please visit our official website or contact us via the platform where you purchased the product.

Image: A customer support representative wearing a headset, smiling, indicating available assistance for product inquiries.