1. Introduction
This manual provides essential information for setting up, operating, and maintaining your Gawfolk GF240A 24.5 Inch FHD 200Hz Gaming Monitor. Please read it thoroughly before use to ensure proper functionality and to maximize your viewing experience.
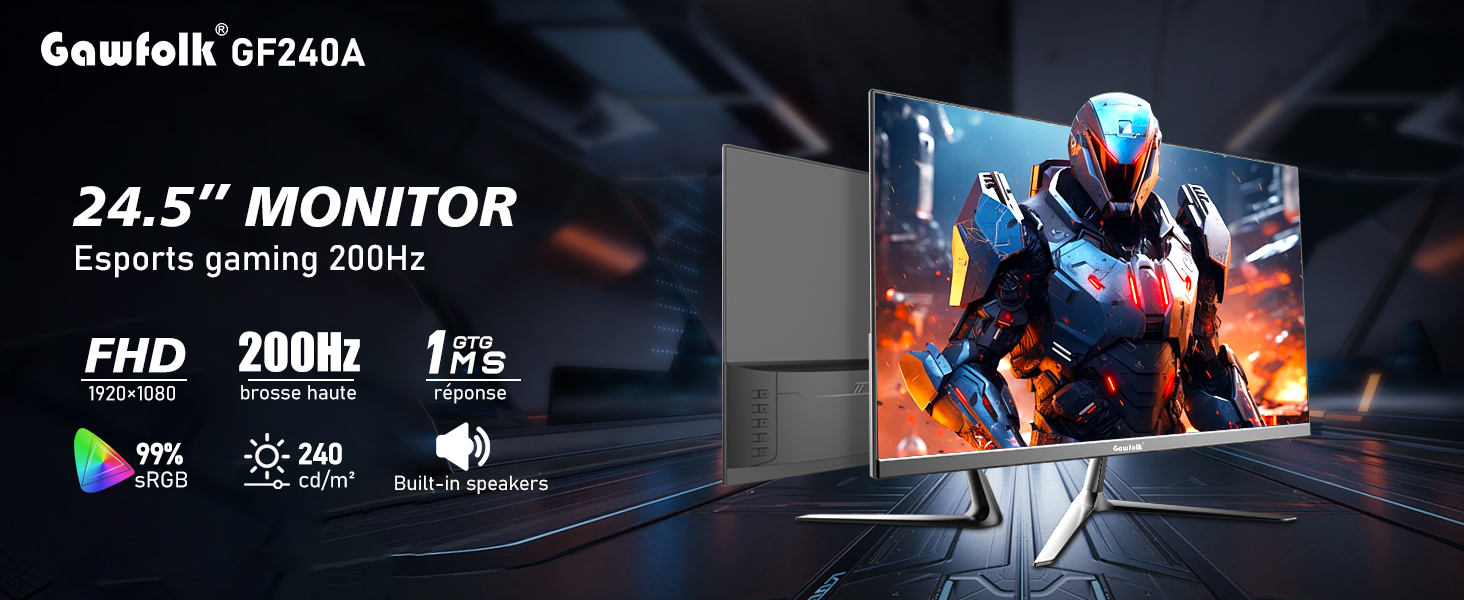
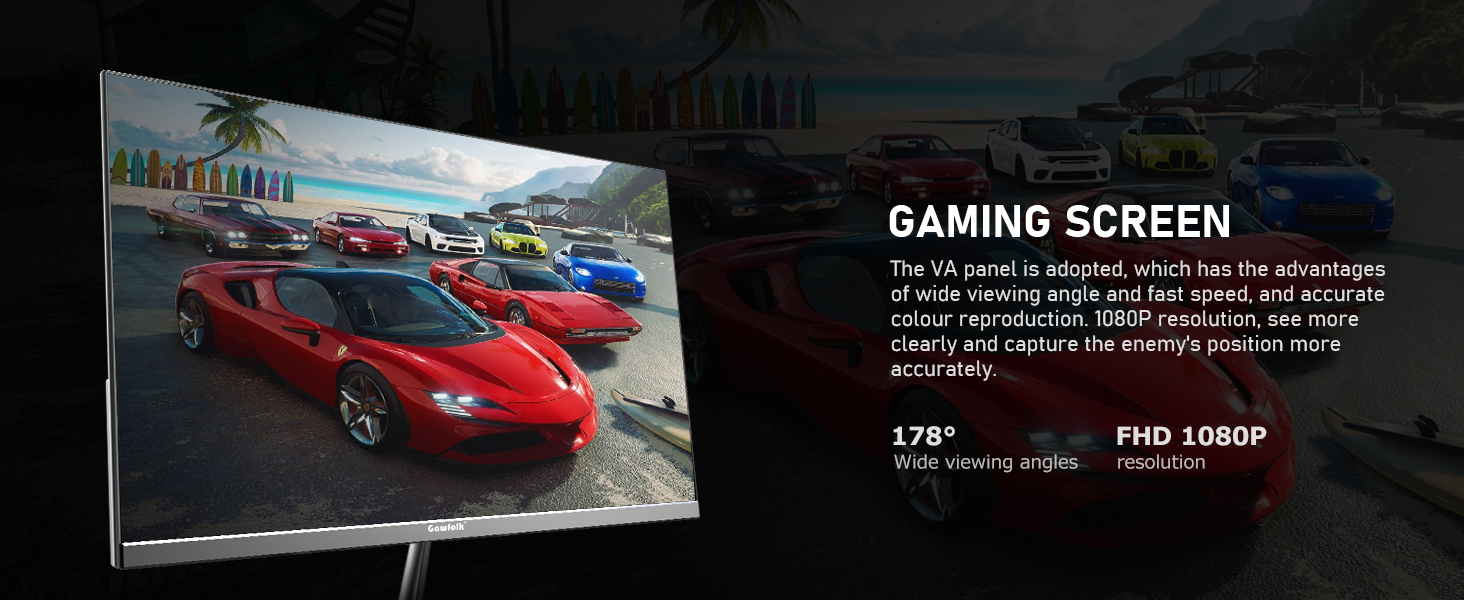
The Gawfolk GF240A monitor features a 24.5-inch Full HD (1920x1080p) display with a 200Hz refresh rate (up to 120Hz via HDMI, up to 200Hz via DisplayPort) and a 1ms GTG response time. It incorporates a VA panel for wide viewing angles and accurate color reproduction, covering 98% sRGB color gamut. Built-in dual speakers provide audio, and FreeSync technology helps minimize input latency and reduce screen tearing. The monitor also includes low blue light and flicker-free technologies for eye comfort during extended use. It is compatible with 75x75mm VESA wall mounts.
2. Product Features
- Display Size: 24.5 inches
- Resolution: 1920 x 1080 (FHD)
- Refresh Rate: Up to 200Hz (DP), Up to 120Hz (HDMI)
- Response Time: 1ms GTG
- Panel Type: VA Panel with 178° wide viewing angles
- Color Gamut: 98% sRGB, 8-bit color depth
- Brightness: 240 cd/m²
- Audio: Built-in dual speakers
- Technologies: FreeSync, Low Blue Light, Flicker-Free
- Connectivity: HDMI, DisplayPort, Audio Out, USB, DC Power Input
- Mounting: VESA Wall Mount Compatible (75x75mm)


3. Package Contents
Upon unpacking, ensure all the following items are present:
- Gawfolk GF240A Monitor
- Monitor Stand Base
- Monitor Stand Bracket
- Power Cable
- DisplayPort (DP) Cable
- Instruction Manual
- Screwdriver (for bracket installation)
4. Setup Instructions
4.1. Monitor Stand Assembly
- Carefully remove the monitor from its packaging, keeping it protected.
- Attach the monitor stand bracket to the back of the monitor using the provided screws and screwdriver.
- Attach the monitor stand base to the bracket, securing it firmly.
4.2. Connecting the Monitor
- Connect the power cable to the DC input port on the monitor and then to a power outlet.
- Connect the DisplayPort (DP) cable from your computer's graphics card to the DP input on the monitor for optimal performance (up to 200Hz refresh rate). Alternatively, use an HDMI cable (up to 120Hz refresh rate).
- If desired, connect external speakers or headphones to the Audio Out port.
- The USB port is for service or firmware updates only and not for general peripheral connection.

4.3. Powering On and Initial Use
- Press the power button on the monitor to turn it on. The Gawfolk logo will appear.
- Before using the monitor, gently peel off the protective dust-proof film from the screen.
5. Operating Instructions
5.1. Input Source Selection
Use the monitor's control buttons (usually located on the back or bottom right) to access the On-Screen Display (OSD) menu. Navigate to the "Input" section to select between HDMI and DisplayPort inputs based on your connection.

5.2. Adjusting Display Settings
Through the OSD menu, you can adjust various display settings:
- Refresh Rate: Ensure your computer's display settings are configured to match the monitor's maximum refresh rate (e.g., 200Hz for DP, 120Hz for HDMI).
- FreeSync: Activate FreeSync in the OSD menu and your graphics card settings to synchronize the monitor's refresh rate with your GPU's frame rate, reducing tearing and stuttering.
- Low Blue Light Mode: Enable this mode to reduce blue light emissions, which can help alleviate eye strain during prolonged use.
- Brightness/Contrast: Adjust these settings to your preference for optimal visual comfort.
5.3. Angle Adjustment
The monitor stand allows for tilt adjustment. Gently hold the top and bottom edges of the monitor and tilt it to your desired viewing angle. Avoid excessive force.
6. Maintenance
- Cleaning the Screen: Use a soft, lint-free cloth slightly dampened with water or a screen-cleaning solution. Do not spray liquid directly onto the screen.
- Cleaning the Casing: Wipe the monitor casing with a soft, dry cloth. Avoid using abrasive cleaners or solvents.
- Storage: If storing the monitor for an extended period, place it back in its original packaging to protect it from dust and damage.
- Ventilation: Ensure adequate airflow around the monitor to prevent overheating. Do not block ventilation openings.
7. Troubleshooting
- No Power:
- Check if the power cable is securely connected to both the monitor and the power outlet.
- Verify the power outlet is functioning.
- No Signal:
- Ensure the video cable (DP or HDMI) is securely connected to both the monitor and your computer.
- Select the correct input source in the monitor's OSD menu.
- Check your computer's display settings to ensure the monitor is detected and enabled.
- Flickering/Tearing:
- Enable FreeSync in both the monitor's OSD menu and your graphics card control panel.
- Ensure your graphics drivers are up to date.
- Image Quality Issues (Blurry, Distorted Colors):
- Adjust the resolution on your computer to match the monitor's native resolution (1920x1080).
- Check the video cable for damage or loose connections.
- Reset monitor settings to factory defaults via the OSD menu.
- No Sound from Built-in Speakers:
- Check the volume settings on both the monitor and your computer.
- Ensure the audio output is correctly routed to the monitor in your computer's sound settings.
- If using HDMI/DP, ensure the audio is being sent through the cable.
8. Specifications
| Feature | Detail |
|---|---|
| Model Number | GF240A |
| Screen Size | 24.5 Inches |
| Resolution | 1920 x 1080 (FHD 1080p) |
| Aspect Ratio | 16:9 |
| Refresh Rate | Up to 200Hz (DisplayPort), Up to 120Hz (HDMI) |
| Response Time | 1ms GTG |
| Panel Type | VA |
| Viewing Angle | 178° |
| Color Gamut | 98% sRGB |
| Brightness | 240 cd/m² |
| Built-in Speakers | Yes |
| Connectivity | HDMI, DisplayPort, Audio Out, USB, DC Power |
| Wall Mount Compatibility | 75x75mm VESA |
| Product Dimensions | 24.21 x 15.55 x 3.93 inches |
| Item Weight | 7.39 pounds |
9. Warranty and Support
Gawfolk provides a 12-month after-sales service for this monitor. If you encounter any issues or have questions regarding the product, please contact Gawfolk customer support for assistance. Contact information can typically be found on the product packaging or the official Gawfolk website.