1. Introduction
Thank you for choosing the SprayMate Tornado 4-Gallon Battery Powered Backpack Sprayer. This manual provides essential information for the safe and efficient operation, assembly, maintenance, and troubleshooting of your new sprayer. Please read all instructions carefully before use to ensure proper function and longevity of the product.

Figure 1: SprayMate Tornado 4-Gallon Battery Powered Backpack Sprayer.
2. Safety Information
Always observe the following safety precautions to reduce the risk of injury or damage:
- Read all instructions: Familiarize yourself with the sprayer's operation before use.
- Wear protective gear: Always wear appropriate personal protective equipment (PPE) such as gloves, eye protection, and a mask when handling chemicals.
- Chemical compatibility: Ensure that the chemicals used are compatible with the sprayer's materials. Do not use flammable, corrosive, or highly viscous liquids.
- Battery safety: Use only the provided battery and charger. Do not expose the battery to extreme temperatures or moisture.
- Keep clear: Keep children and pets away from the spraying area.
- Proper storage: Store the sprayer and chemicals in a secure, cool, dry place, out of reach of children.
- Ventilation: Use in well-ventilated areas.
3. Package Contents
Verify that all items are present in the package:
- Tornado 4-Gallon Battery Powered Backpack Sprayer
- 18V/2.6Ah Li-Ion Battery Pack
- 21V/1A Battery Charger
- Nozzles: (1) 80° fan nozzle, (1) 45° fan nozzle, (1) 0° pin stream nozzle, (1) adjustable nozzle

Figure 2: Included battery and charger.
4. Assembly
Follow these steps to assemble your sprayer:
- Attach the shoulder straps: Securely fasten the backpack straps to the designated attachment points on the sprayer tank. Adjust for a comfortable fit.
- Connect the hose: Attach the spray hose to the outlet port on the sprayer base. Ensure a tight connection to prevent leaks.
- Install the wand and handle: Connect the spray wand to the hose. Attach the inline handle to the wand.
- Insert the battery: Open the battery compartment cover and insert the fully charged 18V/2.6Ah Li-Ion battery pack. Close the cover securely.

Figure 3: The 2025 model features an updated design for improved performance.
5. Charging the Battery
The sprayer is powered by an 18V/2.6Ah Li-Ion battery. Use the included 21V/1A charger to charge the battery.
- Remove the battery from the sprayer.
- Connect the charger to a standard electrical outlet.
- Plug the battery into the charger. The indicator light on the charger will show the charging status.
- Once fully charged, disconnect the battery from the charger and store it safely until ready for use.
A fully charged battery provides up to 2 hours of continuous spray time, allowing for up to 24 gallons of liquid to be sprayed per charge.

Figure 4: Battery compartment with 18V/2.6Ah Lithium-Ion battery.
6. Operation
6.1 Filling the Tank
- Ensure the sprayer is on a stable, level surface.
- Unscrew the wide-mouth tank lid.
- Carefully pour the desired liquid into the tank. The translucent tank features gallon and liter liquid level indicator marks for accurate measurement. Do not overfill.
- Securely replace the tank lid.
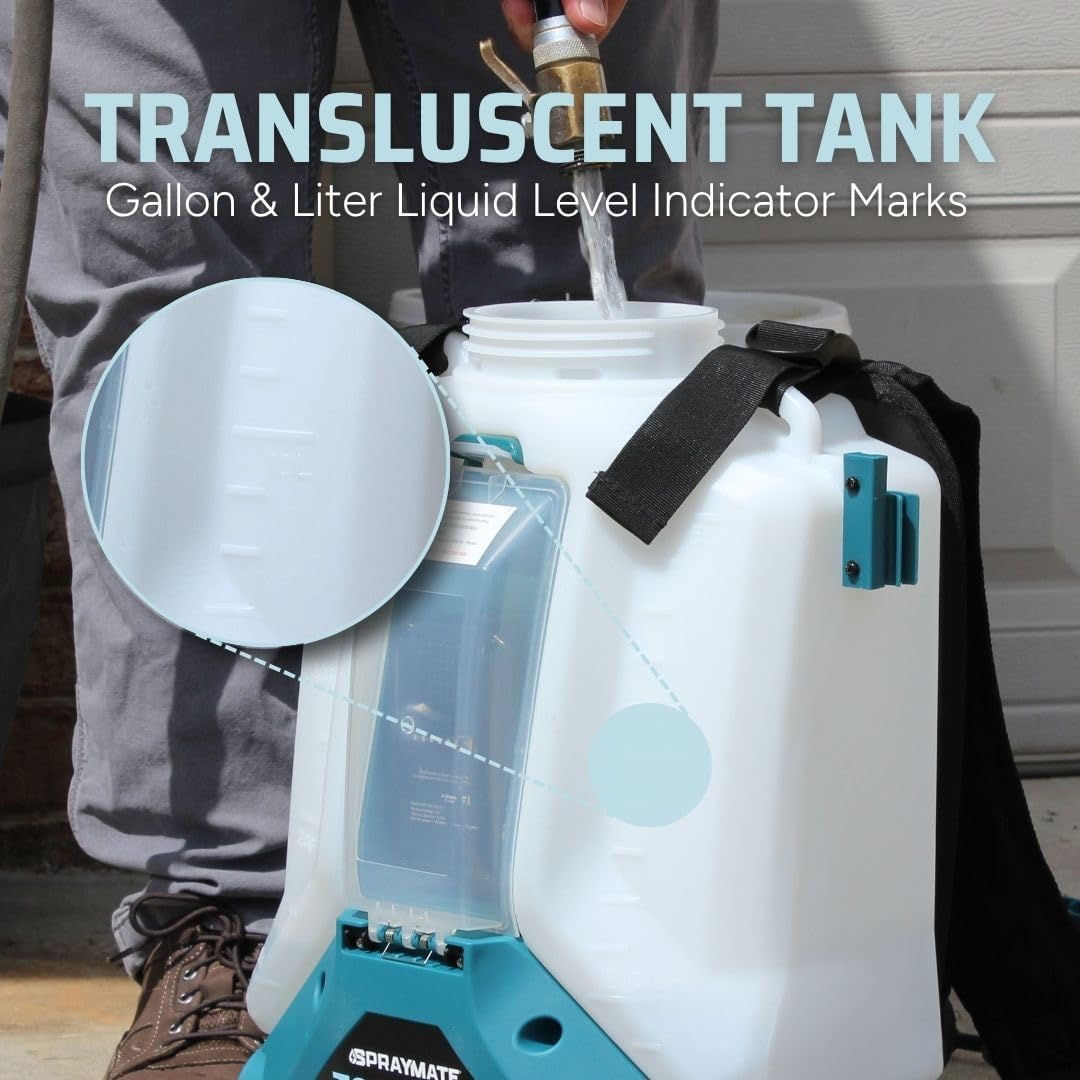
Figure 5: Translucent tank with liquid level indicators for easy filling.
6.2 Attaching Nozzles
The sprayer includes four versatile nozzles for various applications:
- 80° Fan Nozzle: For broad coverage.
- 45° Fan Nozzle: For general spraying.
- 0° Pin Stream Nozzle: For targeted, long-distance application (up to 20 feet).
- Adjustable Nozzle: Allows for a range from fine mist to solid stream.
To change a nozzle, simply unscrew the current nozzle from the spray wand and screw on the desired nozzle until hand-tight.
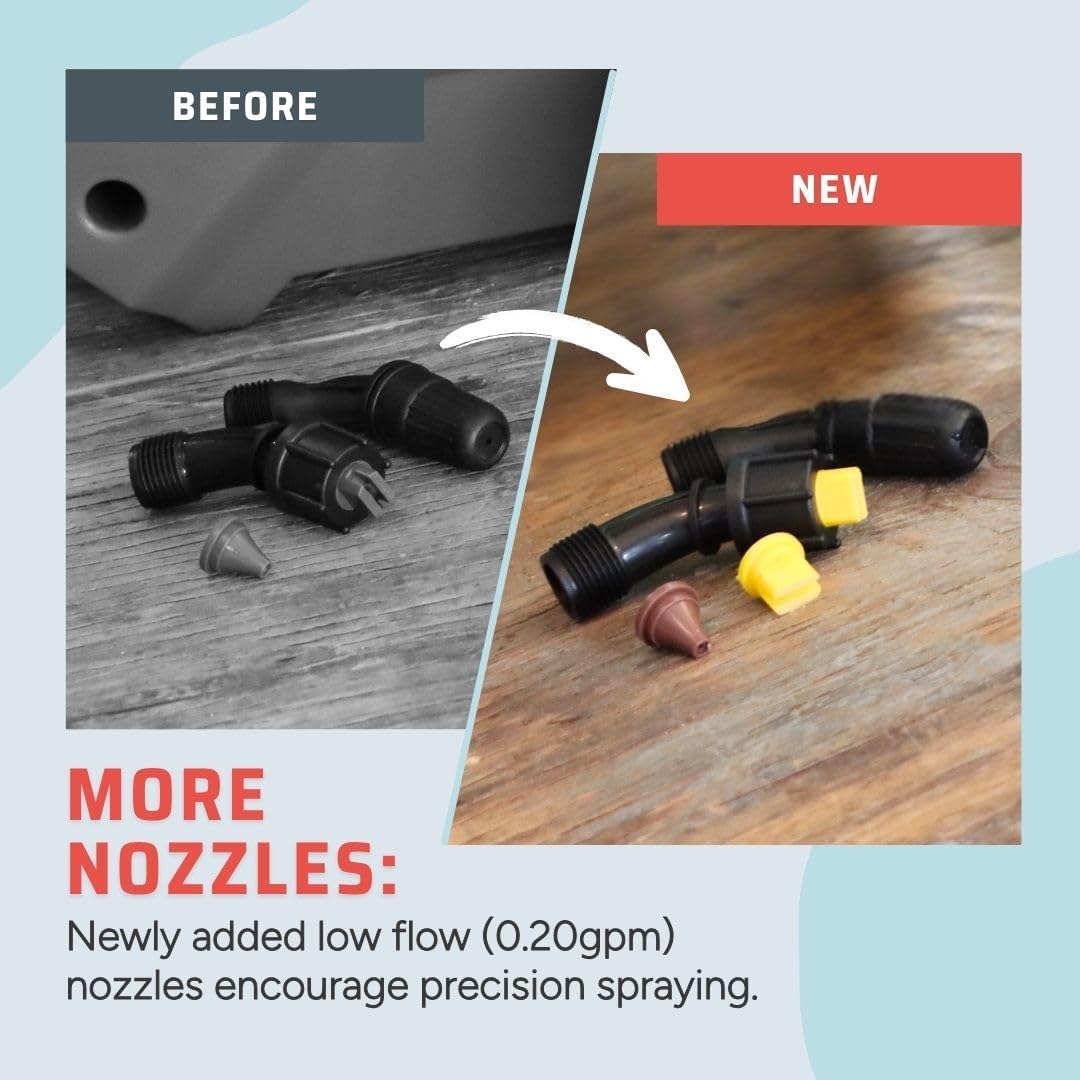
Figure 6: Included nozzles for various spray patterns.
6.3 Spraying
- Put on the backpack sprayer, adjusting the straps for comfort.
- Turn the ON/OFF toggle switch to the 'ON' position. The switch is located on the side of the sprayer base.
- Aim the nozzle at the target area.
- Squeeze the trigger on the inline handle to begin spraying.
- For continuous spraying, engage the trigger lock mechanism on the handle. This eliminates the need to continuously squeeze the trigger.
- To stop spraying, release the trigger or disengage the trigger lock.
- After use, turn the ON/OFF switch to 'OFF'.
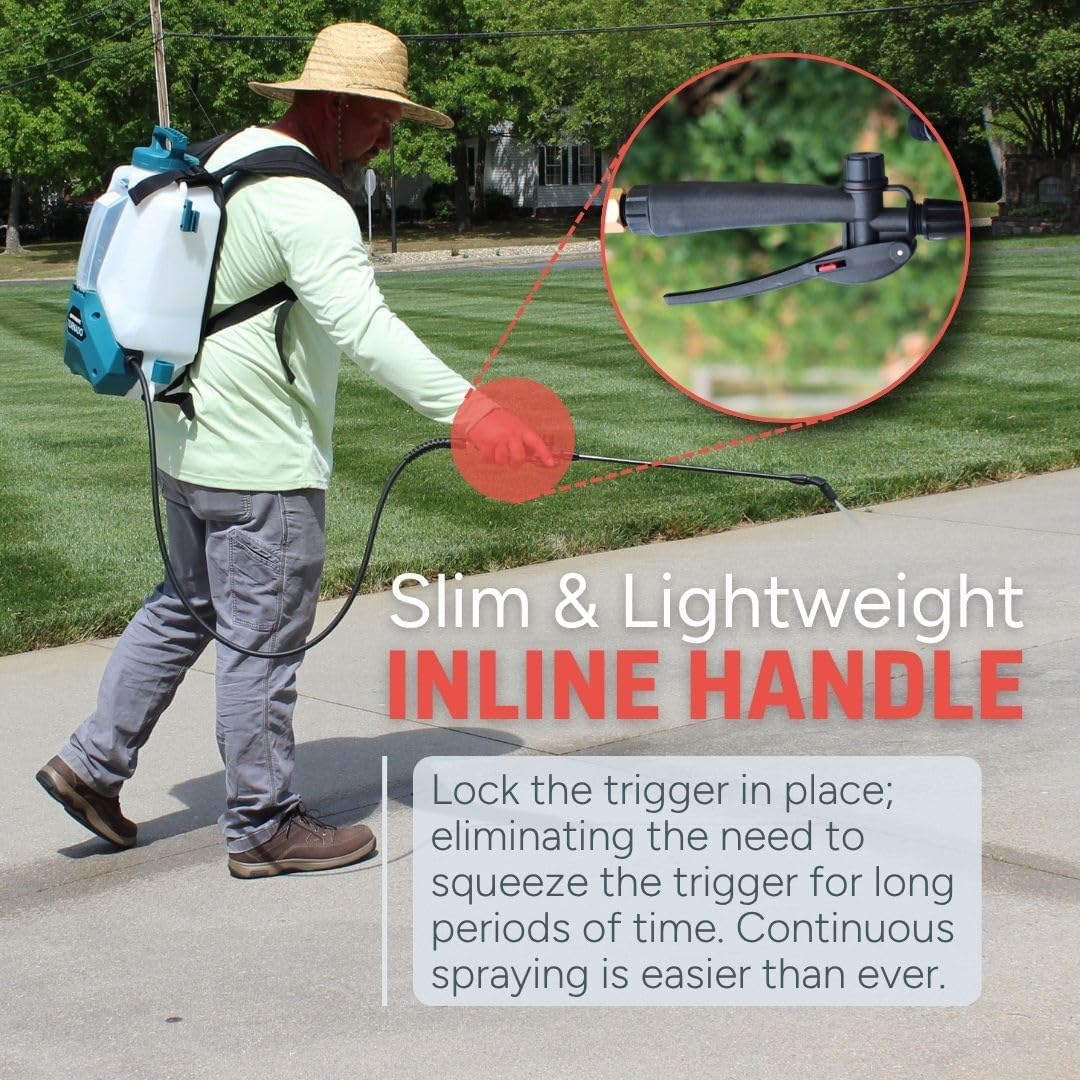
Figure 7: Inline handle with trigger lock for continuous operation.

Figure 8: ON/OFF toggle switch and Max 40 PSI indicator.

Figure 9: The sprayer can reach up to 20 feet with a pin stream nozzle.
6.4 Nozzle Performance
Refer to the table below for detailed performance specifications of each nozzle type:
| Nozzle | Flow Rate (GPM) | Pressure (PSI) |
|---|---|---|
| 45° Fan | 0.20 | 40 |
| 80° Fan | 0.20 | 40 |
| 0° Pin Stream | 0.30 | 10 |
| Adjustable (Cone) | 0.20 | 40 |
| Adjustable (Stream) | 0.30 | 10 |

Figure 10: Adjustable cone nozzle spray pattern.

Figure 11: 0-degree pin stream nozzle spray pattern.
7. Maintenance and Storage
Proper maintenance ensures the longevity and performance of your sprayer:
- Cleaning: After each use, empty any remaining liquid from the tank. Rinse the tank thoroughly with clean water and mild soap. Operate the sprayer with clean water for a few minutes to flush the pump, hose, and wand.
- Nozzle care: Clean nozzles regularly to prevent clogging. If a nozzle becomes clogged, remove it and rinse with water. A small brush or pin can be used to clear stubborn blockages.
- Battery care: Store the battery in a cool, dry place. For long-term storage, charge the battery to approximately 50% capacity.
- Winter storage: If storing in freezing temperatures, ensure all liquid is drained from the sprayer to prevent damage from ice expansion.
- General storage: Store the sprayer in a dry, protected area, away from direct sunlight and extreme temperatures.
8. Troubleshooting
If you encounter issues with your sprayer, refer to the following common problems and solutions:
| Problem | Possible Cause | Solution |
|---|---|---|
| Sprayer does not turn on | Battery not charged or improperly inserted | Ensure battery is fully charged and correctly seated in the compartment. |
| No spray or weak spray | Clogged nozzle or filter | Clean the nozzle and check the filter at the bottom of the tank for blockages. |
| Leaking from connections | Loose hose or wand connections | Tighten all connections. Check O-rings for damage and replace if necessary. |
| Motor runs but no liquid sprays | Tank is empty or suction line is blocked | Refill the tank. Check the suction line for kinks or blockages. |
If the problem persists after attempting these solutions, please contact customer support.
9. Specifications
- Brand: SprayMate
- Model Name: Tornado (2025 QuickSwap Compatible)
- Model Number: SMSASM-2
- Tank Volume: 4 Gallons
- Power Source: Battery Powered
- Battery: 18V/2.6Ah Li-Ion (Included)
- Charger: 21V/1A (Included)
- Maximum Pressure: 40 PSI
- Hose Length: 5 Feet
- Product Dimensions: 14"W x 22"H
- Item Weight: 14 Pounds
- Color: Teal
- Included Nozzles: 80° fan, 45° fan, 0° pin stream, adjustable
- Recommended Uses: Bleaching, De-Icing, Pest Control, Sanitizing, Watering, Weed Control
10. Warranty and Support
For warranty information or technical assistance, please refer to the official SprayMate website or contact customer support directly. Live product support is available Monday through Friday.