Introduction
The Vine C-Wire Adapter is designed to provide a common wire (C-wire) connection for smart thermostats in heating, ventilation, and air conditioning (HVAC) systems that lack this essential wire. Many smart thermostats require a continuous 24VAC power supply, which is typically provided by a C-wire. This adapter facilitates the installation of such thermostats in systems that only have R, G, Y, and W wires, ensuring stable operation without the need for new wiring runs.
This manual provides detailed instructions for the safe and correct installation and use of your Vine C-Wire Adapter.
Important Safety Information
- ALWAYS turn off power to your HVAC system at the circuit breaker before beginning any installation or wiring work. Failure to do so can result in electrical shock, property damage, or personal injury.
- If you are unsure about any part of the installation process, consult a qualified electrician or HVAC technician.
- Ensure all wire connections are secure and properly insulated to prevent short circuits.
- This adapter is designed for use with 24VAC systems only. Do not use with higher voltage systems.
- Keep the adapter and wiring away from sources of heat or moisture.
Package Contents
Verify that all items are present in your package:
- Vine C-Wire Adapter Unit
- Wire Nuts (2)
- Additional Wires (for extending connections if needed)

Image: Vine C-Wire Adapter Kit. This image displays the complete Vine C-Wire Adapter kit, including the main adapter unit, two orange wire nuts, and two additional white wires with crimped ends, ready for installation.
Installation Guide
This guide assumes your existing thermostat wiring consists of R, G, Y, and W wires, and your HVAC system does not have a C-wire available at the thermostat.
Step 1: Power Off Your HVAC System
Locate your HVAC system's circuit breaker and turn off the power. Verify that the thermostat is completely off and unresponsive before proceeding.
Step 2: Access Thermostat Wiring
Remove your existing thermostat from its wall plate to expose the wiring. Note the current connections. Take a picture for reference if desired.
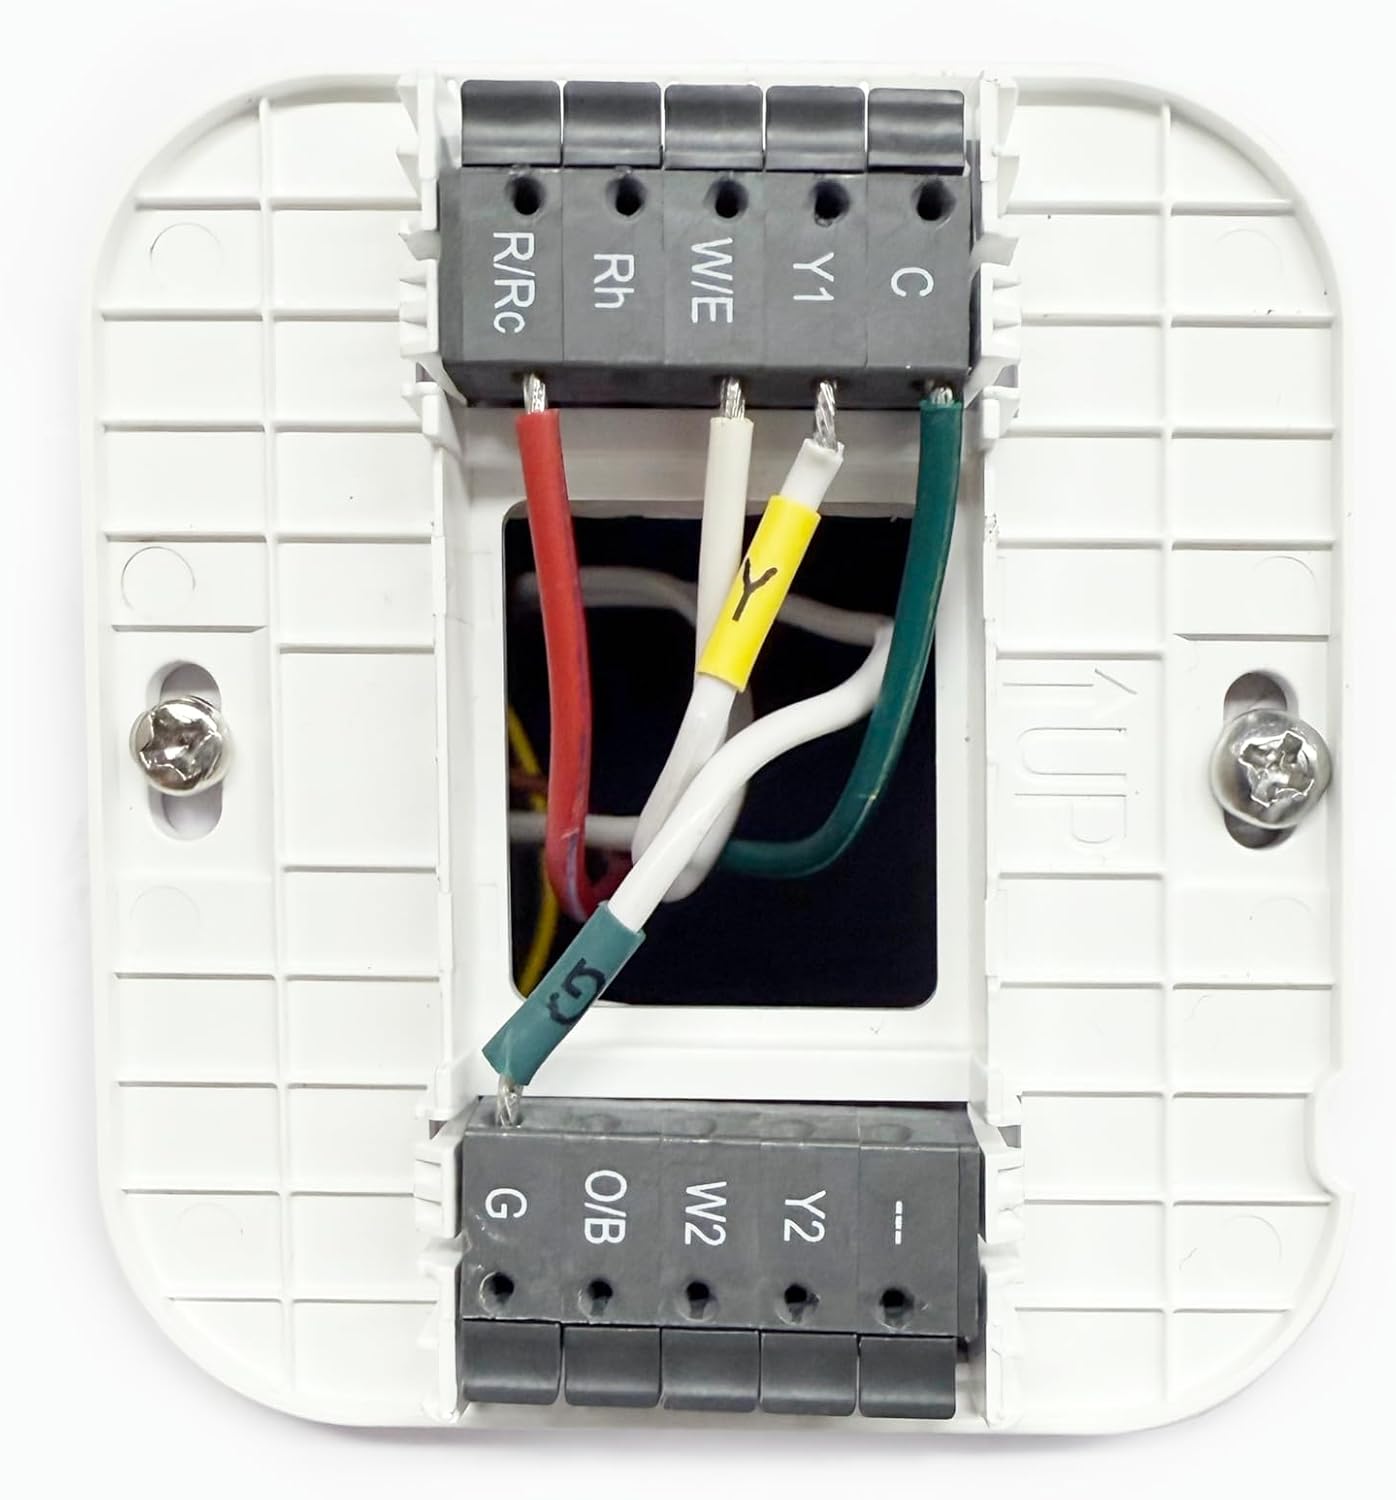
Image: Thermostat Wiring Backplate. This image shows a typical thermostat backplate with existing wiring connected to terminals such as R/Rc, Rh, W/E, Y1, C, G, O/B, W2, and Y2. The C-wire adapter will help provide a connection to the 'C' terminal.
Step 3: Install the C-Wire Adapter at the HVAC Control Board
The Vine C-Wire Adapter should be installed near your HVAC system's control board, typically located in the furnace or air handler. Open the access panel to the control board.
- Identify the R, G, Y, and W wires coming from your thermostat that connect to the HVAC control board.
- Disconnect these wires from the control board terminals.
- Connect the corresponding wires from the C-Wire Adapter's "THERMOSTAT" side (labeled W, Y, G, R) to the wires coming from your thermostat. Use the provided wire nuts for secure connections. For example, connect the adapter's 'R' wire to the thermostat's 'R' wire, 'G' to 'G', and so on.
- Connect the C-Wire Adapter's "EQUIPMENT" side (labeled W, Y, G, C, R) to the corresponding terminals on your HVAC control board. Ensure that the 'C' wire from the adapter is connected to the 'C' terminal on the control board.
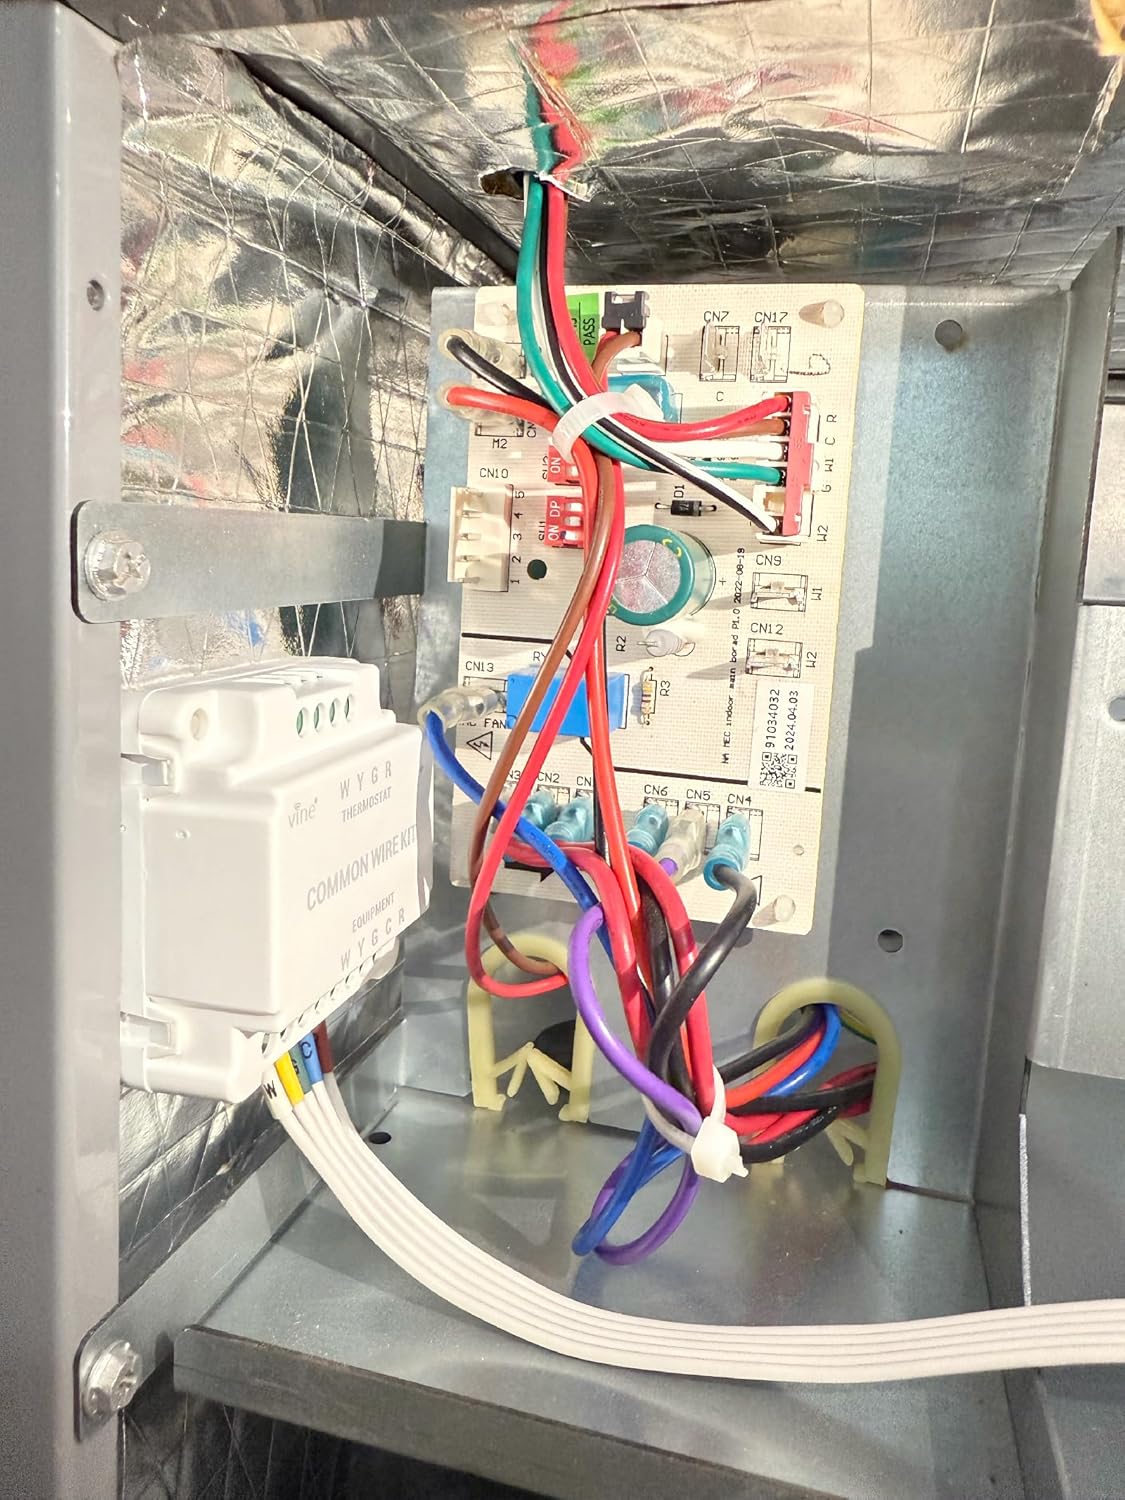
Image: C-Wire Adapter Installed in HVAC Unit. This image shows the Vine C-Wire Adapter unit mounted inside an HVAC system, with its wires connected to the main control board. The adapter is positioned to manage the wiring between the thermostat and the HVAC unit.

Image: C-Wire Adapter Connections at Control Board. A close-up view of the Vine C-Wire Adapter connected to an HVAC control board. Wires from the adapter are neatly connected to the board's terminals, and a wire nut is used to secure a connection, demonstrating proper wiring technique.

Image: Wire Nut Connection Detail. This image provides a detailed view of a wire connection secured with an orange wire nut. It illustrates how two wires are twisted together and then covered by the wire nut for a safe and insulated electrical connection.
Step 4: Connect C-Wire at Thermostat
At the thermostat wall plate, you should now have an additional C-wire available from the adapter's wiring. Connect this new C-wire to the 'C' terminal on your smart thermostat's wall plate.
Step 5: Reassemble and Power On
Carefully reassemble your thermostat onto its wall plate. Once everything is securely connected, return to your circuit breaker and restore power to your HVAC system. Your smart thermostat should now power on and function correctly with the C-wire connection.
Operation
The Vine C-Wire Adapter is a passive component designed to provide a stable 24VAC common wire connection to your smart thermostat. Once correctly installed, it operates continuously without user intervention. Its function is to ensure your smart thermostat receives consistent power, allowing it to perform its programmed functions reliably.
Refer to your smart thermostat's instruction manual for details on its specific operation, programming, and features.
Maintenance
The Vine C-Wire Adapter requires minimal maintenance. Periodically, it is recommended to:
- Ensure all wire connections remain secure at both the thermostat and HVAC control board.
- Inspect the adapter and its wiring for any signs of damage or wear.
- Keep the area around the adapter clean and free from dust or debris to ensure proper ventilation.
Always turn off power to the HVAC system at the circuit breaker before performing any inspection or maintenance.
Troubleshooting
| Problem | Possible Cause | Solution |
|---|---|---|
| Thermostat does not power on after installation. |
|
|
| HVAC system not responding to thermostat commands. |
|
|
| Intermittent power to thermostat. |
|
|
Specifications
- Brand: Vine
- Model Name: ALL
- Compatibility: All 24VAC systems (Air Conditioner, Heat Pump, Furnace)
- Item Weight: 2.89 ounces
- Package Dimensions: 2.32 x 2.32 x 2.13 inches
- Color: White
Warranty and Support
For warranty information and technical support, please refer to the official Vine website or contact Vine customer service directly. Details are typically provided with your product packaging or available online.
Note: Specific warranty terms may vary and are subject to the manufacturer's policies.