Important Safety Instructions
When using electrical appliances, basic safety precautions should always be followed to reduce the risk of fire, electric shock, and/or injury to persons, including the following:
- Read all instructions before operating the blender.
- To protect against electrical shock, do not immerse the blender base, cord, or plug in water or other liquids.
- Close supervision is necessary when any appliance is used by or near children.
- Unplug from outlet when not in use, before assembling or disassembling parts, and before cleaning.
- Avoid contact with moving parts.
- Do not operate any appliance with a damaged cord or plug, or after the appliance malfunctions or has been dropped or damaged in any manner. Contact customer service for examination, repair, or adjustment.
- The use of attachments not recommended or sold by the manufacturer may cause fire, electric shock, or injury.
- Do not use outdoors.
- Do not let cord hang over edge of table or counter, or touch hot surfaces.
- Keep hands and utensils out of container while blending to prevent the possibility of severe injury to persons or damage to the blender. A scraper may be used but only when the blender is not running.
- Blades are sharp. Handle with care.
- Always operate blender with lid in place.
- When blending hot liquids, use caution; steam can cause burns. Do not fill the jar above the maximum fill line for hot liquids.
- Ensure the appliance is switched OFF before connecting to the power source.
SAVE THESE INSTRUCTIONS
Product Overview
The Aeitto Professional Countertop Blender is designed for efficient blending of various ingredients, from ice crushing to smoothies and juices. It features a powerful motor and a large capacity jar for family use.
Components:
- Blender Base (with motor and control panel)
- 68 oz Blending Jar (with lid and measuring cap)
- Plunger
- Recipe Cookbook

Figure 1: Aeitto Professional Countertop Blender with its main components and fresh ingredients.
Control Panel:
- POWER Switch: Turns the blender ON/OFF.
- Speed Dial: Adjusts blending speed from 1 to 7.
- PULSE Button: Provides short bursts of high-speed blending.
- Preset Functions: Dedicated buttons for Ice Crush (P01), Smoothie (P02), and Juice (P03).
- Digital Display: Shows speed level and blending time.

Figure 2: Detailed view of the blender's control panel for easy operation.
Blade System:
The blender features an upgraded 8-point 3D blade system designed to break down ingredients more finely, extracting maximum nutrients and ensuring smoother results.
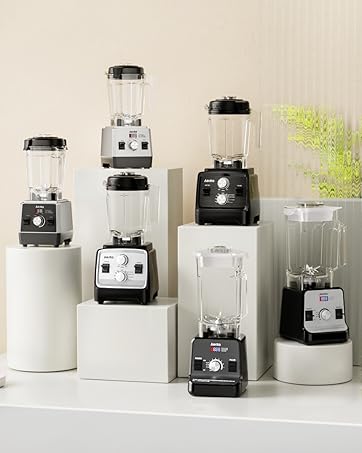
Figure 3: The advanced 8-point 3D blade system for superior blending performance.
Setup
- Unpack: Carefully remove all components from the packaging. Retain packaging for future storage or shipping.
- Clean Before First Use: Wash the blending jar, lid, and plunger in warm, soapy water. Rinse thoroughly and dry. Wipe the blender base with a damp cloth. Do not immerse the blender base in water.
- Assemble the Jar: Ensure the blade assembly is securely attached to the bottom of the blending jar.
- Place the Jar: Position the assembled blending jar onto the blender base, ensuring it is seated correctly and locked into place.
- Connect Power: Plug the power cord into a grounded electrical outlet.
Operating Instructions
Follow these steps for safe and effective blending:
- Prepare Ingredients: Cut ingredients into small pieces (approximately 1 inch) for optimal blending. Add liquids first, then soft ingredients, followed by harder ingredients and ice. Do not overfill the jar beyond the maximum fill line.
- Secure the Lid: Place the lid firmly on the blending jar and ensure the measuring cap is inserted into the lid opening.
- Turn On: Flip the POWER switch to the 'ON' position. The digital display will illuminate.
- Select Function:
- Manual Speed: Turn the Speed Dial to select a speed from 1 to 7. Start with a lower speed and gradually increase as needed.
- Preset Functions: Press the desired preset button (P01 for Ice Crush, P02 for Smoothie, P03 for Juice). The blender will automatically run through a pre-programmed cycle.
- Pulse Mode: For short bursts of power, press and hold the PULSE button. Release to stop. This is ideal for chopping or quick mixing.
- Blending: Allow the blender to process ingredients until desired consistency is achieved. Use the plunger through the lid opening to push down ingredients if necessary, but only when the blender is running.
- Finish: Once blending is complete, turn the Speed Dial to 'OFF' or press the POWER switch to 'OFF'. Unplug the blender from the power outlet.

Figure 4: The 3 preset functions simplify common blending tasks.
Cleaning and Maintenance
Proper cleaning ensures the longevity and hygiene of your blender.
- Unplug: Always unplug the blender before cleaning.
- Self-Cleaning Method:
- Fill the blending jar halfway with warm water and add a few drops of dish soap.
- Secure the lid and place the jar on the blender base.
- Run the blender on a medium speed (e.g., speed 4) for 30-60 seconds, or use the 'PULSE' function a few times.
- Empty the jar, rinse thoroughly with clean water, and dry.
- Dishwasher Safe: The blending jar, lid, and plunger are dishwasher safe. Place them on the top rack of your dishwasher.
- Hand Washing: For thorough cleaning, disassemble the jar components (if applicable) and wash with warm, soapy water. Use a brush to clean around the blades carefully.
- Blender Base: Wipe the blender base with a damp cloth. Do not immerse the base in water or any other liquid.
- Storage: Store the blender in a clean, dry place with the lid loosely placed on the jar to allow air circulation.

Figure 5: Cleaning options: self-cleaning with water or dishwasher safe components.
Troubleshooting
| Problem | Possible Cause | Solution |
|---|---|---|
| Blender does not turn on. | Not plugged in; Power switch is OFF; Jar not properly seated. | Ensure the power cord is securely plugged into a working outlet. Flip the POWER switch to 'ON'. Make sure the blending jar is correctly placed and locked onto the base. |
| Ingredients are not blending smoothly. | Too little liquid; Too many ingredients; Ingredients are too large; Air pocket around blades. | Add more liquid. Reduce the amount of ingredients. Cut ingredients into smaller pieces. Use the plunger to push ingredients towards the blades. Increase speed or use Pulse function. |
| Blender stops during operation. | Overheating; Overload protection activated. | Turn off and unplug the blender. Remove some ingredients. Let the motor cool down for at least 15-20 minutes before restarting. |
| Leakage from the bottom of the jar. | Blade assembly not tightened; Seal ring missing or damaged. | Ensure the blade assembly is securely tightened to the jar. Check if the seal ring is properly in place and undamaged. Replace if necessary. |
Specifications
| Brand | Aeitto |
| Model | B0FK4HRZFP |
| Motor Power | 1800 Watts (Peak) |
| Capacity | 68 oz (2 Liters) |
| Number of Speeds | 7 + Pulse + 3 Presets |
| Product Dimensions | 8.27"D x 7.24"W x 16.73"H |
| Item Weight | 8.62 pounds |
| Container Material | Plastic |
| Special Feature | Portable design |
Warranty and Support
This Aeitto Professional Countertop Blender comes with a Limited Warranty. Please refer to the warranty card included in your product packaging for specific terms and conditions.
For technical support, warranty claims, or general inquiries, please contact Aeitto Customer Service:
- Website: Visit the official Aeitto website (link not provided in product data, please refer to product packaging).
- Email: Refer to your product documentation for customer support email.
- Phone: Refer to your product documentation for customer support phone number.
Please have your model number (B0FK4HRZFP) and purchase date available when contacting support.