mangoal Model A
mangoal 4K Front & 2K Rear 2 Channel HDR Dash Cam User Manual
Model A: Custom Fit for Ford F150 2018-2025, F250/F350 Super Duty 2020-2025
1. Product Overview
The mangoal 4K Front & 2K Rear 2 Channel HDR Dash Cam (Model A) is designed to provide comprehensive vehicle surveillance with high-resolution recording capabilities. Featuring dual STARVIS 2 image sensors (IMX678 for the front and IMX675 for the rear), it captures clear 4K (front) and 2K (rear) video, day and night. This dash cam is custom-fitted for specific Ford F-Series models, ensuring a seamless and integrated appearance.
Key features include 5GHz Wi-Fi for app control, advanced GPS functionality for route tracking, and HDR 2.0 technology for optimal night vision performance. The system supports essential safety features such as G-Sensor for incident detection and parking monitoring.
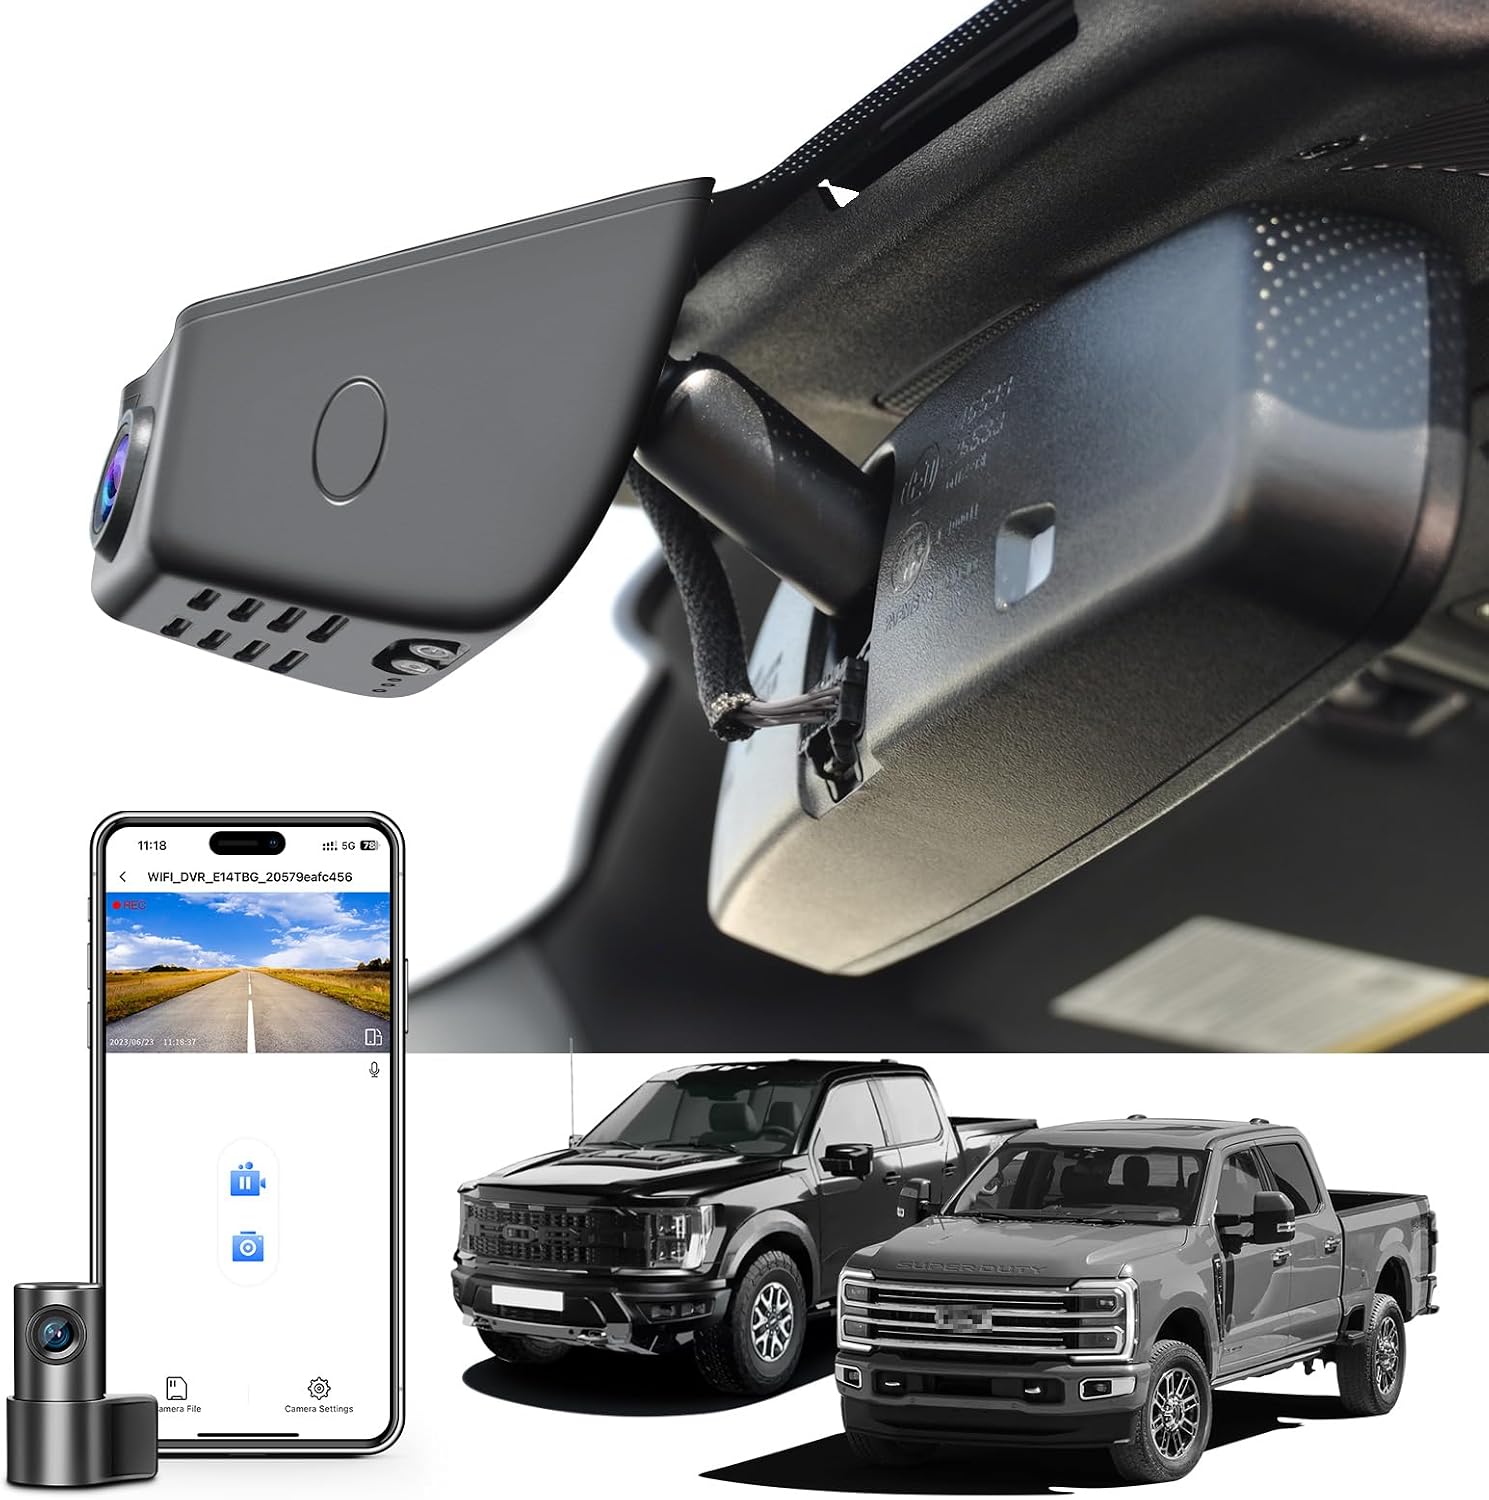
Image: The mangoal 4K Front & 2K Rear Dash Cam discreetly installed behind the rearview mirror, showcasing its integrated design.
2. Package Contents
Verify that all items are present in your package:
- Mangoal OEM Look 4K Dashcam x1
- 128GB Card x1
- Rear Cam x1
- Rear Cam Cable x1
- User Manual x1
- Auto-Dimming Plug Adapter Cable x1
- Crowbar x1
- Strap x2
- T20 Star Screwdriver x1
- T25 Star Screwdriver x1

Image: A visual representation of all included components in the product package.
3. Compatibility Check
This dash cam (Model A) is specifically designed for the following Ford F-Series vehicles:
- Ford F-150: 2018-2025
- Ford F-150 Lightning: 2022-2025
- Ford F-250/F-350 Super Duty: 2020-2025
Your vehicle must have an Auto-Dimming Rearview Mirror Plug Power Adapter. If not, power can only be supplied via OBD or Fuse box (additional purchases may be required).

Image: Compatibility chart for Ford F-series models, detailing features and fixed modes for Model A, B, and C.

Image: Visual guide indicating the specific features required for Model A compatibility, including the rearview mirror plug and sensor cover.
4. Installation Guide
4.1. Front Camera Installation
The front dash cam is designed for an OEM-style fit, integrating seamlessly behind your rearview mirror to avoid obstructing your view and hide wiring.
- Remove the original screw: Carefully remove the existing screw from the rearview mirror bracket.
- Mount the bracket with screw: Attach the provided dash cam bracket using the screw.
- Mount the dash cam: Securely place the dash cam onto the newly installed bracket.
- Use a crowbar to pry open the sensor cover: Gently use the crowbar tool to open the sensor cover near the rearview mirror.
- Connect the rearview mirror with Y-cable: Connect the Y-cable to the rearview mirror's power source and the dash cam.
- Put the sensor cover back on: Carefully reattach the sensor cover, ensuring all wires are neatly tucked away.

Image: Step-by-step visual instructions for installing the front dash cam, ensuring a clean and integrated look.
Video: Detailed installation guide for the front dash cam in a Ford F-Series vehicle, demonstrating each step from screw removal to final cover replacement.
4.2. Rear Camera Installation
The rear camera cable needs to be routed discreetly to maintain a clean interior. Use the provided trim tool to tuck the cable along the vehicle's headliner and pillar trims.
- Connect rear cam plug: Plug the rear camera cable into the dash cam host.
- Hide wiring harness in ceiling: Carefully tuck the wiring harness into the gap between the headliner and the windshield.
- Route cable along A-pillar: Use a car wire trim tool to guide the cable down the A-pillar, ensuring it is hidden.
- Route cable along door frame: Continue routing the cable along the door frame, tucking it under the rubber seals.
- Route cable to rear window: Extend the cable to the rear window, hiding it along the roof lining.
- Mount rear camera: Once the cable is routed, mount the rear camera on the rear glass indoors, ensuring a clear view.
Video: Step-by-step video demonstrating the installation of the rear dash cam, including cable routing and final mounting.
5. App Setup & Operation
The mangoal dash cam connects to your smartphone via 5GHz Wi-Fi for easy control and access to recordings using the "SkyCamm" app.
- Download and Install App: Download the "SkyCamm" app from your device's app store.
- Connect to Dash Cam Wi-Fi: Go to your phone's Wi-Fi settings, find the dash cam's Wi-Fi network (e.g., "WIFI_DVR_E970TBG_05aa"), and connect.
- Open App and Add Camera: Open the "SkyCamm" app, follow the instructions, and click "Add Camera" to connect.
- Live Preview and Adjustment: Enter the camera preview interface. Adjust the angle of the rear cam and mount it on the rear glass indoors. Switch between front and rear camera views to ensure both are functioning correctly.
- Access Camera Files: Click "Camera File" to view recorded videos and pictures.
- Adjust Settings: Click "Camera Settings" to operate various settings such as sound recording, video resolution, loop recording options, exposure compensation, time stamp, WDR, collision sensing, and parking mode.
- Format SD Card: For first-time use or to clear all data, click "Format SD Card" in the settings. Confirm the operation.
Video: Demonstrates the process of connecting the dash cam to the "SkyCamm" app, testing camera functionality, and accessing settings.

Image: The "SkyCamm" app interface, highlighting features like easy Wi-Fi setup, live video preview, and video playback/download.
6. Key Features and Functions
6.1. High-Resolution Recording & Sensors
The dash cam features dual STARVIS 2 image sensors (IMX678 front, IMX675 rear) for superior image quality. It records in 4K (2160P) for the front camera and 2K (1440P) for the rear camera, ensuring clear and detailed footage.

Image: Visual explanation of 4K front and 2K rear recording capabilities, highlighting the dual STARVIS 2 sensors and HDR.

Image: Details on the dual flagship Sony STARVIS 2 sensors (IMX678 and IMX675) for enhanced dynamic range and light sensitivity.
6.2. Night Vision with HDR 2.0
Equipped with HDR 2.0 technology, the dash cam captures finer details and balances highlights and shadows effectively, providing optimal night recording performance and clear license plate identification.
6.3. GPS Functionality
The integrated GPS module tracks and replays your driving route, speed, and location history. This data can be reviewed via computer, offering additional peace of mind.

Image: Overview of GPS function, 24-hour parking monitor, and G-sensor capabilities.

Image: Explanation of the higher-precision GPS function, utilizing multiple global navigation systems for enhanced accuracy.
6.4. Parking Monitor
When properly configured with an optional OBD or Fuse Box Power Adapter, the dash cam can automatically switch to parking mode, providing 24-hour surveillance for your vehicle.

Image: The Parking Monitor feature, which requires an additional power adapter for 24-hour protection.
6.5. G-Sensor
The G-Sensor automatically detects sudden movements or collisions, locking the current video footage to prevent it from being overwritten, ensuring critical evidence is preserved.

Image: The G-Sensor function, which automatically locks video footage during impacts to prevent overwriting.
6.6. Seamless Loop Recording
When the SD card reaches full capacity, the system automatically overwrites the oldest footage, ensuring continuous recording. Supports up to 512GB microSD cards (sold separately).

Image: Explanation of seamless loop recording and supported microSD card capacities.
7. Specifications
| Feature | Detail |
|---|---|
| Product Dimensions | 8.6 x 3.8 x 2.14 inches |
| Item Weight | 1.95 pounds |
| Batteries | 1 Lithium Metal battery required (included) |
| Connectivity Technologies | Wi-Fi (5GHz) |
| Special Features | STARVIS 2 Sensor IMX678 IMX675 Night Vision HDR 2.0, Faster 5GHz Wi-Fi & APP Control, Advanced GPS Function, Built-In Microphone, Built-In Speaker, Built-In Supercapacitor, OEM Style, Motion Sensing, Mute Function, Loop Recording, G-Sensor, Automatic Incident Detection, Parking Monitor |
| Color | Black |
| Video Capture Resolution | Front 4K and Rear 2K |
| Mounting Type | Windshield Mount |
| Field Of View | 150 Degrees |
| Control Method | App |
8. Troubleshooting
If you encounter issues with your dash cam, refer to the following common solutions:
- Camera Not Powering On: Ensure all power connections are secure. Check the vehicle's power outlet or the rearview mirror's power adapter for proper function.
- Recording Issues: Format the SD card regularly (at least once a month) through the app settings. Ensure the SD card is a high-quality, high-speed card (U3 or higher) and not full.
- Wi-Fi Connection Problems: Ensure the dash cam is powered on. Restart both the dash cam and your smartphone. Verify that you are connecting to the correct Wi-Fi network listed in your dash cam's instructions.
- Poor Video Quality: Clean the camera lenses with a soft cloth. Ensure the protective film is removed from the lenses. Check app settings for video resolution and HDR options.
- G-Sensor Too Sensitive/Insensitive: Adjust the G-Sensor sensitivity in the app settings (Low, Middle, High) according to your driving conditions.
- Parking Monitor Not Working: Confirm that an optional OBD or Fuse Box Power Adapter is correctly installed and connected, as this feature requires a constant power supply.
9. Maintenance
Proper maintenance ensures the longevity and optimal performance of your dash cam:
- Clean Lenses: Regularly clean the front and rear camera lenses with a soft, lint-free cloth to prevent smudges and dust from affecting video clarity.
- Format SD Card: Format the microSD card monthly to prevent data corruption and ensure smooth recording. This can be done via the "SkyCamm" app.
- Check Connections: Periodically inspect all cable connections to ensure they are secure and free from damage.
- Software Updates: Check the "SkyCamm" app or the manufacturer's website for any available firmware updates to improve performance and add new features.
- Avoid Extreme Temperatures: Do not expose the dash cam to extreme heat or cold for extended periods, as this can affect battery life and electronic components.
10. Warranty and Support
For warranty information, technical support, or service inquiries, please refer to the official mangoal website or contact their customer service directly. Keep your purchase receipt as proof of purchase for warranty claims.
Manufacturer: mangoal
Date First Available: July 28, 2025