1. Product Overview
The Ubiquiti UniFi G6 Dome is a high-performance 4K PoE camera designed for advanced surveillance applications. It features an 8MP image sensor, AI-powered smart detection capabilities, and robust weatherproofing for both indoor and outdoor environments. This manual provides essential information for the proper installation, operation, and maintenance of your UniFi G6 Dome camera.
Key Features:
- 4K Clarity: 8MP sensor (3840 x 2160) with 30 FPS for sharp detail and smooth video.
- AI Smart Detection: Built-in AI engine detects people, vehicles, animals, faces, and license plates.
- Long-Range Night Vision: Integrated IR LEDs provide up to 30m (98 ft) of visibility in low-light conditions.
- Rugged Build: IK10 vandal resistance and IP66 weatherproof aluminum housing ensure durability.
- Flexible Mounting: Supports ceiling and wall mounts (included), with optional gang box and flush mounts.
- Powered by PoE: Single-cable convenience using 37–57V DC power over Ethernet.
- Advanced Image Controls: Features HDR, 2D/3D noise reduction, motion-based NR, masking, and text overlay.
- Seamless Integration: Works with UniFi Protect for centralized surveillance management.
2. Safety Information
Please read, follow, and keep these instructions. Heed all warnings. Only use attachments/accessories specified by the manufacturer.
- Do not use this product near water or expose it to dripping or splashing.
- Do not attempt to disassemble, repair, or modify the device.
- Ensure proper ventilation and avoid placing the device near heat sources.
- Use only power supplies and cables approved by Ubiquiti Networks.
- Protect the power cord from being walked on or pinched, particularly at plugs, convenience receptacles, and the point where they exit from the device.
- For outdoor installations, ensure all cable connections are properly sealed and protected from moisture.
3. Package Contents
Verify that all items listed below are present in your package:
- Ubiquiti UniFi G6 Dome Camera (UVC-G6-Dome)
- Hardware Kit (screws, wall anchors)
- Type-C cable (for initial setup or maintenance, if applicable)
4. Hardware Overview
Familiarize yourself with the physical components of the UniFi G6 Dome camera.
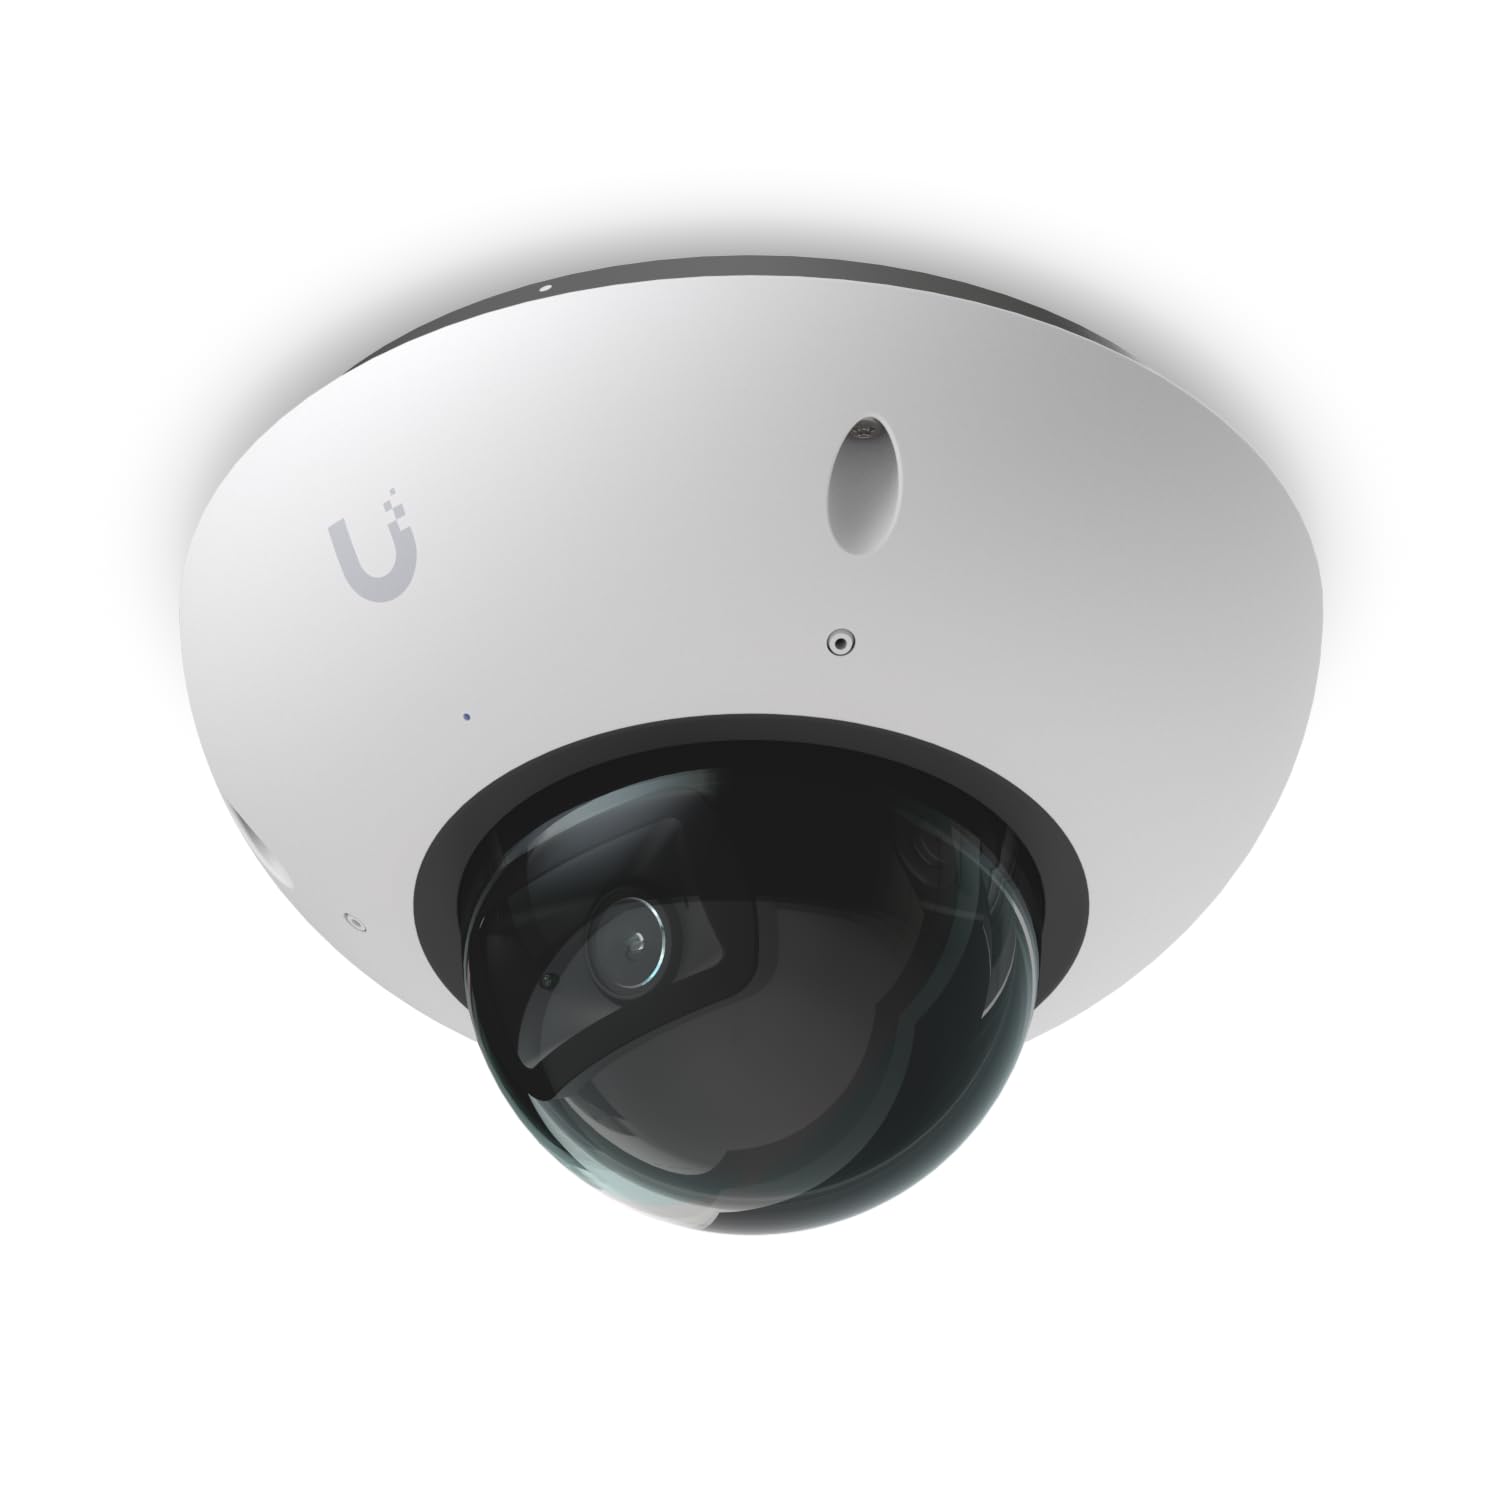
Figure 1: Front view of the UniFi G6 Dome camera.
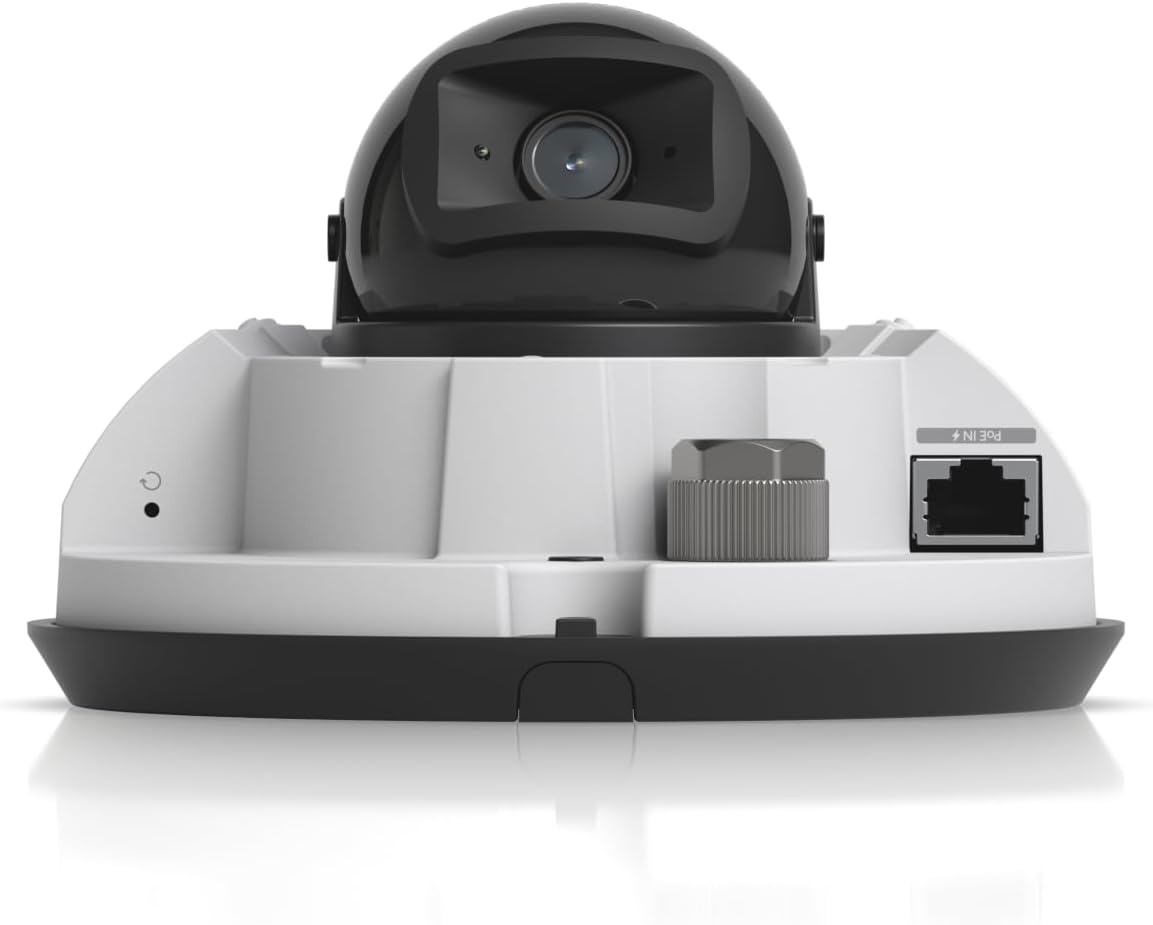
Figure 2: Rear view showing the PoE In port and factory-reset button.
- PoE In Port: Connects to a Power over Ethernet (PoE) switch or injector for both power and data.
- Factory-Reset Button: Used to restore the camera to its default factory settings.
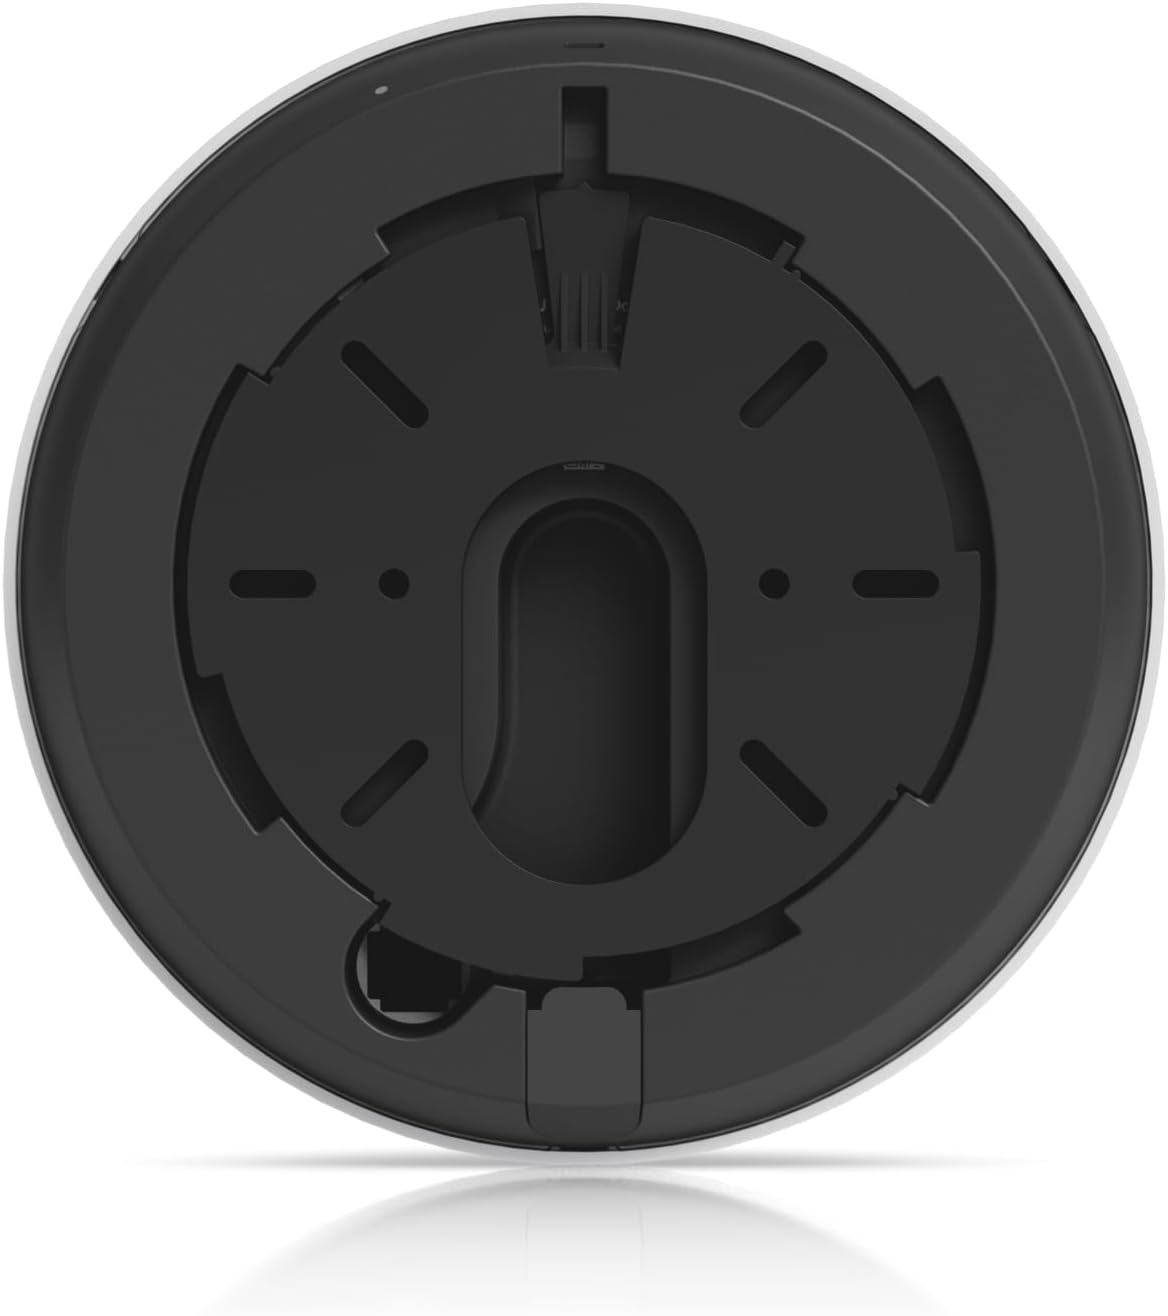
Figure 3: Bottom view illustrating the mounting plate and channels for secure installation.
5. Installation and Setup
Follow these steps to install and set up your UniFi G6 Dome camera.
5.1 Mounting the Camera
- Choose a Location: Select a suitable outdoor or indoor location for optimal surveillance coverage. Consider the camera's field of view (H: 109.9°, V: 56.7°, D: 134.1°) and IR night vision range (30m).
- Prepare the Surface: For ceiling or wall mounting, use the included hardware kit. Drill pilot holes if necessary and secure the mounting plate.
- Attach the Camera: Align the camera with the mounting plate and twist to lock it into place. Ensure it is securely fastened.
- Optional Mounts: For specific installations, consider optional accessories such as a Gang Box Mounting Plate, Camera Dual Mount, Flush Mount, or Weather Shield.
5.2 Power and Network Connection
- Connect PoE Cable: Connect an Ethernet cable from a PoE switch (IEEE 802.3af/at compliant) or a PoE injector to the camera's PoE In port. The camera supports 37–57V DC.
- Verify Connection: Once connected, the camera's status LED should illuminate, indicating power and network activity.
5.3 UniFi Protect Integration
- Install UniFi Protect: Ensure you have a UniFi Protect controller (e.g., UniFi Dream Machine Pro, Cloud Key Gen2 Plus) set up and running on your network.
- Adopt the Camera: Open the UniFi Protect application. The camera should appear as a discoverable device. Follow the on-screen prompts to adopt and configure the camera.
- Initial Configuration: During adoption, you can set the camera's name, time zone, and initial video settings.
6. Operating Instructions
Once installed and adopted, the UniFi G6 Dome camera can be managed and monitored through the UniFi Protect application.
6.1 Live View and Recording
- Access the UniFi Protect dashboard to view live feeds from your camera.
- Configure recording schedules, motion detection zones, and continuous recording settings within the UniFi Protect interface.
6.2 Video Image Settings
Adjust various image parameters to optimize video quality for your specific environment:
- Color: Adjust hue and saturation.
- Brightness & Contrast: Fine-tune image luminance and distinction.
- Sharpness: Enhance image detail.
- White Balance: Correct color rendition based on lighting conditions.
- Exposure Control: Manage the amount of light captured by the sensor.
- 2DNR/3DNR: Reduce digital noise in video.
- NR by Motion: Apply noise reduction selectively based on motion.
- Masking: Create privacy zones to exclude areas from surveillance.
- Text Overlay: Add custom text or timestamps to the video feed.
- HDR: Enable High Dynamic Range for improved detail in both bright and dark areas.
6.3 Smart Detections
Leverage the camera's AI capabilities for advanced event detection:
- Configure alerts for detected people, vehicles, and animals.
- Utilize face recognition and license plate recognition features where supported by your UniFi Protect setup.
7. Maintenance
Regular maintenance ensures optimal performance and longevity of your camera.
- Cleaning: Periodically clean the camera lens and dome cover with a soft, damp cloth to remove dust, dirt, or water spots that may affect image quality. Do not use harsh chemicals.
- Firmware Updates: Keep your camera's firmware updated through the UniFi Protect application. Firmware updates often include performance improvements, new features, and security patches.
- Cable Inspection: Annually inspect the Ethernet cable and connections for any signs of wear, damage, or corrosion, especially in outdoor installations.
- Environmental Check: Ensure the camera's operating environment remains within the specified temperature range (-20 to 50° C) and humidity (0 to 90% noncondensing).
8. Troubleshooting
If you encounter issues with your UniFi G6 Dome camera, refer to the following common troubleshooting steps.
8.1 No Power/No LED Indicator
- Check PoE Source: Ensure the PoE switch or injector is powered on and functioning correctly.
- Inspect Ethernet Cable: Verify the Ethernet cable is securely connected at both ends and is not damaged. Try a different cable if necessary.
- PoE Compatibility: Confirm your PoE source provides 802.3af/at compliant power (37-57V DC).
8.2 Camera Not Appearing in UniFi Protect
- Network Connectivity: Ensure the camera has a valid network connection and can communicate with the UniFi Protect controller. Check network cables and switch ports.
- Firewall Settings: Verify that no firewall rules are blocking communication between the camera and the UniFi Protect controller.
- Factory Reset: If the camera was previously adopted or configured, perform a factory reset by pressing and holding the reset button for approximately 10 seconds until the LED flashes.
8.3 Poor Image Quality
- Clean Lens: Clean the camera lens and dome cover as described in the Maintenance section.
- Adjust Settings: Access UniFi Protect and adjust video image settings such as sharpness, brightness, contrast, and HDR.
- Lighting Conditions: Ensure adequate lighting for optimal performance, especially during the day. Verify IR night vision is functioning correctly in low light.
9. Specifications
Detailed technical specifications for the UniFi G6 Dome camera.
| Feature | Specification |
|---|---|
| Model Name | UVC-G6-Dome |
| Resolution | 4K (8MP, 3840 x 2160, 16:9) |
| Max. Frame Rate | 30 FPS |
| Sensor | 1/1.8" 8MP |
| Lens | Fixed focal length |
| Field of View (FoV) | H: 109.9°, V: 56.7°, D: 134.1° |
| Night Mode | Built-in IR LED illumination and IR cut filter |
| IR Night Vision Range | 30 m (98 ft) |
| Networking Interface | 10/100 MbE RJ45 port |
| Audio | Microphone |
| Max. Power Consumption | 9.25W |
| Supported Voltage Range | 37—57V DC |
| Power Method | PoE |
| Processor | Quad-core Arm Cortex-A53 based chip |
| Enclosure Material | Aluminum alloy |
| Mount Material | Polycarbonate |
| Weatherproofing | IP66 |
| Tamper Resistance | IK10 |
| Mounting | Ceiling, Wall mount (Included) |
| Ambient Operating Temperature | -20 to 50° C (-4 to 122° F) |
| Ambient Operating Humidity | 0 to 90% noncondensing |
| Dimensions | Ø144.7 x 96.3 mm (Ø5.7 x 3.8") |
| Weight | 820 g (1.8 lb) |
| ASIN | B0FJZV8282 |
| UPC | 810084698808 |
10. Warranty Information
Ubiquiti Networks products are covered by a limited warranty. For detailed warranty terms and conditions, please refer to the official Ubiquiti Networks website or the warranty card included with your product. Keep your proof of purchase for warranty claims.
11. Support
For technical support, product documentation, and community forums, please visit the official Ubiquiti Networks support website:
You can also find additional resources and frequently asked questions on the UniFi Protect product page.