1. Introduction
The AUTOWN Fuel Pressure Tester Kit FPTK01-USA is a diagnostic tool designed for accurately measuring fuel pressure in various gasoline engine vehicles. This kit features a dual-scale gauge (0-140 PSI and 0-10 BAR) for precise readings and includes a comprehensive set of adapters for broad compatibility. This manual provides essential information for the safe and effective use of your fuel pressure tester kit.
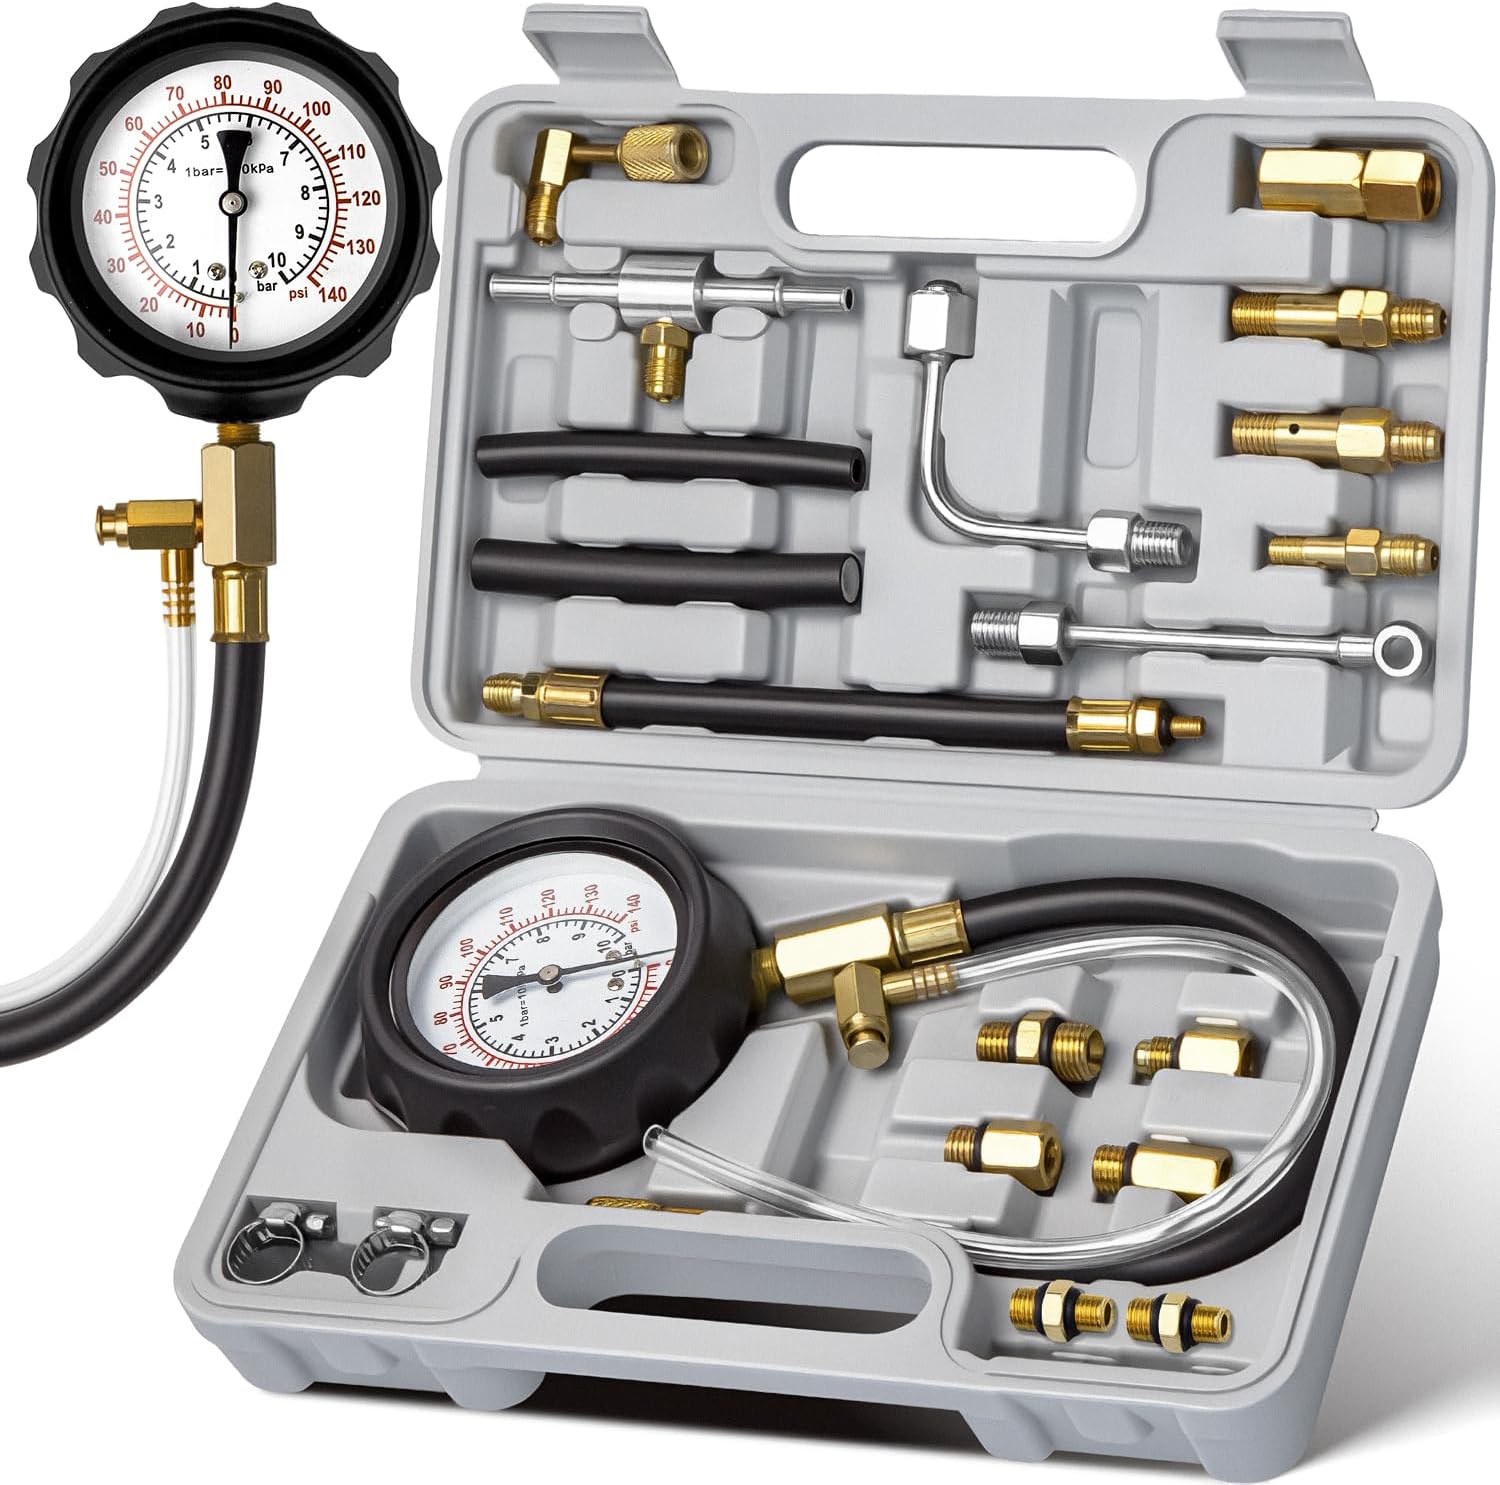
Image 1.1: Overview of the AUTOWN Fuel Pressure Tester Kit, showing the gauge, hoses, and various adapters neatly organized in its carrying case.
2. Safety Information
WARNING: Working with fuel systems involves flammable liquids and high pressures. Failure to follow safety precautions can result in serious injury, fire, or property damage.
- Always wear appropriate personal protective equipment, including safety glasses and gloves.
- Ensure the work area is well-ventilated and free from ignition sources (sparks, open flames, hot surfaces).
- Disconnect the vehicle's battery before working on the fuel system to prevent accidental engine cranking.
- Relieve fuel system pressure before disconnecting any fuel lines. Refer to your vehicle's service manual for specific procedures.
- Have a fire extinguisher rated for fuel fires readily available.
- Dispose of any spilled fuel properly and immediately.
- Do not smoke or allow open flames near the vehicle during testing.
- Always refer to your vehicle's specific service manual for detailed fuel system diagnostic procedures and safety guidelines.
3. Package Contents
Your AUTOWN Fuel Pressure Tester Kit FPTK01-USA includes the following components:
- Liquid-filled, shock-resistant fuel pressure gauge (0-140 PSI / 0-10 BAR) with rubber protective guard.
- Pressure relief valve with drain hose for safe fuel recovery.
- Two hoses with quick-release valves (1/4" and 3/8" sizes).
- Eight adapters (M6 to M14) for various fuel ports.
- Assorted fittings and connectors for comprehensive compatibility.
- Sturdy carrying case for organization and protection.

Image 3.1: All components of the fuel pressure tester kit, including the gauge, hoses, and a variety of adapters, laid out for identification.
4. Specifications
| Feature | Specification |
|---|---|
| Pressure Range | 0-140 PSI (0-10 BAR) |
| Gauge Type | Liquid-filled, shock-resistant, dual-scale |
| Material | OEM-grade brass, aluminum, steel components |
| Adapters Included | 8 adapters (M6 to M14 thread sizes) |
| Hoses Included | Two hoses with quick-release valve (1/4" and 3/8") |
| Item Weight | 2.81 pounds |
| Package Dimensions | 10.87 x 6.85 x 2.44 inches |
| Model Number | FPTK01-USA |
5. Compatibility
This fuel pressure tester kit is designed for use with most gasoline engines in cars, trucks, and ATVs. It includes a variety of adapters to fit common fuel ports.
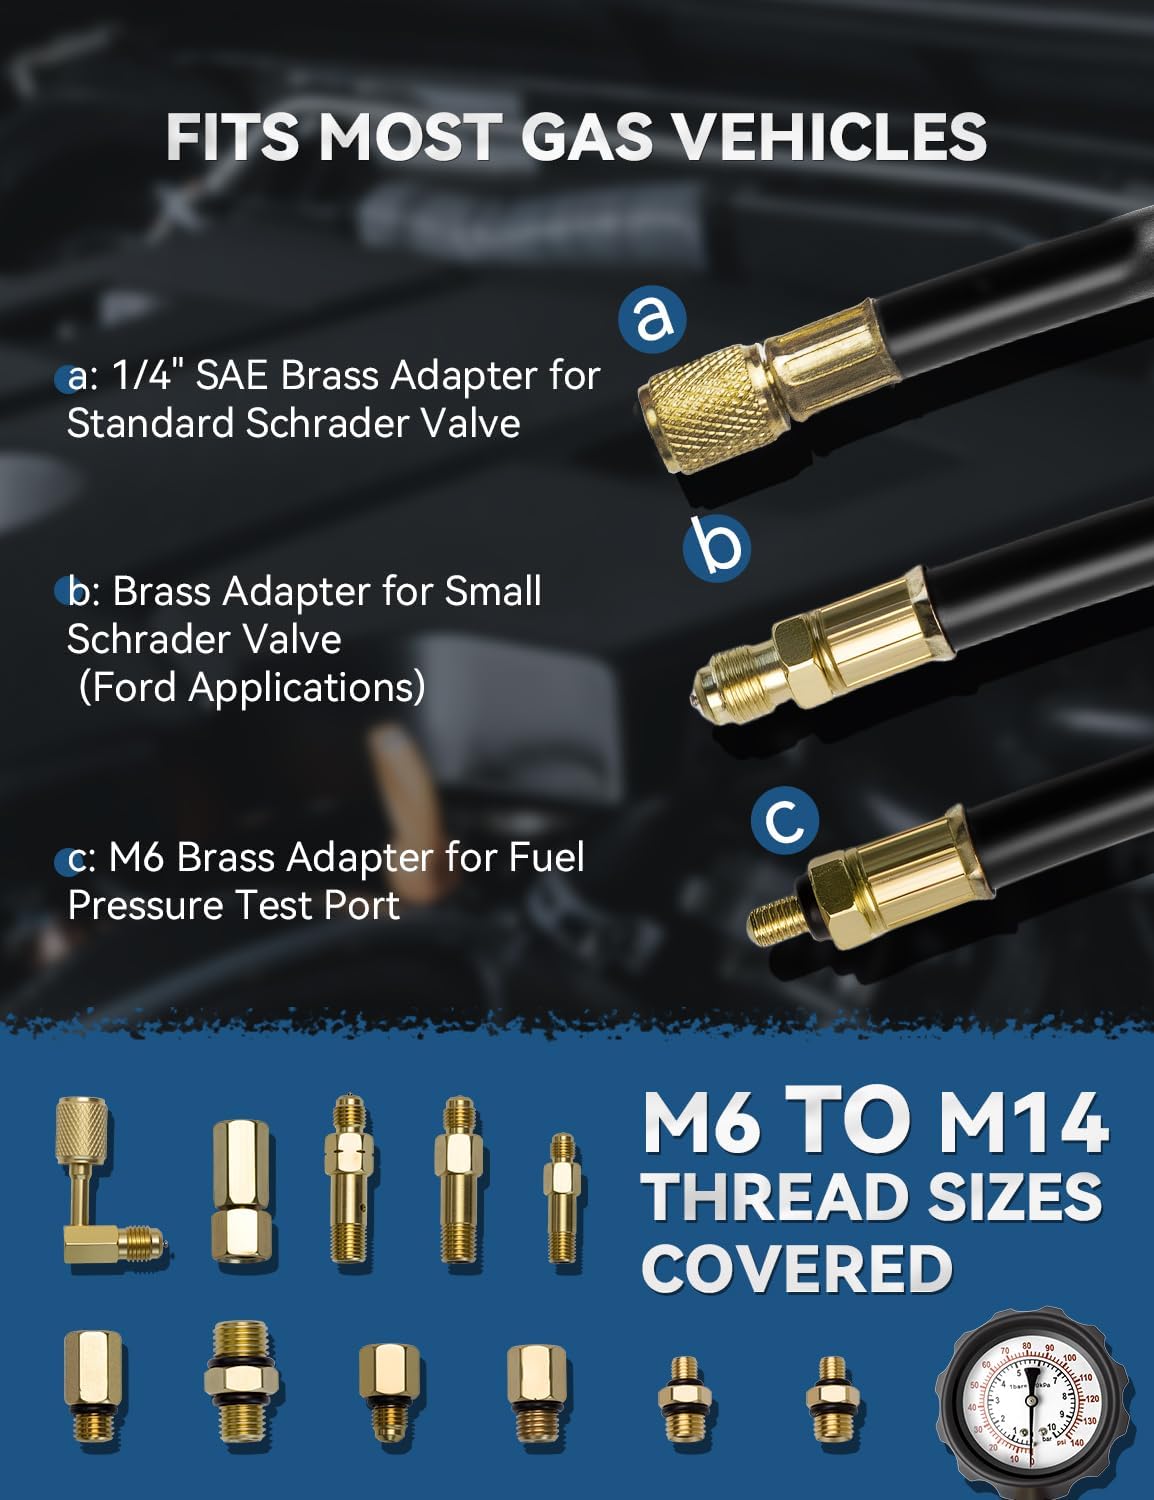
Image 5.1: Examples of included adapters, covering M6 to M14 thread sizes, and specific adapters for standard and small Schrader valves.
Important Compatibility Notice:
This kit is NOT compatible with vehicles equipped with:
- Bosch, CIS Jetronic, or GM TBI (Throttle Body Injection) systems.
- Diesel engines or direct injection systems (GDI, DFI, etc.).
Additionally, it may not fit certain Ford, KIA, Acura, Jeep, BMW, Nissan, and Toyota models that utilize small or non-standard Schrader valves.

Image 5.2: Detailed list of specific vehicle models and systems known to be incompatible with this fuel pressure tester kit.
Recommendation: Before use, always verify your vehicle's fuel port type, pressure range, and compatibility by consulting your owner's manual or a qualified mechanic.
6. Setup
- Prepare the Vehicle: Ensure the engine is cool. Safely relieve any existing fuel system pressure according to your vehicle's service manual. Disconnect the negative terminal of the vehicle's battery.
- Identify Test Point: Locate the fuel pressure test port on your vehicle's fuel rail or fuel line. This is often a Schrader valve or a dedicated test port.
- Select Adapter: Choose the appropriate adapter from the kit that matches your vehicle's fuel test port. Ensure a snug fit.
- Connect Hoses: Attach one of the quick-release hoses to the selected adapter. Then, connect the other end of the hose to the fuel pressure gauge. Ensure all connections are secure to prevent fuel leaks.
- Connect to Fuel System: Carefully connect the adapter and hose assembly to the vehicle's fuel test port.
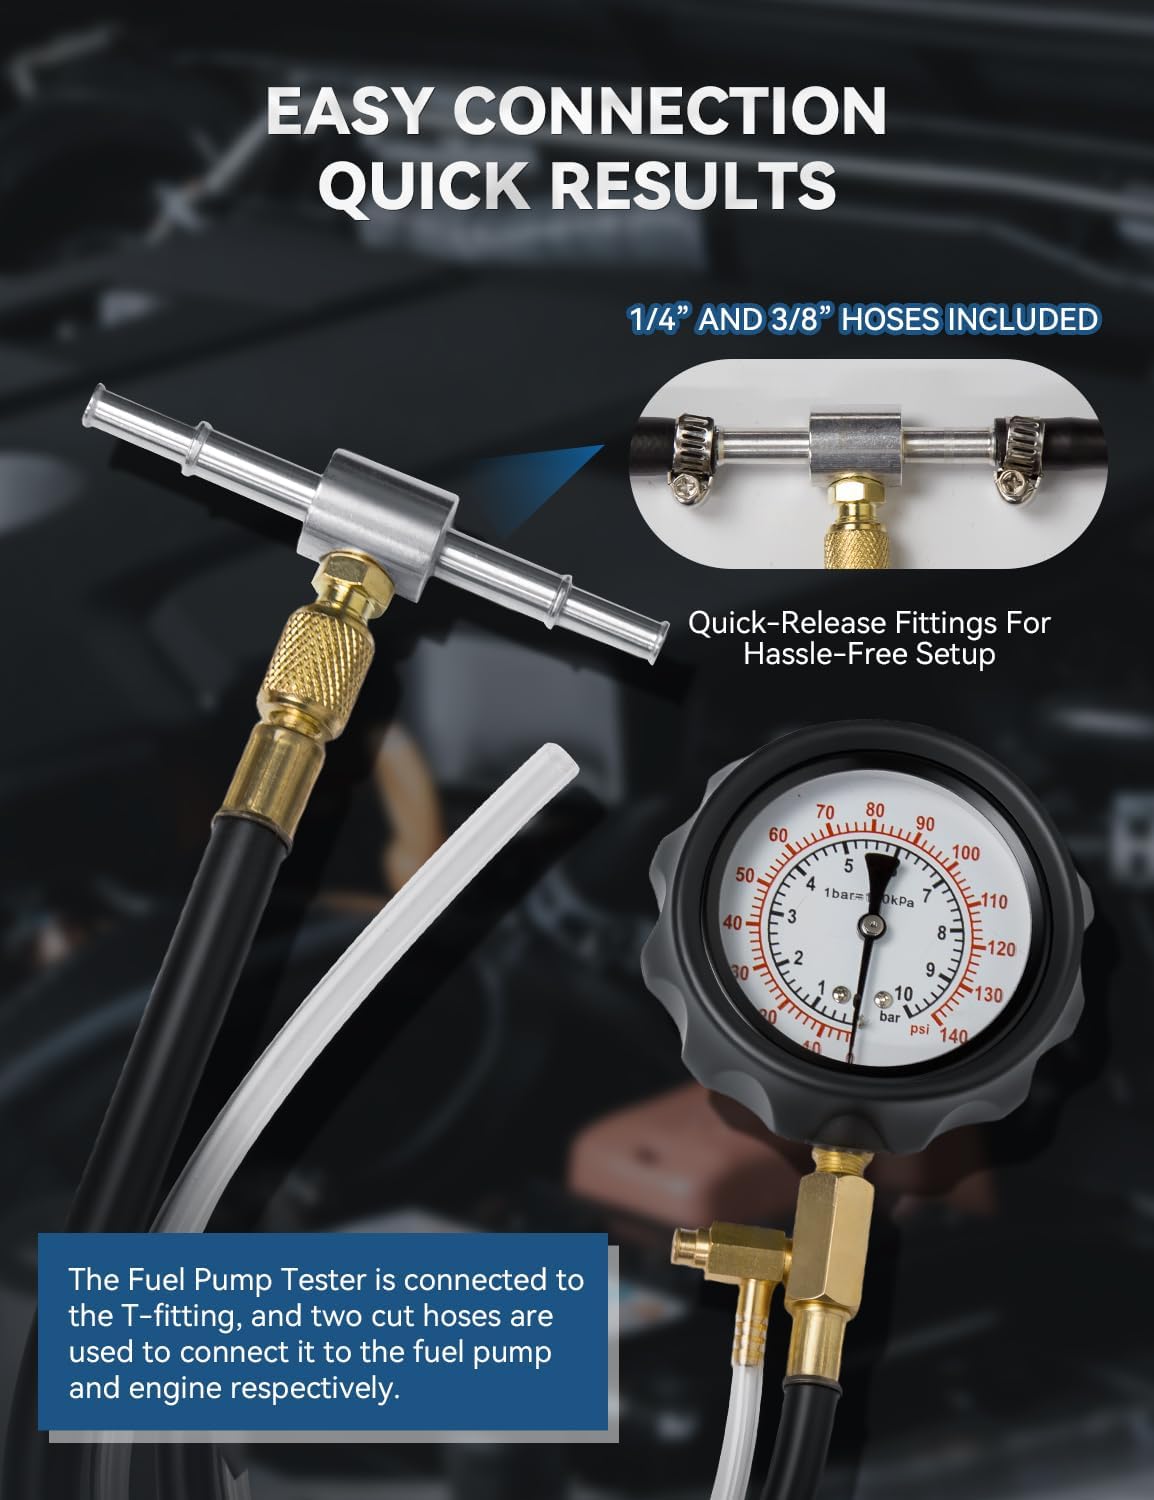
Image 6.1: Illustration of connecting the fuel pressure tester using a T-fitting and quick-release hoses for a secure setup.
7. Operating Instructions
- Reconnect Battery: Reconnect the negative terminal of the vehicle's battery.
- Prime Fuel System: Turn the ignition key to the "ON" position (without starting the engine) for a few seconds, then turn it "OFF". Repeat this 2-3 times to prime the fuel pump and build pressure in the system.
- Read Pressure: Observe the reading on the fuel pressure gauge. Compare this reading to your vehicle's manufacturer specifications (found in the service manual).
- Start Engine (if required): For some diagnostic procedures, you may need to start the engine and observe pressure at idle or under load. Always follow your vehicle's specific diagnostic steps.
- Release Pressure: After testing, safely relieve the fuel system pressure using the integrated pressure relief valve on the gauge. Connect the drain hose to the valve and direct the fuel into an approved container.
- Disconnect: Once pressure is fully relieved, disconnect the gauge and adapters from the vehicle.

Image 7.1: Demonstrating the pressure release valve on the fuel pressure gauge for safe depressurization after testing.
8. Maintenance
- Cleaning: After each use, wipe down the gauge, hoses, and adapters with a clean cloth to remove any fuel residue. Do not use harsh chemicals that could damage the materials.
- Storage: Store all components neatly in the provided carrying case in a cool, dry place, away from direct sunlight and extreme temperatures.
- Inspection: Periodically inspect hoses for cracks, leaks, or damage. Check adapters for wear or stripped threads. Replace any damaged components immediately.
9. Troubleshooting
Common Issues and Solutions:
- No Pressure Reading:
- Ensure all connections are secure and leak-free.
- Verify the fuel pump is operating (listen for a hum when turning the key to "ON").
- Check for a blown fuel pump fuse or relay.
- Confirm the vehicle's fuel system has been properly primed.
- Low Pressure Reading:
- Possible weak fuel pump.
- Clogged fuel filter.
- Leaking fuel injector or fuel line.
- Faulty fuel pressure regulator.
- High Pressure Reading:
- Faulty fuel pressure regulator (stuck closed).
- Restricted fuel return line.
- Fuel Leaks:
- Immediately shut off the engine and relieve pressure.
- Check all connections for tightness.
- Ensure the correct adapter is used and it is fully seated.
- Inspect hoses and O-rings for damage.
If you continue to experience issues or suspect a component malfunction, consult a qualified automotive technician.
10. Warranty and Support
For warranty information or technical support regarding your AUTOWN Fuel Pressure Tester Kit FPTK01-USA, please refer to the documentation included with your purchase or contact AUTOWN customer service directly.
You can typically find contact information on the manufacturer's official website or through the retailer where the product was purchased.