1. Product Overview
The Ainael Galaxy Projector Disc Set (Nebula B) enhances your compatible Ainael Galaxy Projector by providing a variety of ultra-high definition celestial projections. This set includes 6 unique slides, transforming your space into an immersive planetarium experience.
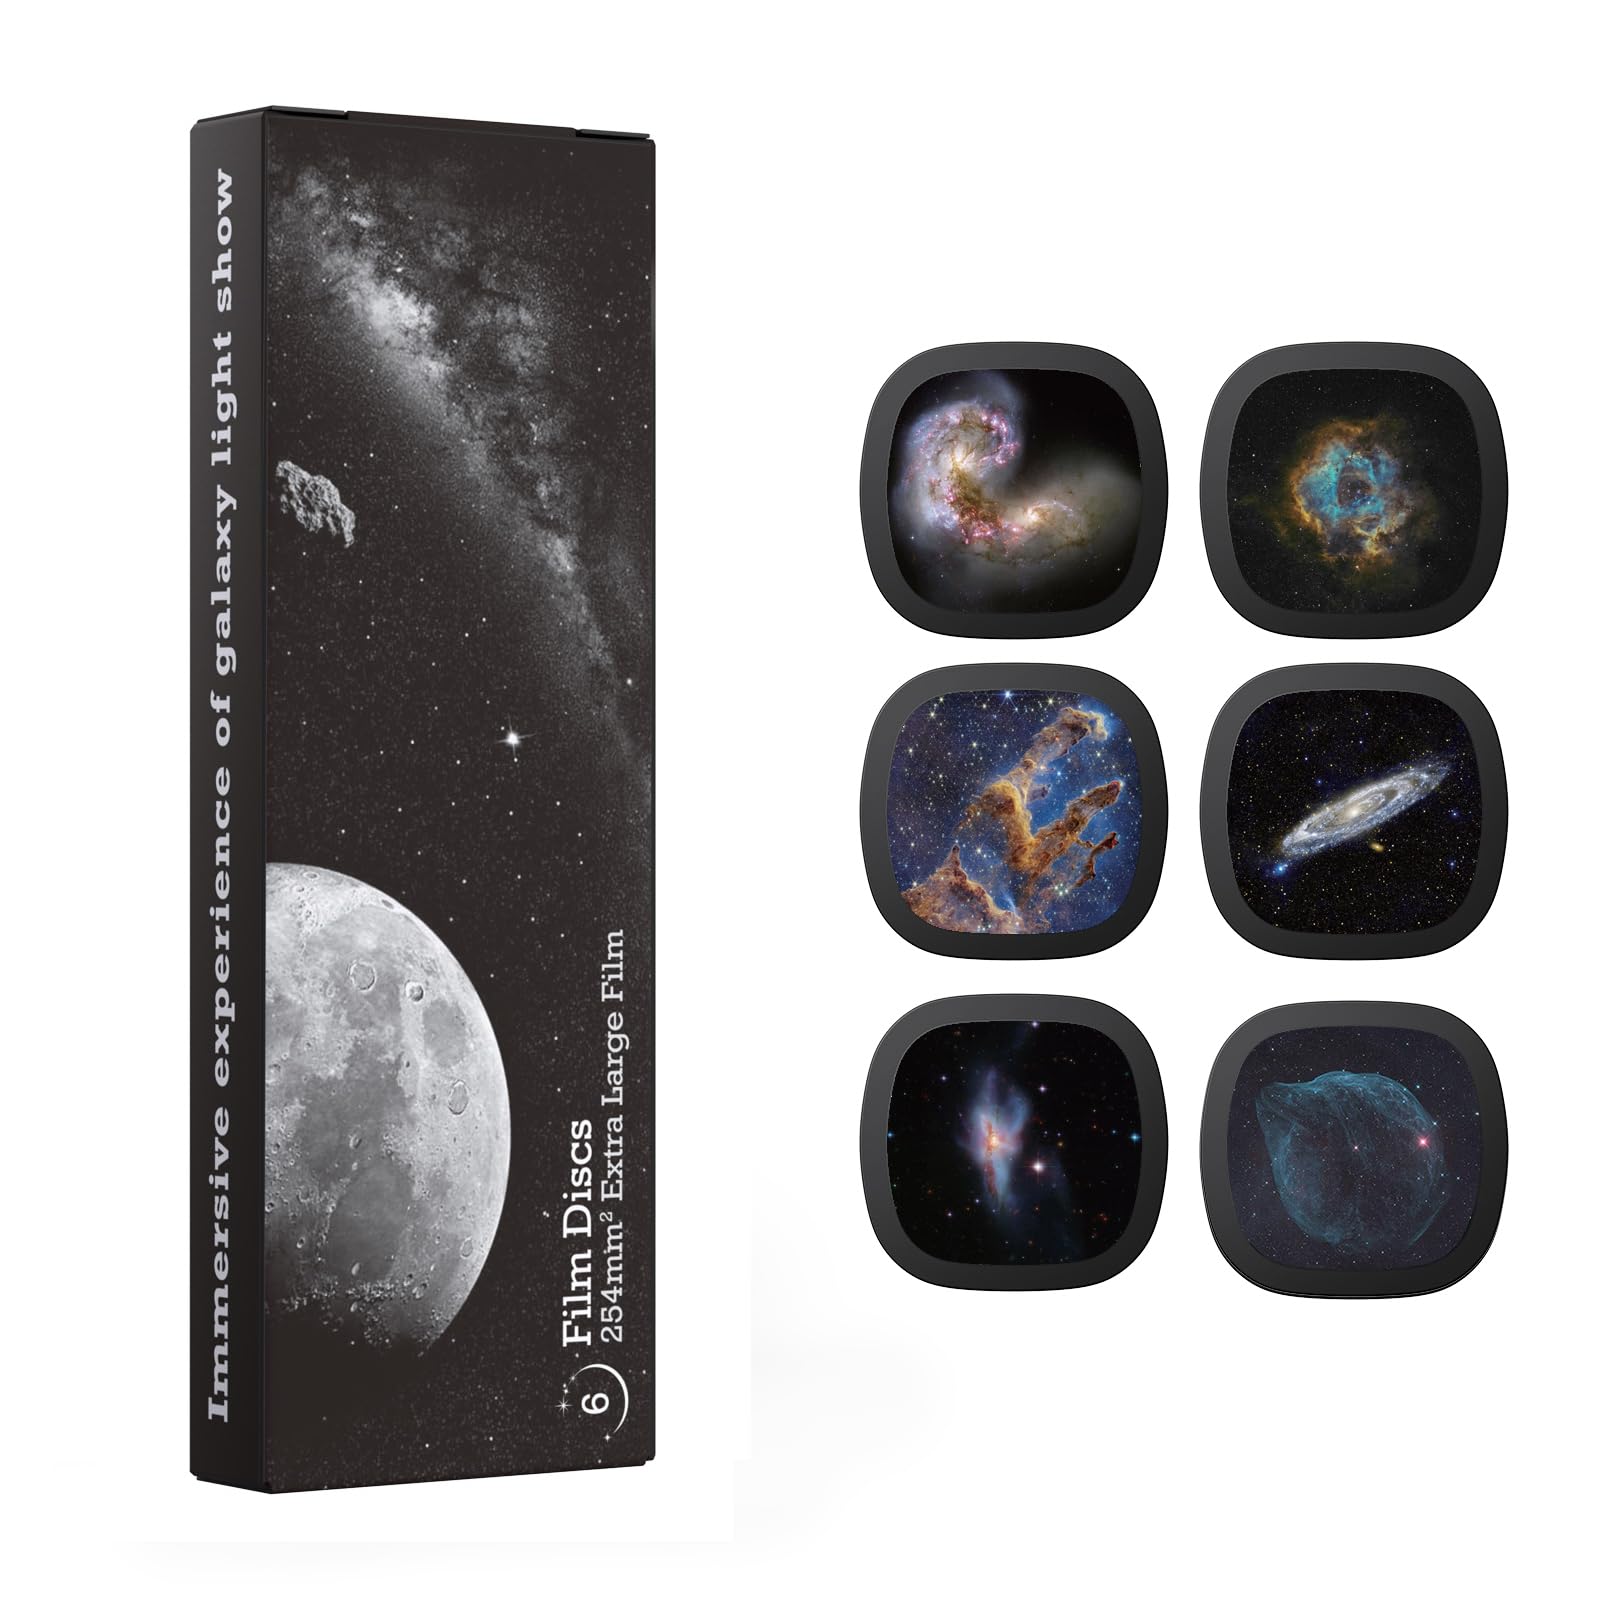
Image 1.1: Ainael Galaxy Projector Disc Set - Nebula B.
Package Contents:
- 6 x Ultra HD Projector Slides (Nebula B Set: Sparring Antennae Galaxies, Rosette Nebula, Pillars of Creation, Andromeda Galaxy, NGC 6240, Sharpless 2-308)
- Instruction Manual
- Cleaning Cloth (for projector lens and discs)
- USB Power Cable
Note: The projector unit is sold separately and is not included with this disc set.
2. Compatibility
This Ainael Projector Disc Set is designed for seamless use with the Ainael Galaxy Projector. It is also fully compatible with the same series galaxy projectors, specifically models SKE-TKQ01 and BL-DQY02 Pro, due to their standard slide slot design.
Important: This disc set is NOT compatible with the BL-DQY02 Basic Version or other projector designs. If you are unsure about your projector model, please contact Ainael customer support for confirmation.
3. Setup and Disc Installation
3.1 Unboxing and Initial Inspection
Carefully remove all components from the packaging. Inspect the projector discs for any damage or dust. Use the provided cleaning cloth to gently wipe the discs if necessary.
3.2 Inserting a Projector Disc
- Locate the disc slot on your compatible Ainael Galaxy Projector.
- Gently slide the desired projector disc into the slot until it clicks into place. Ensure the disc is inserted correctly, with the image facing the projector lens.
- To remove a disc, gently push it further into the slot until it releases, then pull it out.
Video 3.1: Demonstration of inserting and changing projector discs in the Ainael Galaxy Projector.

Image 3.2: Visual guide for inserting and removing projector discs from the projector unit.
3.3 Power Connection
Connect the provided USB power cable to the projector unit and a suitable USB power adapter (not included). Plug the adapter into a wall outlet.
3.4 Placement and Focus Adjustment
Place the projector on a stable surface. The projector can be adjusted to various angles to project onto walls or ceilings. Rotate the focus adjustment knob on the projector to achieve a clear and sharp image. The optimal projection distance is 2.5 meters, providing a projection area of 15.5 square meters.
Video 3.3: Comprehensive overview of the Ainael Meteor and Galaxy Projector, including unboxing, disc installation, and focus adjustment.

Image 3.4: Illustration of adjusting the projector angle for optimal display on a wall.
4. Operating Instructions
4.1 Basic Controls
The projector features one-touch controls for various functions:
- Main Switch (Meteor Switch): Powers the unit on/off and controls the meteor effect.
- Timer Button (1H/2H): Sets an automatic shut-off timer for 1 or 2 hours.
- Rotation Speed (S-/S+): Adjusts the speed of the projected image rotation (Slow/Fast).
- Ambient Light: Cycles through 6 different ambient light modes.

Image 4.1: Overview of the projector's control buttons and their functions.
4.2 Projection Modes
Once a disc is inserted and the projector is powered on, the selected celestial image will be projected. You can adjust the rotation speed and activate the meteor effect as desired. The ambient light ring can also be customized to complement your projection.
Video 4.2: Demonstration of the Ainael Meteor and Galaxy Projector's features, including focus, projection range, and RGB ambient lighting.
5. Maintenance
5.1 Cleaning the Projector Lens and Discs
To maintain optimal projection clarity, regularly clean the projector lens and the surface of the discs. Use the provided soft cleaning cloth. Avoid using abrasive materials or harsh chemicals, as these can scratch the lens or damage the disc images.
5.2 Storage
When not in use, store the projector discs in their original packaging or a protective case to prevent dust accumulation and scratches. Store the projector unit in a cool, dry place away from direct sunlight.
6. Troubleshooting
6.1 Blurry Projection
- Ensure the focus adjustment knob on the projector is rotated until the image is sharp.
- Verify the projection distance is within the recommended range (0.5-3.5m, optimal 2.5m).
- Clean the projector lens and the disc surface with the provided cleaning cloth.
6.2 No Image Projected
- Check if the projector is powered on and properly connected to a power source.
- Ensure a disc is correctly inserted into the disc slot.
- Confirm the disc is compatible with your projector model (SKE-TKQ01 or BL-DQY02 Pro).
6.3 Disc Not Rotating
- Check the rotation speed setting on the projector controls.
- Ensure the disc is not obstructed and is seated correctly in the slot.
7. Specifications
| Feature | Detail |
|---|---|
| Item Weight | 0.37 ounces |
| ASIN | B0FJXRY8JV |
| Item Model Number | Nebula B |
| Product Dimensions | 2.01"W x 0.31"H |
| Material | Acrylonitrile Butadiene Styrene (ABS), Plastic |
| Display Dimensions | 3-15m (Projection Area) |
| Brand | Ainael |
8. Warranty and Support
8.1 Warranty Information
Ainael provides a one-year replacement guarantee for this product in case of any issues. This warranty covers manufacturing defects and ensures peace of mind regarding product quality.
8.2 Customer Support
If you have any questions, require assistance, or need to claim your warranty, please contact our friendly support team. You can find contact information on the Ainael official website or through your purchase platform.