1. Introduction
This manual provides essential information for the safe and efficient operation, installation, and maintenance of your EVANS BP1ME025-ADC Automatic Peripheral Pump. Please read this manual thoroughly before installation or use to ensure proper function and to prevent damage or injury.
The EVANS BP1ME025-ADC is a peripheral water pump featuring a permanent magnet motor, designed for residential water transfer applications requiring medium pressure. Its compact and lightweight design makes it suitable for various household water supply needs.
2. Safety Information
WARNING: Failure to follow these safety instructions could result in electric shock, fire, serious injury, or death.
- Always disconnect the pump from the power supply before performing any maintenance or installation.
- Ensure the electrical installation complies with local regulations and standards.
- Do not operate the pump with damaged cables or plugs.
- Keep children and unauthorized personnel away from the pump during operation.
- Do not pump flammable or corrosive liquids.
- Ensure the pump is installed in a well-ventilated area, protected from direct sunlight and extreme temperatures.
- The pump is designed for water only. Do not use it for other liquids.
- Protect the pump from freezing temperatures.
Important Notice:
The pump is suitable for hot water up to 100 °C. However, ensure all connecting pipes and fittings are also rated for this temperature.
3. Product Overview
The EVANS BP1ME025-ADC is an automatic peripheral pump designed for efficiency and ease of use. Key features include:
- Power: 0.25 HP (Horsepower)
- Motor Type: Permanent Magnet Motor
- Max RPM: 12,000 RPM
- Max Head: 35 meters
- Max Flow Rate: 43 Liters per minute
- Water Temperature: Suitable for water up to 100 °C
- Voltage: 100 Volts (AC). Note: Some visual materials may indicate dual voltage compatibility (100V~/240V~), but the primary specification is 100V.
- Material: Polypropylene (PP)
- Application: Residential, Cistern, Water Tank
- Installation: Compact and lightweight design for easy installation. Rated IP65 for outdoor installation.
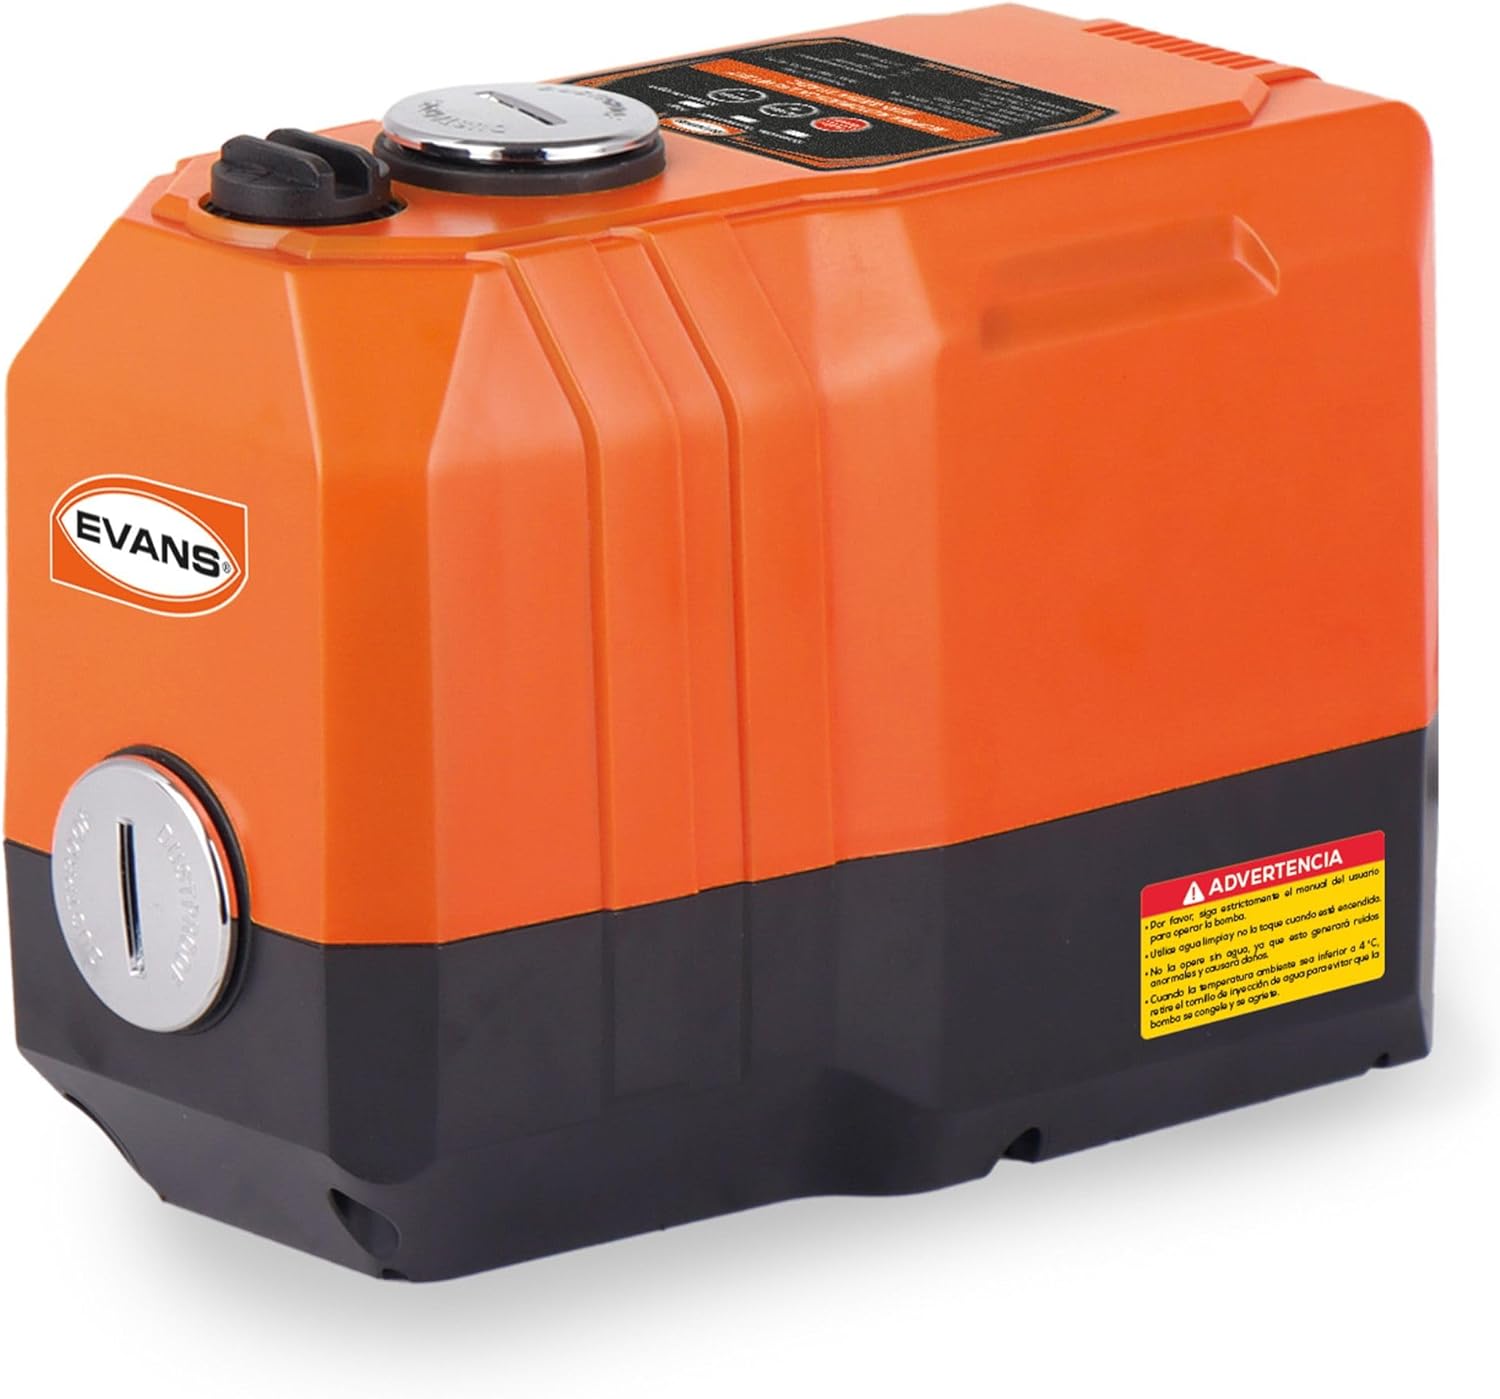
Figure 3.1: EVANS BP1ME025-ADC Automatic Peripheral Pump. This image shows the main view of the pump, highlighting its compact orange and black casing.

Figure 3.2: System Overview and Key Features. This image illustrates the pump's features including 1/4 HP power, automatic system, 50% energy saving, permanent magnet technology, dual voltage capability (100V~ / 240V~), and IP65 rating for outdoor installation.
4. Specifications
| Attribute | Value |
|---|---|
| Manufacturer | EVANS |
| Model Number | BP1ME025-ADC |
| Power | 0.25 HP |
| Motor Type | Permanent Magnet |
| Max RPM | 12,000 RPM |
| Max Head (Elevation) | 35 meters |
| Max Flow Rate | 43 Liters per minute |
| Voltage | 100 Volts (AC) |
| Material | Polypropylene (PP) |
| Color | Orange |
| Power Source | Electric Cable |
| Recommended Use | Cistern, Residential, Water Tank |
| Max Water Temperature | 100 °C |
| Weight | 2.5 Kilograms |
| Dimensions (L x W x H) | 18 cm x 28.5 cm x 22 cm |

Figure 4.1: Pump Dimensions. This image provides a visual representation of the pump's length (18 cm), width (28.5 cm), and height (22 cm), along with its weight (2.5 kg).

Figure 4.2: Performance Curve. This graph illustrates the total dynamic head (MCA meters / FT FEET) versus capacity (LPM / GPM) and efficiency percentage at 12,000 RPM, indicating the recommended operating range for the BP1ME025-ADC pump.
5. Setup and Installation
Proper installation is crucial for the pump's performance and longevity. Consult a qualified technician if you are unsure about any steps.
5.1 General Installation Guidelines
- Mount the pump on a stable, level surface to minimize vibration.
- Ensure adequate ventilation around the pump.
- Protect the pump from direct weather exposure, although it has an IP65 rating for outdoor use, prolonged exposure to harsh conditions should be avoided if possible.
- Use appropriate pipe sizes for inlet and outlet connections to ensure optimal flow.
- Install a check valve on the suction line if the water source is below the pump to prevent backflow and maintain prime.
- Ensure all connections are sealed properly to prevent leaks.
5.2 Installation Diagram: Positive Suction (Water Tank/Tinaco)
This configuration is typically used when the water source (e.g., a water tank or tinaco) is located above or at the same level as the pump, allowing for positive suction pressure.

Figure 5.1: Positive Suction Installation. This diagram shows the pump installed at the outlet of a water tank (Tinaco) to pressurize water for up to 3 simultaneous services. The water flows from the tank, through the pump, and then to the services.
- Connect the pump's inlet to the outlet of the water tank.
- Connect the pump's outlet to the household water distribution system (services).
- This setup is commonly used to boost pressure for multiple services from a gravity-fed tank.
5.3 Installation Diagram: Negative Suction (Cistern/Municipal Network)
This configuration is used when the water source (e.g., a cistern or municipal network) is below the pump, requiring the pump to draw water upwards.
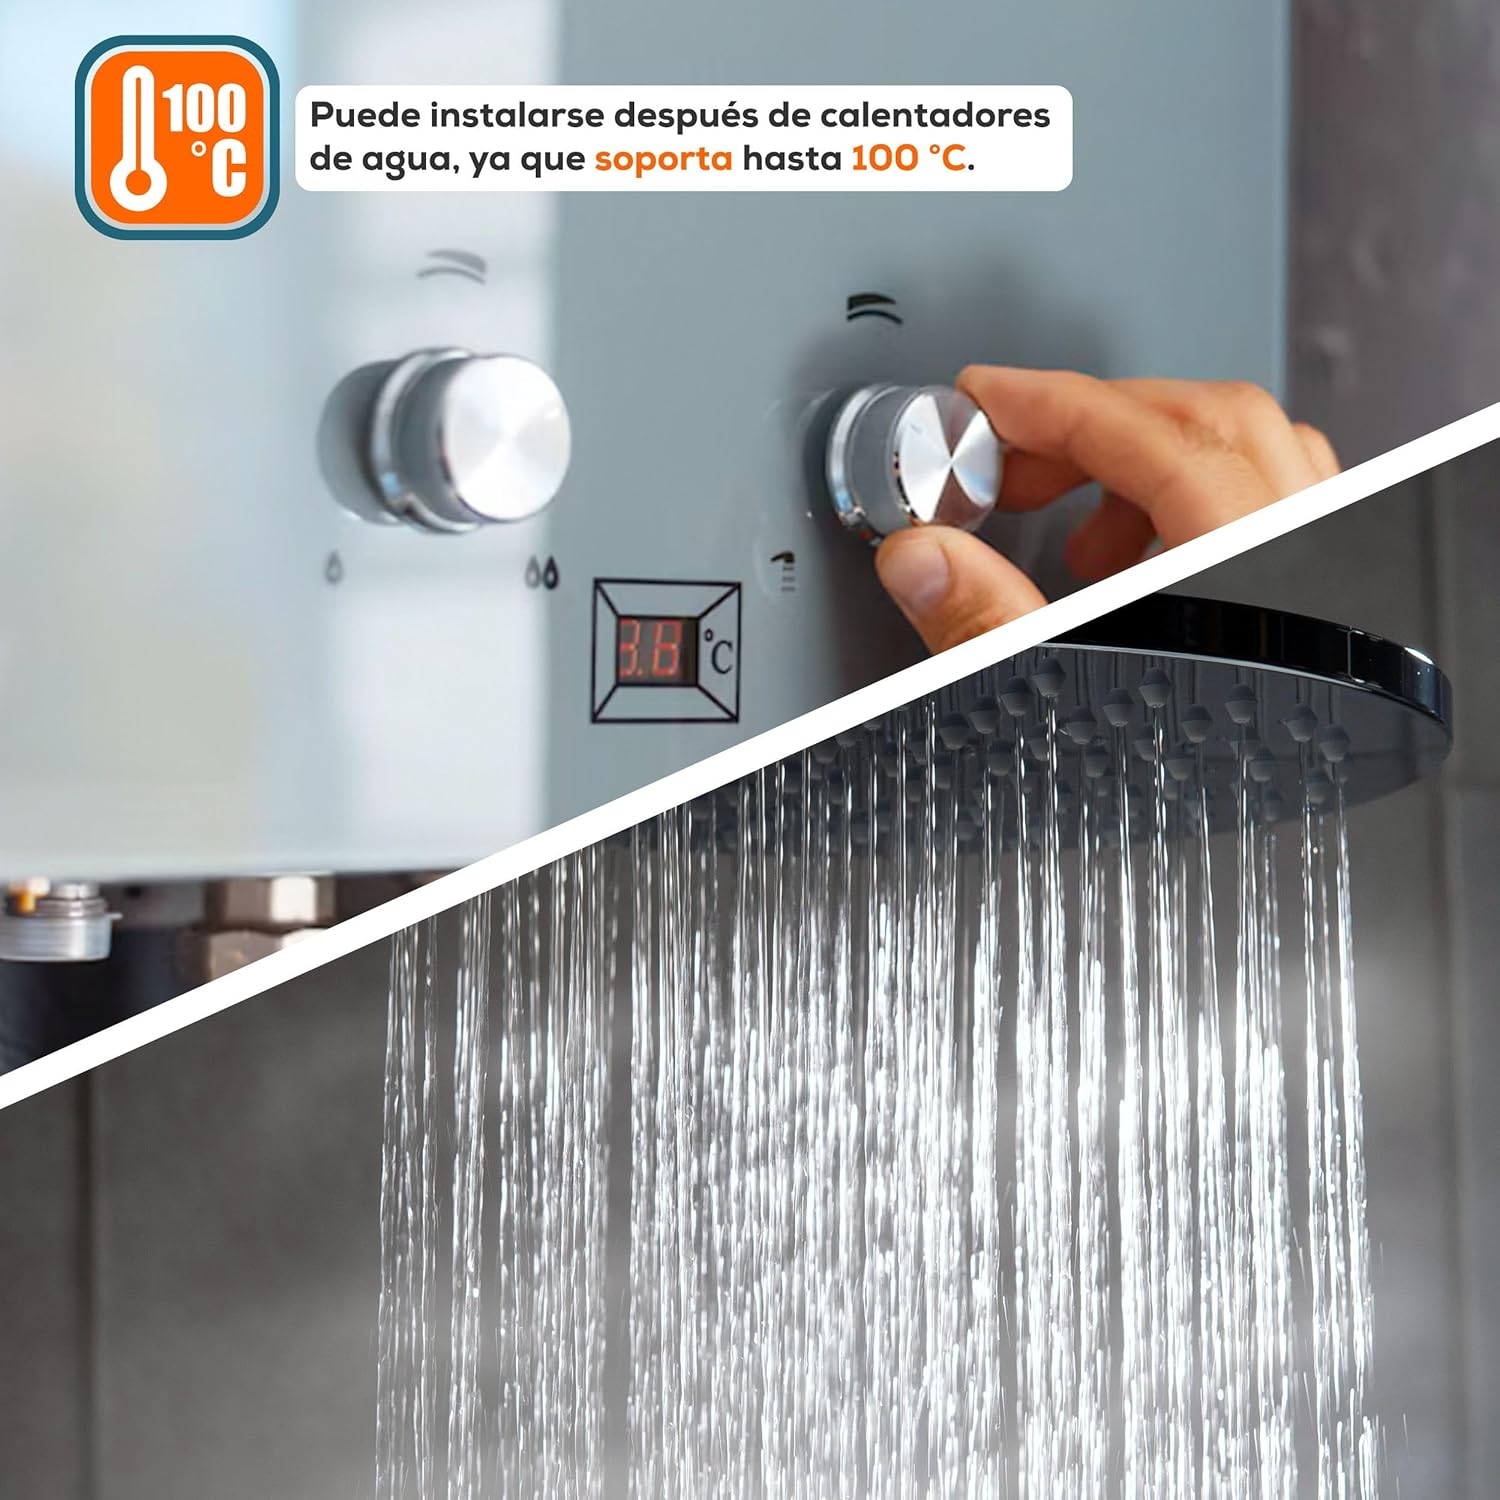
Figure 5.2: Negative Suction Installation. This diagram illustrates the pump drawing water from a cistern or municipal network. It shows the use of a foot valve (válvula de pie) in the cistern, an electronic level sensor (electrónivel), and a check valve (válvula check) on the discharge side. This setup can directly pressurize services in 1 or 2-level homes without needing a hydropneumatic tank or pressure switch.
- For cistern installations, install a foot valve at the end of the suction pipe inside the cistern to prevent debris from entering the pump and to maintain prime.
- An electronic level sensor (electrónivel) can be used to protect the pump from dry running.
- Connect the pump's inlet to the suction line from the cistern or municipal network.
- Install a check valve on the discharge side of the pump to prevent backflow into the pump.
- This setup is suitable for directly pressurizing water in 1 or 2-story homes without additional pressure tanks or switches.
6. Operating Instructions
The EVANS BP1ME025-ADC pump is designed for automatic operation. Follow these steps for initial startup and general use.
6.1 Priming the Pump
- Ensure all plumbing connections are secure and leak-free.
- Open the priming port (usually a cap on top of the pump housing).
- Fill the pump casing completely with water until it overflows from the priming port.
- Securely close the priming port cap.
- Open a faucet in your household system to allow air to escape during startup.
6.2 Initial Startup
- Once primed, connect the pump to the appropriate electrical power supply (100V).
- The pump should start automatically and begin to build pressure.
- Allow the pump to run for a few minutes, checking for any leaks or unusual noises.
- Close the open faucet once a steady flow of water is achieved and all air has been expelled from the system.
- The pump will automatically shut off once the system reaches its set pressure.
6.3 Automatic Operation
The pump is equipped with an automatic system. It will turn on when water demand is detected (e.g., opening a faucet) and turn off when the demand ceases and the system pressure is restored.

Figure 6.1: Hot Water Application. This image demonstrates the pump's capability to handle hot water up to 100°C, making it suitable for use after water heaters to provide pressurized hot water for showers and other applications.
7. Maintenance
Regular maintenance ensures the longevity and optimal performance of your EVANS pump.
- Regular Inspection: Periodically check for leaks, unusual noises, or vibrations.
- Cleanliness: Keep the pump and its surroundings clean and free from debris.
- Winterization: In areas prone to freezing temperatures, drain the pump completely and store it in a warm, dry place, or insulate it properly to prevent damage from freezing water.
- Foot Valve/Filter Cleaning: If using a foot valve with a filter (e.g., in cistern installations), inspect and clean it regularly to prevent clogging.
- Electrical Connections: Ensure all electrical connections are tight and free from corrosion.
CAUTION: Always disconnect power before performing any maintenance.
8. Troubleshooting
This section addresses common issues you might encounter with your pump. For problems not listed here, contact EVANS customer support.
| Problem | Possible Cause | Solution |
|---|---|---|
| Pump does not start | No power supply; tripped circuit breaker; faulty wiring. | Check power connection, reset breaker, inspect wiring (by a qualified electrician). |
| Pump runs but no water flows | Pump not primed; air in suction line; clogged suction line/foot valve; low water level in source. | Re-prime the pump; check for air leaks in suction line; clean foot valve/filter; ensure adequate water supply. |
| Low pressure or flow | Partial clog in suction/discharge line; worn impeller; air in system. | Check and clear any clogs; re-prime the pump; contact service for impeller inspection. |
| Pump cycles on and off frequently | Small leak in plumbing system; faulty check valve; automatic control issue. | Inspect plumbing for leaks; check/replace check valve; contact service for control unit inspection. |
| Excessive noise/vibration | Loose mounting; foreign object in pump; cavitation (air in water). | Tighten mounting bolts; disconnect power and inspect impeller for obstructions; ensure proper priming and water supply. |
9. Warranty and Support
EVANS products are manufactured to high-quality standards. For warranty information, please refer to the documentation included with your purchase or visit the official EVANS website.
For technical assistance, spare parts, or service, EVANS offers a comprehensive support network:
- After-Sales Service: Available for all EVANS products.
- Original Spare Parts: Ensure optimal performance and longevity by using only genuine EVANS parts.
- Authorized Service Centers: Over 200 authorized service centers are available throughout the Mexican Republic for professional support and repairs. Please visit the EVANS official website for a list of service centers near you.
You can visit the official EVANS store on Amazon for more information: EVANS Official Store