Introduction
This instruction manual provides detailed guidance for the assembly, operation, and maintenance of your new Tackview Ergonomic Office Chair with Footrest. Please read this manual thoroughly before assembly and use to ensure proper function and longevity of your chair. Keep this manual for future reference.
Safety Information
- Always follow the assembly instructions provided.
- Be cautious when adjusting the headrest, lumbar support, and footrest to avoid injury.
- Do not exceed the maximum weight capacity of the chair, which is approximately 150 kg (330 lbs).
- Ensure all screws and bolts are tightened securely before use and periodically check for looseness.
- Keep children and pets away during assembly.
Package Contents
Before beginning assembly, verify that all components are present and undamaged. If any parts are missing or damaged, please contact customer service.
- Backrest Assembly
- Seat Cushion Assembly with Armrests
- Chair Base (5-star)
- Gas Lift Cylinder
- Casters (5 pieces)
- Headrest
- Footrest
- Hardware Pack (screws, washers, Allen wrench)
- Instruction Manual
Setup and Assembly
Assembly is required for this chair. For a visual guide, a step-by-step video guide is typically provided with the product or available on the manufacturer's website. Follow these general steps:
- Attach Casters to Base: Insert the five casters into the holes at the end of each leg of the chair base. Push firmly until they click into place.
- Insert Gas Lift: Place the gas lift cylinder into the center hole of the assembled chair base.
- Attach Mechanism to Seat: Secure the seat mechanism to the underside of the seat cushion using the provided screws. Ensure the front of the mechanism faces the front of the seat.
- Connect Seat to Gas Lift: Carefully place the assembled seat cushion onto the gas lift cylinder.
- Attach Backrest: Align the backrest with the mounting plates on the seat mechanism and secure it with screws.
- Install Headrest: Slide the headrest into the designated slots at the top of the backrest.
- Attach Footrest: Secure the footrest assembly to the underside of the seat, typically near the front.

Figure 1: Overall dimensions of the Tackview Ergonomic Office Chair. This diagram illustrates the chair's height, width, and depth, including adjustable components like the seat and headrest, and the retractable footrest.
Operating Instructions
1. Seat Height Adjustment
To adjust the seat height, locate the lever on the right side beneath the seat. Pull the lever upwards while seated to lower the seat, or stand up and pull the lever to raise the seat. Release the lever at the desired height.
Figure 2: Seat height adjustment range. The chair allows for approximately 10cm of vertical seat adjustment to accommodate various user heights.
2. Headrest Adjustment
The 3D adjustable headrest can be moved vertically and swiveled to provide optimal neck support. Adjust the height by sliding it up or down. The headrest also swivels up to 60 degrees for personalized comfort.
- Vertical Adjustment: Pull the headrest up or push it down to adjust its height (approx. 5cm range).
- Angle Adjustment: Tilt the headrest forward or backward to find your preferred angle (approx. 35-degree range).

Figure 3: Headrest adjustment capabilities. This image demonstrates the vertical and angular adjustments available for the headrest, allowing users to customize neck support.
3. Lumbar Support Adjustment
The adjustable lumbar support helps maintain a healthy posture and supports your lower back. It can be adjusted both vertically and horizontally.
- Vertical Adjustment: Push the lumbar support up or down (approx. 5cm range) to align with the natural curve of your spine.
- Horizontal Adjustment: Rotate the knob on the side of the lumbar support to adjust its depth (approx. 3cm range) for personalized pressure.

Figure 4: Lumbar support adjustment. This image details how to adjust the lumbar support vertically (5cm) and horizontally (3cm) to fit individual body types and preferences.
4. Recline Function and Footrest
The chair features a multi-angle recline function and a retractable footrest for versatile use, from working to resting.
- Recline: Use the lever on the left side of the chair to adjust the backrest angle between 90° (working mode) and 140° (rest/nap mode). Push the lever down to lock the recline position.
- Footrest: Pull the footrest out from beneath the seat when reclining for added leg support. Push it back in when not in use.

Figure 5: Recline and footrest operation. This image demonstrates the various recline positions and the functionality of the integrated footrest for enhanced comfort.
5. Armrest Adjustment
The armrests are designed to move with the recline of the chair, providing continuous support. While they are not independently adjustable for height or rotation, their linkage ensures ergonomic support in various reclined positions.
Maintenance
- Cleaning:
- For mesh and fabric parts, use a soft brush or vacuum cleaner to remove dust. For stains, gently wipe with a damp cloth and mild soap, then dry thoroughly.
- For plastic and metal parts, wipe with a soft, damp cloth. Avoid abrasive cleaners.
- Inspection: Periodically check all screws and bolts to ensure they are tight. Re-tighten if necessary to prevent wobbling or instability.
- Gas Lift: The gas lift is a sealed unit and requires no maintenance. If it fails, contact customer service for replacement.
- Casters: Keep casters clean from hair and debris to ensure smooth movement.
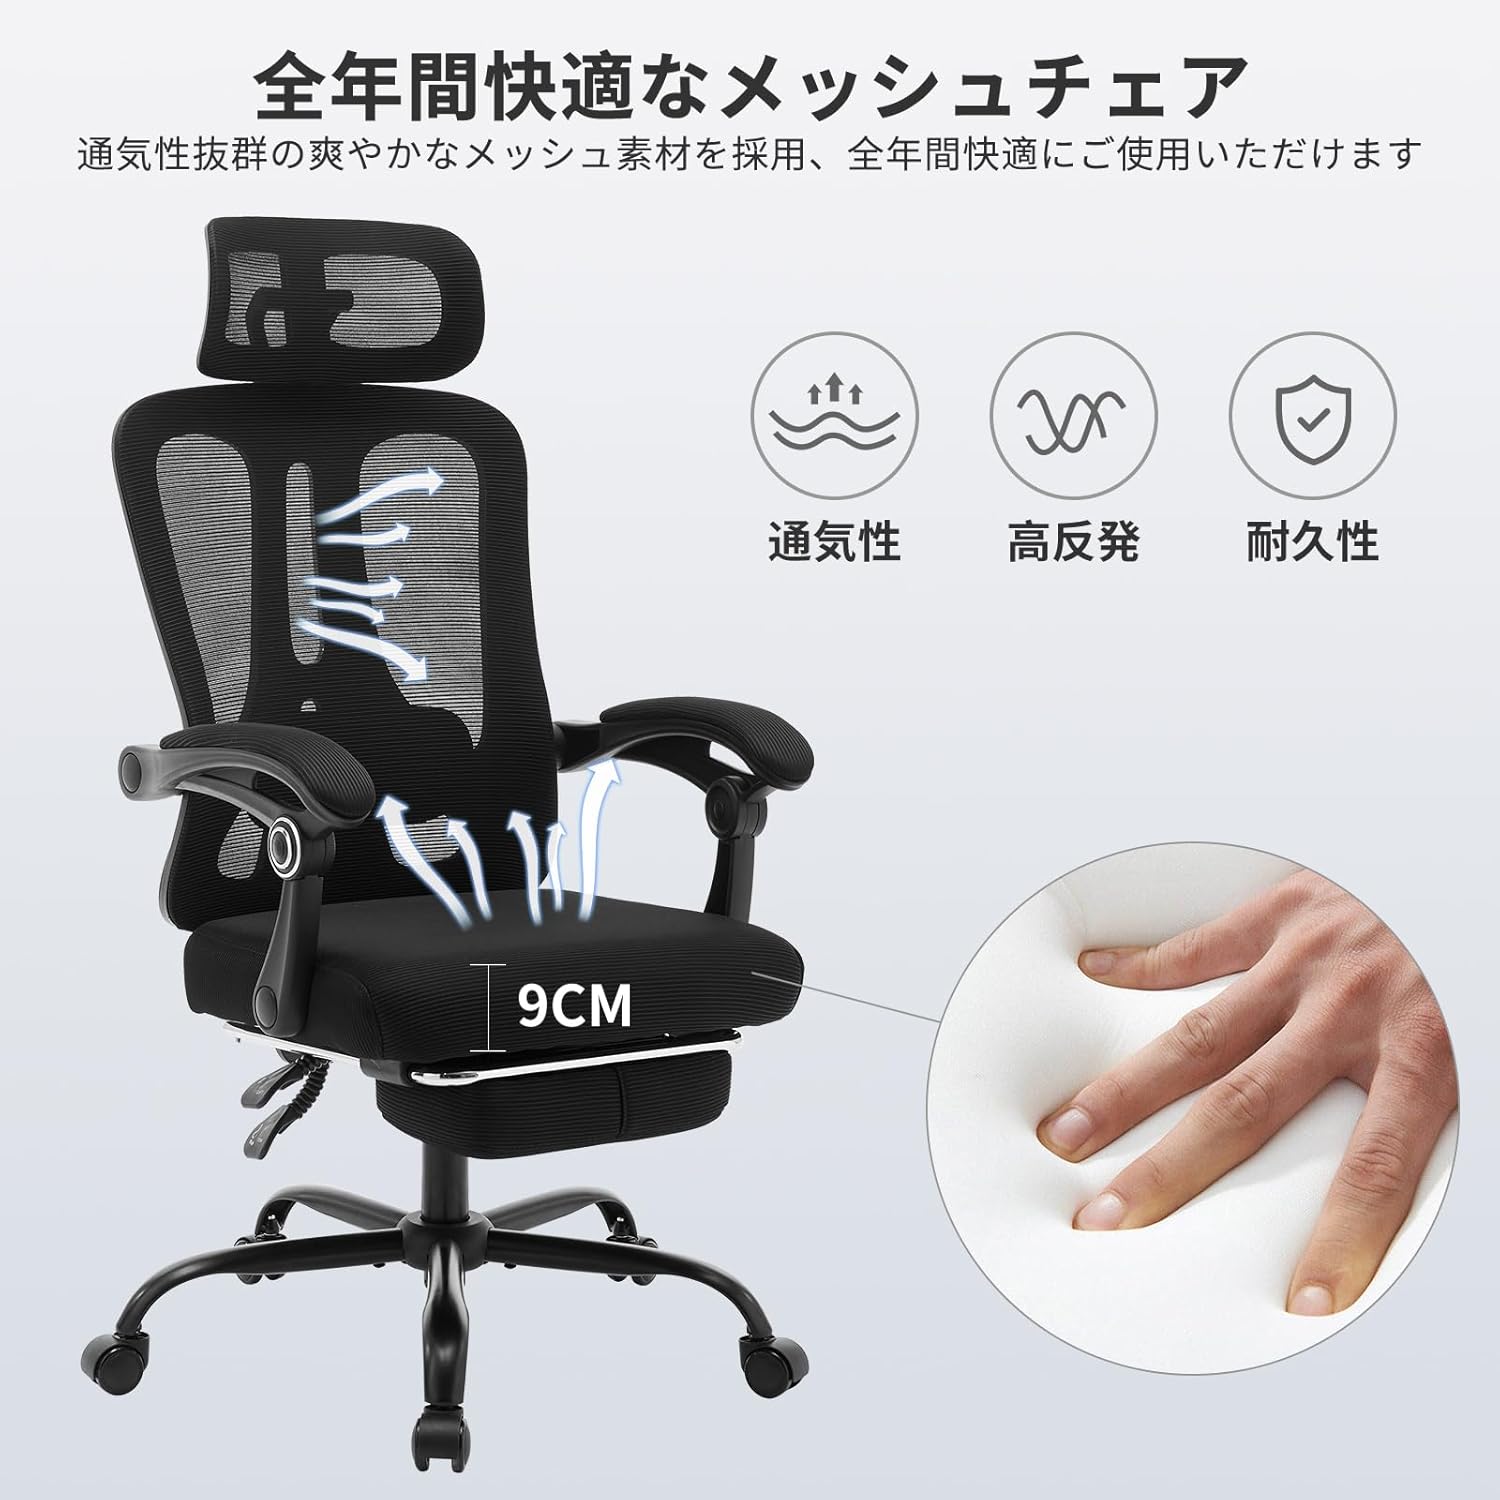
Figure 6: Chair materials. This image highlights the breathable mesh back and the high-density foam seat, emphasizing their properties for comfort and durability.
Troubleshooting
| Problem | Possible Cause | Solution |
|---|---|---|
| Chair wobbles or feels unstable. | Loose screws or uneven floor. | Check and tighten all assembly screws. Ensure the chair is on a flat, even surface. |
| Seat height adjustment not working. | Gas lift cylinder malfunction or lever issue. | Ensure the lever is fully engaged. If the gas lift is faulty, contact customer service for replacement. |
| Casters not rolling smoothly. | Debris caught in casters. | Remove any hair, dust, or debris from the caster wheels. |
| Backrest does not recline or lock. | Recline mechanism issue or lever not engaged. | Check the recline lever for proper engagement. Ensure no obstructions are preventing movement. |
Specifications
- Model: v2fmkHq9V3dCDdz7mb_LlAuqPev
- Brand: Tackview
- Product Dimensions (D x W x H): 71.1 x 50.8 x 127 Centimetres (28 x 20 x 50 inches)
- Item Weight: 18.9 kg (41.67 lbs)
- Maximum Weight Capacity: Approximately 150 kg (330 lbs)
- Material: Acrylic (Frame), Polyurethane (Seat), Mesh (Back)
- Color: Black
- Reclining Positions: 4 (90° to 140°)
- Assembly Required: Yes
- Included Components: Arm Pad (Armrests are integrated with seat)

Figure 7: Durability and construction. This image highlights key components contributing to the chair's stability and load-bearing capacity, such as the SGS certified gas lift and robust base.
Warranty and Support
For any questions, concerns, or issues regarding your Tackview Ergonomic Office Chair, please contact our customer service. We are committed to providing responsive support to ensure your satisfaction.
Please refer to your purchase documentation for specific warranty terms and contact information. Keep your proof of purchase for warranty claims.