1. Introduction
This manual provides detailed instructions for the YPBDAN Wireless Gaming Mouse, Model BX149. This tri-mode mouse offers versatile connectivity options (2.4GHz wireless, Bluetooth 5.3, and USB-C wired) and is designed for both gaming and general computer use. Please read this manual thoroughly to ensure proper setup and optimal performance of your device.
2. Product Features
- Tri-Mode Connectivity: Seamlessly switch between 2.4GHz wireless (0.1ms ultra-low latency), Bluetooth 5.3, and USB-C wired connections. Offers 10m transmission distance and 120 IPS tracking speed.
- Extended Battery Life: Equipped with advanced energy-saving technology, providing up to 60 hours of continuous use. Rechargeable via USB-C.
- Ultra-Lightweight & Ergonomic Design: Innovative perforated shell reduces weight to 71 grams, maintaining structural integrity. Contoured grips ensure comfort during prolonged use.
- High-Precision Sensor: Features an advanced optical sensor with 6 adjustable DPI levels (800-10000 DPI), 25G acceleration, and 7200 FPS tracking.
- Customizable RGB Lighting: Personalize your experience with various RGB lighting effects.
- Durable Construction: Built with switches rated for 50 million clicks.
- Universal Compatibility: Compatible with Windows 11/10/8/7/XP/Vista and macOS systems.
3. Package Contents
- YPBDAN Wireless Gaming Mouse (Model: BX149)
- USB-C Charging Cable
- 2.4GHz USB Receiver (stored in the mouse)
- Non-Slip Tapes (optional application)
- User Manual (this document)
4. Product Overview
Familiarize yourself with the mouse's components and controls:

Image 4.1: Mouse Button Layout. This image displays the top and bottom views of the YPBDAN Wireless Gaming Mouse, highlighting its various buttons and switches. Key features include the left and right click buttons, scroll wheel, DPI adjustment button, forward and backward buttons on the side, and the BT/2.4GHz mode switch and On/Off switch located on the underside.
- Left Click Button
- Right Click Button
- Scroll Wheel (also functions as a clickable button)
- Forward Button
- Backward Button
- DPI Adjustment Button
- Connectivity Mode Switch (BT/2.4GHz)
- Power On/Off Switch
- USB-C Charging Port (front of mouse)
- 2.4GHz USB Receiver Storage Slot (underside of mouse)
5. Setup and Connection
5.1. Initial Charging
Before first use, it is recommended to fully charge the mouse. Connect the supplied USB-C cable to the charging port on the front of the mouse and the other end to a USB power source (e.g., computer USB port, USB wall adapter).
- Charging Status Indicator:
- Low Battery: Red light blinking
- Charging: Red light on
- Charging Completed: Green light on
- The mouse can be used while charging in wired mode.
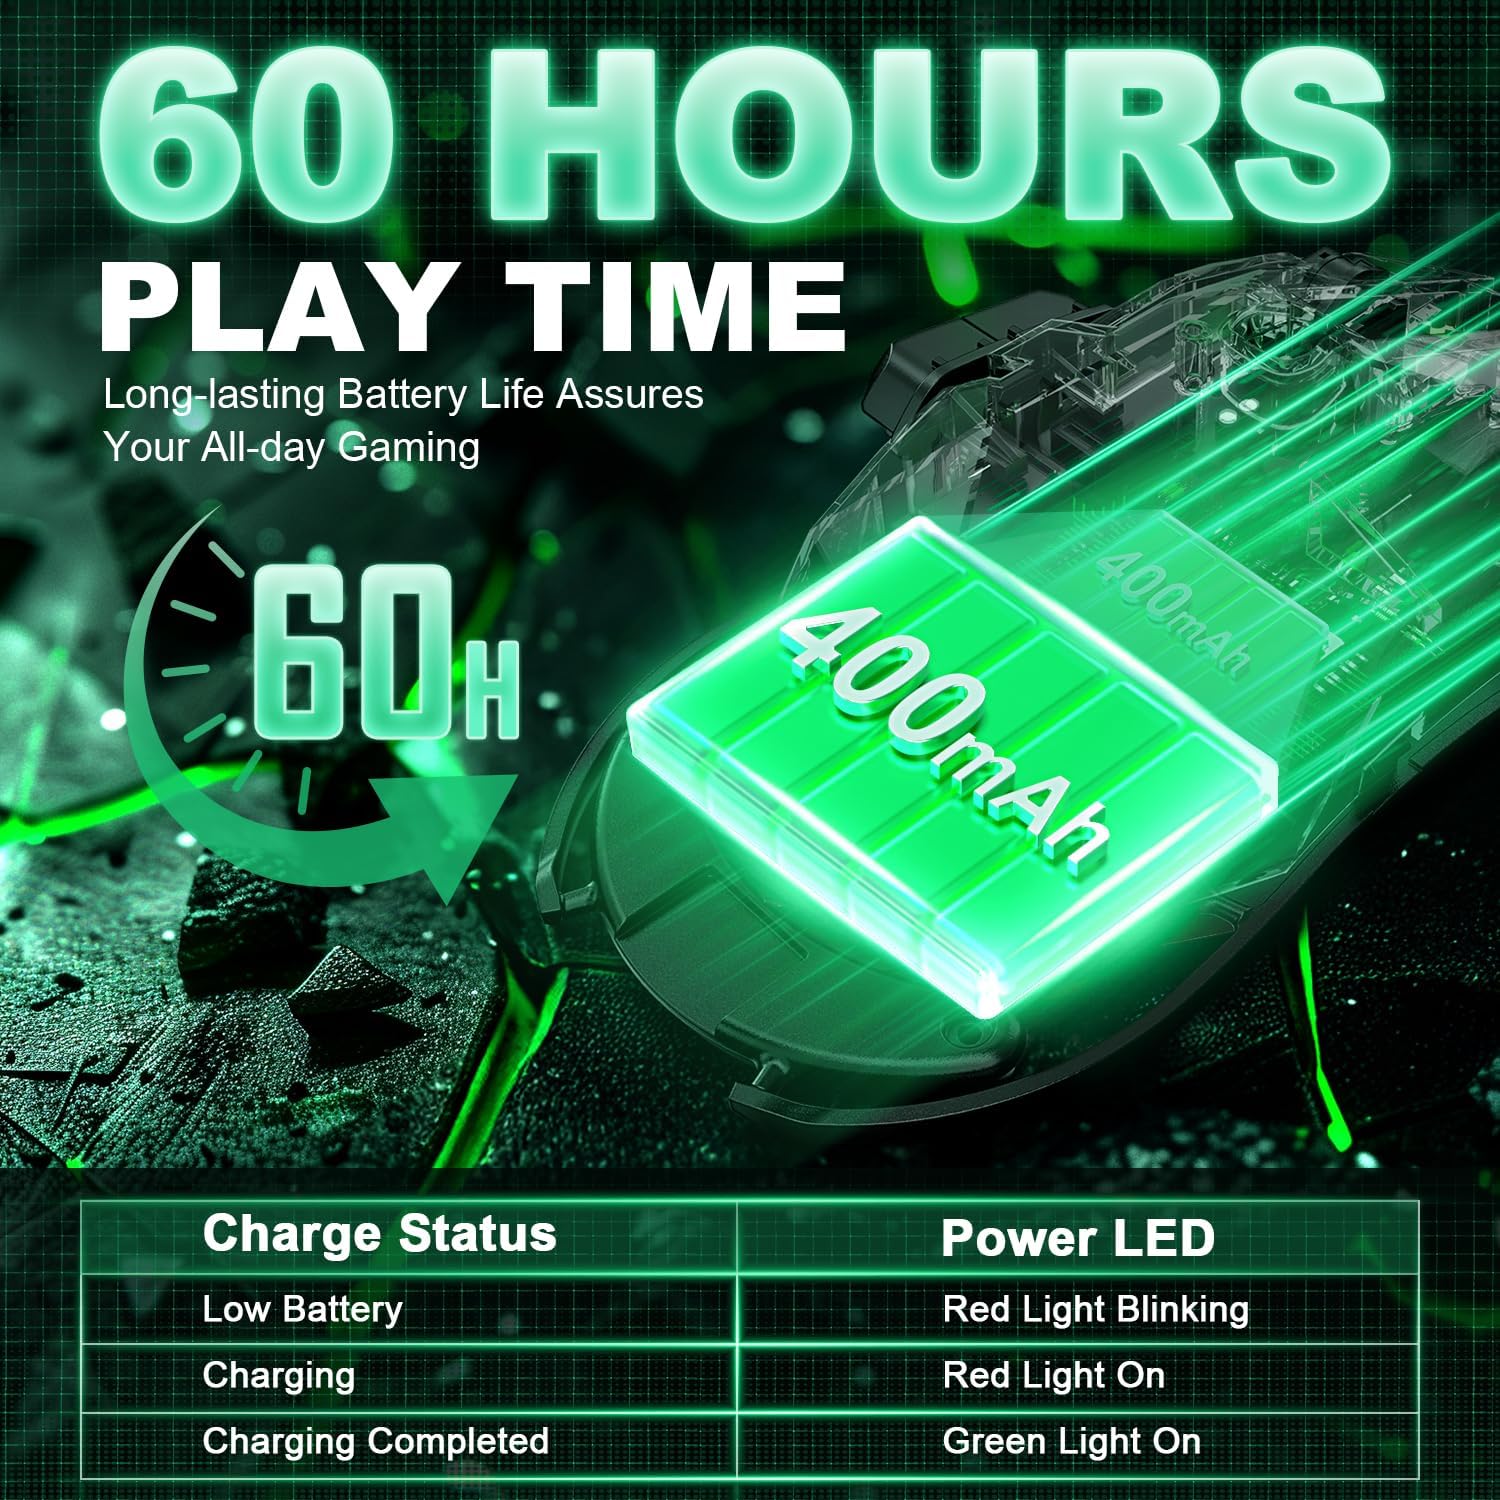
Image 5.1: Battery and Charging Status. This image illustrates the mouse's 60-hour battery life and provides a table detailing the LED indicators for low battery, charging, and fully charged states.
5.2. Connecting via 2.4GHz Wireless Mode
- Locate the 2.4GHz USB receiver stored in the slot on the underside of the mouse.
- Plug the USB receiver into an available USB port on your computer.
- Slide the connectivity mode switch (7) on the underside of the mouse to the "2.4G" position.
- Turn on the mouse using the On/Off switch (8). The mouse should automatically connect to your computer.
5.3. Connecting via Bluetooth 5.3 Mode
- Ensure your computer's Bluetooth is enabled.
- Slide the connectivity mode switch (7) on the underside of the mouse to the "BT" position.
- Turn on the mouse using the On/Off switch (8). The mouse's indicator light will blink (green for BT mode 1, blue for BT mode 2), indicating it's in pairing mode.
- On your computer, search for Bluetooth devices and select "YPBDAN Mouse" (or similar) to pair.
5.4. Connecting via USB-C Wired Mode
- Connect the supplied USB-C cable to the charging port on the front of the mouse.
- Connect the other end of the USB-C cable to an available USB port on your computer.
- The mouse will function as a wired mouse and charge simultaneously.
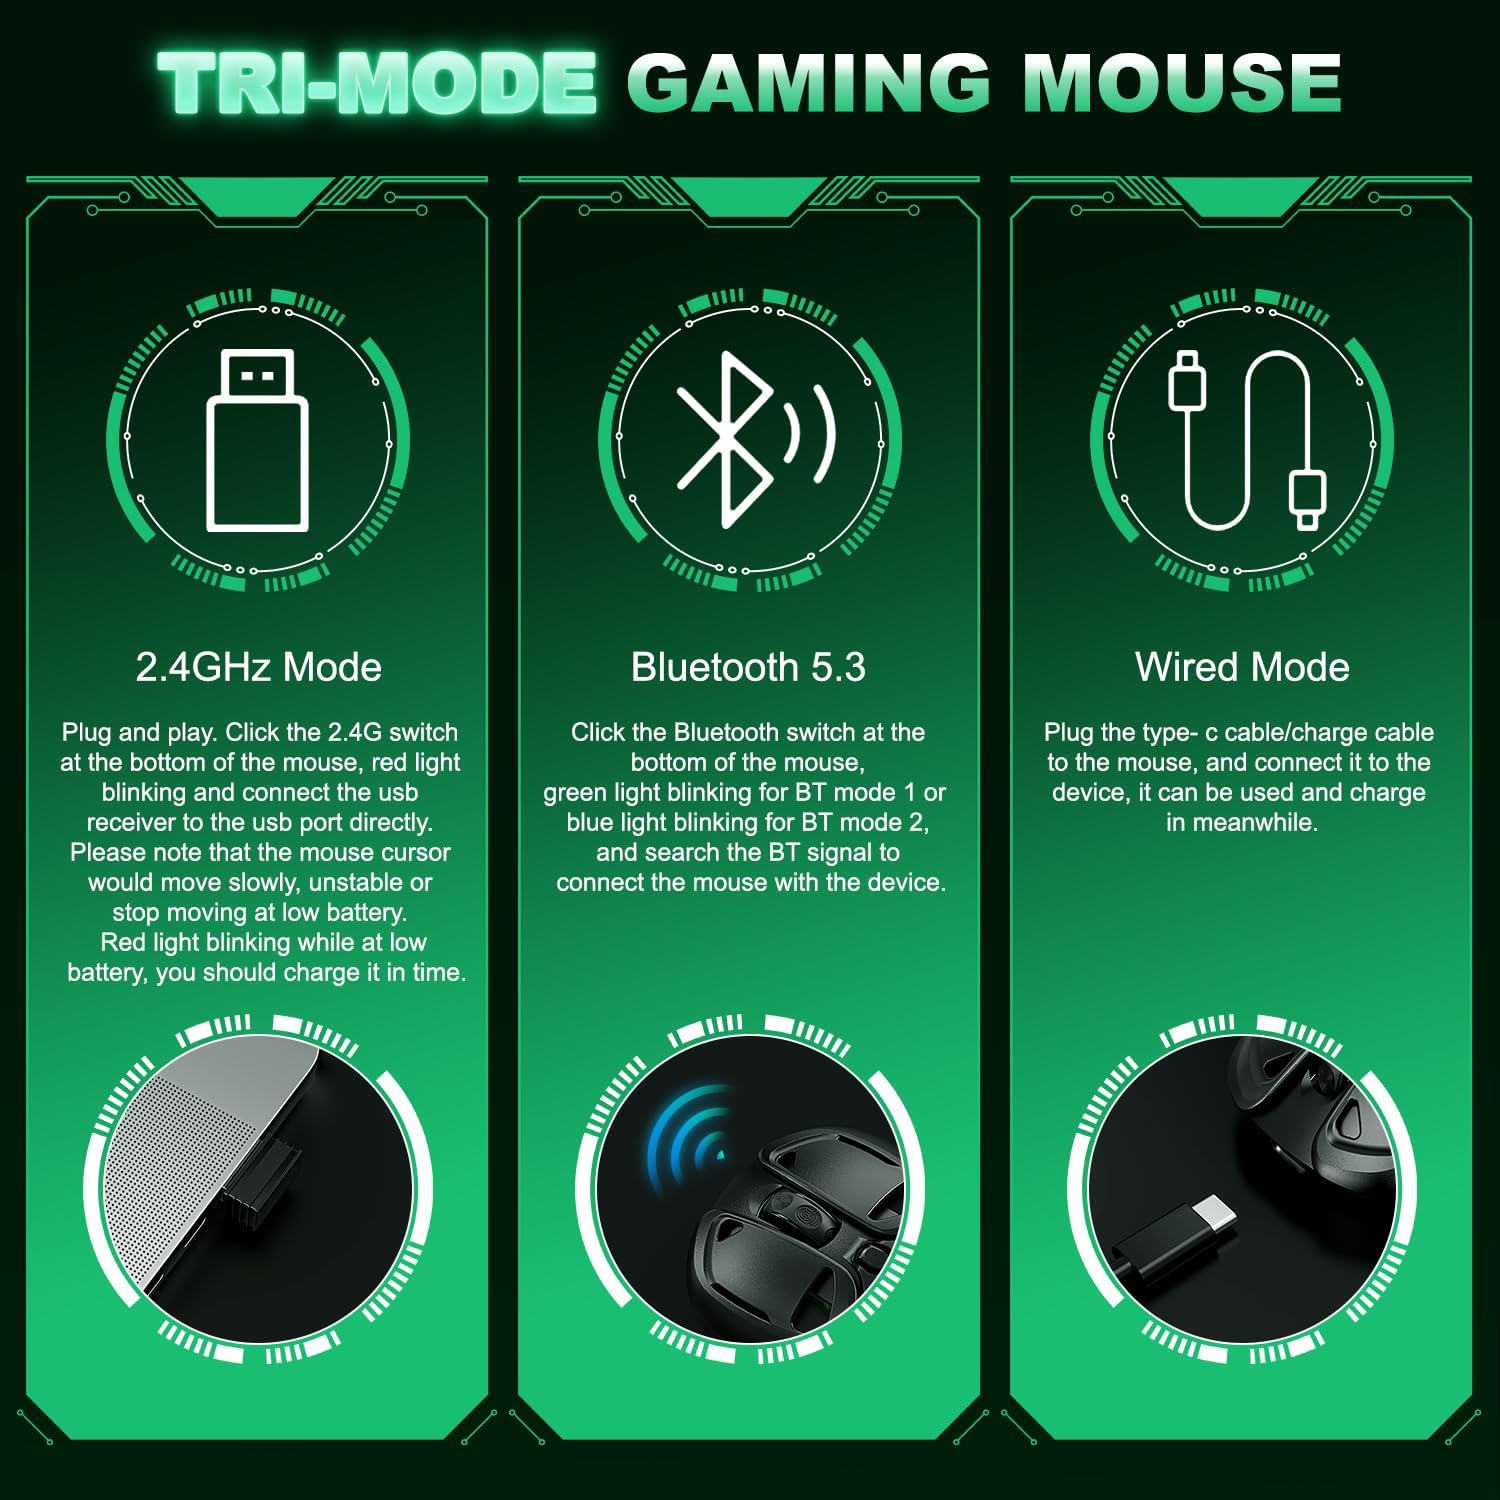
Image 5.2: Tri-Mode Connectivity. This image visually explains how to connect the mouse using its three modes: 2.4GHz wireless with a USB receiver, Bluetooth 5.3, and wired via USB-C cable.
6. Operating Instructions
6.1. Basic Button Functions
- Left Click (1): Standard selection and activation.
- Right Click (2): Opens context menus.
- Scroll Wheel (3): Scrolls content vertically. Can also be clicked for middle-click functionality.
- Forward Button (4): Navigates forward in web browsers or file explorers.
- Backward Button (5): Navigates backward in web browsers or file explorers.
6.2. DPI Adjustment
The mouse features 6 adjustable DPI levels (800-10000 DPI) to customize cursor sensitivity. Press the DPI Adjustment Button (6) to cycle through the available DPI settings. Each DPI setting may correspond to a different RGB lighting color for easy identification.
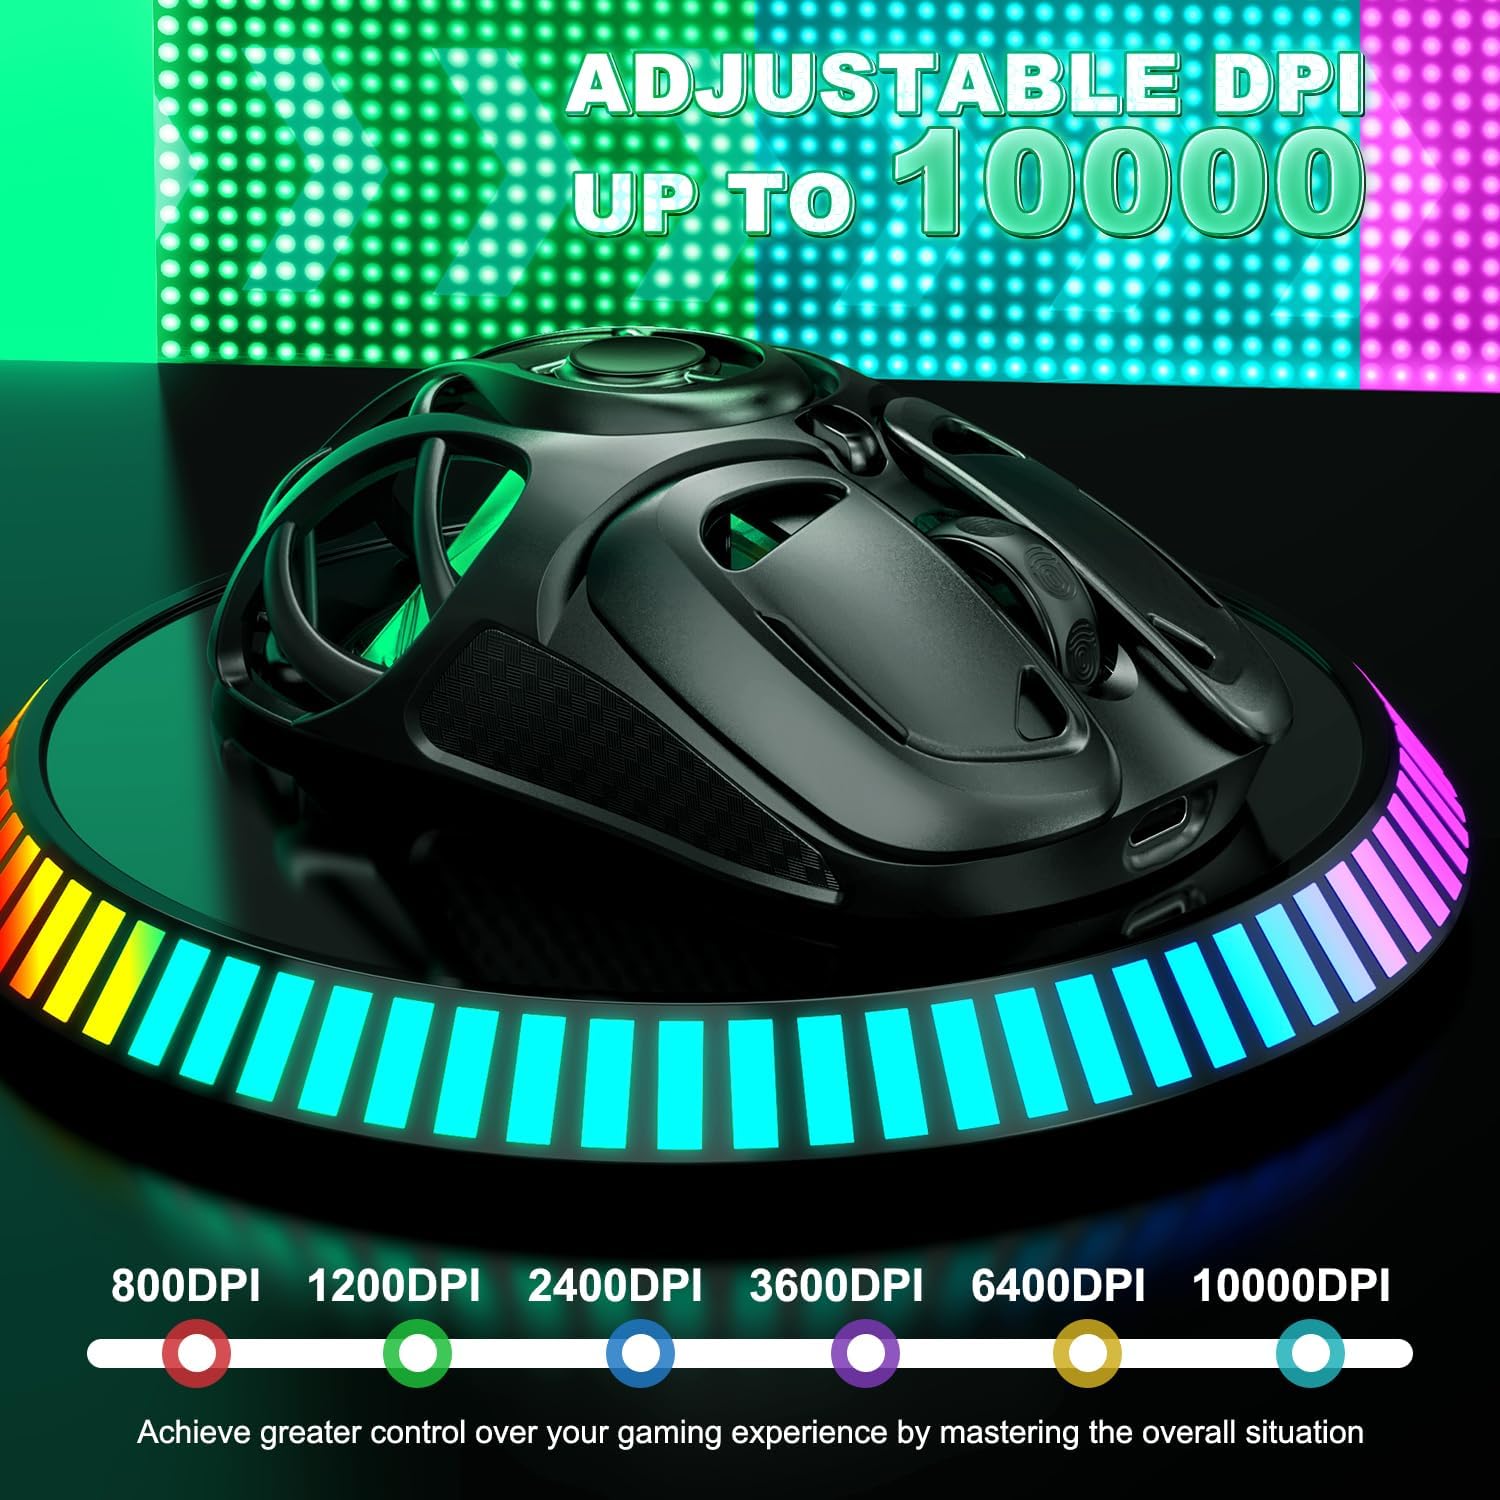
Image 6.1: Adjustable DPI Settings. This image displays the mouse and its DPI range, from 800 to 10000, with corresponding color indicators for each level.
6.3. RGB Lighting Effects
The mouse features customizable RGB lighting. Specific instructions for changing lighting modes or colors are typically managed through dedicated software (if available) or by pressing the DPI button (6) or other designated buttons. Refer to the product's official website for any available software downloads.

Image 6.2: Breathing RGB Lighting. This image highlights the dynamic breathing lighting effects of the mouse, showcasing its aesthetic appeal.
7. Maintenance
7.1. Cleaning
To maintain optimal performance and appearance, regularly clean your mouse. Use a soft, dry cloth to wipe the surface. For stubborn dirt, a slightly damp cloth can be used, ensuring no moisture enters the internal components, especially through the perforated shell. Avoid harsh chemicals or abrasive cleaners.
7.2. Battery Care
- Avoid fully discharging the battery frequently to prolong its lifespan.
- If the mouse will not be used for an extended period, charge it to about 50% and store it in a cool, dry place.
- Recharge the mouse when the low battery indicator (red blinking light) appears to prevent performance degradation.
7.3. Applying Non-Slip Tapes
The package includes optional non-slip tapes for enhanced grip. Carefully peel the tapes and apply them to the designated areas on the mouse's sides and buttons as shown in the diagram. Ensure the surface is clean and dry before application for best adhesion.

Image 7.1: Non-Slip Tapes Application. This image provides a visual guide for applying the customized non-slip tapes to the KM-3 Gaming Mouse, indicating placement on the main buttons and sides.
8. Troubleshooting
| Problem | Possible Cause | Solution |
|---|---|---|
| Mouse not responding in wireless mode. | Low battery, incorrect mode selected, receiver not connected, or interference. |
|
| Cursor movement is sluggish or unresponsive. | Low battery, dirty optical sensor, or surface issues. |
|
| Bluetooth connection issues. | Mouse not in pairing mode, Bluetooth disabled on computer, or previous pairing conflict. |
|
| RGB lighting not working or stuck on one color. | Software issue or specific lighting mode selected. |
|
9. Specifications
| Feature | Detail |
|---|---|
| Model Number | BX149 |
| Connectivity | 2.4GHz Wireless, Bluetooth 5.3, USB-C Wired |
| DPI Settings | 800 / 1200 / 2400 / 3600 / 6400 / 10000 DPI (6 levels) |
| Tracking Speed | 120 IPS |
| Acceleration | 25G |
| Frame Rate | 7200 FPS |
| Battery Life | Up to 60 hours (continuous use) |
| Charging Port | USB-C |
| Weight | 71 grams (approx. 2.5 ounces) |
| Switch Lifespan | 50 million clicks |
| Dimensions | 5.04 x 3.39 x 1.85 inches |
10. Compatibility
The YPBDAN Wireless Gaming Mouse is broadly compatible with various operating systems, including:
- Windows 11
- Windows 10
- Windows 8
- Windows 7
- Windows XP
- Windows Vista
- macOS (for MacBooks and other Apple computers)
It is suitable for use with desktop computers, laptops, and notebooks across these platforms.
11. Warranty and Support
For warranty information and customer support, please refer to the product packaging or contact YPBDAN customer service directly. Details regarding specific warranty periods and support channels are typically provided with your purchase or on the manufacturer's official website.