1. Introduction
Thank you for choosing the WINAZ 66-Inch L-Shaped Office Desk. This manual provides detailed instructions for assembly, operation, maintenance, and troubleshooting to ensure optimal use and longevity of your product. Please read this manual thoroughly before assembly and retain it for future reference.
2. Safety Information
WARNING: Failure to follow these safety instructions may result in injury or damage to the product.
- Always assemble according to the provided instructions.
- Keep the desk away from high-traffic areas to prevent tip-over.
- Be cautious of sharp edges during and after assembly.
- Do not overload the desk beyond its weight capacity.
- Keep the power outlet dry and away from flammable materials.
- Keep small parts out of reach of children.
- Ensure all connections are secure before use.
3. Package Contents
Before beginning assembly, verify that all components and hardware are present. Refer to the included parts list and hardware diagram for identification.

Figure 1: Fully assembled WINAZ L-Shaped Office Desk.
4. Assembly Instructions
For a detailed visual guide, please refer to the official installation video provided below. This video demonstrates each step of the assembly process.
Video 1: Installation Guide for WINAZ 66-Inch L-Shaped Desk. This video provides step-by-step visual instructions for assembling the desk, including attaching drawer slides, connecting panels, and installing the power outlet and CPU platform.
General Assembly Steps:
- Prepare Components: Unpack all parts and hardware. Identify each piece using the provided diagrams. Separate drawer slides into their inner and outer sections as instructed.
- Assemble Cabinet Structures: Begin by assembling the two main cabinet structures that form the L-shape. This involves attaching drawer slides to the side panels, inserting cam lock bolts and wooden dowels, and securing the panels together using cam locks. Ensure the correct orientation of panels as indicated in the manual.
- Attach Desk Tops: Carefully place and secure the main desk panels (1 and 2) onto the assembled cabinet structures. Use cam locks and wooden dowels to create a stable connection.
- Assemble Drawers: Construct the six drawers by attaching drawer slides to the drawer sides, securing the front and back panels, and sliding in the drawer bottoms. Pay attention to the groove positions for the drawer bottoms.
- Install Drawer Hardware: Attach the drawer handles and install the lock cylinders for the lockable drawers. Ensure the lock rod is facing downward for proper function.
- Insert Drawers: Carefully insert each assembled drawer into its corresponding cabinet slot. For lockable drawers, ensure the lock rod is positioned correctly before fully pushing the drawer in.
- Install Mobile CPU Platform: Place the mobile CPU platform (component 13) in the designated area under the desk.
- Install Power Outlet: Secure the built-in power strip into the pre-cut opening on the desk surface using the provided screws.

Figure 2: The L-shaped desk after main structural assembly.
5. Features Overview
- Integrated Charging Hub: ETL-certified built-in power strip with 3 AC outlets and 2 USB ports (2.4A smart charging). Features child-safe shutters, surge protection, and overload prevention.
- Spacious Worksurface: Generous 66"x47.2" desktop accommodates multiple monitors, laptops, and work items.
- Ample & Organized Storage: Six wooden drawers, including two versatile file cabinets with adjustable dividers and hanging-file capability (A4/F4/Letter/Legal), and four smaller drawers for supplies.
- Secure & Silent Storage: Two lockable file cabinets and four keyed small drawers with an interlock system (2 keys included). Stainless steel slide rails ensure smooth and quiet operation.
- Mobile CPU Platform: 18.5"x9.25" MDF stand with 4 height-adjustable leg pads to protect your PC and ensure optimal airflow. Tool-free design for easy movement.
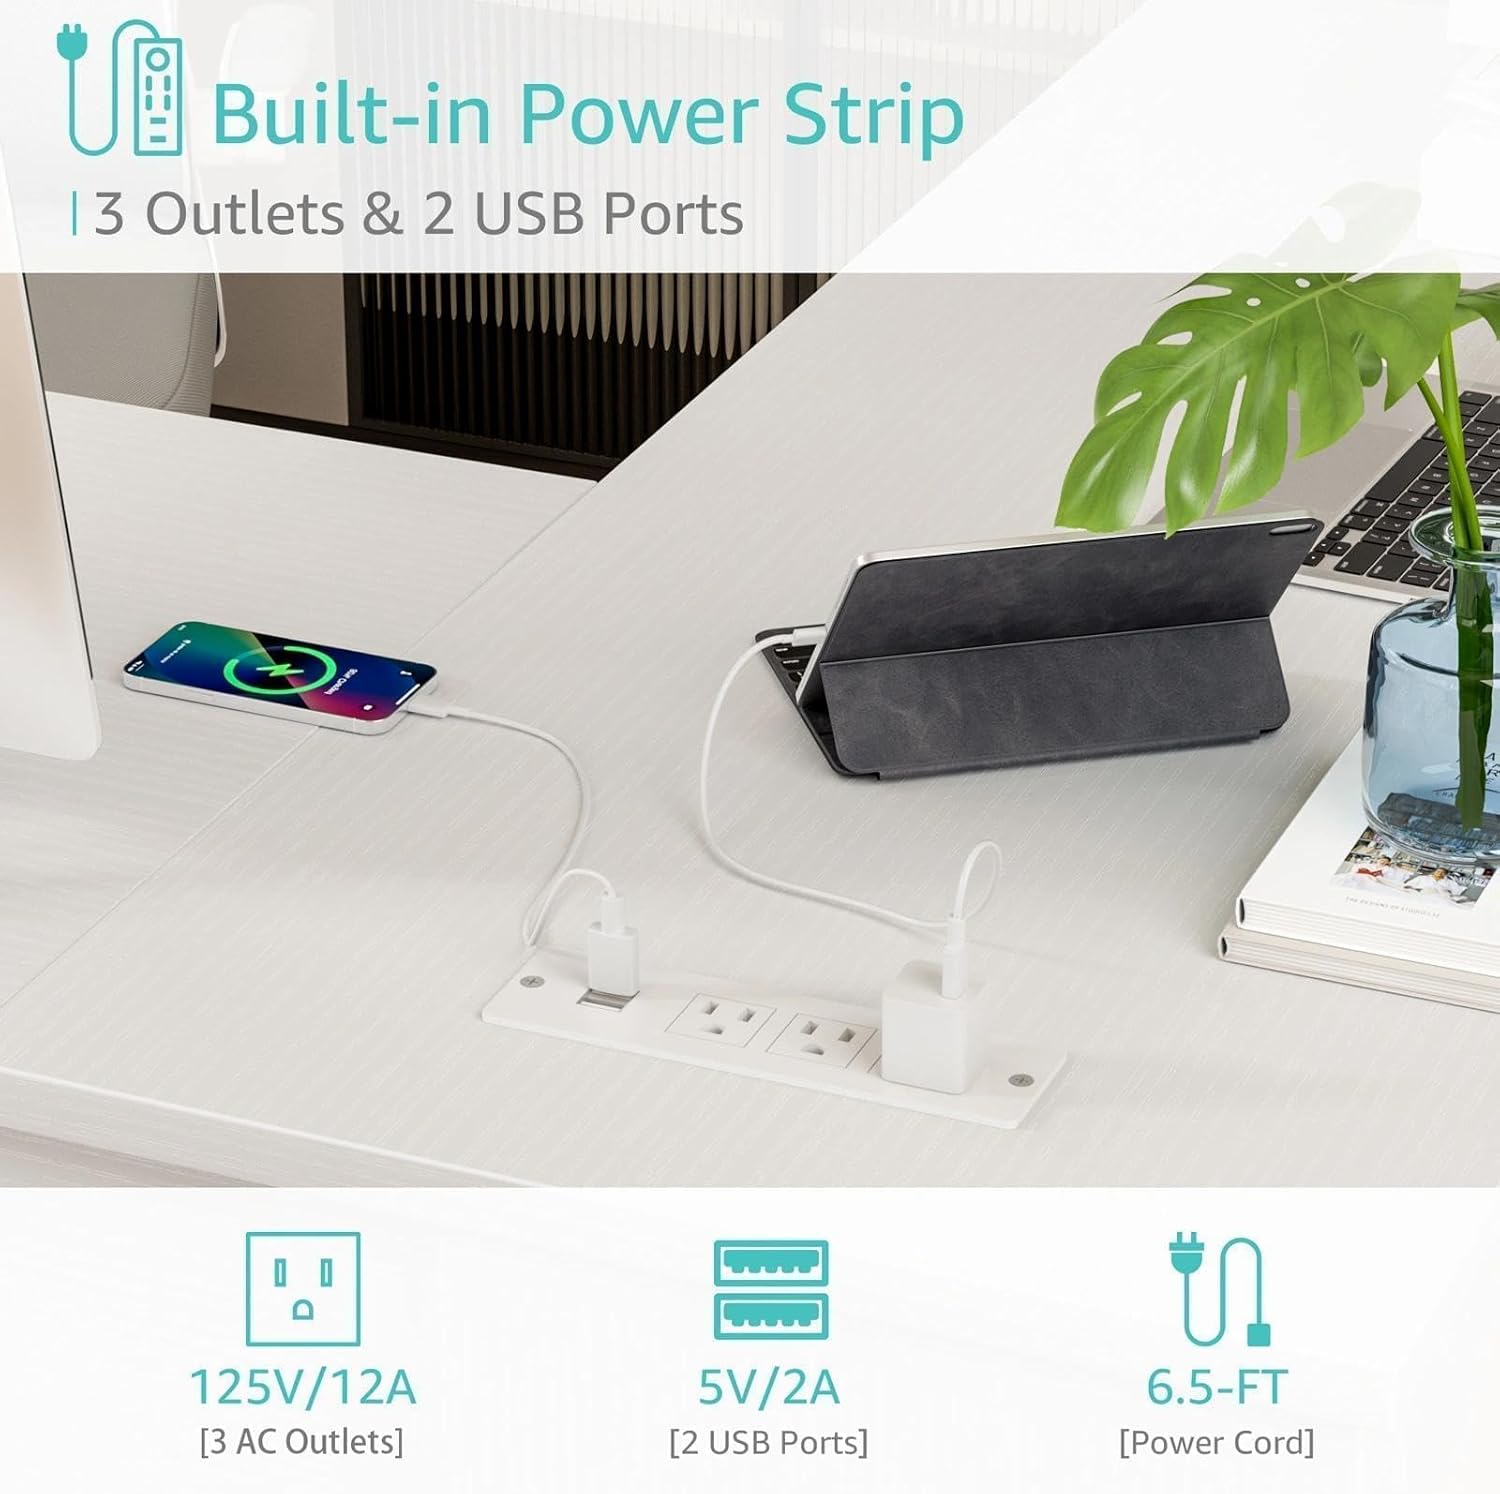
Figure 3: Integrated power outlet for convenient charging.

Figure 4: Illustration of the secure multi-drawer interlock system.

Figure 5: The mobile CPU platform for convenient computer placement.
6. Operating Instructions
6.1. Using the Integrated Charging Hub
- Plug the desk's power cord into a wall outlet.
- Connect your devices (computers, monitors, phones, tablets) to the 3 AC outlets or 2 USB ports on the desk surface.
- The hub provides 2.4A smart charging for USB devices.
- The power strip includes surge protection and overload prevention for safe use.
6.2. Operating Lockable Drawers
- The desk features two lockable file cabinets and four smaller keyed drawers.
- To lock a drawer, ensure it is fully closed, then insert the key into the lock and turn it to the locked position.
- The interlock system ensures that when one drawer is open, others remain closed to prevent tipping.
- To unlock, insert the key and turn it to the unlocked position.
6.3. Using the Mobile CPU Platform
- Place your computer tower on the mobile CPU platform.
- The platform can be easily slid under the desk or moved between work zones as needed.
- The adjustable leg pads help protect your PC from dust and uneven floors.
7. Maintenance
- Cleaning: Wipe the desk surfaces with a soft, damp cloth. Avoid harsh chemicals or abrasive cleaners that may damage the finish.
- Spills: Immediately wipe up any spills to prevent staining or damage to the engineered wood.
- Hardware: Periodically check all screws and fasteners to ensure they are tight. Retighten if necessary.
- Drawer Slides: Keep drawer slides free of dust and debris for smooth operation. A light application of silicone spray can help maintain smoothness if needed.
- Avoid Direct Sunlight: Prolonged exposure to direct sunlight can cause fading or discoloration.
8. Troubleshooting
- Drawers not closing smoothly: Check for any obstructions in the drawer slides. Ensure the slides are properly aligned and securely fastened.
- Desk wobbles: Verify that all cam locks and screws are fully tightened. Ensure the desk is placed on a level surface. Adjust leg pads if applicable.
- Power outlet not working: Check if the desk's main power cord is securely plugged into a functional wall outlet. Ensure no circuit breakers have tripped.
- Missing parts: If any parts are missing or damaged upon arrival, please contact customer support immediately.
9. Specifications
| Attribute | Detail |
|---|---|
| Brand | WINAZ |
| Model Number | WIN-L6D66-WT |
| Material | Engineered Wood |
| Product Dimensions (L x W x H) | 66.1 x 47.2 x 29.9 inches |
| Item Weight | 120 pounds |
| Number of Drawers | 6 (2 file cabinets, 4 small drawers) |
| Power Outlet | 3 AC outlets, 2 USB ports (2.4A), ETL-certified, surge protection |
| Color | White |
| Assembly Required | Yes (Instructions included for self-assembly) |

Figure 6: Detailed product dimensions.
10. Warranty and Support
This WINAZ L-Shaped Office Desk is backed by a 30-day free return policy and a 12-month warranty. Our dedicated customer support team is committed to resolving any issues and providing expert solutions for your needs. For assistance, please refer to the contact information provided with your purchase or visit the official WINAZ website.