
1. Introduction
Thank you for choosing the HERZO 2-in-1 Cordless Electric Stapler Nailer. This versatile tool is designed for various DIY projects, upholstery, home repairs, and crafts, offering the convenience of both stapling and nailing without the need for a compressor or power cord. Please read this manual carefully before use to ensure safe and optimal operation.
2. Safety Instructions
Always follow basic safety precautions to reduce the risk of fire, electric shock, and personal injury.
- Triple Safety Protection: The tool is equipped with three safety switches: a power button, a contact safety nose, and a trigger switch. The LED indicator will light green when the tool is ready to fire.
- Do Not Operate While Charging: Never use the stapler/nailer while it is connected to the charger.
- Power Off When Not in Use: Always turn off the tool when not in use to prevent accidental discharge.
- Eye Protection: Always wear safety glasses when operating the tool.
- Keep Work Area Clear: Ensure your work area is well-lit and free from clutter.
- Secure Workpiece: Always secure the material you are working on to prevent movement.
- Avoid Accidental Firing: Keep fingers away from the trigger when not actively stapling or nailing.
- Store Safely: Store the tool in a dry, secure place out of reach of children.
3. Package Contents
Verify that all items are present in your package:
- HERZO 2-in-1 Cordless Electric Stapler Nailer (Model HNG40V-US)
- 500 U-shaped staples (1/8")
- 1000 U-shaped staples (1/4")
- 500 T-shaped nails (3/8")
- USB Type-C Charging Cable
- User Manual
4. Product Features and Components
Familiarize yourself with the parts of your HERZO Electric Stapler Nailer:

Image 4.1: Overview of the HERZO Electric Stapler Nailer with key components labeled, including LED Work Light, Power Switch, On/Off Trigger, USB-C interface, Heat Dissipation Port, and Safety Striker Guard.
- LED Work Light: Illuminates the work area for better visibility.
- Power Switch: Main on/off control for the tool.
- On/Off Trigger: Activates the stapling/nailing mechanism.
- USB-C Interface: Port for charging the internal battery.
- Heat Dissipation Port: Helps maintain optimal operating temperature.
- Safety Striker Guard: Prevents accidental firing unless pressed against a surface.
- Magazine: Holds staples or nails.
- Battery Indicator: Shows charging status and battery level.
5. Setup
5.1 Charging the Battery
The HERZO Electric Stapler Nailer features a built-in 1500 mAh lithium-ion battery, providing cordless convenience. Before first use, fully charge the battery.
- Ensure the tool's power switch is in the "OFF" position.
- Connect the supplied USB Type-C charging cable to the USB-C interface on the tool.
- Connect the other end of the USB cable to a compatible USB power adapter (not included).
- The LED indicator will show the charging status:

Image 5.1: The LED indicator shows red when charging and green when fully charged.
- Red Light: Charging in progress.
- Green Light: Fully charged.
- A full charge takes approximately 3 hours.
- Disconnect the charger once charging is complete.
Important: Do not use the stapler/nailer while it is charging.
5.2 Loading Staples or Nails
This tool is compatible with U-shaped staples (6-10mm / 1/4"-3/8") and T-shaped nails (10mm / 3/8").

Image 5.2: Compatible staple (U-shaped, 6-10mm) and nail (T-shaped, 10mm) dimensions.
- Ensure the tool is turned OFF and disconnected from any charger.
- Locate the magazine release latch at the bottom rear of the tool.
- Press the latch and pull out the magazine pusher rod.
- Insert a strip of staples or nails into the magazine with the points facing downwards. Ensure they are correctly seated.

Image 5.3: The magazine open, showing where to insert straight nails (T-shaped) and code pins (U-shaped staples).
- Push the pusher rod back into the magazine until it locks securely.
6. Operating Instructions
Follow these steps for safe and effective operation:
- Prepare Work Area: Ensure your workpiece is stable and secure. Wear appropriate safety gear, including eye protection.
- Turn On Tool: Flip the power switch to the "ON" position. The LED indicator should light up.
- Position Tool: Place the nose of the stapler/nailer firmly against the material where you want to drive the fastener. The safety striker guard must be fully depressed.
- Fire Fastener: Squeeze the trigger to drive a staple or nail. The LED indicator will turn green when ready to fire.
- Check Results: Inspect the driven fastener. Adjust pressure or technique if needed.

Image 6.1: Examples demonstrating the effect of straight nails (T-shaped) and code nails (U-shaped staples) on a wooden surface.
- Turn Off Tool: When finished, flip the power switch to the "OFF" position and store the tool safely.
Note: The tool is designed for materials such as fabric, paper, carpet, leather, foam, plastic, and soft wood.
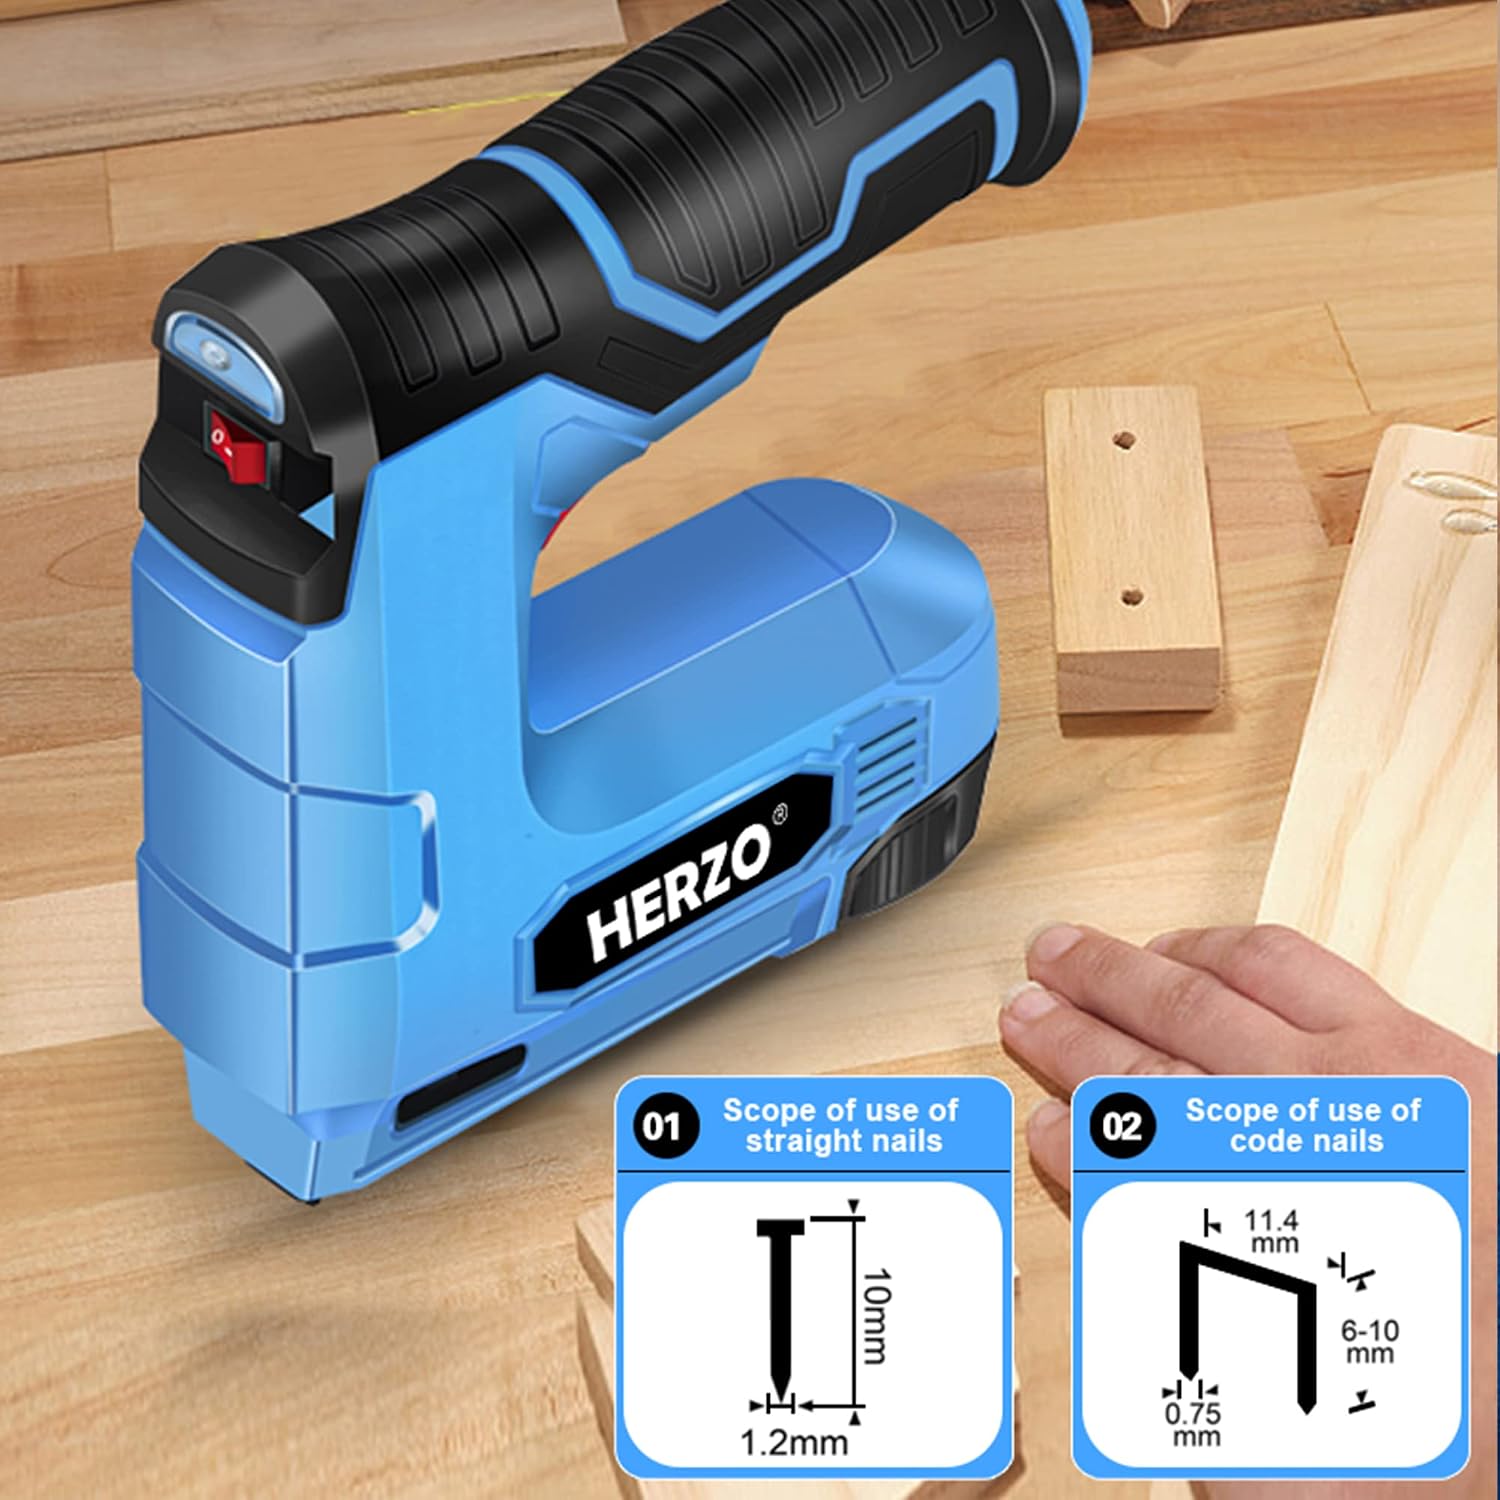
Image 6.2: Visual guide indicating the types of fasteners (straight nails and code nails) and their general application.
7. Maintenance
Regular maintenance ensures the longevity and optimal performance of your tool.
- Cleaning: Keep the tool clean and free from dust and debris. Use a soft, dry cloth to wipe down the exterior. Do not use harsh chemicals or abrasive cleaners.
- Magazine Inspection: Periodically check the magazine for any obstructions or bent fasteners that could cause jams.
- Battery Care: For best battery life, avoid fully discharging the battery frequently. Charge it regularly, even if not in constant use. Store the tool with a partial charge if storing for extended periods.
- Storage: Store the tool in a dry, cool place, away from direct sunlight and extreme temperatures.
8. Troubleshooting
If you encounter issues with your HERZO Electric Stapler Nailer, refer to the following common problems and solutions:
| Problem | Possible Cause | Solution |
|---|---|---|
| Tool does not fire. |
|
|
| Fasteners are not driven fully. |
|
|
| Tool jams frequently. |
|
|
If the problem persists after trying these solutions, please contact HERZO customer support.
9. Specifications
| Feature | Detail |
|---|---|
| Brand | HERZO |
| Model Number | HNG40V-US |
| Operating Mode | Semi-automatic |
| Battery Type | 4V Lithium-Ion |
| Battery Capacity | 1500 mAh |
| Charging Time | Approx. 3 hours (via USB Type-C) |
| Weight | 0.7 kg |
| Material | Metal (housing) |
| Compatible Staples | U-shaped, 6-10mm (1/4" - 3/8") |
| Compatible Nails | T-shaped, 10mm (3/8") |
| Color | Blue |
10. Warranty and Support
The HERZO 2-in-1 Cordless Electric Stapler Nailer is backed by a 1-year warranty.
For any questions, concerns, or warranty claims, please contact HERZO customer support. Our team is ready to assist you.
Please refer to your purchase documentation for specific contact details or visit the official HERZO website.