1. Introduction
This manual provides instructions for the installation, operation, and maintenance of your Creality K2 Pro/K2 Chamber AI Camera. This camera is designed to enhance your 3D printing experience by offering real-time monitoring, AI-powered print failure detection, and time-lapse recording capabilities.

Figure 1: Overview of Creality Chamber AI Camera features.
2. Package Contents
Before proceeding with installation, please verify that all items are present in your package:
- K2 Pro Camera x 1
- Connection Cable x 1
- Mounting Screws x 2
- User Manual/Quick Start Guide x 1

Figure 2: Included components in the camera package.
3. Setup and Installation
The Chamber AI camera is designed for easy installation and is compatible with Creality K2 and K2 Pro 3D printers. A dedicated camera interface is reserved on these printers for connection.
- Locate the Camera Interface: Identify the designated camera port within your K2 or K2 Pro 3D printer chamber. Refer to your printer's manual for the exact location.
- Mount the Camera: Position the camera in the designated mounting area within the printer chamber. Secure it using the provided mounting screws. Ensure the camera lens has a clear view of the print bed.
- Connect the Cable: Connect one end of the provided connection cable to the camera and the other end to the camera interface port on your 3D printer. Ensure a firm connection.
- Power On: Power on your 3D printer. The camera should be detected automatically.

Figure 3: Camera installation within a compatible Creality 3D printer.
4. Operating Instructions
4.1 Real-time Monitoring
The camera provides real-time, high-definition, and high frame rate video of your printing process. You can monitor your prints remotely using the Creality Cloud application or Creality Print software.
- Download and Install: Ensure you have the latest versions of Creality Cloud (for mobile devices) or Creality Print (for desktop) installed.
- Log In: Log in to your Creality Cloud account within the application or software.
- Connect to Printer: Follow the in-app instructions to connect to your K2 or K2 Pro 3D printer.
- View Live Feed: Once connected, you can access the live camera feed to view your printing progress anytime, anywhere.

Figure 4: Real-time viewing of printing status.
4.2 AI Detection Features
The Chamber AI Camera incorporates intelligent artificial detection to identify potential printing issues and prevent material waste or damage to your printer.
- Print Failure Detection: The camera can detect common printing failures, such as 'spaghetti' (filament tangles), and will notify you to take corrective action.
- Build Plate Check: It reminds users if the heatbed is empty without a build plate, preventing prints from starting on an incorrect surface.
- Foreign Object Detection: The system identifies foreign objects on the heatbed before printing begins, helping to avoid damage to the 3D printer or print head.

Figure 5: Examples of AI detection for print failures and foreign objects.
4.3 Time-lapse Photography
The camera can automatically generate time-lapse videos of your prints, which are convenient for sharing or reviewing the printing process.
- Automatic Generation: After a print is complete, log in to your Creality Cloud account. The time-lapse video will be automatically generated and available for viewing.
- Sharing: You can easily share these time-lapse videos directly from the Creality Cloud platform.
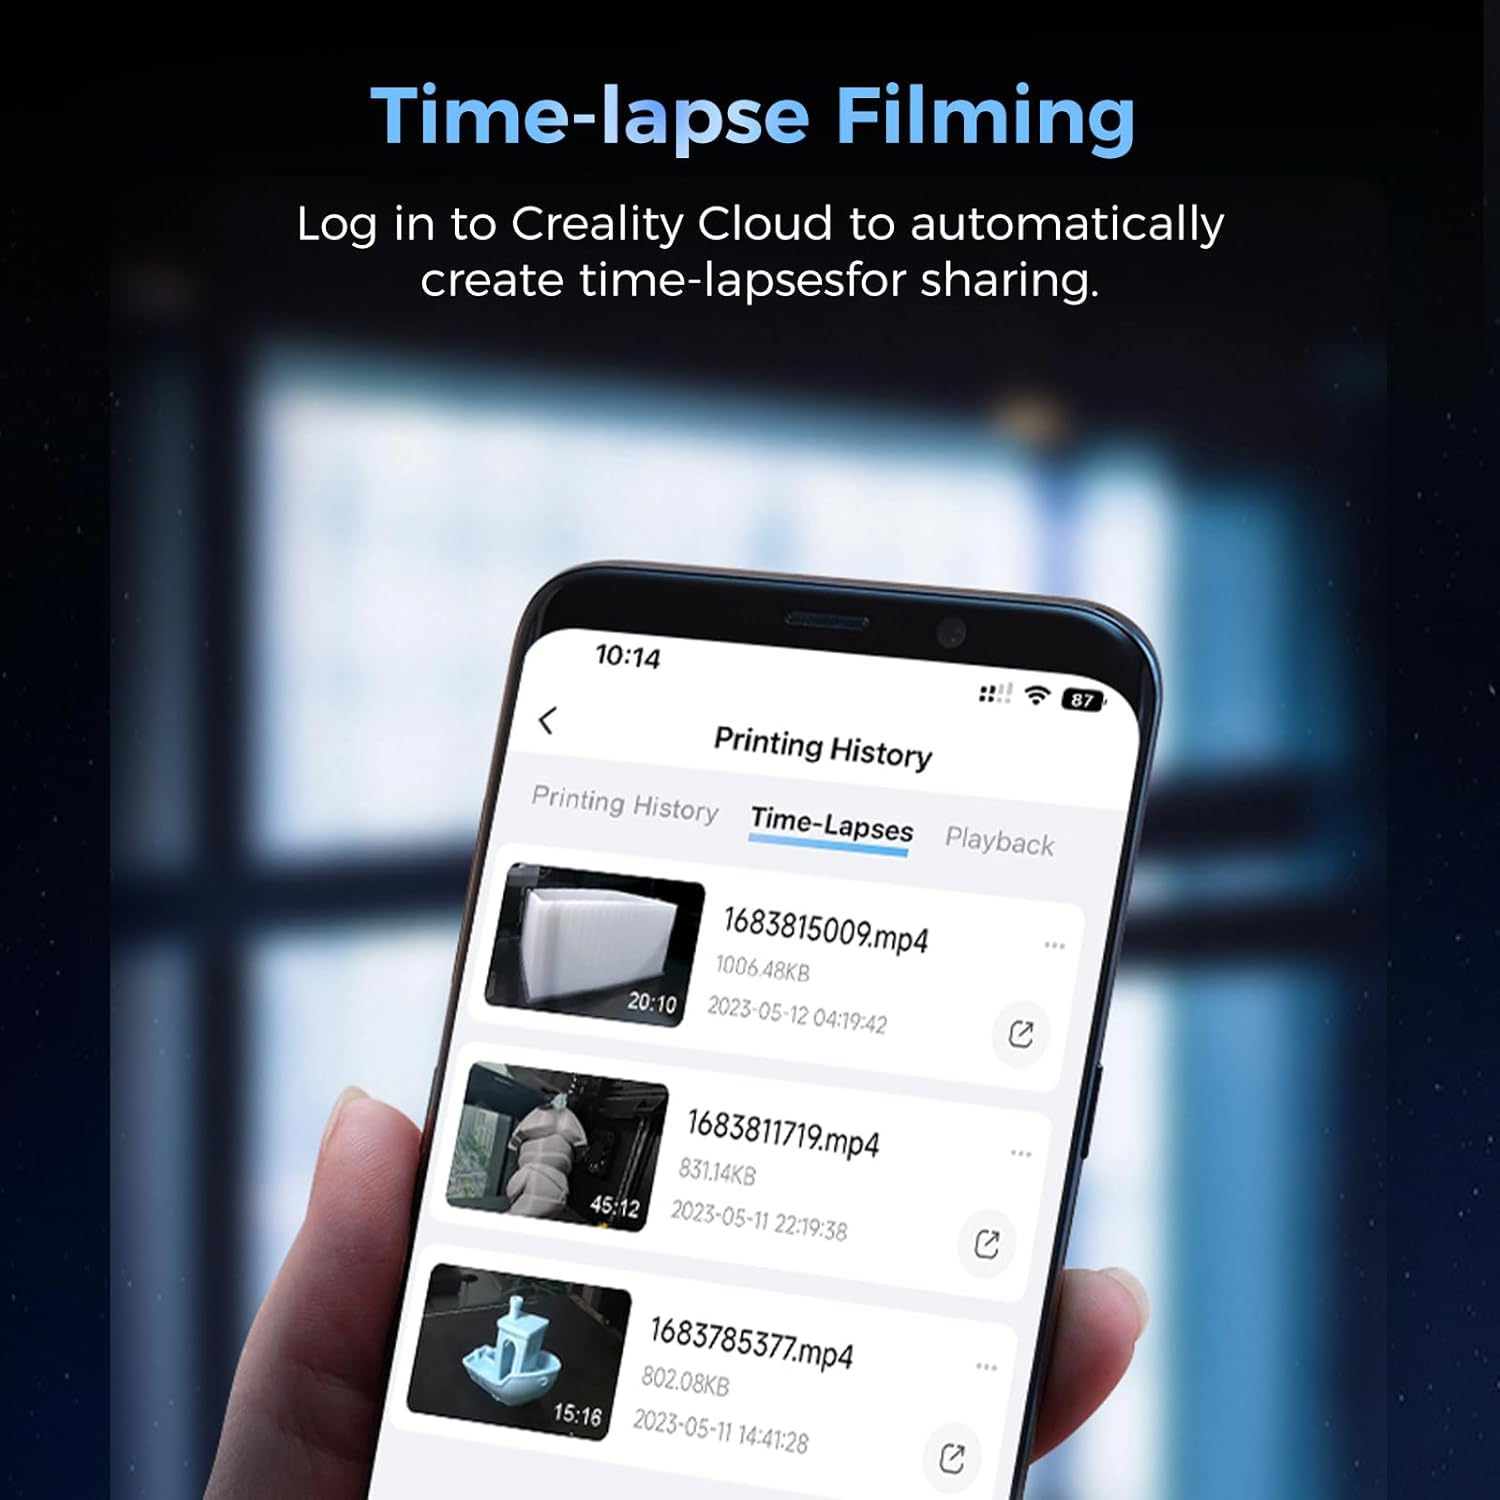
Figure 6: Time-lapse video management within Creality Cloud.
4.4 Image Quality
The camera is designed to provide clear and detailed images, reducing motion blur and flicker for a smooth viewing experience.

Figure 7: Comparison of image clarity between standard and AI camera.
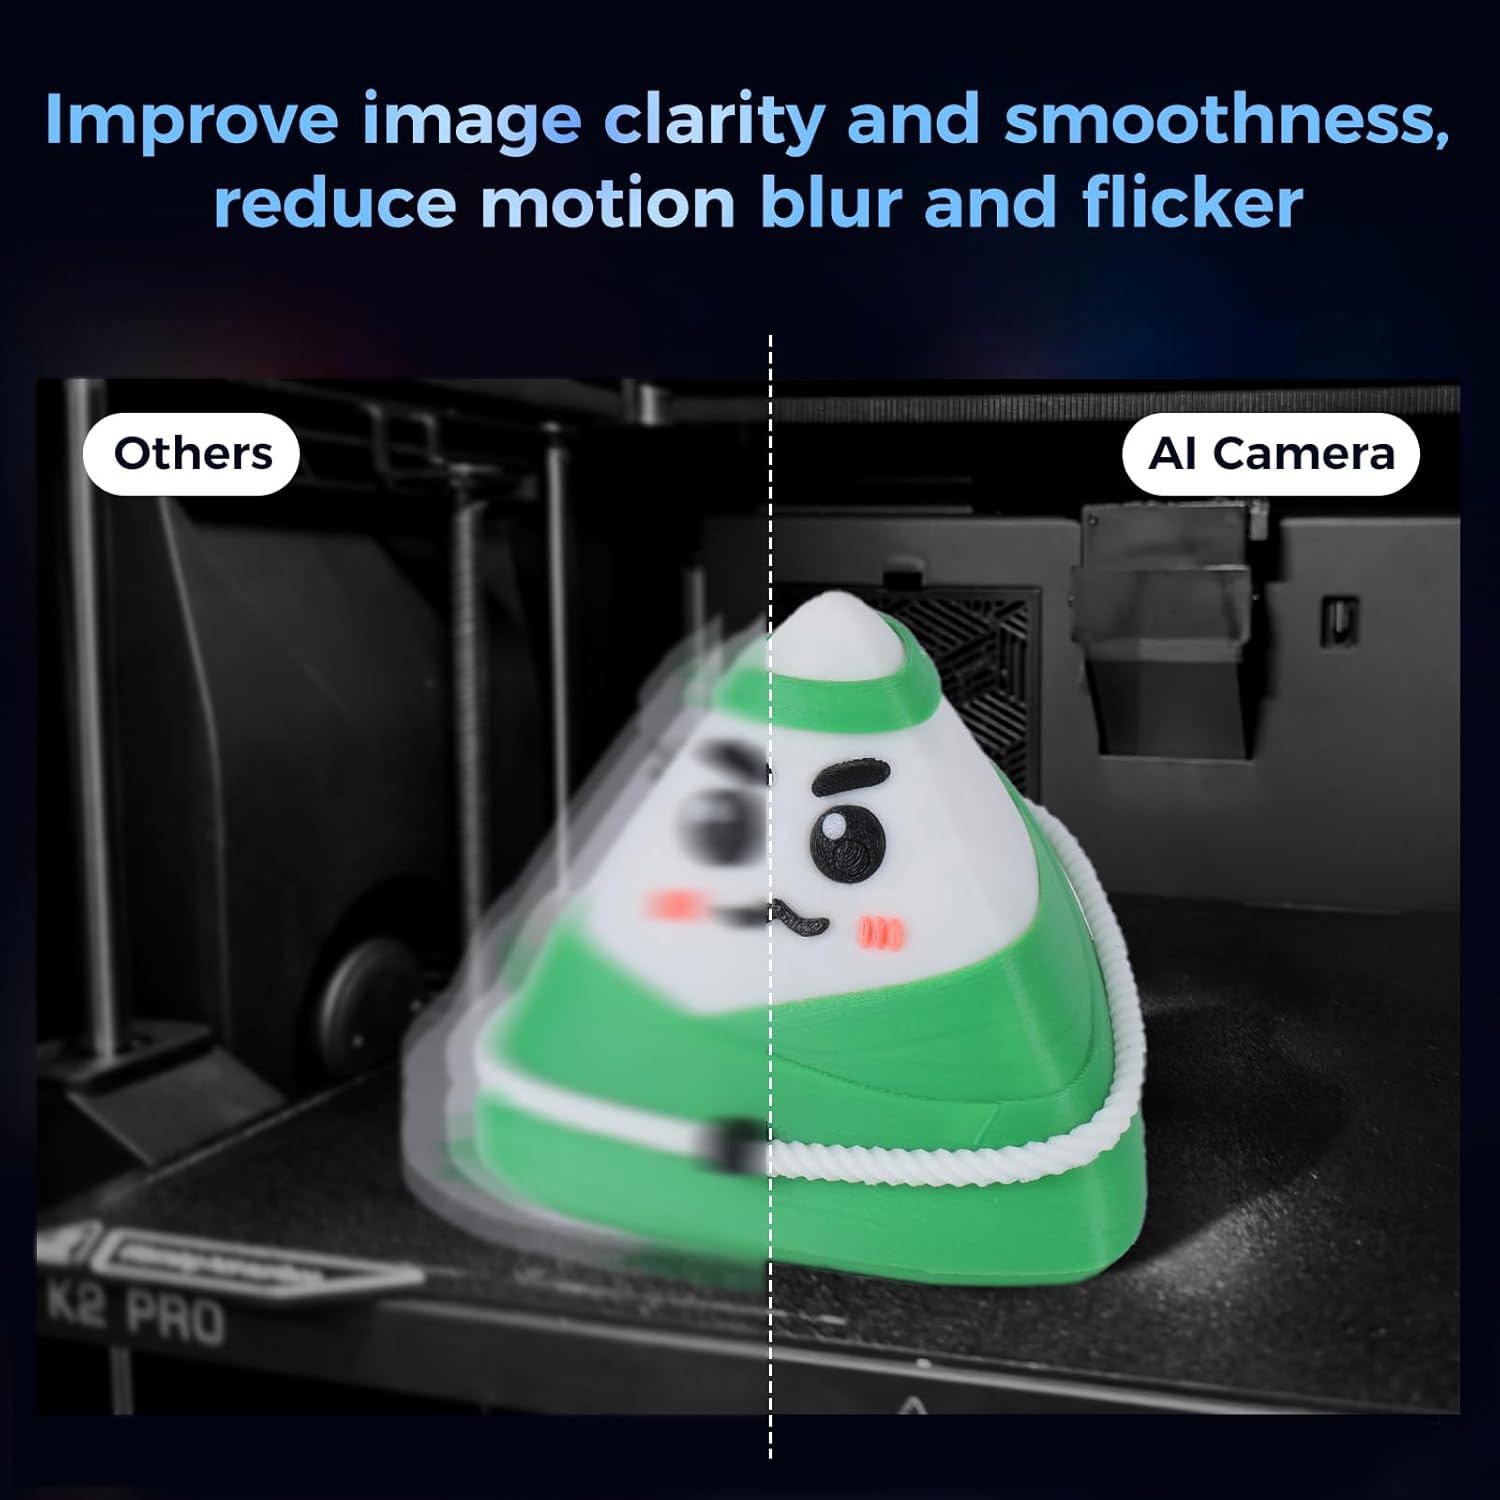
Figure 8: Comparison of image smoothness and motion blur reduction.
5. Maintenance
To ensure optimal performance and longevity of your Chamber AI Camera, follow these simple maintenance guidelines:
- Lens Cleaning: Periodically clean the camera lens with a soft, dry, lint-free cloth. Avoid using abrasive materials or harsh chemicals that could scratch the lens.
- Dust Removal: Keep the camera body free from dust and debris, especially around ventilation areas if present. Use a soft brush or compressed air if necessary.
- Environmental Conditions: Operate the camera within the recommended environmental conditions for your 3D printer. Avoid extreme temperatures or humidity.
6. Troubleshooting
If you encounter issues with your Creality K2 Pro/K2 Chamber AI Camera, refer to the following troubleshooting steps:
- Camera Not Detected:
- Ensure the connection cable is securely plugged into both the camera and the printer's dedicated camera interface.
- Verify that your 3D printer model (K2 or K2 Pro) has the necessary dedicated camera port. Some printer versions or models (e.g., K2 SE) may not be compatible or may require a specific port not universally present. If your printer lacks the required port, the camera cannot be used.
- Restart your 3D printer.
- No Live Feed in Creality Cloud/Print:
- Check your internet connection and ensure your printer is connected to the network.
- Ensure you are logged into your Creality Cloud account.
- Update the Creality Cloud app or Creality Print software to the latest version.
- Verify that the camera is enabled in your printer's settings (if applicable).
- Poor Image Quality:
- Clean the camera lens as described in the Maintenance section.
- Ensure adequate lighting within the printer chamber.
- AI Detection Not Working:
- Ensure the camera has a clear, unobstructed view of the print bed.
- Verify that AI detection features are enabled in the Creality Cloud/Print settings.
- Ensure your printer's firmware and Creality Cloud/Print software are up to date.
If these steps do not resolve the issue, please contact Creality customer support for further assistance.
7. Specifications
| Feature | Specification |
|---|---|
| Model Number | AMUS-CU-3D-AC-K2 Pro-Camera |
| Package Dimensions | 4.72 x 3.19 x 2.4 inches |
| Item Weight | 2.11 ounces |
| Color | Black |
| Video Capture Resolution | 1080p |
| Shooting Modes | Automatic, Manual |
| Exposure Control Type | Automatic, Manual |
| Media Type | SD Card (for internal storage/recording if supported by printer) |
| Compatibility | Creality K2, K2 Pro 3D Printers (Not Compatible with K2 SE) |
8. Warranty and Support
For warranty information, please refer to the warranty card included with your product or visit the official Creality website. If you require technical assistance, have questions about installation, operation, or troubleshooting, please contact Creality customer support through their official channels. Provide your product model number (AMUS-CU-3D-AC-K2 Pro-Camera) and a detailed description of your issue for efficient service.
Creality Official Website: www.creality.com