
Introduction
This manual provides detailed instructions for the installation, operation, and maintenance of your GESIPOR 32"x19" Wall Mount Bathroom Vanity with LED Smart Sensor Light. Please read this manual thoroughly before installation and use to ensure proper function and safety. This floating vanity sink features a V-shaped inner edge for efficient drainage, an additional shelf layer for storage, and a unique cutout design for hanging towels. It is equipped with embedded smart sensor LED lights for convenience.
Package Contents
Before beginning installation, verify that all components listed below are present and undamaged. If any parts are missing or damaged, please contact customer support.
- Bathroom Sink (32"x19" White With LED)
- Shelf Layer
- Bottle Trap
- Sand Sponge
- Hardware required for installation (fasteners, brackets)
Note: Faucet for the 1.37" faucet hole must be purchased separately.
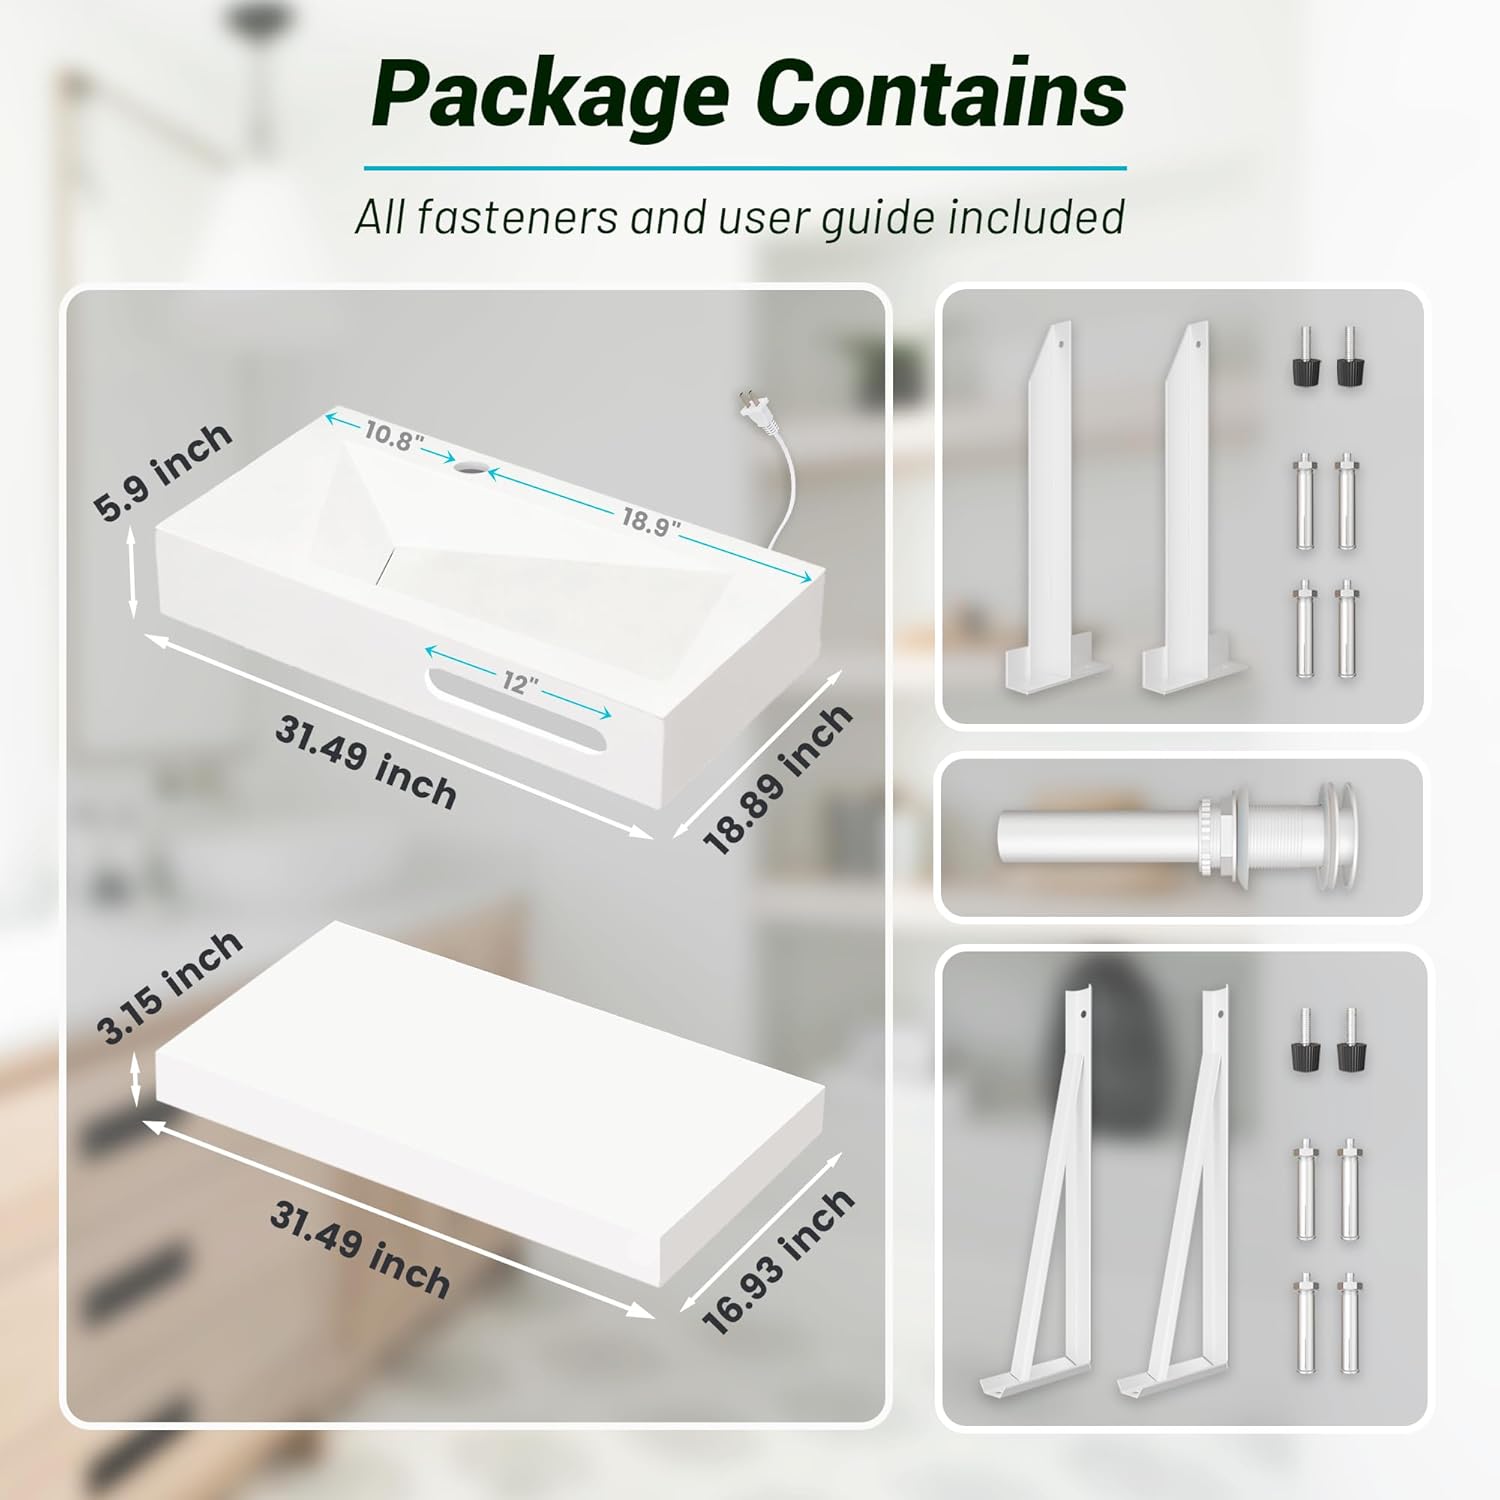
Figure 1: Included Package Contents
Specifications
| Brand | GESIPOR |
| Model | 32"x19" |
| Color | White With Led |
| Material | Stone Resin |
| Product Dimensions (D x W x H) | 18.9"D x 31.5"W x 5.9"H |
| Style | Modern, Floating |
| Lighting | LED Smart Sensor Light |
Installation Instructions
Self-assembly is required. An installation manual is included with the product for reference. Ensure you have the necessary tools before starting. It is recommended to have two people for installation.
- Unpack Components: Carefully remove all items from the packaging. Inspect for any damage.
- Measure and Mark: Determine the desired height and position for the vanity on your wall. Use a tape measure to mark the locations for the mounting brackets. Ensure the marks are level and accurately spaced according to the vanity dimensions.
- Drill Pilot Holes: Using an appropriate drill bit for your wall type (e.g., tile, drywall), drill pilot holes at the marked locations.
- Install Wall Anchors: Insert the provided wall anchors into the pilot holes. Tap gently with a hammer until flush with the wall surface.
- Mount Brackets: Secure the mounting brackets to the wall using the provided screws. Ensure they are firmly attached and level.
- Position Vanity Sink: With assistance, carefully lift the vanity sink and align it with the mounted brackets. Lower it onto the brackets, ensuring it sits securely.
- Install Shelf Layer: Position the separate shelf layer below the main sink unit, aligning it with its respective mounting points or brackets. Secure it in place.
- Connect Plumbing: Install the bottle trap and connect it to your existing plumbing. Ensure all connections are tight to prevent leaks.
- Connect LED Power: If applicable, connect the LED smart sensor light to a 110V power outlet.
- Seal Edges: Apply a bead of silicone sealant along the back edge of the vanity where it meets the wall to prevent water infiltration.
Installation Video Guide
Video 1: How to Install a GESIPOR Bathroom Vanity. This video demonstrates the step-by-step installation process for the floating vanity, including measuring, drilling, mounting brackets, and positioning the sink and shelf.
Operating Instructions
LED Smart Sensor Light
The vanity is equipped with an embedded smart sensor LED light for convenience and energy efficiency.
- Automatic Activation: The LED lights will automatically turn on when motion is detected within 3 meters (approximately 10 feet) of the sensor.
- Automatic Deactivation: The lights will automatically turn off when no motion is detected for a period, typically after you leave the detection zone.
- Power Requirement: The LED strip requires a 110V power outlet for operation. Ensure it is properly plugged in.
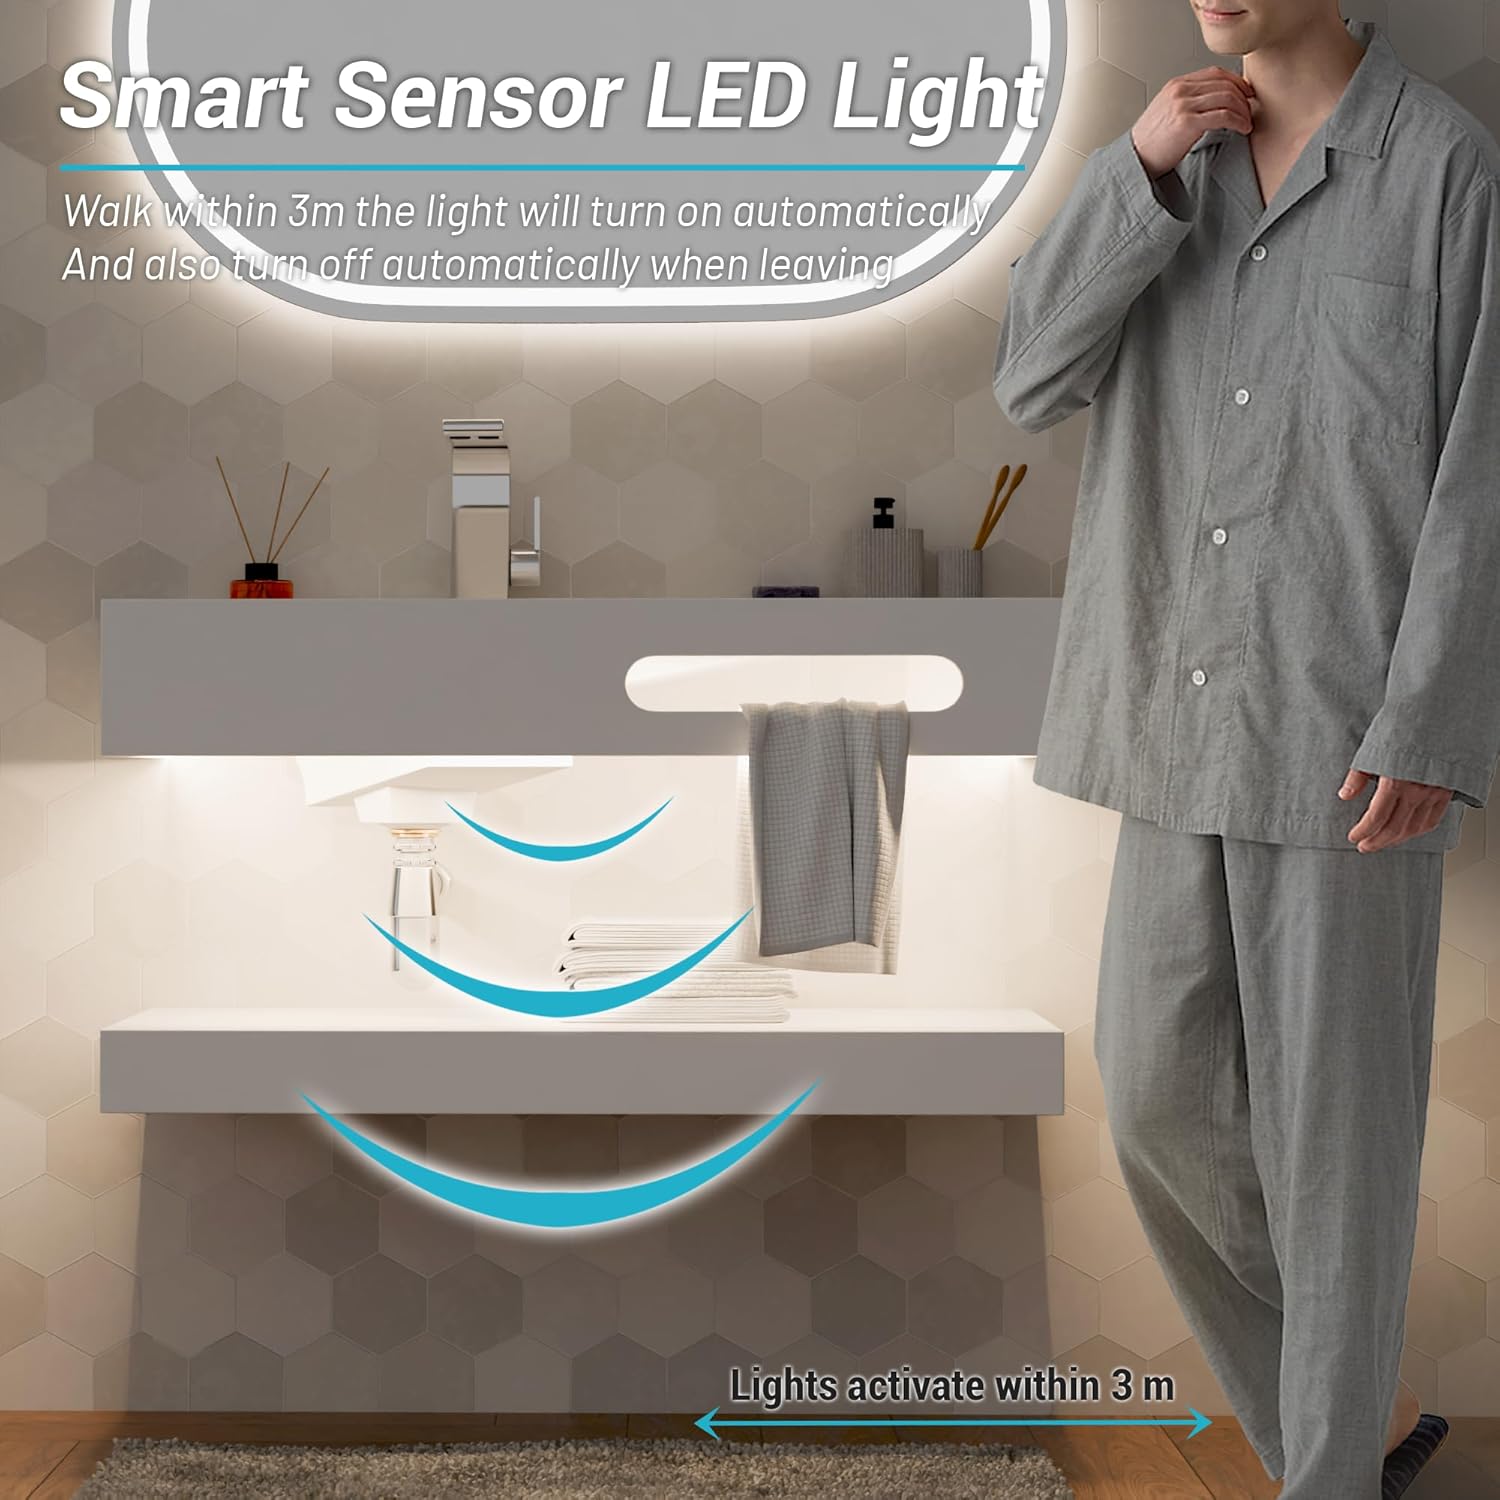
Figure 2: Smart Sensor LED Light Operation

Figure 3: LED Light On/Off Demonstration
Maintenance
The stone resin material is designed to be smooth, durable, and resistant to stains and wear. Regular cleaning will help maintain its appearance and longevity.
- Daily Cleaning: Wipe down the vanity surface with a soft cloth and mild soap and water. Rinse thoroughly and dry to prevent water spots.
- Stain Removal: For tougher stains, use the provided sand sponge or a non-abrasive cleaner. Avoid harsh chemicals or abrasive scrubbers, as these can damage the surface.
- LED Light Care: Ensure the LED light strip remains dry. If cleaning around the sensor, use a dry, soft cloth.
- Drain Maintenance: Periodically check the V-shaped drain for any blockages and clear as needed to ensure fast and unobstructed drainage.
Material Properties

Figure 4: Material Properties
Cleaning Demonstration
Video 2: GESIPOR Floating Bathroom Vanity Features. This video showcases the vanity's design, including the LED light, towel holder, and demonstrates the ease of cleaning the stone resin surface.
Troubleshooting
- Water Not Draining Properly:
- Check the V-shaped drain for any debris or blockages.
- Ensure the bottle trap is correctly installed and not clogged.
- LED Light Not Turning On:
- Verify that the vanity is properly connected to a 110V power outlet.
- Check if the power outlet is functional.
- Ensure the sensor is not obstructed and there is motion within the 3-meter detection range.
- Vanity Feels Unstable:
- Recheck all mounting bracket connections to the wall and to the vanity. Ensure all screws are tightened.
- Confirm that the wall anchors are securely installed in a suitable wall material.
Warranty and Support
For warranty information, product support, or to report missing/damaged parts, please refer to the documentation included with your purchase or contact GESIPOR customer service directly. Keep your purchase receipt as proof of purchase.