Oakcastle IR200
Oakcastle IR200 Internet Radio User Manual
Model: IR200
1. Introduction
Thank you for choosing the Oakcastle IR200 Internet Radio. This manual provides essential information for the safe and efficient operation of your device. Please read it thoroughly before use and retain it for future reference.
The Oakcastle IR200 is a versatile audio system offering multiple listening options, including Internet Radio, DAB+, FM, Bluetooth 5.3, and AUX input. It features a color display, remote control, and podcast support for a comprehensive audio experience.
2. Package Contents
Carefully unpack the box and ensure all items listed below are present and in good condition:
- Oakcastle IR200 Internet Radio Unit
- Power Cable
- Remote Control
- User Manual (this document)

Image 2.1: Contents of the Oakcastle IR200 package, including the radio unit, its box, power cable, remote control, and user manual.
3. Product Overview
Familiarize yourself with the main components and controls of your Oakcastle IR200 radio.
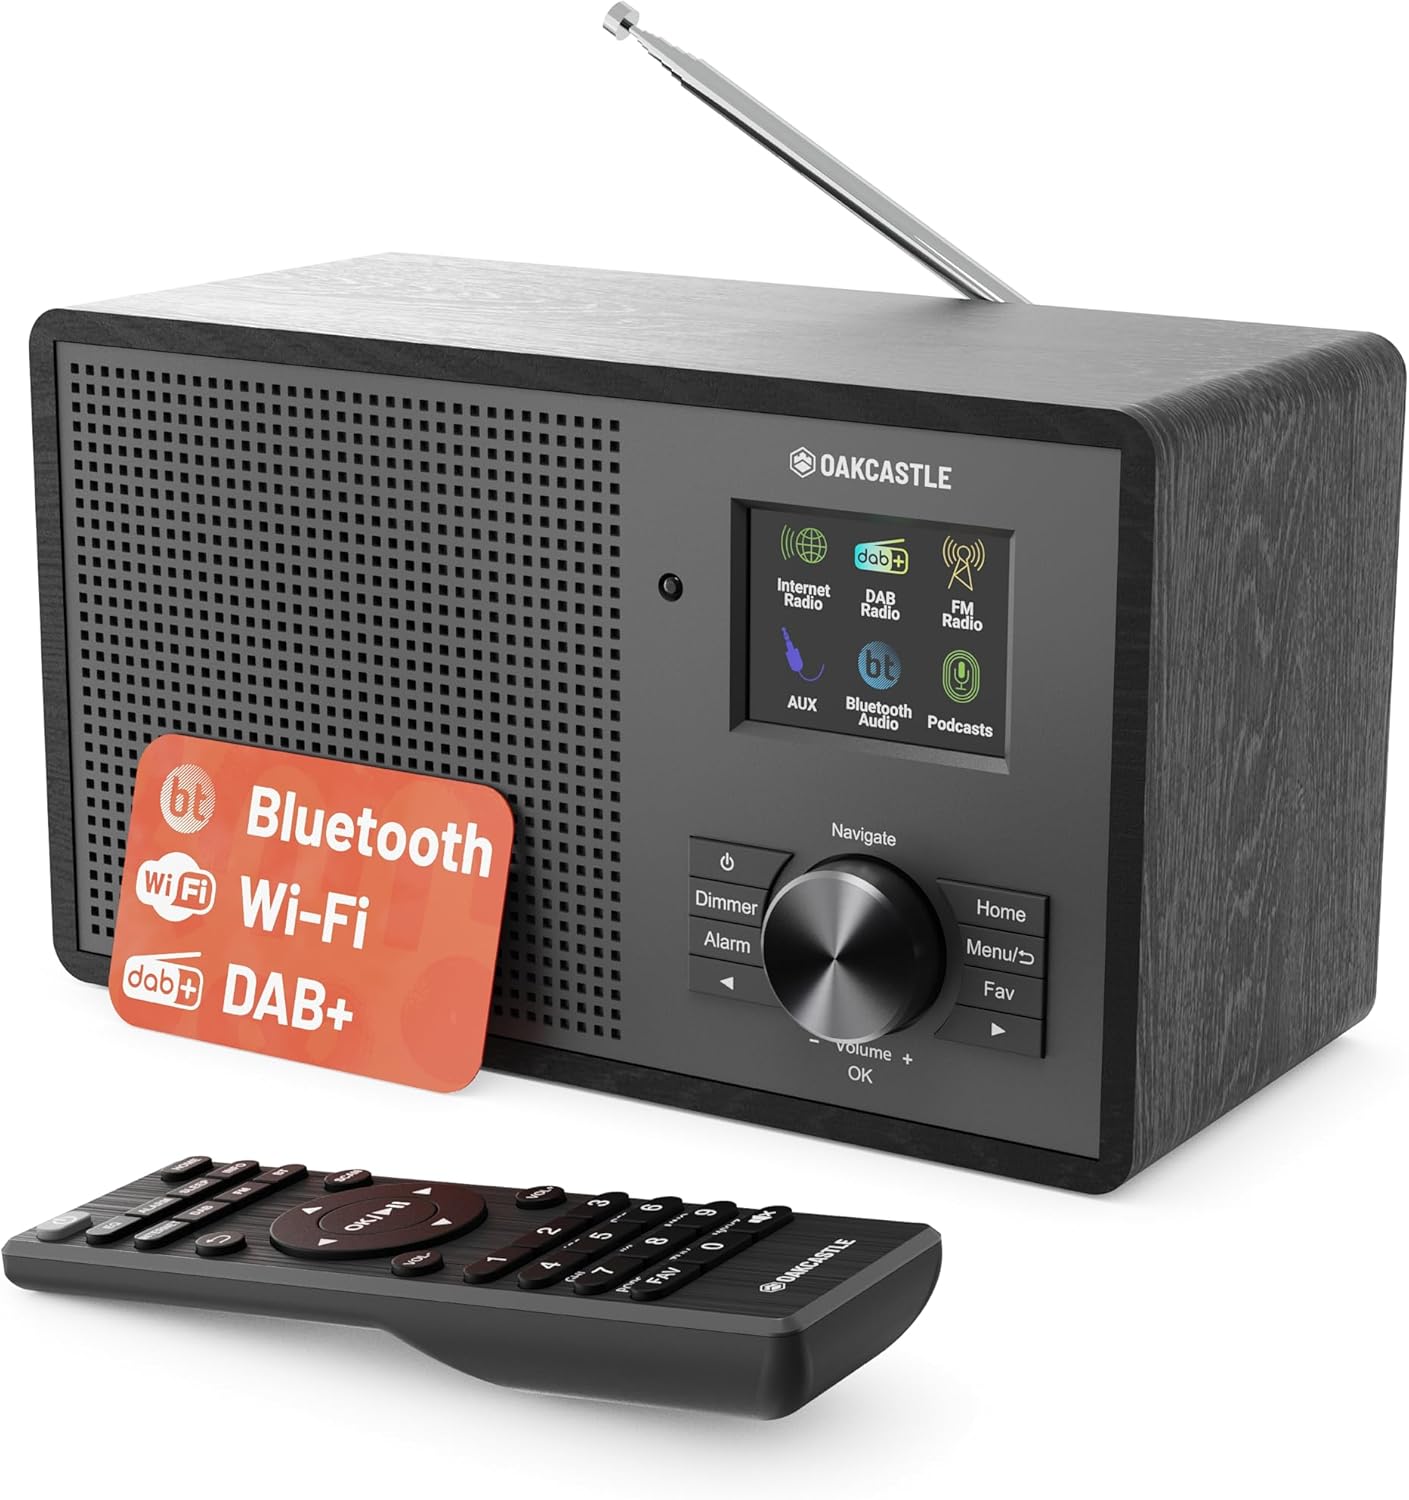
Image 3.1: Front view of the Oakcastle IR200 radio, showcasing the display, control knob, buttons, and the included remote control.
3.1 Front Panel Controls
- Display Screen: Shows station information, time, and menu options.
- Navigate/Volume/OK Knob: Rotate to navigate menus or adjust volume; press to confirm selections.
- Power Button: Turns the unit on/off or puts it into standby.
- Dimmer Button: Adjusts display brightness.
- Alarm Button: Accesses alarm settings.
- Home Button: Returns to the main menu.
- Menu Button: Accesses mode-specific menus.
- Fav Button: Accesses favorite station presets.
3.2 Rear Panel Connections

Image 3.2: Rear view of the Oakcastle IR200, highlighting the headphone output and AUX input ports.
- Telescopic Antenna: For DAB+ and FM reception.
- AUX Input: Connect external audio devices.
- Headphone Output: Connect headphones for private listening.
- DC IN: Power adapter connection.
4. Initial Setup
4.1 Power Connection
- Insert the power cable into the DC IN port on the rear of the radio.
- Plug the other end of the power cable into a wall socket.
- Press the Power button on the front panel or remote control to turn on the radio.
4.2 Antenna Adjustment
For optimal DAB+ and FM reception, fully extend the telescopic antenna located at the rear of the unit.
4.3 Network Connection (for Internet Radio)
- Upon first power-on, the radio will guide you through the network setup.
- Select "Network Wizard" or "Wi-Fi Setup" from the menu.
- The radio will scan for available Wi-Fi networks. Select your network from the list.
- Enter your Wi-Fi password using the navigation knob and OK button.
- Once connected, the radio will display a confirmation message.
5. Operating Modes
The Oakcastle IR200 offers several listening modes. Press the "Home" button to access the main menu and select your desired mode.
5.1 Internet Radio
Access thousands of global radio stations via your Wi-Fi connection.

Image 5.1: The radio's display screen in Internet Radio mode, showing station information.
- From the main menu, select "Internet Radio".
- You can browse stations by location, genre, or search by name.
- Rotate the Navigate knob to scroll through options and press OK to select.
- To save a station as a favorite, press the "Fav" button during playback.
5.2 DAB+ Radio
Enjoy high-quality digital radio broadcasts.

Image 5.2: The radio's display screen in DAB+ Radio mode, showing the current station.
- From the main menu, select "DAB+ Radio".
- The radio will automatically scan for available DAB+ stations.
- Use the Navigate knob to select a station from the list.
- To save a station as a favorite, press the "Fav" button during playback.
5.3 FM Radio
Tune into traditional analog FM broadcasts.
- From the main menu, select "FM Radio".
- To auto-scan for stations, press and hold the OK button or use the scan function via the menu.
- To manually tune, rotate the Navigate knob.
- To save a station as a favorite, press the "Fav" button during playback.
5.4 Bluetooth Connectivity
Stream audio wirelessly from your Bluetooth-enabled devices.

Image 5.3: The radio's display screen in Bluetooth mode, indicating readiness for pairing.
- From the main menu, select "Bluetooth". The radio will enter pairing mode.
- On your external device (e.g., smartphone), enable Bluetooth and search for "Oakcastle IR200".
- Select "Oakcastle IR200" to pair. Once connected, you can stream audio.
5.5 AUX Input
Connect external audio sources using a 3.5mm audio cable.
- Connect one end of a 3.5mm audio cable to the AUX IN port on the rear of the radio.
- Connect the other end to the headphone jack or audio output of your external device.
- From the main menu, select "AUX".
- Control playback from your external device.
5.6 Podcasts
Browse and listen to a wide range of podcasts.
- From the main menu, select "Podcasts".
- Browse podcasts by category or search for specific titles.
- Select a podcast to start listening.
6. Settings and Features
6.1 System Settings
Access general system settings via the main menu to configure time, language, display, and more.
- Time/Date: Set time format, synchronize time.
- Language: Select your preferred language for the menu.
- Display: Adjust backlight, color scheme.
- Network: Reconfigure Wi-Fi settings.
- Software Update: Check for and install firmware updates.
6.2 Equalizer (EQ)
Customize the audio output to your preference using the equalizer settings, accessible via the remote control or system menu.
6.3 Presets
The radio supports over 90 presets for your favorite Internet, DAB+, and FM stations. To recall a preset, press the "Fav" button and select from the list.
6.4 Alarms
Set alarms to wake up to your favorite radio station or a buzzer sound. Access alarm settings via the "Alarm" button on the front panel or remote.
7. Remote Control
The included remote control provides convenient access to all radio functions from a distance.
Ensure batteries are correctly inserted. Point the remote control towards the front of the radio for optimal response.
7.1 Remote Control Functions
- Power: On/Off/Standby.
- Volume +/-: Adjust volume level.
- Navigation Buttons (Up/Down/Left/Right): Navigate menus.
- OK: Confirm selection.
- Mode Buttons (Internet, DAB, FM, Bluetooth, AUX): Switch between modes.
- Preset Buttons (1-90+): Directly select saved favorite stations.
- EQ: Access equalizer settings.
- Menu: Access mode-specific menus.
- Fav: Access favorite station list.
8. Maintenance
8.1 Cleaning
To clean the radio, use a soft, dry cloth. Do not use abrasive cleaners, waxes, or solvents as these may damage the finish.
8.2 General Care
- Keep the unit away from direct sunlight, heat sources, and moisture.
- Avoid dropping the unit or subjecting it to strong impacts.
- Ensure proper ventilation around the unit.
9. Troubleshooting
| Problem | Possible Cause | Solution |
|---|---|---|
| No power | Power cable not connected; wall socket not active. | Check power cable connection; try a different wall socket. |
| No sound | Volume too low; Mute activated; Incorrect source selected. | Increase volume; Check mute status; Select correct input mode. |
| Internet Radio not connecting | Incorrect Wi-Fi password; Weak Wi-Fi signal; Router issue. | Re-enter Wi-Fi password; Move radio closer to router; Restart router. |
| Poor DAB+/FM reception | Antenna not extended; Poor signal area. | Fully extend antenna; Reposition radio for better signal. |
| Bluetooth not pairing | Radio not in pairing mode; Device too far; Device already paired. | Ensure radio is in Bluetooth mode; Move device closer; Unpair from other devices. |
10. Specifications
| Feature | Detail |
|---|---|
| Brand | Oakcastle |
| Model | IR200 |
| Color | Black |
| Connectivity Technology | Wi-Fi, Bluetooth 5.3, AUX |
| Tuning Technology | Internet Radio, DAB+, FM |
| Special Features | Bluetooth, EQ, Podcasts, Internet Radio, Remote Control |
| Power Source | Electric Cable (Mains) |
| Product Dimensions (H x W x D) | 14 cm x 10.5 cm x 23 cm (approx.) |
| Product Weight | 0.94 kg |
| Compatible Devices | MP3 Player, Smartphone, Tablet |
11. Warranty and Support
11.1 Warranty Information
The Oakcastle IR200 comes with a standard warranty. An extended 3-year warranty is available upon product registration on the manufacturer's website. Please refer to the warranty card included in your package or visit the official Oakcastle website for details.
11.2 Customer Support
For technical assistance, troubleshooting, or further inquiries, please contact Oakcastle customer support. Contact details can typically be found on the official Oakcastle website or on the warranty card.
Ask a question about this manual
Ask about setup, troubleshooting, compatibility, parts, safety, or missing instructions. Manuals+ will review the question and use this page’s manual context to help answer it.