
1. Introduction
This manual provides detailed instructions for the installation, operation, and maintenance of your CNSTWEI 12.1-inch Carplay Screen Car Radio. This unit is designed to integrate seamlessly with Ford F150 Raptor models from 2009 to 2012, enhancing your vehicle's infotainment capabilities while retaining original car functions.
The system features an 8-core CPU, 2GB RAM, 64GB ROM, a 12.1-inch IPS touchscreen with 1024x768 resolution, built-in Wireless Carplay and Wired Android Auto, GPS navigation, Wi-Fi, Bluetooth 5.0, FM radio, and DSP audio processing.
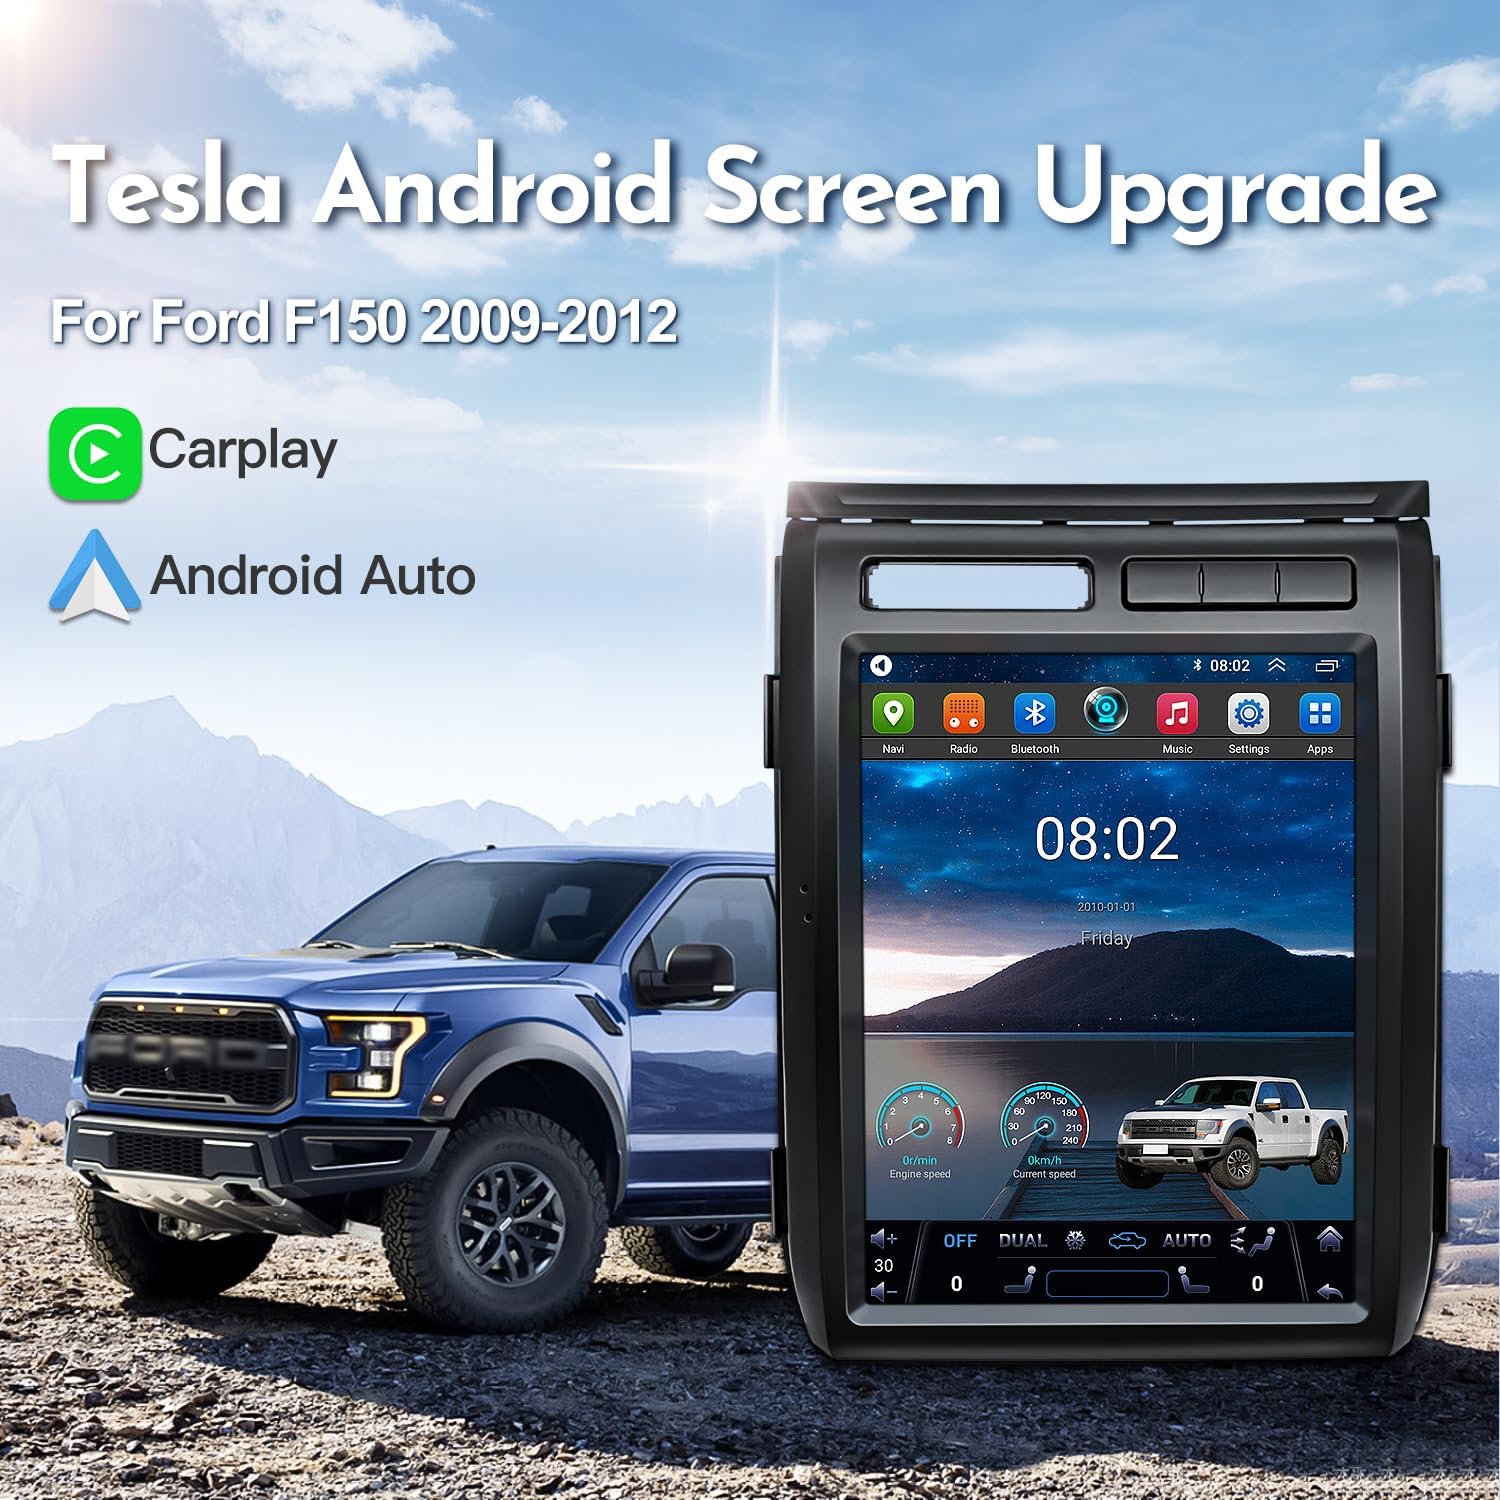
Image 1.1: The CNSTWEI 12.1-inch Carplay Screen Car Radio unit.
2. Safety Information
Please read all instructions carefully before installation and operation. Improper installation or use can lead to damage to the product, vehicle, or personal injury. Always consult a professional for installation if you are unsure about any steps.
- Do not attempt to operate the unit while driving. Distracted driving can cause accidents.
- Ensure all wiring is correctly connected to prevent short circuits or electrical fires.
- Keep the unit away from water and excessive moisture.
- Do not disassemble or modify the unit. This will void the warranty and may cause damage.
- Use only specified power cables and accessories.
3. Package Contents
Verify that all items are present in the package before beginning installation:
- 1 x 12.1-inch Car Touchscreen Unit
- 1 x Microphone (MIC)
- 1 x Power Cable Harness
- 1 x Camera Input Cable (CAM)
- 1 x GPS Antenna
- 1 x USB Cable
- 1 x AUX Cable
- 1 x User Manual (this document)
- Installation Tools (if included in your specific package)

Image 3.1: Overview of included cables and components.
4. Compatibility & Pre-Installation Notes
This product is specifically designed for Ford F150 Raptor models manufactured between 2009 and 2012. It is crucial to verify your vehicle's dashboard configuration before installation.
4.1. Model Selection (A vs. B)
The correct model (A or B) depends on whether your original radio has a screen. Please refer to the image below to determine the appropriate model for your vehicle.
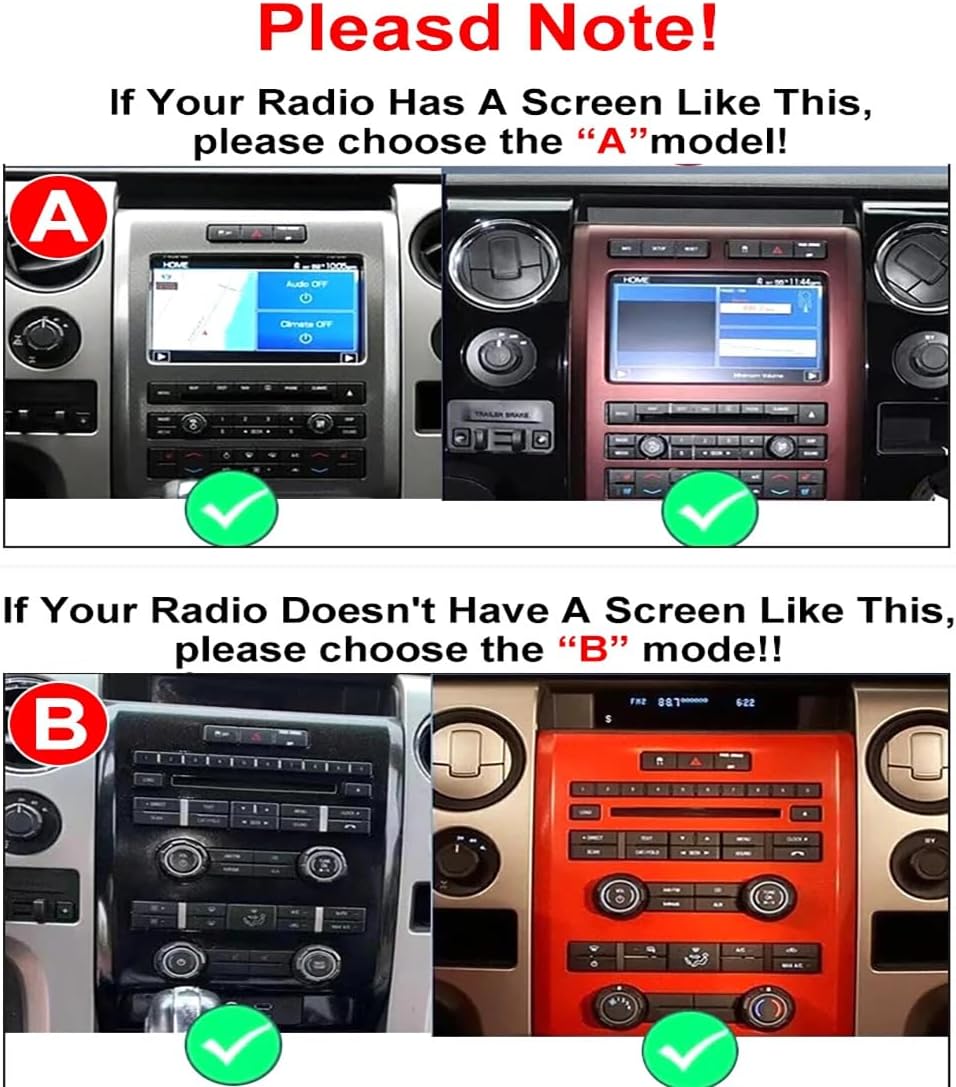
Image 4.1: Guide for selecting Model A or Model B based on your original radio configuration. Choose 'A' if your radio has a screen, 'B' if it does not.
4.2. Incompatible Configurations
Certain 2012 F150 models with a specific central control panel design are not compatible with this product. If your central control panel matches the examples shown in the image below, this product is not suitable.

Image 4.2: Examples of incompatible central control panels. Do not purchase if your vehicle matches these designs.
5. Setup and Installation
Installation of this unit requires basic automotive electrical knowledge. If you are not confident in performing the installation yourself, it is highly recommended to seek professional assistance.
5.1. General Installation Steps (Overview)
- Disconnect Battery: Before starting, disconnect the negative terminal of your vehicle's battery to prevent electrical shorts.
- Remove Original Radio/Panel: Carefully remove the existing radio unit and surrounding dashboard trim. Refer to your vehicle's service manual for specific instructions on trim removal.
- Connect Wiring Harness: Connect the provided power cable harness, AUX/USB cables, GPS antenna, and camera input cable to the new Carplay screen unit. Ensure all connections are secure.
- Integrate with Vehicle Wiring: Connect the new wiring harness to your vehicle's existing wiring. This unit is designed to retain original car radio, amplifier function, and steering wheel controls.
- Test Functionality: Before fully reassembling the dashboard, reconnect the battery and power on the unit. Test all functions: radio, Bluetooth, Carplay/Android Auto, GPS, and steering wheel controls.
- Secure and Reassemble: Once all functions are verified, securely mount the new Carplay screen unit and reassemble the dashboard trim.

Image 5.1: Comparison of the dashboard before and after installation of the CNSTWEI Carplay Screen.
6. Operating Instructions
Your CNSTWEI Carplay Screen Car Radio offers a range of features for an enhanced driving experience.
6.1. Basic Navigation
- The unit operates on an Android system, similar to a tablet. Navigate using the touchscreen.
- Access applications from the home screen or app drawer.
- Swipe down from the top for quick settings and notifications.
6.2. Carplay & Android Auto
The unit supports both Wireless Carplay and Wired Android Auto.
- Wireless Carplay: Ensure your iPhone's Bluetooth and Wi-Fi are enabled. On the unit, select the Carplay app and follow the on-screen prompts to pair your device.
- Wired Android Auto: Connect your Android phone to the unit via a USB cable. Select the Android Auto app on the unit and follow the on-screen prompts.
- Once connected, you can access navigation, music, calls, and messages directly from the unit's screen.
6.3. GPS Navigation
The unit comes with a GPS antenna and supports various navigation applications such as Google Maps, iGo, and Waze. Ensure the GPS antenna is properly installed for optimal signal reception.

Image 6.1: Example of the navigation interface.
6.4. DSP Audio Processor
The built-in Digital Signal Processor (DSP) allows for high-precision audio tuning. Access the DSP settings through the audio or sound settings menu to customize equalization, surround sound, and other audio parameters for an optimized listening experience.

Image 6.2: DSP Presound and Aftersound Adjustment interfaces.
6.5. Reversing System
The unit supports both original and aftermarket rearview cameras. When a compatible camera is connected and the vehicle is shifted into reverse, the screen will automatically display the camera feed.

Image 6.3: Reversing system display.
7. Specifications
| Brand | CNSTWEI |
| Model Number | A model 2+64GB |
| Screen Size | 12.1 inches |
| Display Type | IPS Touchscreen with 2.5D Multi-Touch |
| Resolution | 1024x768 |
| CPU | 8 Core |
| RAM | 2GB DDR (Other variants available) |
| ROM | 64GB (Other variants available) |
| Operating System | Android 15 (or latest compatible version) |
| Connectivity | Bluetooth 5.0, Wi-Fi, USB, 3.5mm Jack |
| Supported Internet Services | Android Auto, Apple CarPlay |
| Audio Output Mode | Stereo, AUX, Bluetooth, Speakers |
| Surround Sound Channel Config | 6.0 |
| Video Encoding | H.264, H.265/HEVC |
| Control Method | Touch |
8. Troubleshooting
If you encounter issues, refer to the following common problems and solutions. Many problems are caused by incorrect cable connections or settings.
- No Power: Check all power cable connections. Ensure the vehicle's battery is properly connected and charged. Verify fuses.
- No Sound: Check speaker connections. Verify audio settings (volume, mute, DSP settings). Ensure the correct audio source is selected.
- Carplay/Android Auto Not Connecting: For Wireless Carplay, ensure Bluetooth and Wi-Fi are enabled on your iPhone. For Wired Android Auto, try a different USB cable. Ensure the Carplay/Android Auto app is selected on the unit.
- GPS Signal Lost: Ensure the GPS antenna is securely connected and placed in a location with a clear view of the sky (e.g., on the dashboard).
- Steering Wheel Controls Not Working: Verify the CANbus box connection (if applicable) and check the steering wheel control settings in the unit's system menu.
- Screen Unresponsive: Try restarting the unit. If the issue persists, perform a factory reset (note: this will erase all user data and settings).
If problems persist after attempting these solutions, please contact customer support.
9. Maintenance
Proper maintenance ensures the longevity and optimal performance of your Carplay screen unit.
- Cleaning the Screen: Use a soft, lint-free cloth specifically designed for electronics screens. Do not use abrasive cleaners or solvents. Gently wipe the screen to remove dust and fingerprints.
- Software Updates: Periodically check for software updates provided by the manufacturer to ensure you have the latest features and bug fixes. Follow the update instructions carefully.
- Environmental Conditions: Avoid exposing the unit to extreme temperatures or direct sunlight for prolonged periods, as this can affect performance and lifespan.
10. Warranty and Support
This product comes with a limited warranty. Please refer to the warranty information provided at the time of purchase for specific terms and conditions. Generally, the warranty covers manufacturing defects.
For technical support, installation assistance, or warranty claims, please contact CNSTWEI customer service. Most issues can be resolved with guidance from our support team.
- Customer Service: Refer to your purchase documentation or the seller's contact information for support channels (e.g., Amazon email).
- When contacting support, please provide your product model number (A model 2+64GB) and a detailed description of the issue.