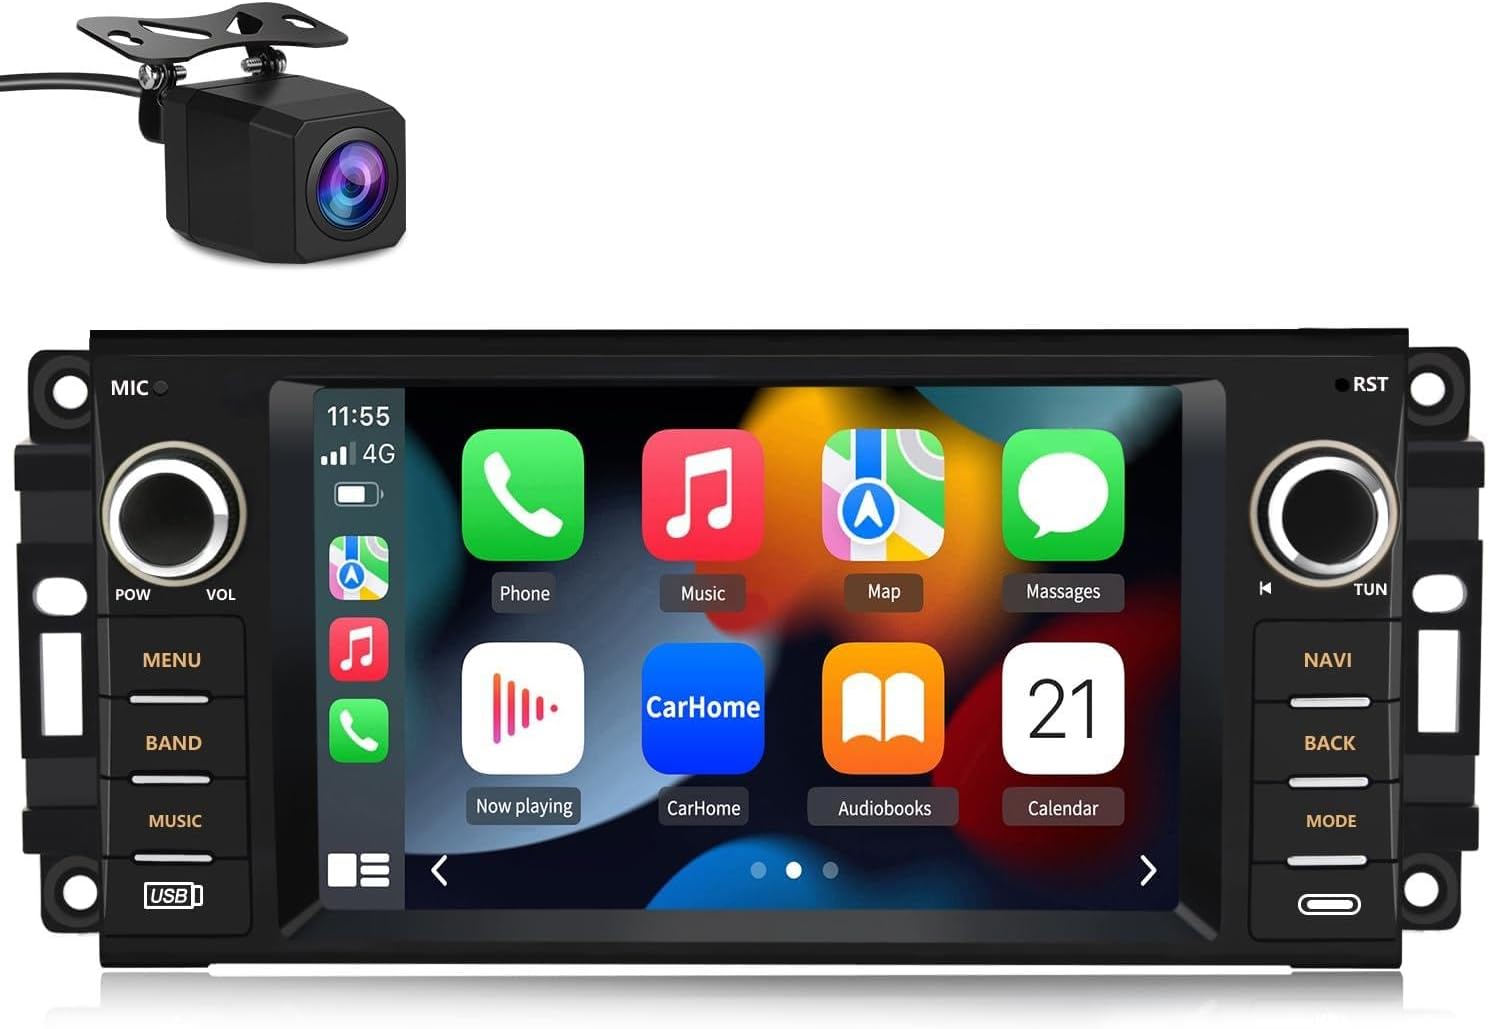
The EagleNav XTJE72C is a 7-inch Android 13 car stereo designed to upgrade your vehicle's infotainment system. It features a high-definition touchscreen, 2GB RAM, and 32GB ROM, offering responsive performance. Key functionalities include wireless CarPlay and Android Auto, Bluetooth hands-free calling, GPS navigation, FM/AM radio, and support for a reverse camera. This unit is compatible with various Jeep, Chrysler, and Dodge models.
Image 1.1: EagleNav 7-inch Android 13 Car Stereo with included reverse camera.
1.1 Compatible Vehicle Models
Jeep Wrangler/Unlimited: 2007-2018
Jeep Compass: 2009-2016
Jeep Patriot: 2009-2016
Jeep Grand Cherokee: 2005-2011
Jeep Liberty: 2008-2011
Jeep Commander: 2008-2011
Chrysler Sebring: 2007-2010
Chrysler Town & Country: 2007-2010
Dodge Grand Caravan: 2011-2014
Dodge Charger: 2008-2010
Dodge Ram Pickup 1500/2500/3500: 2009-2012
Image 1.2: Compatible vehicle models for the EagleNav car stereo.
2. Setup and Installation
This section provides guidance for installing your EagleNav car stereo. The unit features a plug-and-play design for simplified installation. However, professional installation is recommended if you are unfamiliar with car audio wiring.
2.1 Package Contents
Before beginning installation, verify that all components are present:
EagleNav 7-inch Android 13 Car Stereo Unit
Power Cable
RCA Cable
Reversing Line (for camera)
Can Bus Decoder
GPS Module
USB Cables (x2)
Antenna
Crowbar (for panel removal)
Screwdriver
External Microphone
Image 2.1: Included components for the EagleNav car stereo.
2.2 Installation Steps
Remove Original Stereo: Carefully remove the vehicle's original stereo unit and dashboard trim using appropriate tools.
Connect Wiring Harness: Connect the provided power cable and RCA cables to the new stereo unit. Ensure all connections are secure.
Connect GPS Antenna: Attach the GPS module to the designated port on the stereo. Position the antenna in a location with a clear view of the sky for optimal signal reception.
Connect USB Cables: Route the USB cables to a convenient location, such as the glove compartment, for connecting external devices.
Connect External Microphone: Plug in the external microphone for improved call quality.
Connect Reverse Camera (if applicable): If installing a reverse camera, connect its video and power cables according to the wiring diagram.
Test Functionality: Before fully reassembling the dashboard, power on the vehicle and test the stereo's basic functions, including power, audio, touchscreen, and camera input.
Secure and Reassemble: Once functionality is confirmed, secure the new stereo unit in place and reassemble the dashboard trim.
Video 2.1: Detailed installation guide for the EagleNav 7-inch Radio in a Jeep Wrangler JK.
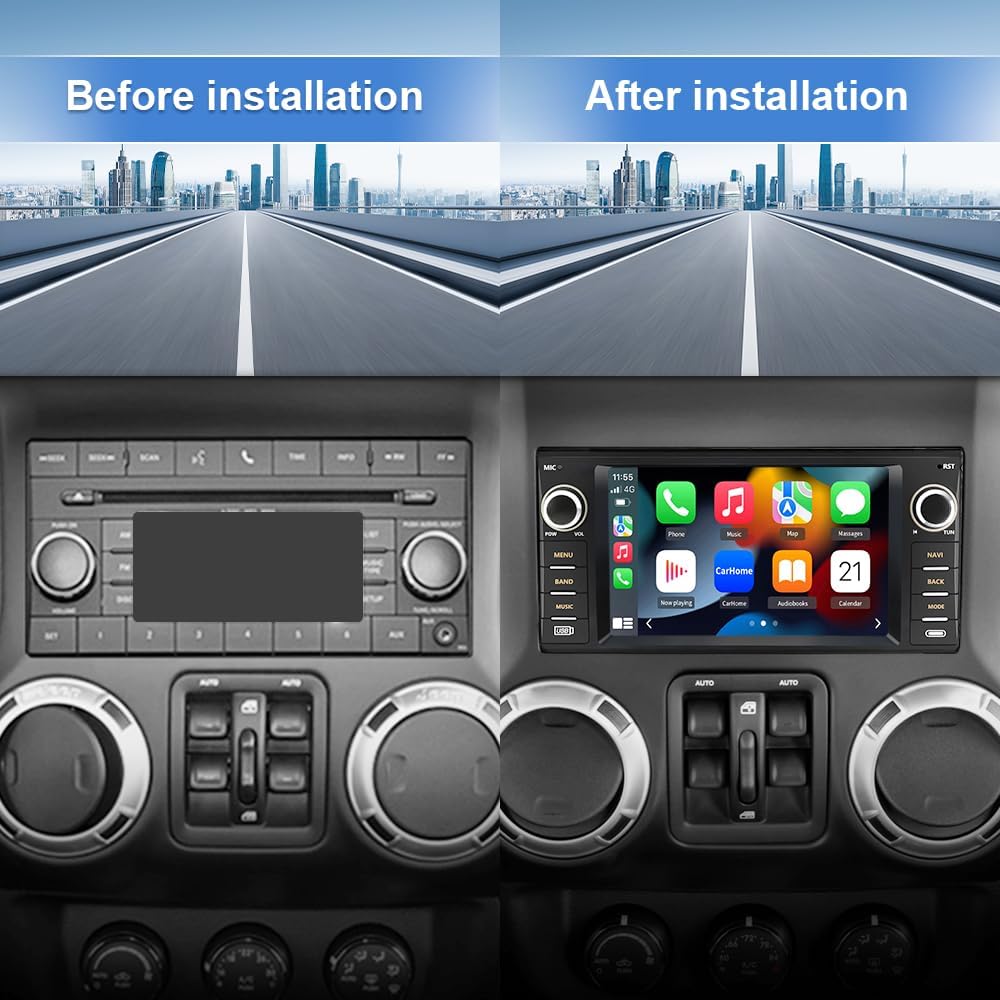
Image 2.2: Visual comparison of the dashboard before and after installing the EagleNav car stereo.
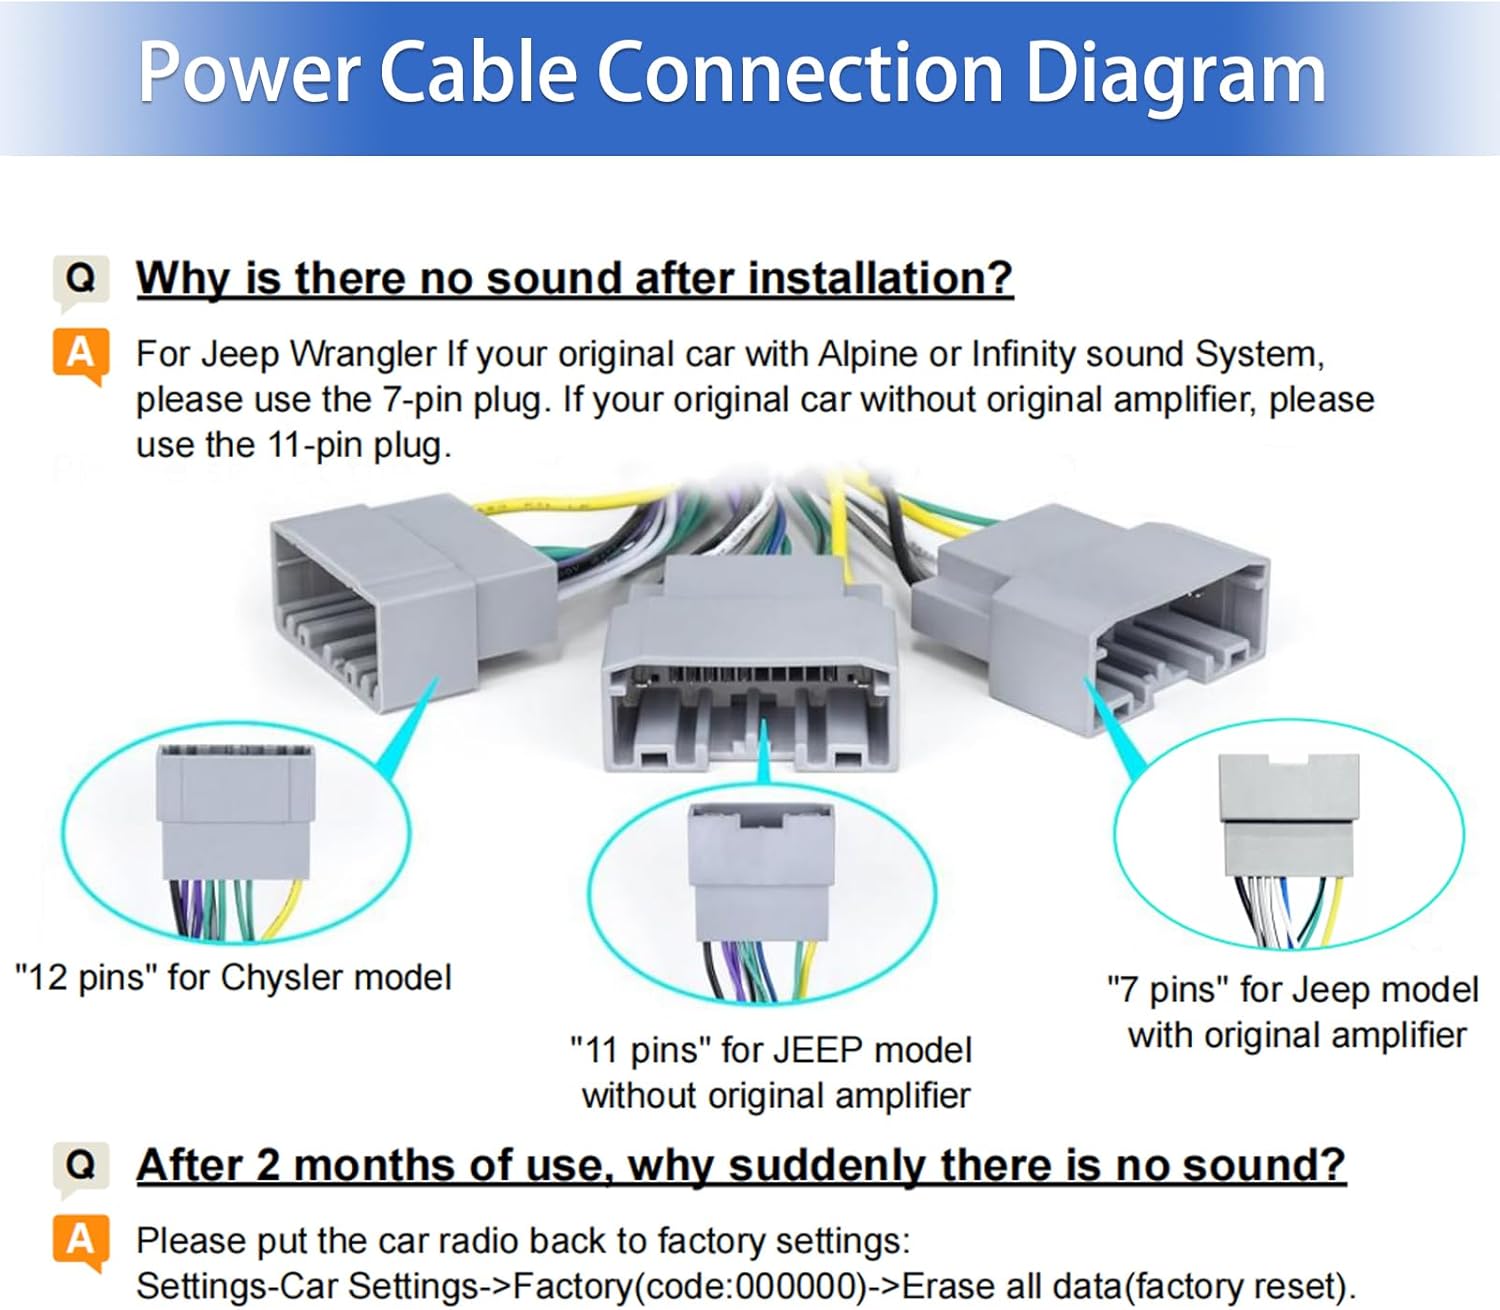
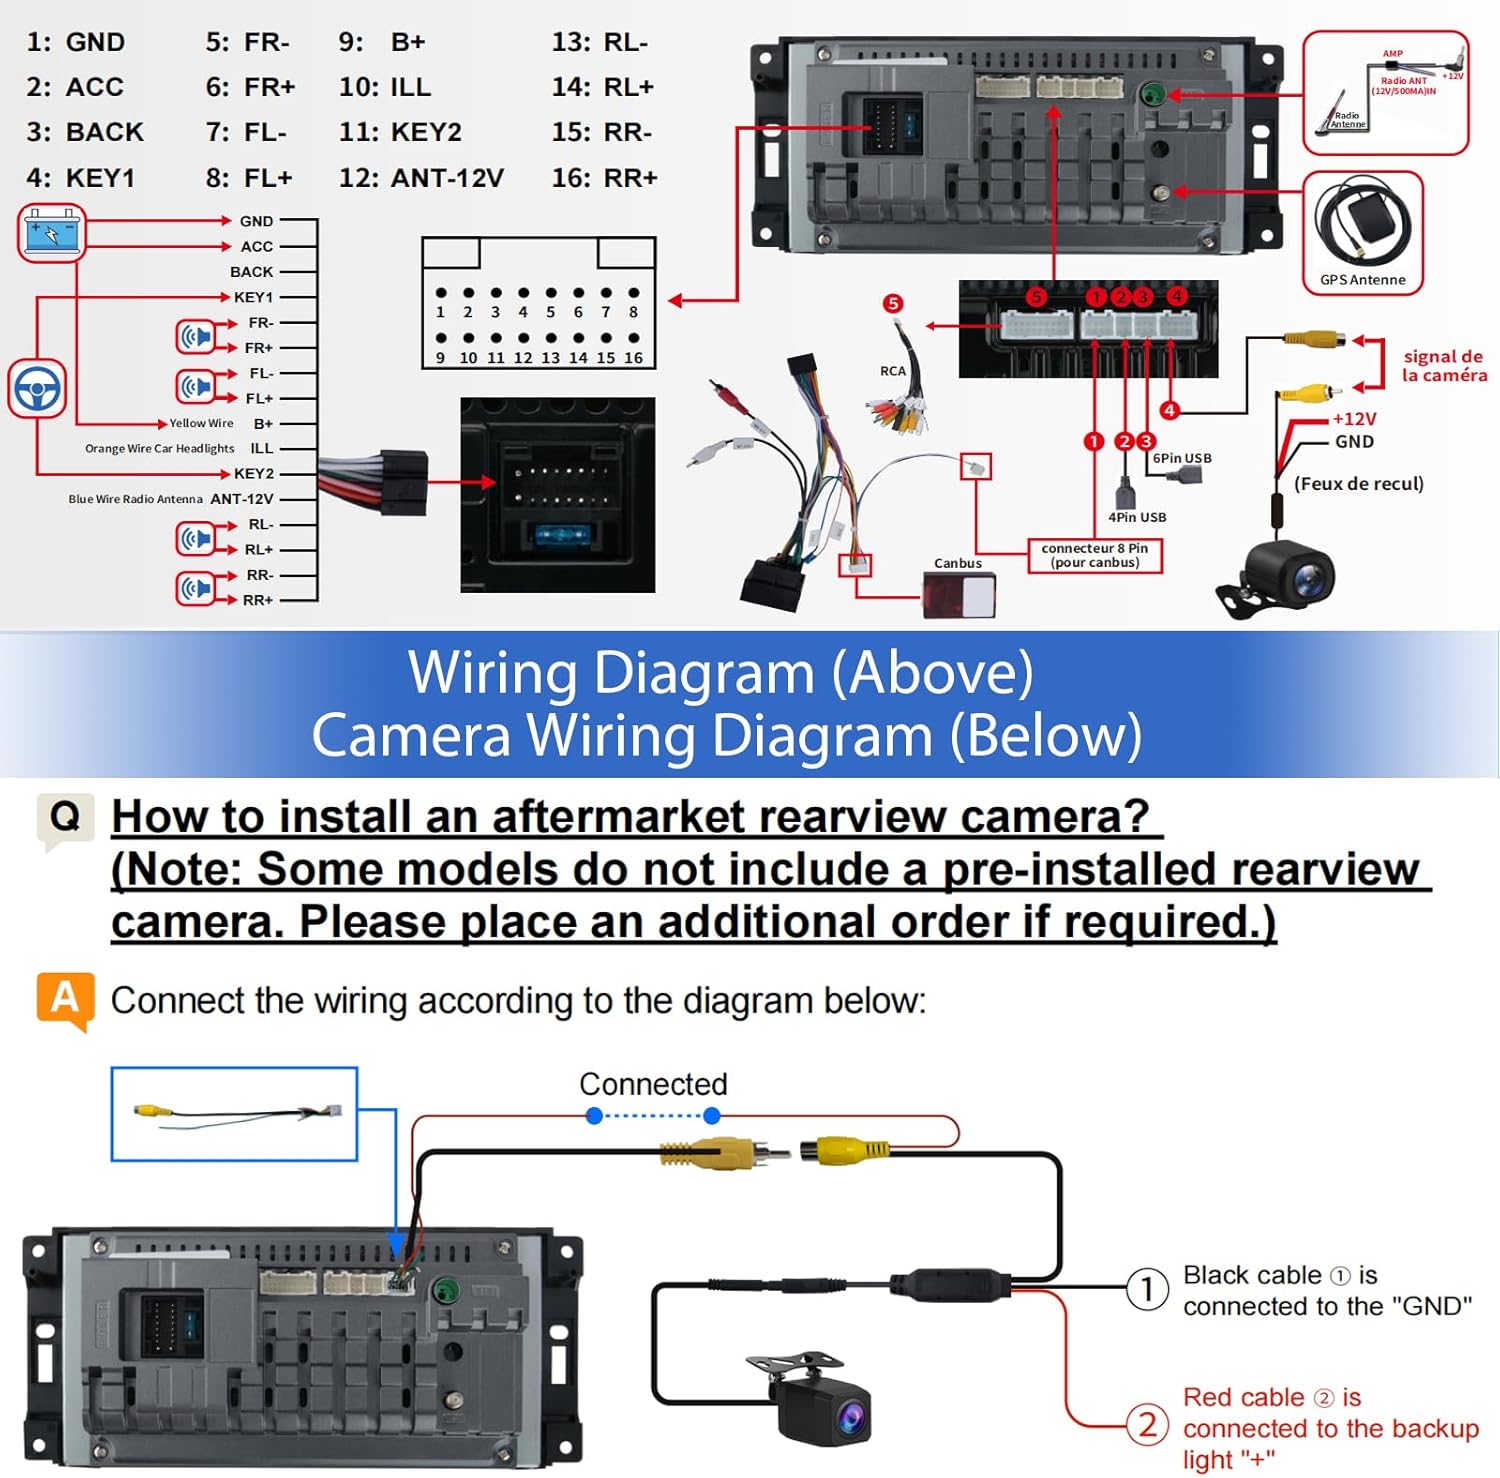
2.3 Wiring Diagrams
Refer to the following diagrams for correct wiring connections:
Image 2.3: Power Cable Connection Diagram. Note specific plugs for Chrysler (12 pins) and Jeep models (11 pins for no amplifier, 7 pins for Alpine/Infinity sound system).
Image 2.4: Detailed wiring diagram for the main unit and camera connections.
Important Note for Jeep Wrangler with Alpine or Infinity Sound System:
If your Jeep Wrangler is equipped with an Alpine or Infinity sound system, use the 7-pin plug for the power connection. For vehicles without an original amplifier, use the 11-pin plug.
3. Operating Instructions
This section covers the primary functions and operations of your EagleNav car stereo.
3.1 Wireless CarPlay & Android Auto
The unit supports wireless CarPlay and Android Auto via Bluetooth, allowing seamless integration with your smartphone. Project your phone's content to the stereo screen for navigation, calls, music, and other applications.
Video 3.1: Demonstration of CarPlay function operation and connection process.
Image 3.1: Wireless CarPlay and Android Auto interface.
3.2 Bluetooth Hands-Free and Steering Wheel Controls
Connect your Android or iOS phone via Bluetooth for hands-free calling. The unit supports steering wheel controls, allowing you to safely manage calls, adjust volume, and change songs without taking your hands off the wheel. An external microphone is included for enhanced voice clarity.
Image 3.2: Steering wheel control integration and reverse camera display.
3.3 Media Playback
The stereo offers multiple media playback options:
FM/AM Tuner: High-quality digital stereo (RDS) FM/AM tuner with automatic and semi-automatic station search.
USB Playback: Connect USB flash drives for offline music and video playback.
Online Media: Access online music and video streaming through Wi-Fi/WLAN internet connectivity.
Audio Equalizer: Customize sound with stereo EQ presets (jazz, rock, pop, classic) and individual speaker volume control.
3.4 Personalized Design & UI
The unit allows for customization of the user interface and display settings:
Customizable UI: Adjust the interface layout and theme to your preference.
Split-Screen Functionality: Use two applications simultaneously on the screen.
Key Light Adjustment: Change the color of the physical button backlights.
Screen Brightness: Supports both manual and automatic brightness adjustment, switching based on headlight status.
Image 3.3: Multiple UI interfaces, FM radio, Digital Signal Processing, and Split Screen features.
Image 4.1: Key specifications and features of the EagleNav car stereo.
5. Troubleshooting
This section addresses common issues you might encounter with your EagleNav car stereo.
5.1 No Sound After Installation
If there is no sound after installation, verify the following:
Wiring Check: Ensure all power and speaker wires are correctly connected according to the wiring diagram.
Amplifier Compatibility: For Jeep Wrangler models with Alpine or Infinity sound systems, confirm you are using the correct 7-pin plug. For vehicles without an original amplifier, use the 11-pin plug.
5.2 Sudden Loss of Sound After Extended Use
If the sound suddenly stops after a period of use, a factory reset may resolve the issue:
Navigate to Settings → Car Settings → Factory.
Enter the factory code (usually 000000).
Select Erase all data (factory reset).
Note: A factory reset will erase all personalized settings and data.
6. Maintenance
To ensure the longevity and optimal performance of your EagleNav car stereo, follow these maintenance guidelines:
Screen Cleaning: Use a soft, lint-free cloth to gently wipe the touchscreen. Avoid abrasive cleaners or harsh chemicals.
Software Updates: Periodically check for wireless software updates via the unit's settings: Settings → System → About Device → Wireless Upgrade.
Environmental Conditions: Avoid exposing the unit to extreme temperatures or direct sunlight for prolonged periods.
Connection Integrity: Periodically check all cable connections to ensure they remain secure and free from damage.
7. Warranty and Support
Your EagleNav car stereo comes with a one-year warranty from the date of purchase.
7.1 Technical Support
For any questions regarding installation, operation, or troubleshooting, please contact EagleNav customer service. Technical support is available to assist you.
You can typically find contact information on the product packaging, warranty card, or the seller's store page. For direct inquiries, you may reach out to the seller, EagleNav, through their official channels.
Ask a question about this manual
Ask about setup, troubleshooting, compatibility, parts, safety, or missing instructions. Manuals+ will review the question and use this page’s manual context to help answer it.