Introduction
This manual provides comprehensive instructions for the ORICO X50 Thunderbolt 5 M.2 NVMe SSD Enclosure. This device is engineered for high-speed external data storage, offering compatibility with the latest Thunderbolt 5 standard, as well as backward compatibility with Thunderbolt 4/3 and USB4 ports. It supports 2280 M.2 NVMe SSDs up to 8TB, making it suitable for demanding tasks such as 4K/8K video editing and 3D rendering.
What's in the Box
The package for your ORICO X50 enclosure includes the following components:
- 1 x 80Gbps M.2 Enclosure
- 1 x USB Cable (Thunderbolt 5 compatible)
- 1 x User Manual
- 1 x Thermal Pad
- 1 x Screwdriver

Specifications
| Feature | Detail |
|---|---|
| Model | X50 |
| Connectivity Technology | Thunderbolt 5, Thunderbolt 4/3, USB4 |
| Transmission Rate (Theoretical) | Read: 6000MB/s, Write: 5800MB/s (80Gbps bandwidth) |
| SSD Compatibility | M-Key/(M&B) Key NVMe 2280 SSD (PCIe 4.0 x4 recommended). Not compatible with M.2 SATA SSDs or PCIe 5.0 SSDs. |
| Max Digital Storage Capacity | Up to 8 TB |
| Material | Aluminum Alloy |
| Cooling System | Fanless (Finned aluminum chassis, thermal grease, hydrogel coating) |
| Dimensions | 6.1 x 3.82 x 1.77 inches (approximate) |
| Item Weight | 10.2 ounces |
| Supported Operating Systems | Windows, macOS, Linux |
Setup: SSD Installation Guide
Follow these steps to install your M.2 NVMe SSD into the ORICO X50 enclosure:
- Remove the Back Cover: Use the provided screwdriver to loosen the screw on the back of the enclosure. Carefully slide off the back cover.

Figure 2: Use the screwdriver to remove the back cover. - Insert the SSD: Gently insert your M.2 NVMe SSD into the internal slot at a 30-degree angle. Push down to align it with the mounting hole and secure it with the small screw provided.

Figure 3: The internal view of the enclosure showing the M.2 SSD slot and mounting screw. Note: Ensure your SSD is a 2280 M-Key or M&B-Key NVMe/PCIe type. M.2 SATA SSDs and PCIe 5.0 SSDs are not supported.
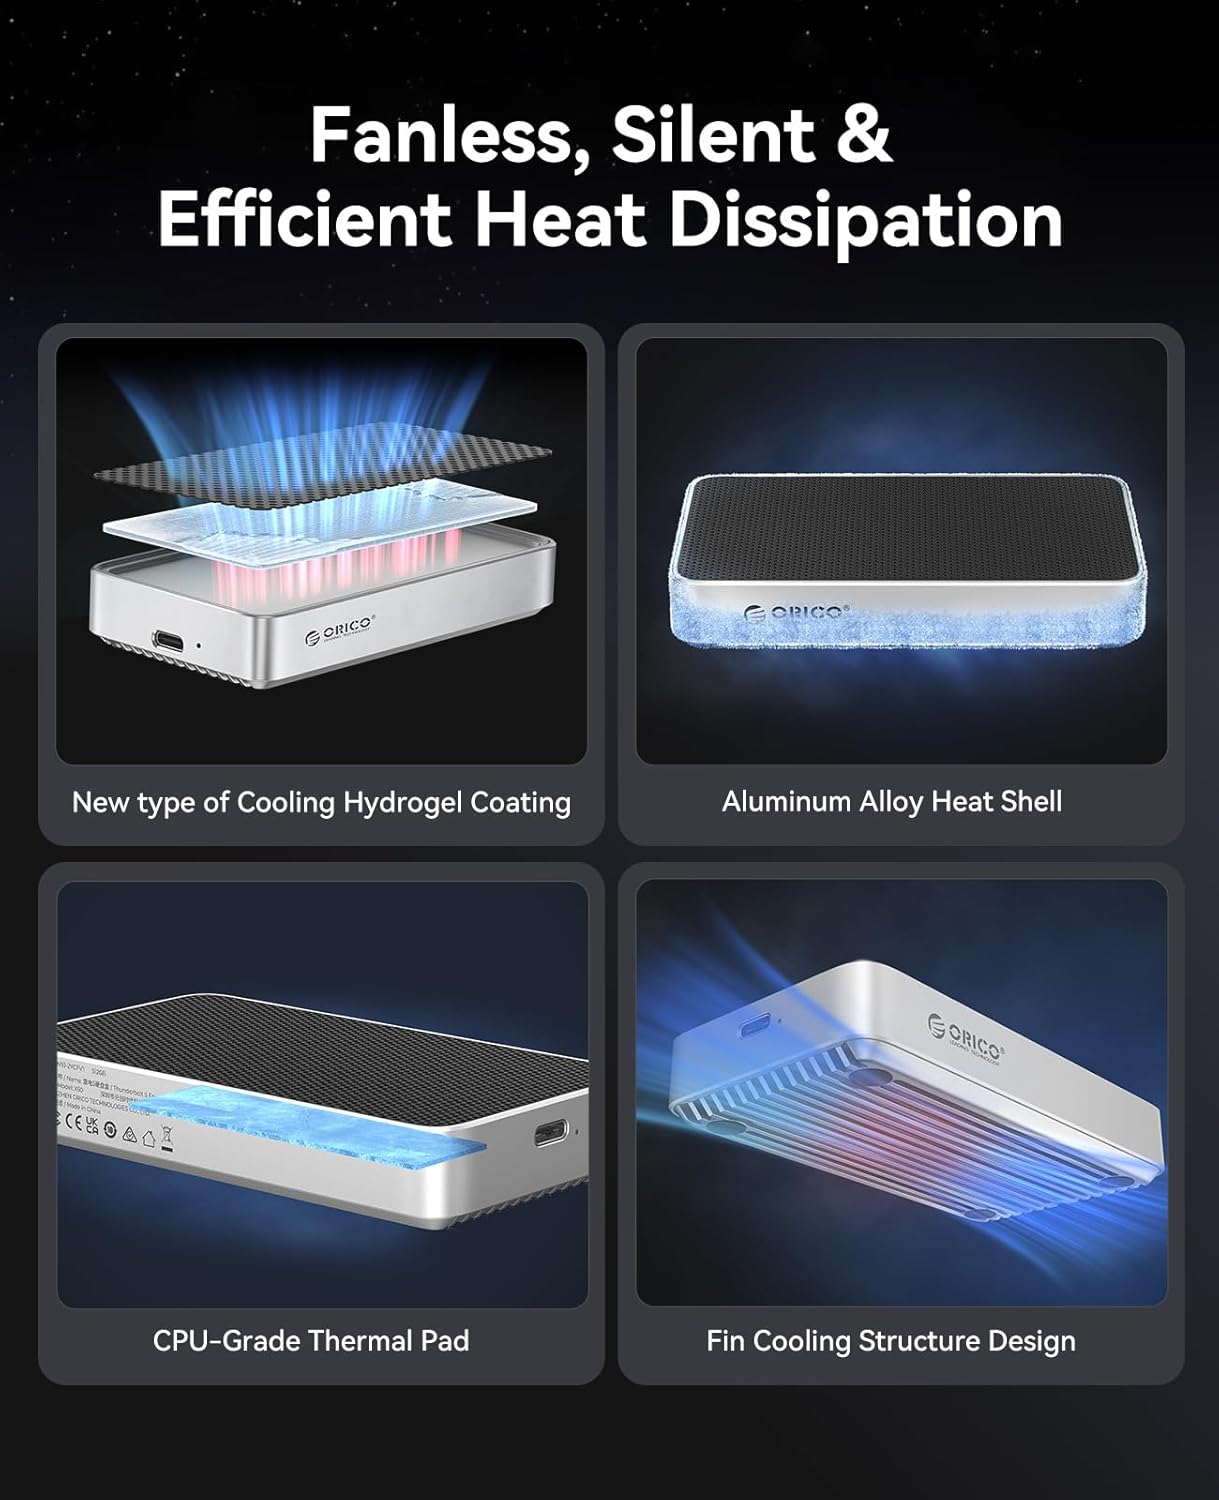
Figure 4: Diagram illustrating compatible M.2 NVMe SSD types (M-Key and M&B-Key 2280). - Apply Thermal Pad: Peel off the protective films from both sides of the thermal pad. Carefully place the thermal pad onto the installed SSD, ensuring it covers the main chips for efficient heat transfer to the enclosure's aluminum body.

Figure 5: The thermal pad helps dissipate heat from the SSD to the enclosure. - Reinstall the Cover: Slide the back cover back into place, ensuring it aligns correctly. Tighten the screw to secure the cover.

Figure 6: The ORICO X50 enclosure ready for connection after SSD installation.
Operating Instructions
Connecting to Your Computer
Connect the ORICO X50 enclosure to your computer using the provided Thunderbolt 5 compatible USB-C cable. The enclosure is designed to work seamlessly with Thunderbolt 5, Thunderbolt 4/3, and USB4 ports.
Initial Setup and Formatting
Upon first connection, the newly installed SSD may need to be initialized and formatted by your operating system before use.
- For macOS:
- Open Disk Utility (Applications > Utilities > Disk Utility).
- In the Disk Utility sidebar, click the "View" button and select "Show All Devices".
- Select the external ORICO X50 drive (usually listed under "External").
- Click the "Erase" button in the toolbar.
- Provide a name for the drive. For "Format", choose APFS for Mac-only use or ExFAT for compatibility with both macOS and Windows. For "Scheme", select GUID Partition Map.
- Click "Erase" to format the drive.
- For Windows:
- Right-click the Start button and select Disk Management.
- Locate the unallocated space corresponding to your ORICO X50 SSD.
- Right-click the unallocated space and select "New Simple Volume". Follow the wizard to assign a drive letter and format the drive. Choose NTFS for Windows-only use or ExFAT for compatibility with both Windows and macOS.
- For Linux:
- Use a disk utility tool like GParted or the command line (e.g.,
fdisk,mkfs) to partition and format the drive. Common formats include Ext4 for Linux-only or ExFAT for cross-platform compatibility.
- Use a disk utility tool like GParted or the command line (e.g.,

Data Transfer
Once formatted, the SSD will appear as a mounted external drive on your system. You can now drag and drop files, copy, paste, or use it as a target for backups and other storage needs.
Performance
The ORICO X50 enclosure is designed to deliver exceptional performance, especially with Thunderbolt 5 compatible systems.
- Next-Gen 80Gbps Speed: Experience theoretical speeds up to 6000MB/s read and 5800MB/s write. This allows for rapid transfer of large files, such as 6GB in seconds.
- Massive Capacity: Supports M.2 NVMe SSDs up to 8TB, providing ample space for all your projects and data.


Ideal Use Cases
The high performance of the ORICO X50 makes it suitable for:
- 4K/8K Video Editing: Seamlessly edit high-resolution video files directly from the external SSD.
- 3D Modeling and Rendering: Accelerate workflows for complex 3D projects.
- VR/AR Content Development: Handle large assets and rapid iterations with ease.
- High-Speed Data Backup: Perform quick and efficient backups of critical data.

Maintenance
Fanless Cooling System
The ORICO X50 features an advanced fanless cooling design to maintain optimal operating temperatures without noise. This system includes:
- A finned aluminum chassis for increased heat dissipation surface area.
- Integrated thermal grease and a hydrogel coating to efficiently transfer heat from the SSD.
This design ensures reliability and sustained performance during long, intensive workloads by preventing thermal throttling.
General Care
- Keep the enclosure clean and free from dust. Use a soft, dry cloth for cleaning.
- Avoid exposing the device to extreme temperatures, direct sunlight, or high humidity.
- Always safely eject the drive from your operating system before disconnecting the cable to prevent data corruption or loss.
Troubleshooting
Common Issues and Solutions
- Drive Not Recognized:
- Ensure the SSD is correctly installed and secured within the enclosure.
- Check that the Thunderbolt 5 cable is securely connected to both the enclosure and your computer.
- Try connecting to a different USB-C/Thunderbolt port on your computer.
- Test the enclosure with another computer to rule out system-specific issues.
- If it's a new SSD, ensure it has been initialized and formatted (refer to "Initial Setup and Formatting" section).
- Slow Speeds:
- Verify that your computer's port and the cable you are using support Thunderbolt 5 (80Gbps) or USB4 speeds.
- Ensure you are using a high-performance PCIe 4.0 x4 NVMe SSD. Older or slower SSDs will not achieve maximum speeds.
- For Thunderbolt 3 users: Some systems may default to USB speeds (~10Gbps). For full Thunderbolt 3 performance, a dedicated Thunderbolt 3/4 enclosure might be recommended, or ensure your system's Thunderbolt settings are optimized.
- Close any background applications that might be consuming significant system resources or disk I/O.
- Connection Drops (Mac users):
- Ensure your macOS is updated to the latest version.
- Try using a different Thunderbolt 5 cable.
- Connect the enclosure to a different Thunderbolt port on your Mac.
- Overheating:
- While the enclosure is designed for efficient fanless cooling, prolonged heavy use (e.g., continuous large file transfers, 4K/8K video editing) may cause the aluminum body to become warm. This is normal and indicates effective heat dissipation.
- Ensure the enclosure is placed on a flat surface with adequate airflow around it. Avoid covering it.
Warranty and Support
The ORICO X50 Thunderbolt 5 M.2 NVMe SSD Enclosure is backed by a 3-year limited warranty from the date of purchase. This warranty covers manufacturing defects and ensures reliable operation under normal use conditions.
For technical support, product registration, or to initiate a warranty claim, please utilize the following contact information:
- Official Website: www.orico.com.cn
- Customer Service Hotline: 400-6696298
- Email Support: support@orico.com.cn
Please retain your proof of purchase for warranty validation.