1. Introduction
This manual provides detailed instructions for the installation, operation, and maintenance of your ATOTOEXCEL X10G129PE 12.95" QLED Android Car Stereo. Please read this manual thoroughly before using the product to ensure proper functionality and safety. Keep this manual for future reference.
2. Product Overview
The ATOTOEXCEL X10G129PE is an advanced car stereo system featuring a 12.95-inch QLED display, powerful processing capabilities, and extensive connectivity options. It is designed to enhance your in-car entertainment and navigation experience.
Key Features:
- Powerful Performance: Equipped with a QCM SD665 SoC and 8GB RAM + 128GB storage for responsive operation, multi-tasking, and support for wireless CarPlay/Android Auto/MirrorLink.
- 12.95" QLED Floating Display: A high-resolution (1920x1200) QLED panel with 550 nits brightness and anti-glare coating. The FlexView Pro mount allows for adjustable height, tilt, and angle.
- Dual-Camera Recording: Supports two 1080P cameras for simultaneous front and rear or interior recording, including parking monitoring and emergency video lock.
- Evolved Audio Suite: Features a Digital Signal Processor (DSP) with 36-band EQ, time alignment, 3-way crossover, and HD 24-bit DAC. Includes optical output and 10 assignable channels for a custom 7.1.2 sound experience.
- Cellular Network & Dual-Band Wi-Fi: Built-in modem for streaming, map updates, and app installation. Supports hotspot functionality for other devices.
- Vehicle Data Integration: Compatible with steering wheel controls, factory amplifiers, and vehicle information systems (gauges, climate data) where supported.
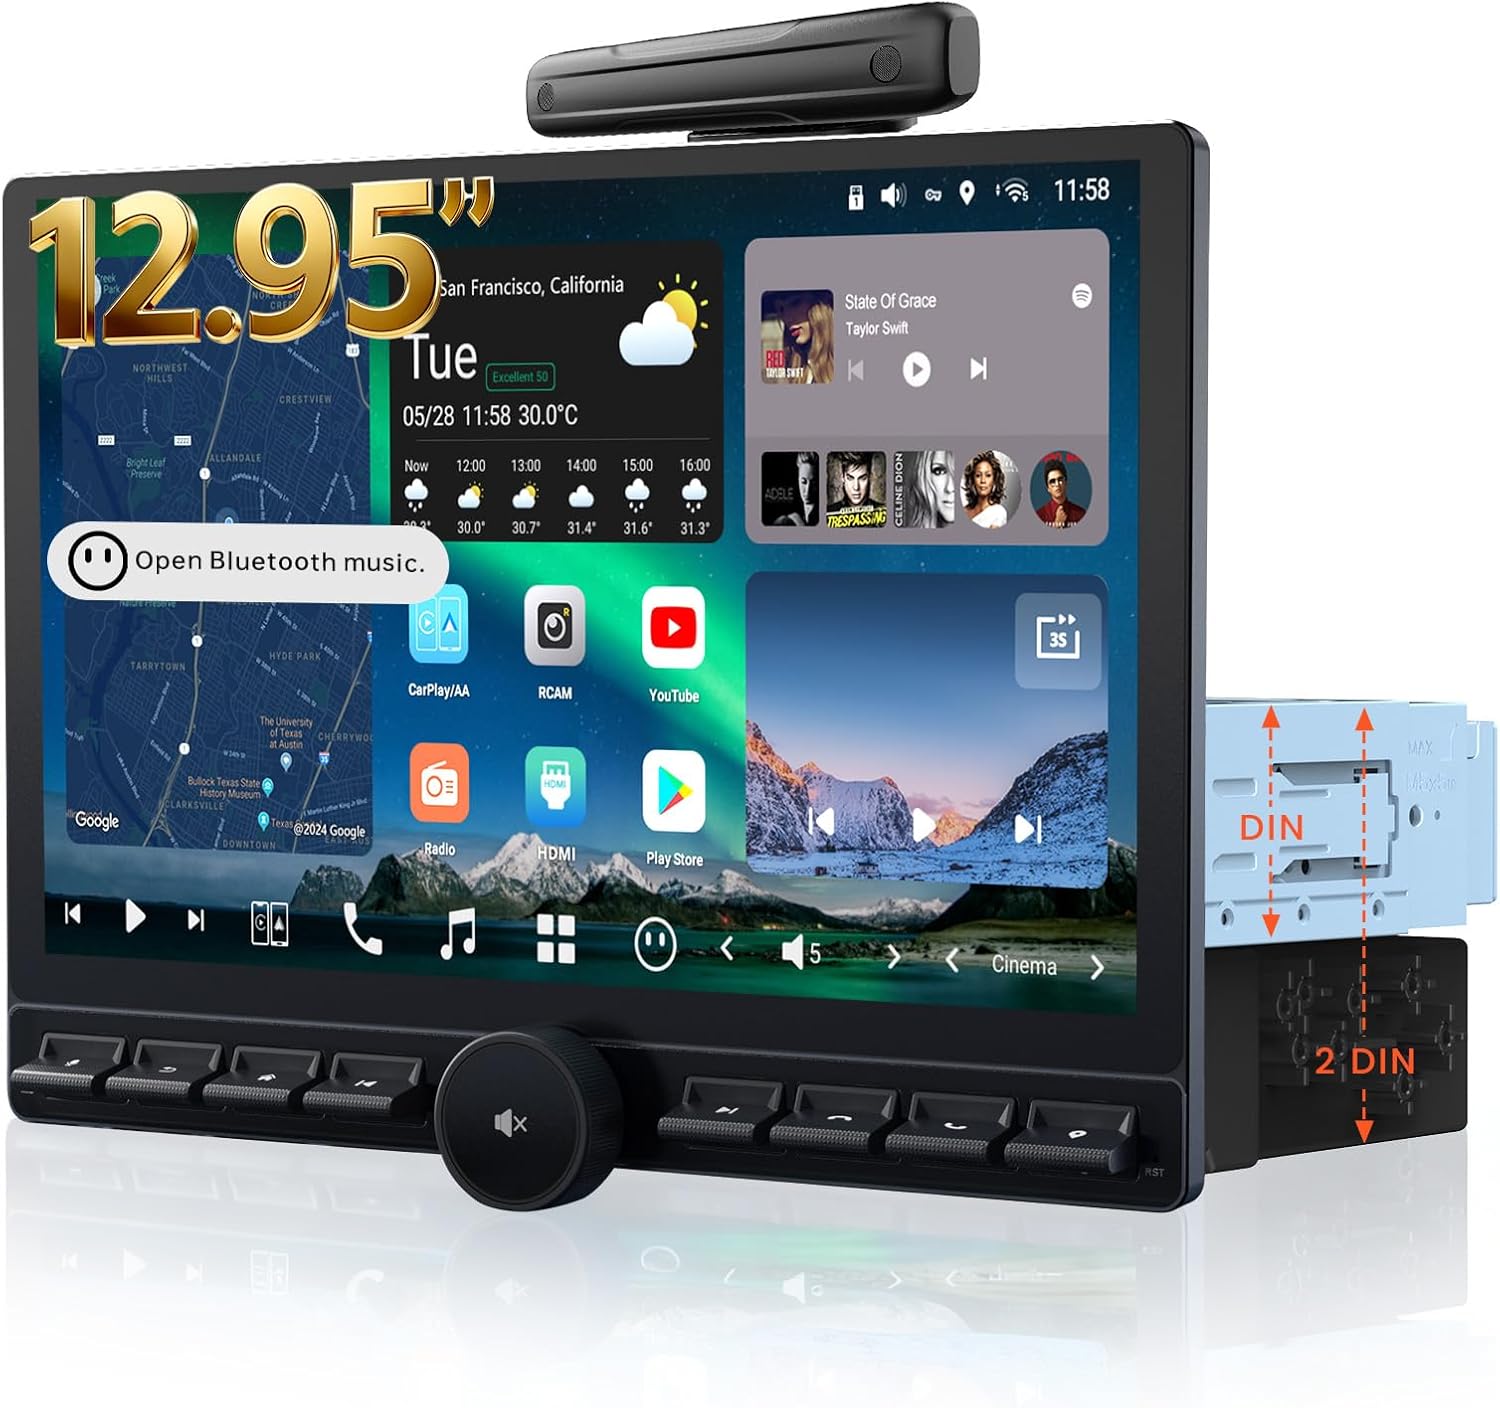
Image 2.1: Front view of the ATOTOEXCEL X10G129PE car stereo, showcasing the 12.95-inch QLED display and physical control buttons.

Image 2.2: Diagram illustrating the adjustable features of the FlexView Pro mount, including up/down, left/right, forward, swivel, and tilt adjustments for optimal viewing.

Image 2.3: Visual representation of the package contents, including the main unit, wiring harnesses, USB cables, RCA cables, antenna, and mounting brackets.
3. Setup and Installation
Proper installation is crucial for the optimal performance of your car stereo. It is recommended to have the unit installed by a qualified professional.
3.1. Pre-Installation Check
- Verify that all components listed in the package contents are present.
- Ensure your vehicle's dashboard opening is compatible with Single DIN or Double DIN installation.
- Measure the available space to avoid obstruction of essential vehicle controls by the display.

Image 3.1: Diagrams showing standard Double-DIN and Single-DIN opening installations. Note that DIN Sleeve 1 and 2 may need to be removed if pre-installed.

Image 3.2: Visual guide reminding users to measure and ensure the display's full range of motion (left/right, up/down, forward/backward slide) does not obstruct vehicle controls or vents.
3.2. Wiring Connections
Refer to the detailed wiring diagram for connecting power, speakers, antennas, and other peripherals. Ensure all connections are secure and correctly matched to avoid damage to the unit or vehicle.

Image 3.3: Comprehensive wiring diagram illustrating connections for power, ground, illumination, parking brake, reverse camera, steering wheel controls, audio outputs, and other inputs/outputs.
3.3. Initial Power-On
After installation, turn on your vehicle's ignition. The stereo should power on automatically. Follow any on-screen prompts for initial setup, such as language selection and time zone.
4. Operating Instructions
4.1. User Interface (UI) Navigation
The X10G129PE features a custom AICE 13 UI. Navigate through menus and applications using the touchscreen or physical buttons and knob. Customizable widgets and dynamic wallpapers allow for personalization.
4.2. Audio Settings
Access the DSP settings to fine-tune your audio experience. Adjust the 36-band equalizer, set time alignment for optimal sound staging, and configure the 3-way crossover for connected speakers and subwoofers.

Image 4.1: Screenshot of the 36-band equalizer and time alignment interface, demonstrating the audio customization options.

Image 4.2: Diagram illustrating the 24-bit HD DAC and active 3-way crossover, showing dedicated outputs for tweeters, midrange, and dual subwoofers.
4.3. Connectivity
- Wireless CarPlay/Android Auto: Connect your smartphone wirelessly for navigation, music, and communication.
- 4G LTE & Wi-Fi: Insert a SIM card for cellular data or connect to a Wi-Fi network for internet access. The unit can also act as a hotspot.
- Bluetooth: Pair your phone for hands-free calling and audio streaming. Supports dual phone connection.
- HDMI Input: Connect external devices like game consoles or media sticks for video playback on the QLED display.

Image 4.3: Illustration of the built-in cellular network modem and its ability to provide internet access and hotspot functionality for various devices.

Image 4.4: Overview of seamless connectivity features, including dual Bluetooth phone connection, auto lock/unlock, and compatibility with accessories like OBDII scanners and footwell lights.
4.4. Control Options
The stereo offers multiple ways to control its functions:
- Steering Wheel Controls: Integrate with your vehicle's existing steering wheel buttons (requires compatible data interface or adapter).
- Wireless Remote: Use an optional wireless remote for convenient control.
- Voice Command: Utilize voice commands for various functions, including navigation and media playback.

Image 4.5: Visual representation of various control methods, including data interface, OEM steering wheel controls, third-party SWC adapters, wireless remote, and voice commands.
4.5. Digital Apps
The unit comes with built-in digital applications and supports additional app installations via Google Play and Findapps.
- DriveChat: GenAI Voice Assistant for interactive commands.
- TrackHU: GPS tracking app with flexible refresh rates and geofence alerts.
- FindApps: APK downloader for installing apps not available on Google Play Store.
- Cloud Photo: Image and video album with photo sync functionality (in progress).

Image 4.6: Display of the built-in digital applications: DriveChat, TrackHU, FindApps, and Cloud Photo, highlighting their respective functionalities.
5. Maintenance
To ensure the longevity and optimal performance of your ATOTOEXCEL X10G129PE, follow these maintenance guidelines:
- Cleaning the Display: Use a soft, lint-free cloth to gently wipe the QLED screen. For stubborn smudges, slightly dampen the cloth with water or a screen-safe cleaner. Avoid harsh chemicals or abrasive materials.
- General Cleaning: Keep the unit and surrounding areas free from dust and debris. Use a soft brush or compressed air to clean vents and button crevices.
- Software Updates: Regularly check for Over-the-Air (OTA) firmware updates. These updates often include performance improvements, new features, and bug fixes. Updates can be applied directly on the device.
- Avoid Extreme Temperatures: Do not expose the unit to extreme heat or cold for extended periods, as this can affect its electronic components and display.
6. Troubleshooting
If you encounter issues with your ATOTOEXCEL X10G129PE, refer to the following common troubleshooting steps:
6.1. No Power
- Check the vehicle's fuse box for any blown fuses related to the stereo or accessory power.
- Ensure all power connections (constant 12V, ignition 12V, ground) are securely connected according to the wiring diagram.
- Verify that the vehicle's battery has sufficient charge.
6.2. No Sound
- Check speaker wire connections for proper polarity and secure contact.
- Ensure the volume is not muted or set to a very low level.
- Verify that the correct audio source is selected.
- If using external amplifiers, check their power and signal connections.
6.3. Display Issues
- If the screen is black or unresponsive, try restarting the unit by turning the vehicle's ignition off and on.
- Check the display cable connection to the main unit.
- Adjust display brightness and contrast settings in the system menu.
6.4. GPS Signal Loss
- Ensure the GPS antenna is properly installed and has a clear view of the sky.
- Check the GPS antenna connection to the unit.
- Move the vehicle to an open area away from tall buildings or dense foliage that might obstruct satellite signals.
6.5. Bluetooth Connection Problems
- Ensure Bluetooth is enabled on both the stereo and your mobile device.
- Delete previous pairings on both devices and attempt to pair again.
- Move your mobile device closer to the stereo.
For issues not covered here, please refer to the online manual or contact customer support.
7. Specifications
| Feature | Specification |
|---|---|
| Display Size | 12.95 inches |
| Display Type | QLED |
| Display Resolution | 1920 x 1200 |
| Processor | QCM SD665 SoC |
| RAM | 8GB |
| Internal Storage | 128GB |
| Operating System | Android 13 Based (AICE 13 UI) |
| Audio Channels | 7.1.2 CH |
| Equalizer | 36-band EQ |
| DAC | HD 24-bit |
| Connectivity | 4G LTE, Dual-Band Wi-Fi, Bluetooth, Wireless CarPlay, Wireless Android Auto |
| Inputs | HDMI, Dual 1080P Camera Inputs |
| Outputs | Optical SPDIF, 4V RCA Preamp Outputs |
| Item Weight | 9.68 pounds |
| Package Dimensions | 14.76 x 10.83 x 10.83 inches |
8. Warranty and Support
Your ATOTOEXCEL X10G129PE comes with a standard 12-month warranty from the date of purchase, with an option for an additional 6 months of extended coverage by communicating with the manufacturer within 30 days of purchase.
8.1. Online Resources
Access the online manual and quick guide by scanning the QR code provided on the product box or visiting the Eproductcare platform for assistance.

Image 8.1: Information regarding Over-the-Air updates, 12+6 months extended coverage, product care team availability, and access to the online manual via QR code.
8.2. Customer Support
For further assistance, technical support, or warranty claims, please contact ATOTOEXCEL customer support through your order center or the Eproductcare platform. Responsive support staff are available to assist you.

