1. Introduction
This manual provides instructions for the proper installation, operation, and maintenance of your Weather Guard 172-5-04 Aluminum Wheel Well Truck Tool Box. This driver-side tool box offers 3.4 cubic feet of storage capacity and features a durable Gloss Black ARMOR TUF Powder Coat finish. It is designed to utilize the open truck bed space above and behind the wheel wells, providing secure storage for small parts and hand tools.
Please read this manual thoroughly before installation and use to ensure safe and efficient operation.
2. Safety Information
Always observe the following safety precautions to prevent injury or damage to the product and vehicle:
- Ensure the tool box is securely mounted to the truck bed according to the installation instructions. Improper mounting can lead to detachment during transit.
- Do not overload the tool box. Refer to the specifications for maximum weight capacity.
- Keep hands and fingers clear of the lid and latching mechanisms when opening or closing to prevent pinching.
- Always ensure the lid is fully closed and locked before driving to prevent contents from spilling out or the lid from opening unexpectedly.
- Do not stand on or use the tool box as a step.
3. Setup and Installation
The Weather Guard 172-5-04 tool box is designed for installation over the driver-side wheel well of compatible trucks. Proper installation is crucial for security and stability.
3.1 Unpacking
Carefully remove the tool box from its packaging. Inspect for any shipping damage. Retain all packaging materials until you are satisfied with the product.
3.2 Required Tools (Not Included)
- Drill
- Wrenches/Sockets
- Measuring Tape
- Marker or Pencil
- Safety Glasses
3.3 Mounting Instructions
- Position the Tool Box: Place the tool box in the desired driver-side wheel well location in your truck bed. Ensure it is level and does not interfere with other truck bed accessories or the tailgate operation.
- Mark Mounting Points: Using the pre-drilled holes on the tool box as a guide, mark the corresponding drilling locations on your truck bed.
- Drill Pilot Holes: Carefully drill pilot holes at the marked locations. Ensure you use an appropriate drill bit size for the mounting hardware (not included, typically). Take care not to drill into critical vehicle components.
- Secure the Tool Box: Align the tool box with the drilled holes. Use appropriate mounting hardware (bolts, washers, nuts - typically purchased separately or included in a separate mounting kit) to securely fasten the tool box to the truck bed. Tighten all fasteners firmly, but do not overtighten.
- Verify Stability: After installation, gently shake the tool box to ensure it is stable and securely attached.

Image: Driver side view of the Weather Guard 172-5-04 tool box, showcasing its design for wheel well placement.

Image: Side profile of the Weather Guard 172-5-04 tool box, illustrating its shape to fit over a truck's wheel well.
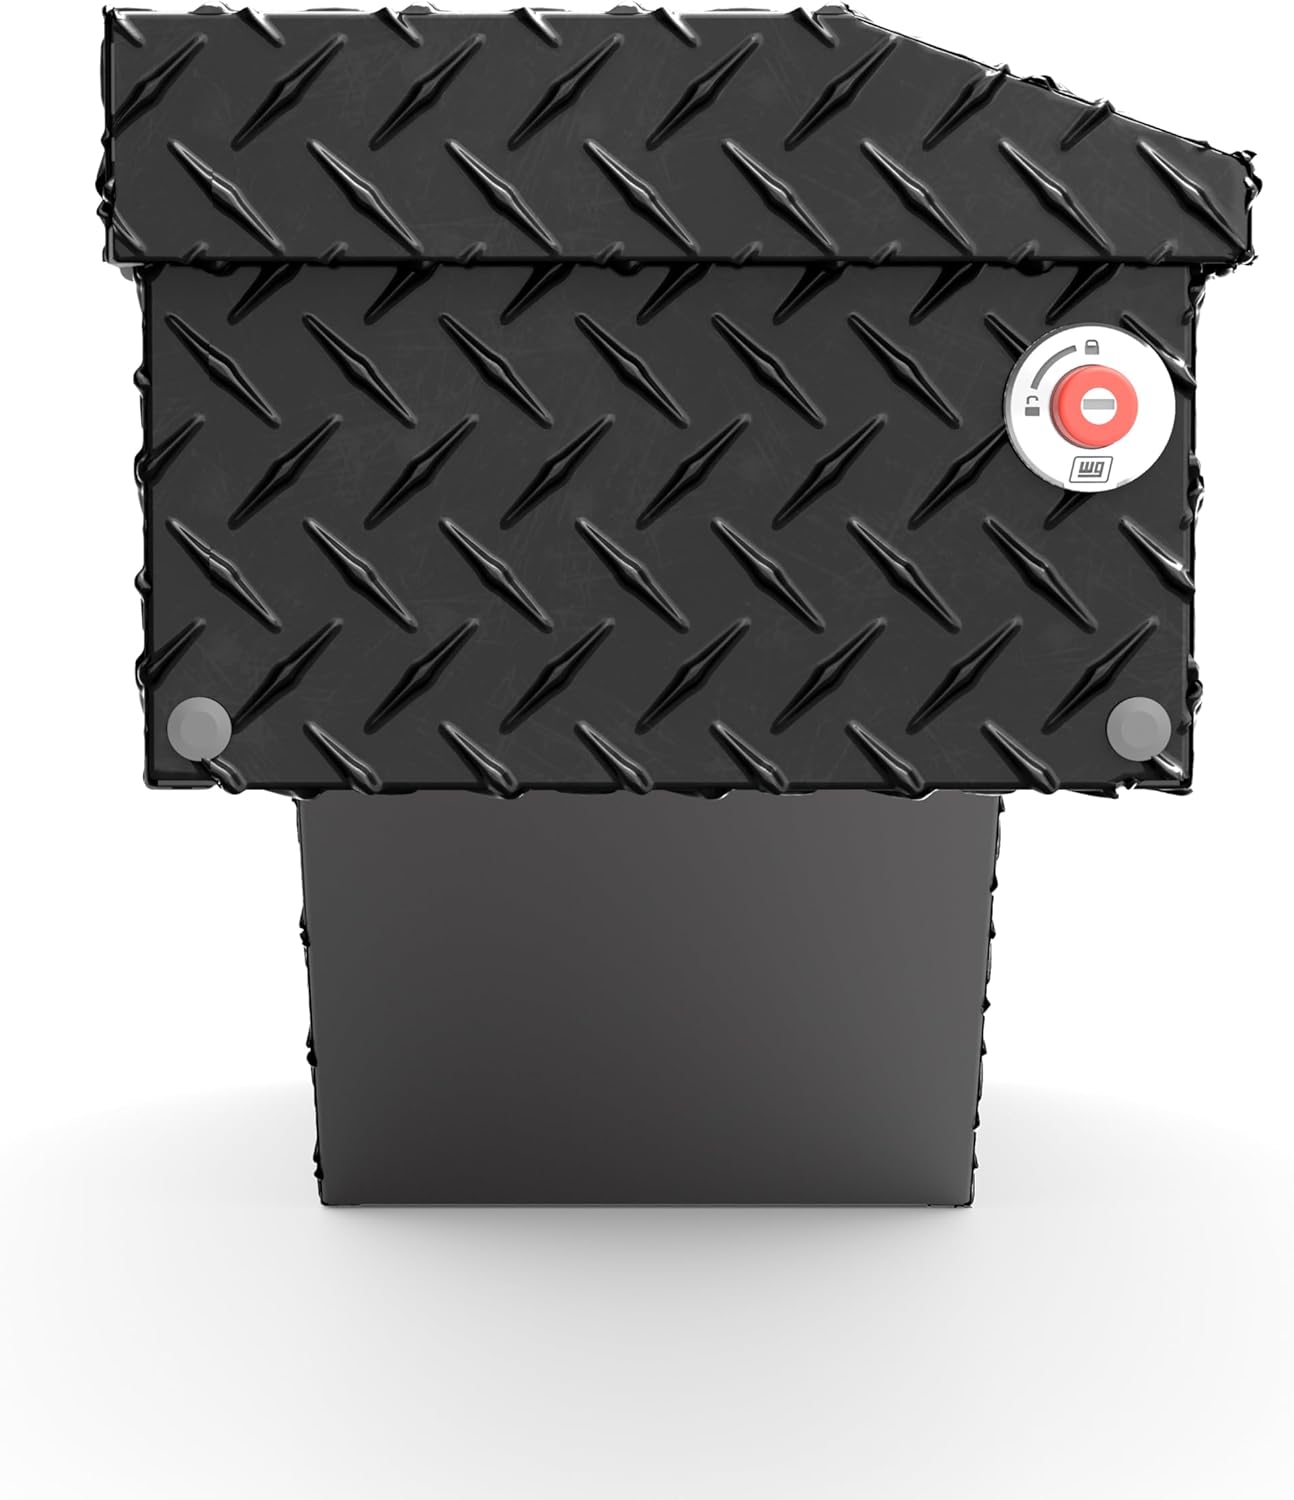
Image: Front view of the Weather Guard 172-5-04 tool box, highlighting the red push-button lock mechanism.
4. Operating Instructions
The Weather Guard 172-5-04 tool box is designed for ease of use and secure storage.
4.1 Opening the Tool Box
- Unlock: Insert the key into the lock cylinder and turn to the unlocked position. The red push-button lock will extend, indicating it is unlocked.
- Open: Press the red push-button lock to release the latch. Lift the lid upwards until it is fully open. The gas struts (if equipped) will assist in holding the lid open.
4.2 Closing and Locking the Tool Box
- Close: Gently pull the lid downwards until it engages with the latching mechanism. Ensure the lid is fully seated and the latch clicks into place.
- Lock: Push the red button inwards until it is flush with the housing. This action locks the box. For added security, turn the key in the lock cylinder to the locked position and remove the key. The retractable push-button provides a visual indicator of the lock status.
4.3 Key Compatibility (1KEY ULTRALOCK™)
This tool box features the 1KEY ULTRALOCK™ system, allowing you to manage multiple Weather Guard truck boxes with a single key. Consult your Weather Guard dealer or the official website for instructions on re-keying or coding your boxes to a single key.

Image: Illustration of the 1KEY ULTRALOCK™ system, showing compatibility across multiple Weather Guard boxes.
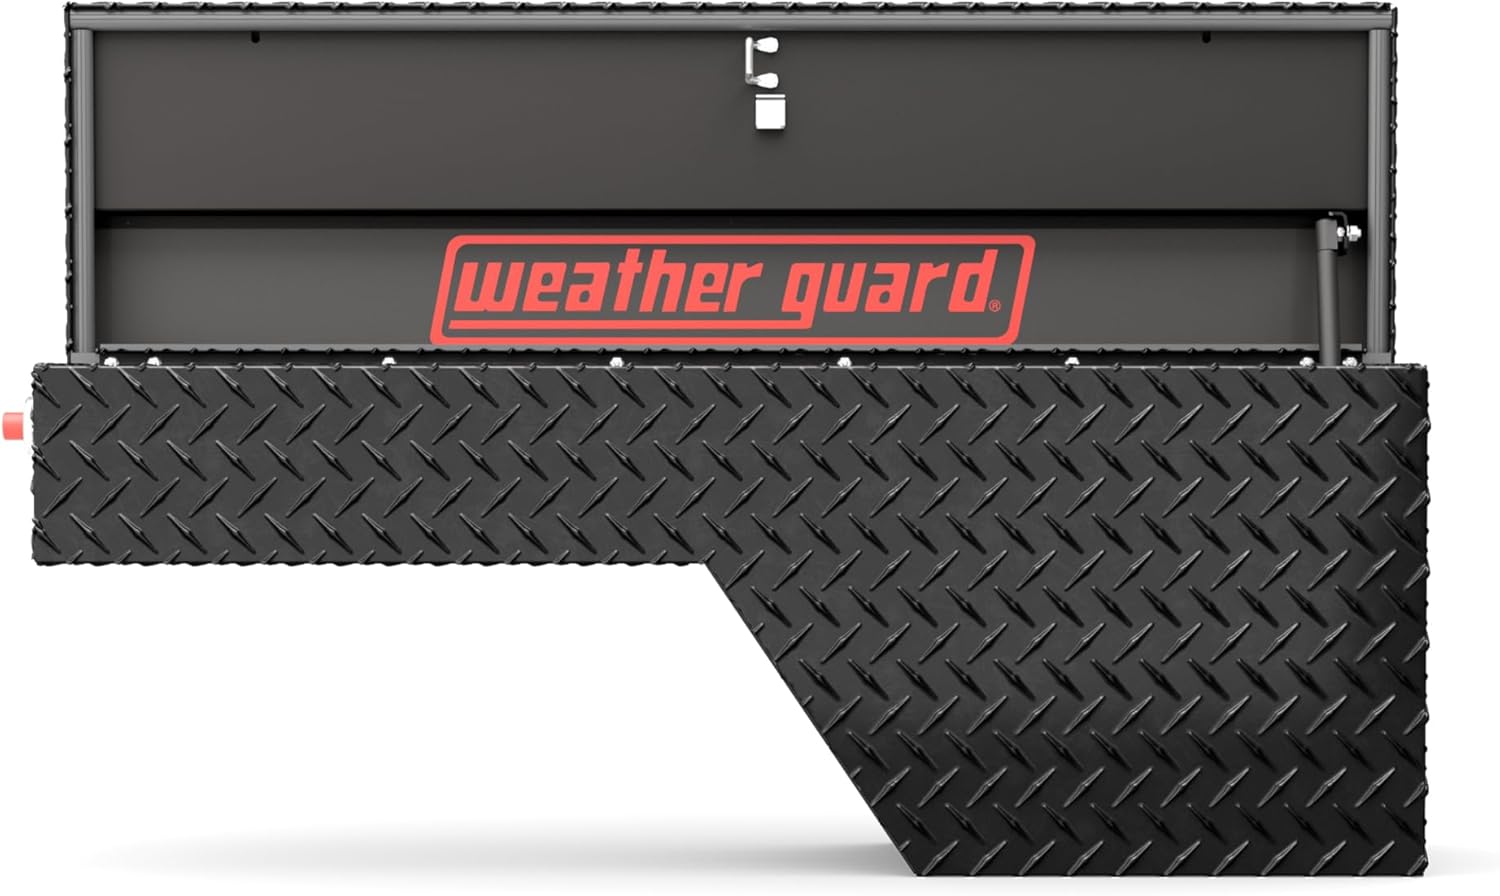
Image: Interior view of the Weather Guard 172-5-04 tool box, showing the Weather Guard logo and internal latching mechanism.
Video: This video demonstrates the features and operation of a Weather Guard truck tool box, including the locking mechanism and overall design. (Note: This video is 1:11 in length and provides general product overview.)
5. Maintenance
Regular maintenance will ensure the longevity and optimal performance of your Weather Guard tool box.
5.1 Cleaning
- Clean the exterior with mild soap and water. Avoid abrasive cleaners or solvents that could damage the ARMOR TUF powder coat finish.
- Rinse thoroughly and dry with a soft cloth to prevent water spots.
- Periodically clean the interior to remove dirt, dust, and debris.
5.2 Lubrication
- Apply a small amount of silicone-based lubricant to the lock cylinder and latching mechanism every 6-12 months, or more frequently in harsh environments. This helps ensure smooth operation and prevents corrosion.
- Check the gas struts (if applicable) for smooth operation. If they become stiff or fail to hold the lid open, they may need replacement.
5.3 Weather Seal Inspection
The tool box features a full weather seal to protect contents from the elements. Periodically inspect the rubber seal around the lid for cracks, tears, or compression. Replace damaged seals to maintain weather resistance.

Image: Close-up of the ARMOR TUF powder coat finish, demonstrating its durability and resistance to elements like water.

Image: Weather Guard logo plate on a tool box covered in snow, illustrating the product's weather-resistant design.
6. Troubleshooting
This section addresses common issues you might encounter with your tool box.
6.1 Lid Does Not Close or Latch Properly
- Check for Obstructions: Ensure no items inside the box are preventing the lid from closing fully.
- Inspect Latch Mechanism: Check if the latch mechanism is clean and free of debris. Lubricate if necessary.
- Verify Alignment: Ensure the tool box is still securely mounted and has not shifted, which could affect lid alignment.
6.2 Lock Is Stiff or Difficult to Turn
- Lubricate Lock: Apply a graphite-based or silicone-based lubricant into the keyhole and work the key in and out several times.
- Check Key: Ensure you are using the correct key and that it is not bent or damaged.
6.3 Water Inside the Tool Box
- Inspect Weather Seal: Examine the rubber weather seal around the lid for any damage, gaps, or signs of wear. Replace if necessary.
- Check Lid Closure: Ensure the lid is fully closed and latched, creating a tight seal.
7. Specifications
| Feature | Detail |
|---|---|
| Model Number | 172-5-04 |
| Brand | Weather Guard |
| Material | Aluminum |
| Color | Gloss Black |
| Storage Capacity | 3.4 cu ft |
| Product Dimensions (L x W x H) | 46.63" x 15.43" x 16.4" |
| Item Weight | 42 pounds |
| Special Features | Lockable, Rust Resistant, ARMOR TUF Powder Coat, Full Weather Seal, 1KEY ULTRALOCK™ |
| Placement | Driver Side Wheel Well |
| UPC | 783965072915 |
8. Warranty Information
Weather Guard products are backed by a limited lifetime warranty against defects in material and workmanship. For specific warranty terms, conditions, and registration information, please refer to the official Weather Guard website or contact customer support. Keep your proof of purchase for warranty claims.
9. Customer Support
If you have any questions regarding the installation, operation, or maintenance of your Weather Guard tool box, please contact Weather Guard customer support.
- Website: www.weatherguard.com (for product information, FAQs, and contact details)
- Phone: Refer to the official website for the most current customer service contact numbers.