TEMPWARE TW10000ER
TEMPWARE 10000W Electric Garage Heater (Model TW10000ER) Instruction Manual
Introduction
This instruction manual provides essential information for the safe and efficient operation, installation, and maintenance of your TEMPWARE 10000W Electric Garage Heater, Model TW10000ER. Please read this manual thoroughly before installation and use, and retain it for future reference.
Safety Information
WARNING: Improper installation, adjustment, alteration, service, or maintenance can cause property damage, injury, or death. Read the installation, operating, and maintenance instructions thoroughly before installing or servicing this equipment.
- Always turn off power at the circuit breaker before installation or maintenance.
- This heater operates on 240V and must be hardwired by a qualified electrician.
- Ensure proper grounding in accordance with the National Electric Code (NEC) and local codes.
- Do not operate the heater with damaged wiring or if it has been dropped or damaged.
- Keep combustible materials at least 3 feet (0.9 meters) away from the front and sides of the heater.
- The heater is equipped with overheat protection; if it shuts off unexpectedly, allow it to cool before restarting.
- This appliance is for indoor use only.
Product Overview
The TEMPWARE 10000W Electric Garage Heater is designed for efficient heating of large spaces such as workshops and garages. It features adjustable louvers, multiple mounting angles, a digital display, and remote control functionality.

Image: Front view of the TEMPWARE 10000W Electric Garage Heater, showing the blue casing, front grille, control panel, and an included remote control.
Key Features:
- High Performance: 10,000W power capacity, 34,120 BTU output.
- Adjustable Heating: Fully adjustable louvers and multiple mounting angles for directional heat.
- Programmable Timer: 1 to 12-hour timer for energy management.
- Precision Thermostat: Adjustable from 45°F to 95°F (7°C to 35°C).
- Safety Features: Advanced overheat protection and sturdy steel construction.
- Remote Control: Full-function remote for convenient operation.
Installation
IMPORTANT: Installation must be performed by a qualified electrician in accordance with all national and local electrical codes. This unit requires a 240V hardwired connection.
Mounting Options:
The heater supports various mounting angles (0°, 30°, 60°, 90°) for optimal heat distribution. It can be mounted to the ceiling or wall using the provided bracket.

Image: Illustrations demonstrating the heater's variable mounting angles (0, 30, 60, 90 degrees) for ceiling or wall installation.
Hardwiring Instructions:
- Turn off Power: Ensure the main power supply to the installation area is completely off at the circuit breaker.
- Access Wiring Compartment: Remove all screws from the bottom panel of the heater to access the internal wiring.
- Run Wiring: Route the appropriate gauge wire (6 AWG Copper Only, rated at 167°F/75°C or higher) through the designated cut-out on the side of the heater. Connect the wire to the Power Block as instructed.
- Secure Connections: Torque all terminal screws and power block lugs tight with the required torque (45 in-lbs).
- Install Panel: Reinstall the bottom panel back and tighten all screws.
- Connect to Circuit Breaker: Connect the heater to a properly sized current protection circuit breaker (Recommended: 60A double-pole breaker) in your main service panel. Ensure proper grounding.
- Verify: Before initial use, consult a licensed electrician to verify all wiring connections are correct and tight to prevent electrical shorts.
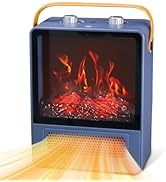
Image: Step-by-step diagram illustrating the hardwiring process for the electric garage heater, including turning off power, accessing wiring, connecting wires, securing terminals, and connecting to a circuit breaker.
Operation
Control Panel:
The heater features an integrated control panel with a digital display and buttons for power, mode, temperature adjustment, and timer settings.
Remote Control:
The included remote control provides convenient access to all functions from a distance of up to 27 feet.

Image: A hand holding the remote control for the TEMPWARE electric garage heater, with the heater visible in the background of a large warehouse, illustrating remote coverage.
- Power ON/OFF: Press the power button on the control panel or remote to turn the unit on or off.
- Temperature Adjustment: Use the TEMP +/- buttons to set the desired temperature between 45°F and 95°F (7°C and 35°C). The heater will cycle on and off to maintain this setting.
- Timer Setting: Press the TIMER button to set the operating duration from 1 to 12 hours. The heater will automatically shut off after the set time.
- Mode Selection: Use the MODE button to cycle through available operating modes (if applicable, based on model).
- F/C Conversion: Press the F/C button to switch the temperature display between Fahrenheit and Celsius.
Maintenance
Regular maintenance ensures optimal performance and longevity of your heater.
- Cleaning: Ensure the heater is unplugged and completely cool before cleaning. Use a soft, damp cloth to wipe the exterior. Do not use abrasive cleaners or solvents.
- Air Intake/Outlet: Periodically check and clean the air intake and outlet grilles to ensure they are free from dust and debris, which can impede airflow and reduce efficiency.
- Electrical Connections: Annually, or as needed, have a qualified electrician inspect the hardwired connections for tightness and signs of wear.
- Storage: If storing the heater for an extended period, ensure it is clean, dry, and stored in a safe, protected location.
Troubleshooting
| Problem | Possible Cause | Solution |
|---|---|---|
| Heater does not turn on. | No power supply; circuit breaker tripped; unit overheated. | Check power connection and circuit breaker. Allow unit to cool if overheat protection activated. Consult electrician if issue persists. |
| Insufficient heat output. | Thermostat set too low; room size exceeds heating capacity; obstructed airflow. | Increase thermostat setting. Ensure heater is appropriate for room size. Clear any obstructions from grilles. |
| Heater cycles on/off frequently. | Thermostat setting too close to ambient temperature; overheat protection activating. | Adjust thermostat. Check for proper ventilation and clear obstructions. |
| Remote control not working. | Dead batteries; obstruction between remote and heater. | Replace remote batteries. Ensure clear line of sight to the heater's receiver. |
Specifications
| Feature | Detail |
|---|---|
| Brand | TEMPWARE |
| Model Number | TW10000ER |
| Power Output | 10,000W |
| BTU/Hour | 34,120 |
| Voltage | 240 Volts (AC) |
| Amperage | 41.67 Amps |
| Heating Coverage | Up to 1500 sq ft |
| Thermostat Range | 45°F-95°F (7°C-35°C) |
| Timer | 1-12 Hours |
| Product Dimensions | 20.5 x 21.5 x 20.9 inches |
| Recommended Wire Size | 6 AWG Copper Only (rated 167°F/75°C) |
| Recommended Circuit Breaker | 60A (or larger, in accordance with NEC and local codes) |
| Form Factor | Cabinet, Ceiling/Wall Mount |
| Color | Blue |
Warranty and Support
For warranty information or technical assistance, please contact TEMPWARE customer support. Our local support team is available to help with any questions or issues you may encounter.
Email: customerservice@albatrossindustry.com
You can also reach out via your Amazon account for support.