1. Introduction
The AudioBox RXP-200 is a multi-functional emergency radio designed to provide essential information and utilities during power outages, emergencies, and outdoor activities. It features AM/FM/NOAA weather band reception, a built-in flashlight, a reading lamp, an SOS alarm, and multiple charging options including USB Type-C, hand crank, and solar panel. This manual provides instructions for safe and effective use of your device.
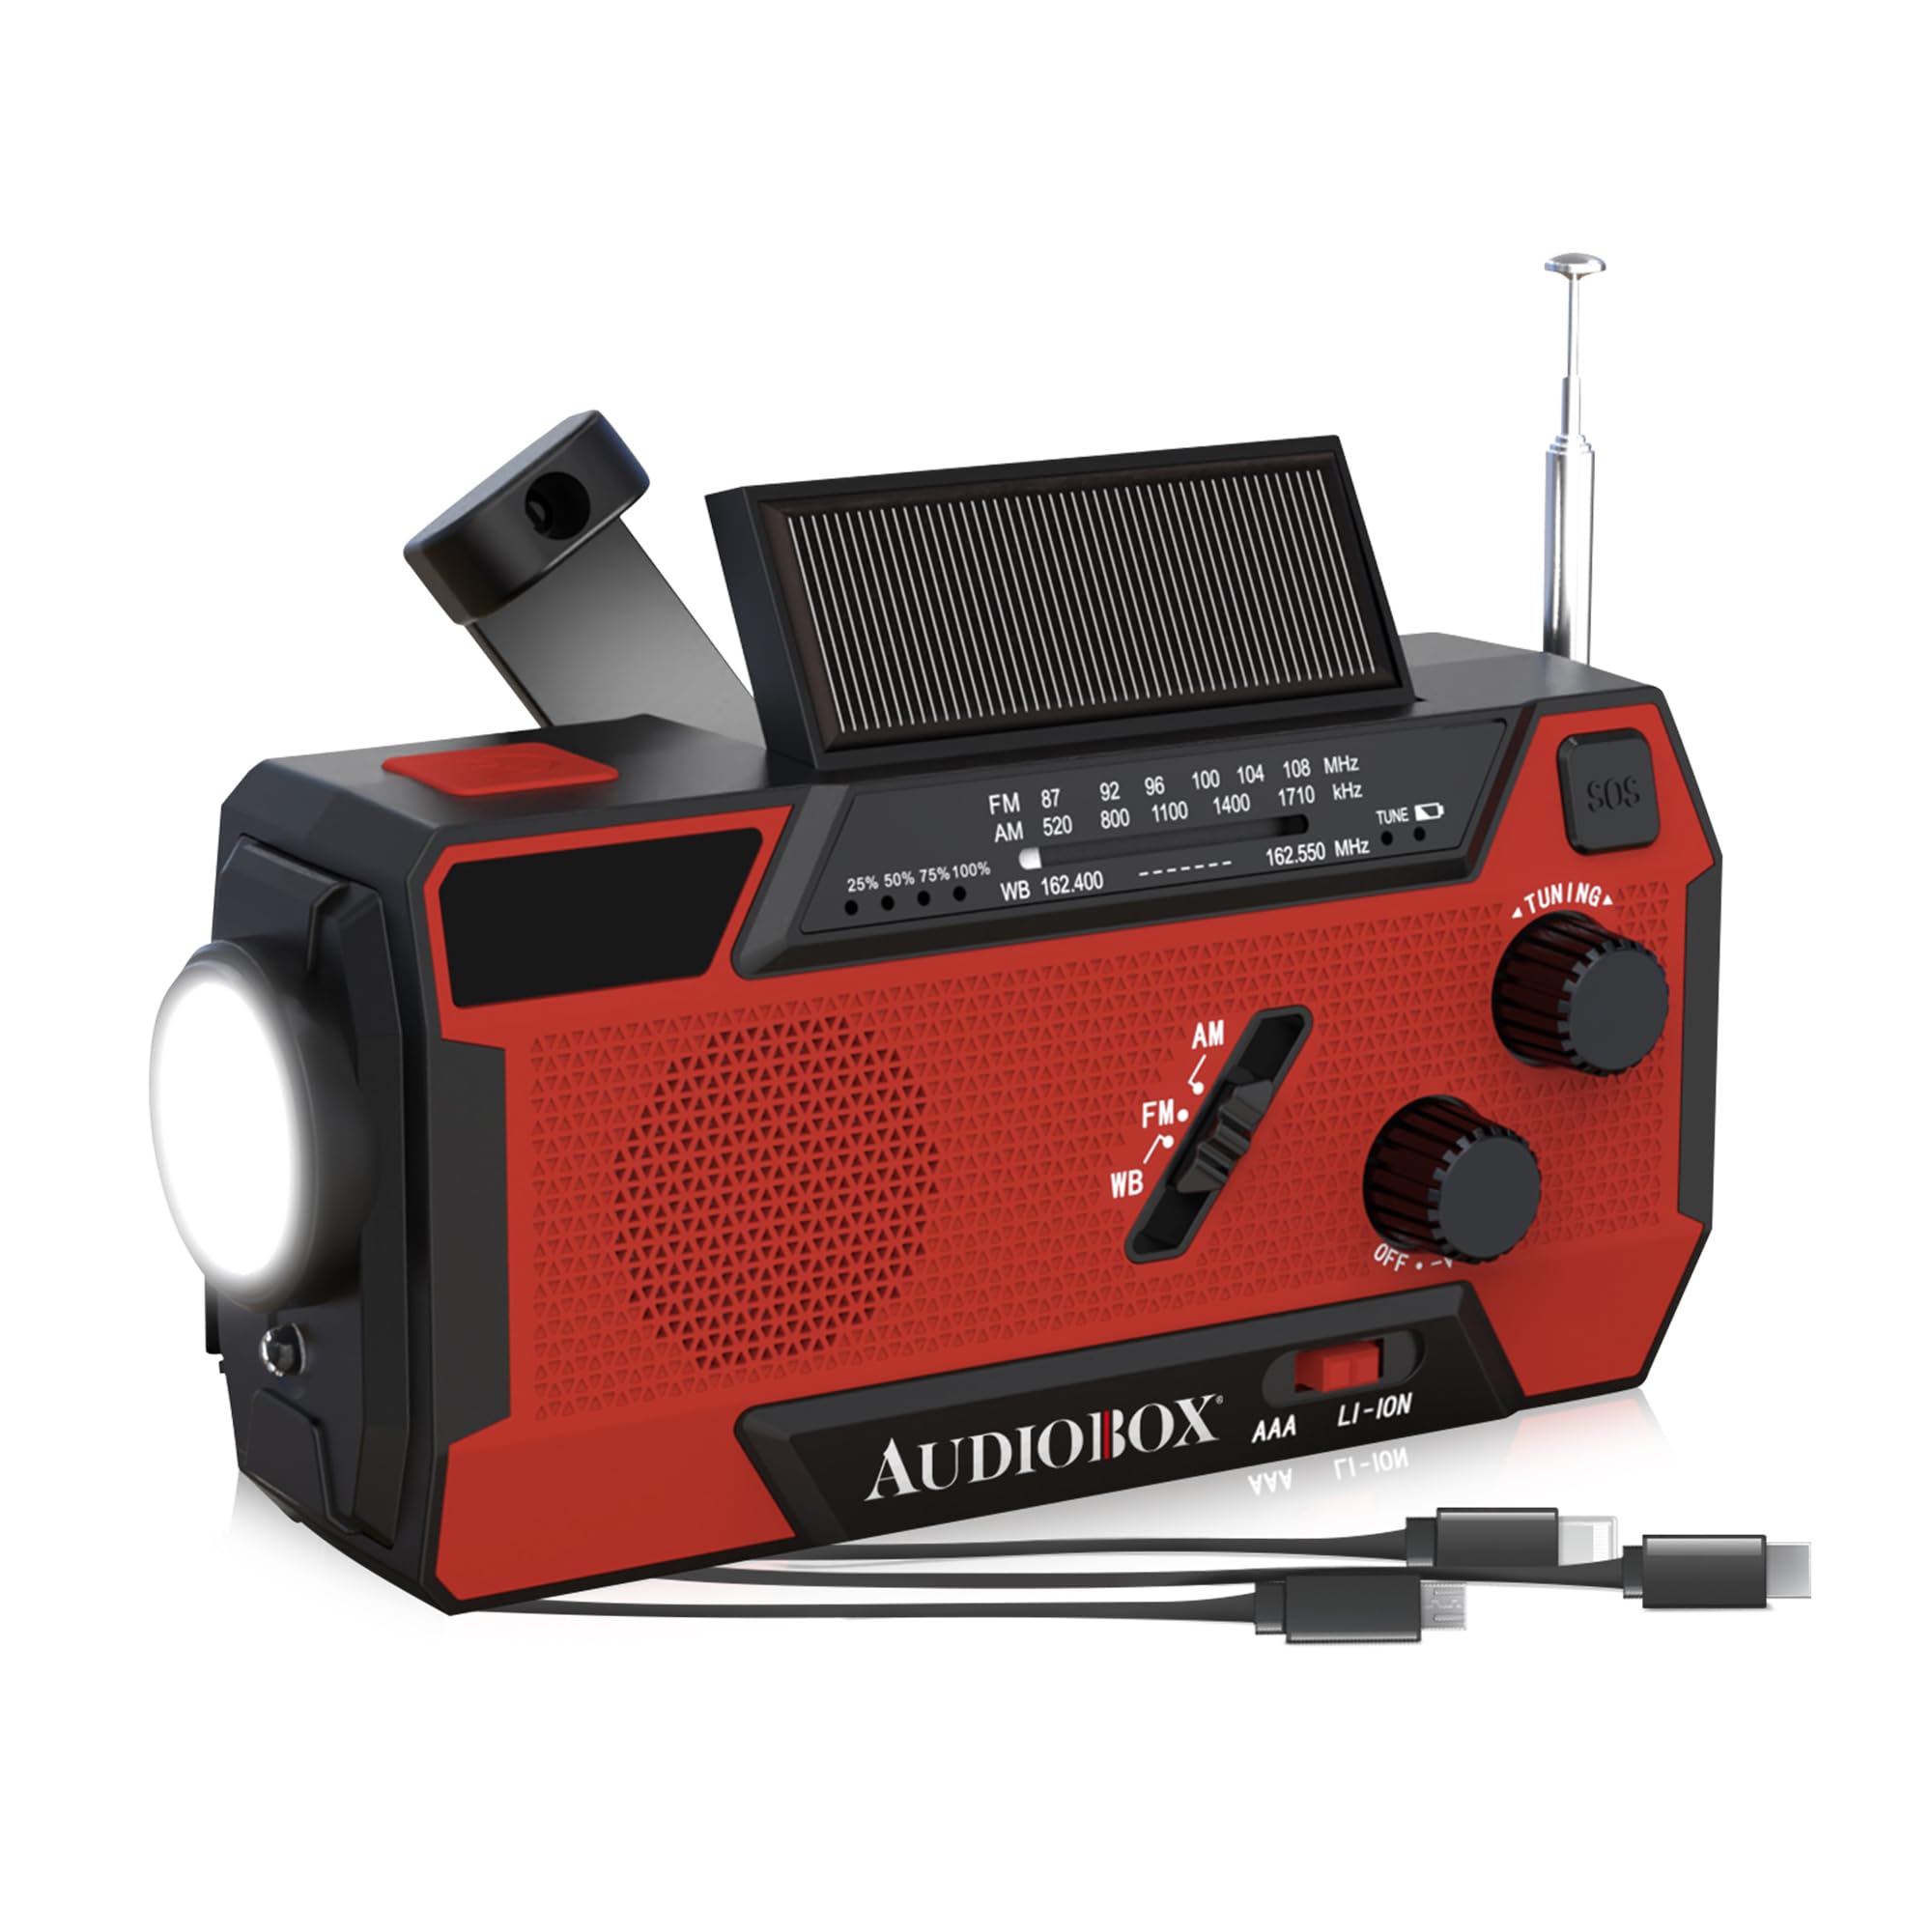
Image 1.1: The AudioBox RXP-200 Emergency NOAA Radio, showcasing its compact design and key features.
2. Safety Information
- Do not expose the device to extreme temperatures or direct sunlight for prolonged periods.
- Avoid dropping or subjecting the radio to strong impacts.
- Keep the device away from water and moisture. While it is IPX3 water-resistant, it is not waterproof and should not be submerged.
- Do not attempt to disassemble or modify the radio. This will void the warranty and may cause damage.
- Use only the specified charging methods.
- Keep out of reach of children.
3. Package Contents
Verify that all items are present in the package:
- AudioBox RXP-200 Emergency NOAA Radio
- USB Type-C Charging Cable
- Quick Start Guide (This manual serves as a detailed guide)

Image 3.1: Front view of the AudioBox RXP-200 packaging, showing product features.

Image 3.2: Back view of the AudioBox RXP-200 packaging, highlighting additional information.

Image 3.3: Side view of the AudioBox RXP-200 packaging, detailing features like LED light and power mode switch.

Image 3.4: Side view of the AudioBox RXP-200 packaging, illustrating charging methods like hand crank and solar.
4. Product Overview and Components
Familiarize yourself with the various parts of your AudioBox RXP-200 radio:
- Telescopic Antenna: For improved radio signal reception.
- Solar Panel: For trickle charging the internal battery under direct sunlight.
- Hand Crank: For manual power generation.
- LED Flashlight: Main light source for illumination.
- Reading Lamp: Side-mounted light for broader illumination.
- SOS Alarm Button: Activates a loud siren and flashing light for emergencies.
- Power/Volume Knob: Turns the radio on/off and adjusts volume.
- Tuning Knob: Selects radio frequencies.
- Band Selector Switch: Switches between AM, FM, and WB (Weather Band).
- USB Type-C Input Port: For charging the radio.
- USB-A Output Port: For charging external devices (e.g., smartphones).
- Battery Indicator Lights: Shows current battery level.
5. Setup
5.1 Initial Charging
Before first use, fully charge the radio using the USB Type-C cable. Connect the cable to the USB Type-C input port on the radio and to a standard USB power adapter (not included) or computer USB port. The battery indicator lights will show charging progress.
5.2 Antenna Adjustment
For optimal radio reception, extend the telescopic antenna fully and adjust its direction until the clearest signal is achieved.
6. Operating Instructions
6.1 Power On/Off and Volume
Rotate the Power/Volume Knob clockwise to turn the radio on and increase the volume. Rotate counter-clockwise to decrease volume and turn off the radio.
6.2 Radio Operation (AM/FM/WB)
- Turn on the radio using the Power/Volume Knob.
- Use the Band Selector Switch to choose between AM, FM, or WB (Weather Band).
- Rotate the Tuning Knob to scan for stations. Adjust the telescopic antenna for better reception.
6.3 NOAA Weather Alert
When the radio is set to the WB band, it can receive NOAA weather alerts. In some models, an alert function may automatically activate the radio when a weather alert is broadcast. Refer to the specific model's features for automatic alert functionality.
6.4 Flashlight Operation
Press the Flashlight Button (location may vary, typically on the front or side) to turn the LED flashlight on or off.
6.5 Reading Lamp Operation
Open the solar panel or a designated flap (if applicable) to reveal the reading lamp. Press the Reading Lamp Button (or a combined light button) to turn it on or off.
6.6 SOS Alarm Activation
In an emergency, press and hold the SOS Alarm Button for a few seconds to activate a loud siren and flashing light. Press it again to deactivate.
6.7 Charging External Devices (Power Bank Function)
Connect your smartphone or other USB-powered device to the USB-A Output Port on the radio using your device's charging cable. The radio's internal 2000mAh battery will begin charging your external device.
7. Charging the Radio
The AudioBox RXP-200 offers multiple ways to recharge its internal 2000mAh lithium-ion battery:
7.1 USB Type-C Charging
Connect the provided USB Type-C cable to the radio's USB Type-C Input Port and to a 5V USB power source (e.g., wall adapter, computer, power bank). This is the fastest charging method.
7.2 Hand Crank Charging
Rotate the Hand Crank clockwise or counter-clockwise at a steady pace (approximately 130-150 RPM) for 3-5 minutes to generate enough power for a short period of radio use or flashlight operation. Continuous cranking will charge the battery further.
7.3 Solar Panel Charging
Place the radio with the Solar Panel facing direct sunlight. This method provides a slow, supplementary charge and is ideal for maintaining battery levels or for emergency trickle charging when other power sources are unavailable. It is not intended as the primary charging method.
8. Maintenance
8.1 Cleaning
Wipe the radio with a soft, damp cloth. Do not use abrasive cleaners or solvents. Ensure all ports are dry before charging.
8.2 Storage
Store the radio in a cool, dry place away from direct sunlight and extreme temperatures. If storing for extended periods, charge the battery at least once every three months to prolong its lifespan.
8.3 Battery Care
The built-in lithium-ion battery is not user-replaceable. Do not attempt to remove or replace it. Dispose of the device according to local regulations for electronic waste.
9. Troubleshooting
| Problem | Possible Cause | Solution |
|---|---|---|
| Radio does not turn on. | Battery is depleted. | Charge the radio using USB Type-C, hand crank, or solar panel. |
| Poor radio reception. | Antenna not extended or poor signal area. | Fully extend the telescopic antenna and adjust its position. Move to an open area. |
| Flashlight/Reading lamp not working. | Battery is low or light is off. | Charge the radio. Ensure the light button is pressed correctly. |
| External device not charging. | Radio battery is too low or cable is faulty. | Ensure the radio has sufficient charge. Try a different USB cable. |
10. Specifications
- Model: RXP-200
- Radio Bands: AM, FM, WB (NOAA Weather Band)
- Battery: 2000mAh Lithium-Ion (built-in)
- Charging Methods: USB Type-C, Hand Crank, Solar Panel
- Output: USB-A (for charging external devices)
- Flashlight Brightness: 140 Lumens
- Water Resistance: IPX3
- Dimensions: 7.8"L x 2.46"W x 3.07"H
- Weight: 0.85 Pounds
- Special Features: SOS Alarm, Reading Lamp
11. Warranty and Support
For warranty information and customer support, please contact the seller or manufacturer directly. Refer to your purchase documentation for specific warranty terms and contact details.
Manufacturer: General Sound Co
Brand: Audiobox
For further assistance, please visit the Audiobox Store on Amazon.