
LINKHOO JD-SS-2TC
LINKHOO Outdoor Trash Can Storage Shed User Manual
Model: JD-SS-2TC
Introduction
Thank you for choosing the LINKHOO Outdoor Trash Can Storage Shed. This manual provides essential information for the proper assembly, operation, and maintenance of your new storage shed. Designed to securely store two large galvanized steel trash cans, this unit features a lockable door and an auto-buffer storage cover for convenience and durability. Please read this manual thoroughly before beginning assembly or use to ensure safe and efficient operation.
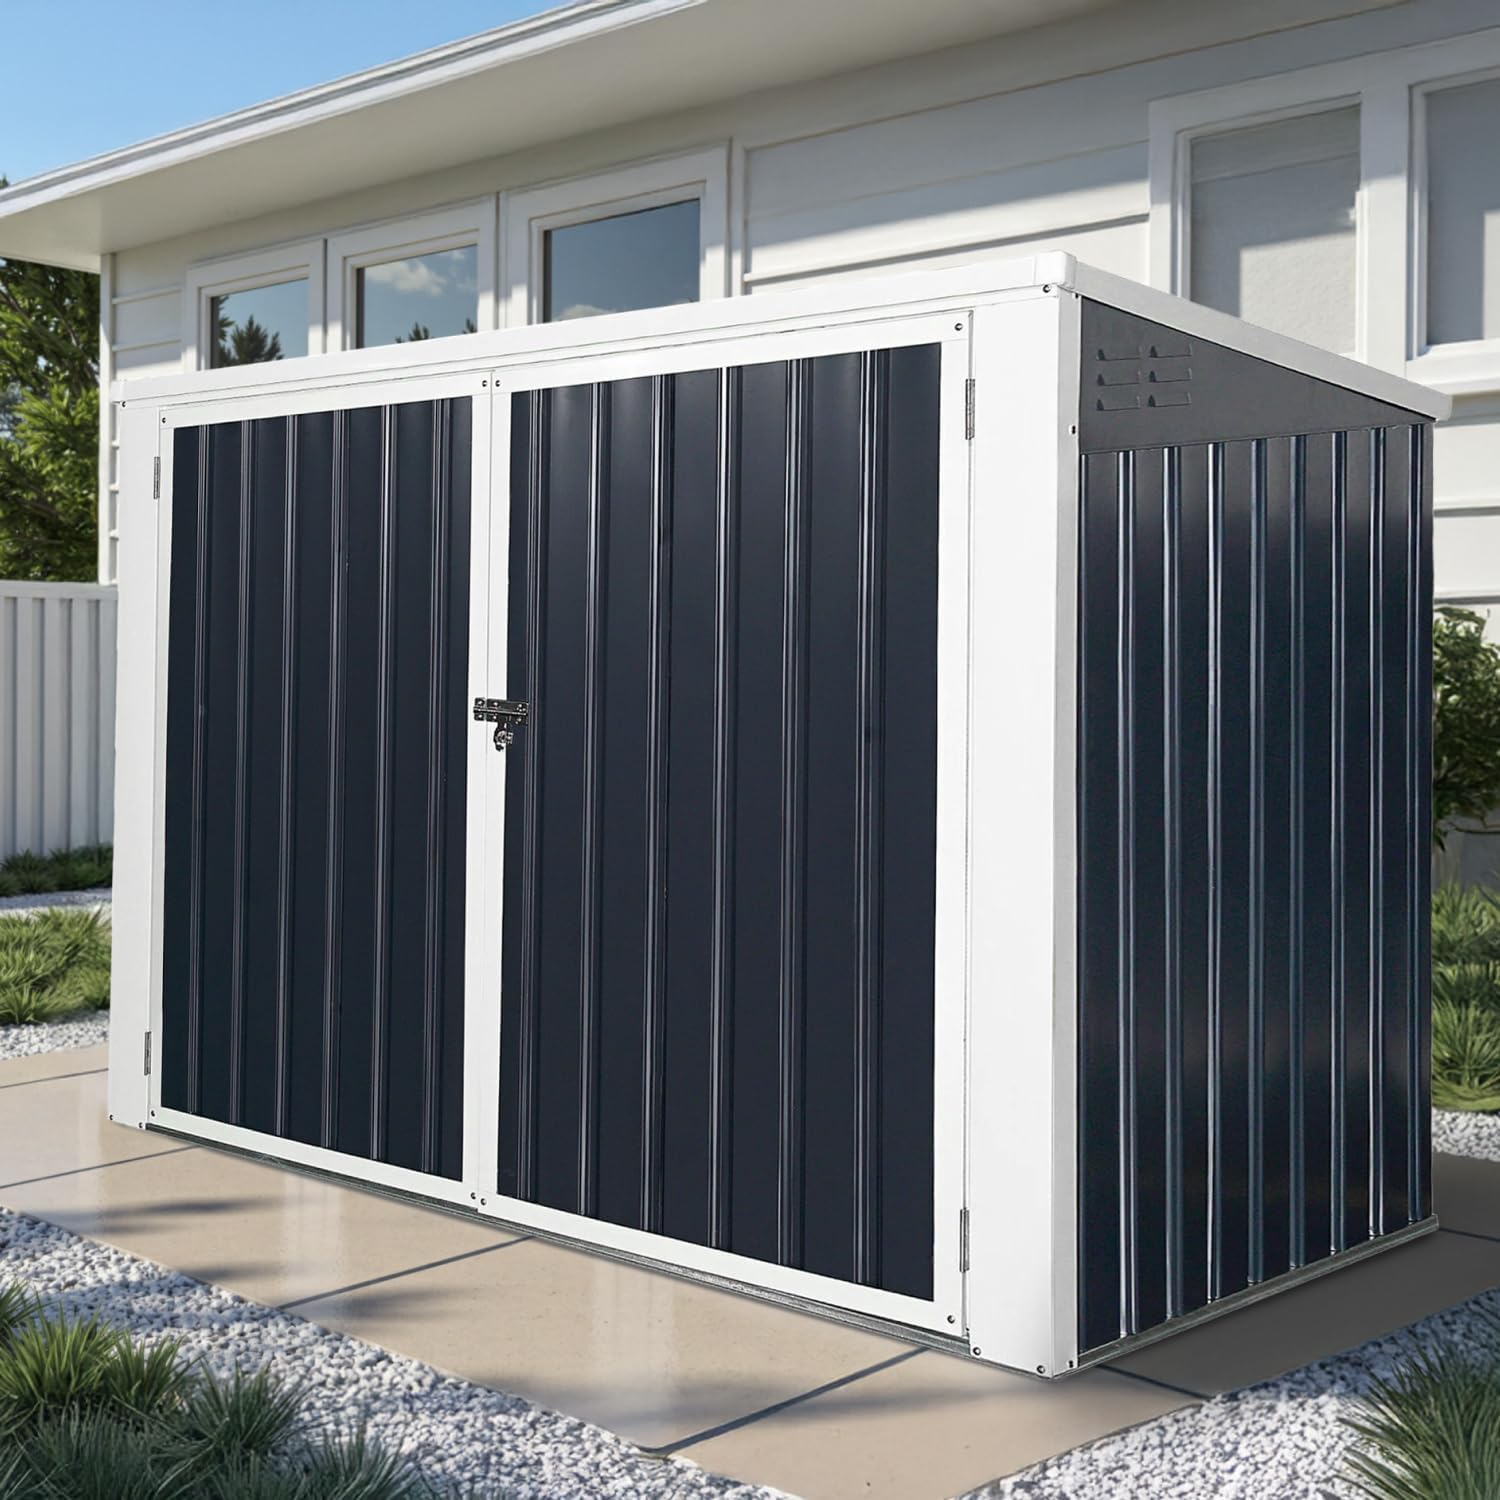
Image: The LINKHOO Outdoor Trash Can Storage Shed, featuring a black and white design, positioned on a patio next to a house. This shed is designed to discreetly store trash cans.
Safety Information
- Always assemble the shed on a level, stable, and well-drained surface.
- Ensure all parts are present and undamaged before beginning assembly.
- Wear appropriate personal protective equipment, such as gloves, during assembly to prevent injury.
- It is recommended that two people perform the assembly to ensure safety and ease of installation.
- Secure the base of the shed using the provided ground stakes or expansion bolts to prevent tipping, especially in windy conditions.
- Keep children and pets away from the assembly area.
- Do not overload the shed. Adhere to the intended use for trash can storage or light utility items.
Setup and Assembly
The LINKHOO Outdoor Trash Can Storage Shed is designed for straightforward assembly with pre-cut and pre-drilled panels. Follow these steps carefully for proper installation.
- Unpack and Verify Parts: Carefully unpack all components and compare them against the parts list provided in your physical manual. Ensure all parts are labeled correctly to match the manual.
- Prepare the Surface: Select a level, well-drained area for installation. This is crucial for the stability and longevity of the shed.
- Peel Protective Film: Before assembly, peel off any protective film from the panels. This ensures a clean finish and proper fit.
- Assemble Panels: Follow the step-by-step instructions in your physical manual to connect the pre-drilled panels. Power tools may be helpful for quicker assembly.
- Secure the Base: Once the main structure is assembled, secure the base to the ground using the provided ground stakes or expansion bolts. This prevents movement and enhances stability.

Image: A visual guide illustrating helpful assembly tips, including peeling protective film from panels, the recommendation for two-person assembly with power tools, and securing the shed's base with ground stakes or expansion bolts.
Operating Instructions
The LINKHOO storage shed is designed for easy access and secure storage of your trash cans.
- Opening the Doors: To access the interior, unlock the front doors using the integrated lockable latch. The doors swing open wide for easy placement and removal of trash cans.
- Using the Auto-Buffer Cover: The shed features an auto-buffer storage cover. This mechanism assists in smoothly opening and closing the top lid, providing hands-free access when placing or retrieving items.
- Placing Trash Cans: Roll your 50-gallon trash cans into the shed. The interior is spacious enough to accommodate two standard large trash cans.
- Securing the Shed: After placing or removing items, ensure both the top cover and front doors are securely closed and locked to protect contents from weather and pests.

Image: A man demonstrates the ease of use by rolling a large green trash can into the open LINKHOO storage shed, highlighting its accessibility.

Image: The interior of the LINKHOO storage shed, with its top lid and front doors open, showing two 50-gallon trash cans comfortably stored inside.

Image: Detailed view of the shed's key features: a robust lockable door latch on the left, and the hands-free automatic cover mechanism on the right, illustrating the smooth operation of the lid.
Maintenance
The LINKHOO Outdoor Trash Can Storage Shed is designed for low maintenance and durability across all seasons.
- Cleaning: The galvanized steel construction is easy to clean. For general cleaning, wipe down surfaces with a damp cloth. For the outdoor bin, an occasional vinegar rinse may be beneficial to prevent mildew buildup.
- Weather Resistance: The shed is built with water-resistant and UV-protected materials, designed to withstand various weather conditions without fading or warping.
- Inspection: Periodically inspect all bolts and connections to ensure they remain tight. Re-tighten if necessary.
- Drainage: Ensure the area around the shed remains clear of debris to allow for proper drainage and prevent water accumulation.

Image: The LINKHOO storage shed stands robustly outdoors, accompanied by icons symbolizing its resilience against snow, wind, and sun, emphasizing its all-season durability.
Troubleshooting
If you encounter issues during assembly or use, refer to the following common problems and solutions:
- Parts Do Not Align:
Solution: Double-check that you are using the correct parts for each step as indicated in the manual. Ensure panels are oriented correctly. Sometimes, slight adjustments or loosening previously tightened screws can help align misaligned holes before re-tightening. Verify the ground is perfectly level. - Assembly Takes Longer Than Expected:
Solution: The shed involves many small pieces and can be time-consuming. Ensure you have adequate time set aside for assembly. Having a second person assist and using power tools (as recommended) can significantly speed up the process. - Missing or Damaged Parts:
Solution: If you find any parts are missing or damaged upon unboxing, do not proceed with assembly. Contact LINKHOO customer support immediately for assistance and replacement parts. - Shed Feels Unstable:
Solution: Ensure the shed is placed on a completely level surface. Verify that all screws and bolts are securely tightened. Confirm that the base is properly anchored to the ground using the provided stakes or expansion bolts.
Specifications
| Brand | LINKHOO |
| Model Number | JD-SS-2TC |
| Color | Black |
| Material | Metal (Galvanized Steel) |
| Product Dimensions (D x W x H) | 66.74" x 37.8" x 52.44" |
| Item Weight | 72.8 Pounds |
| Style | 2 Trash Cans |
| Water Resistance Level | Water Resistant |
| Ultraviolet Light Protection | Yes |
| Assembly Required | Yes |

Image: A detailed diagram illustrating the key dimensions of the horizontal storage shed, including height, width, and depth measurements in inches.
Warranty and Support
LINKHOO is committed to providing high-quality products and customer satisfaction. Your Outdoor Trash Can Storage Shed is designed for a 10+ year lifespan under normal use and proper maintenance.
- Returns: This product is eligible for 30-day easy returns. Please refer to your purchase platform's return policy for detailed instructions.
- Customer Support: For any questions, concerns, or assistance with assembly or product issues, please contact LINKHOO customer support. We strive to provide 24-hour support to address your needs promptly.

Image: A graphic illustrating LINKHOO's commitment to customer service, featuring a delivery truck representing efficient shipping (1 package) and a customer support representative symbolizing 24-hour assistance.
Related documentsJD-SS-2TC


Ask a question about this manual
Ask about setup, troubleshooting, compatibility, parts, safety, or missing instructions. Manuals+ will review the question and use this page’s manual context to help answer it.