Introduction
This manual provides essential information for the safe and effective installation, operation, and maintenance of your YTXXDEUS 3-in-1 RV Water Heater Repair Kit. This kit is designed to replace critical components in compatible Atwood/Dometic RV water heaters, addressing common issues such as ignition failure, inconsistent water temperature, and fuse blowouts. Please read these instructions thoroughly before attempting any repairs.
Safety Information
WARNING: Improper installation, adjustment, alteration, service, or maintenance can cause property damage, injury, or death. Read the installation, operating, and maintenance instructions thoroughly before installing or servicing this equipment.
- Always disconnect all power (12V DC and 120V AC) to the RV water heater before performing any service or maintenance.
- Turn off the gas supply to the water heater before servicing.
- Ensure the water heater has cooled down completely before handling components to prevent burns.
- Wear appropriate personal protective equipment, including safety glasses and gloves.
- If you are unsure about any step, consult a qualified RV technician.
- Do not bypass any safety devices.
Package Contents
Verify that all components listed below are present in your kit:
- 1x RV Water Heater Control Circuit Board (Part #91365)
- 1x Thermal Cut-Off & ECO Thermostat Kit (Part #91447)
- 1x Spark Sensor Igniter Electrode (Part #93868)
- 1x Connecting Plate with 2x Screws
- 1x ECO Thermostat
- 1x T'STAT Thermostat
- 1x Black Foam Cover
- 1x Copper Connecting Wire
- 2x Fuses
- 1x Instruction Sheet (general guide)
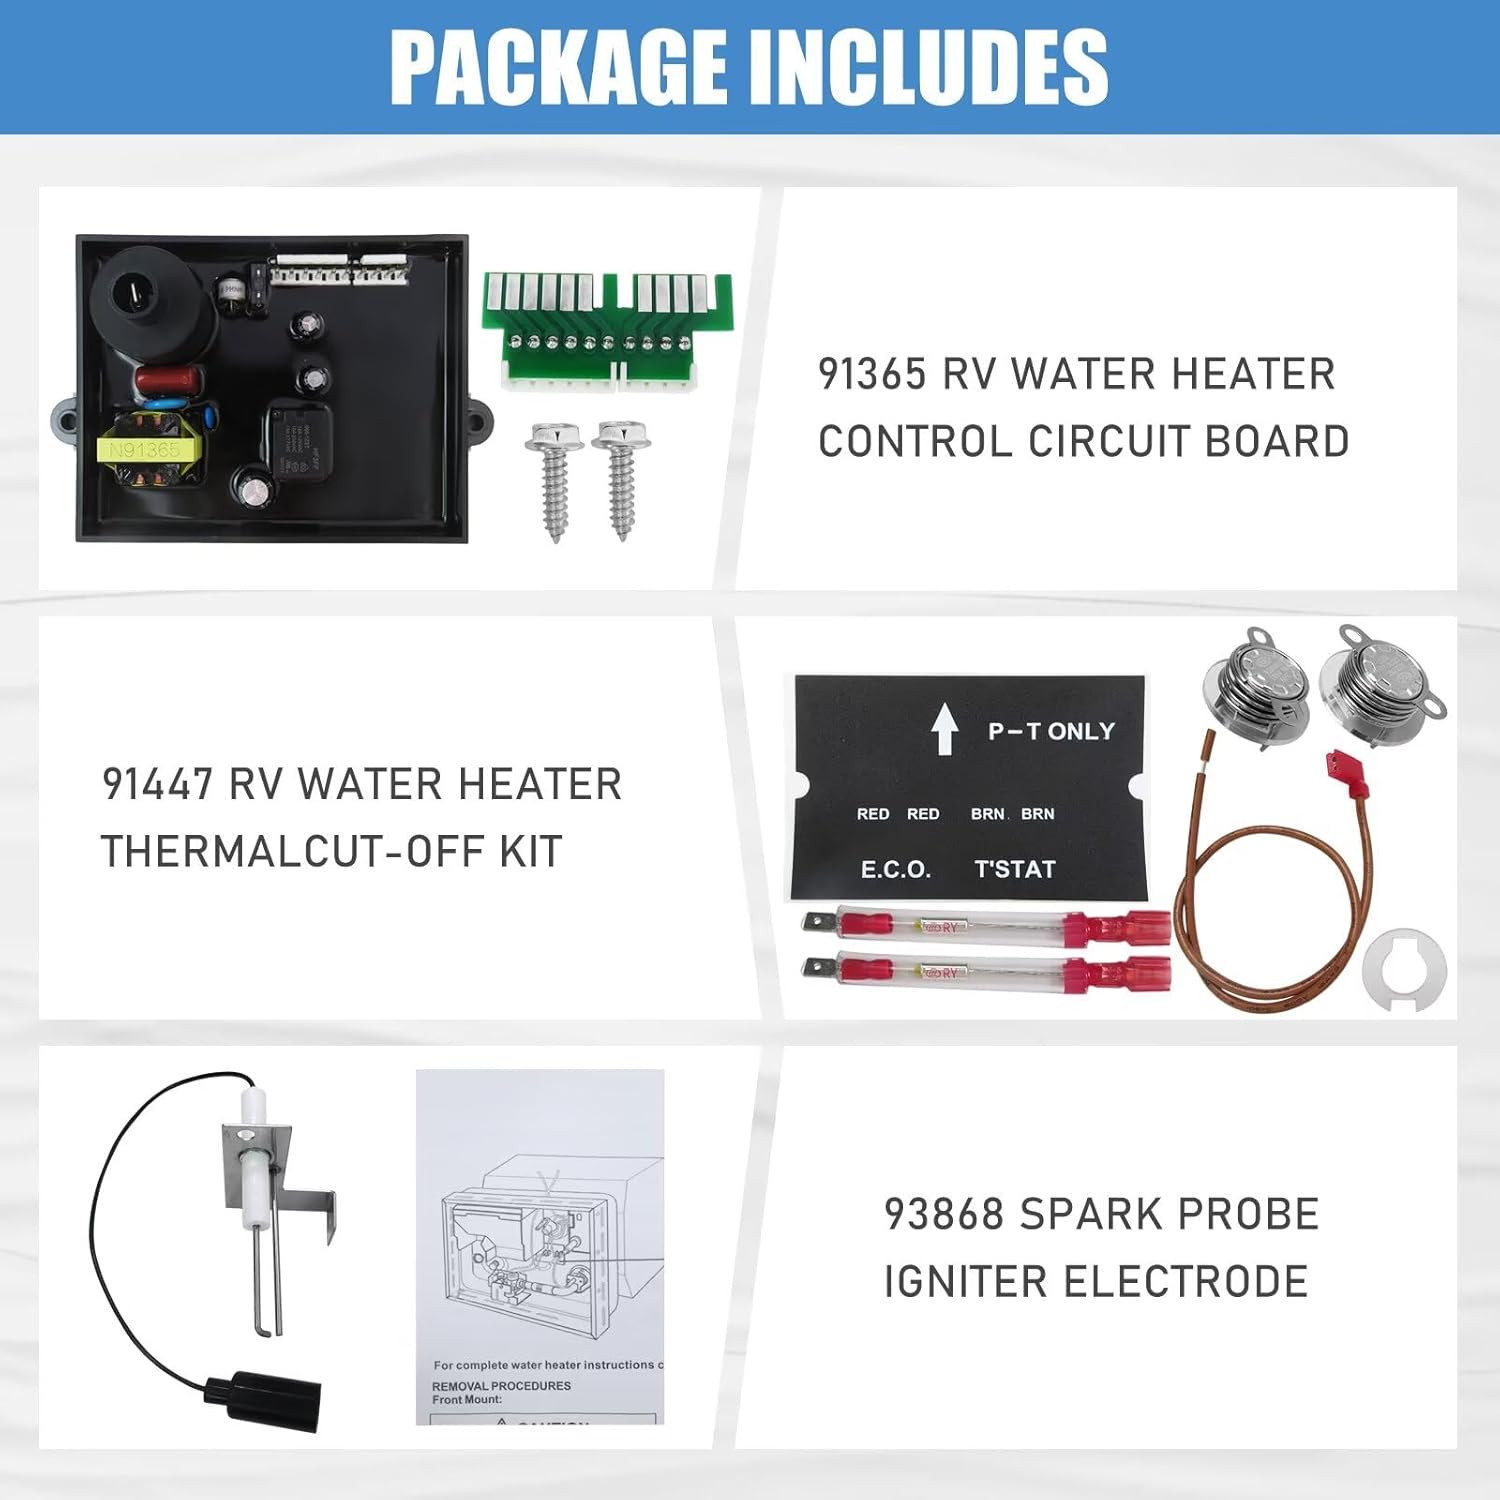
Figure 1: Overview of the complete kit contents, including the 91365 circuit board, 91447 thermal cut-off kit, and 93868 spark igniter electrode.
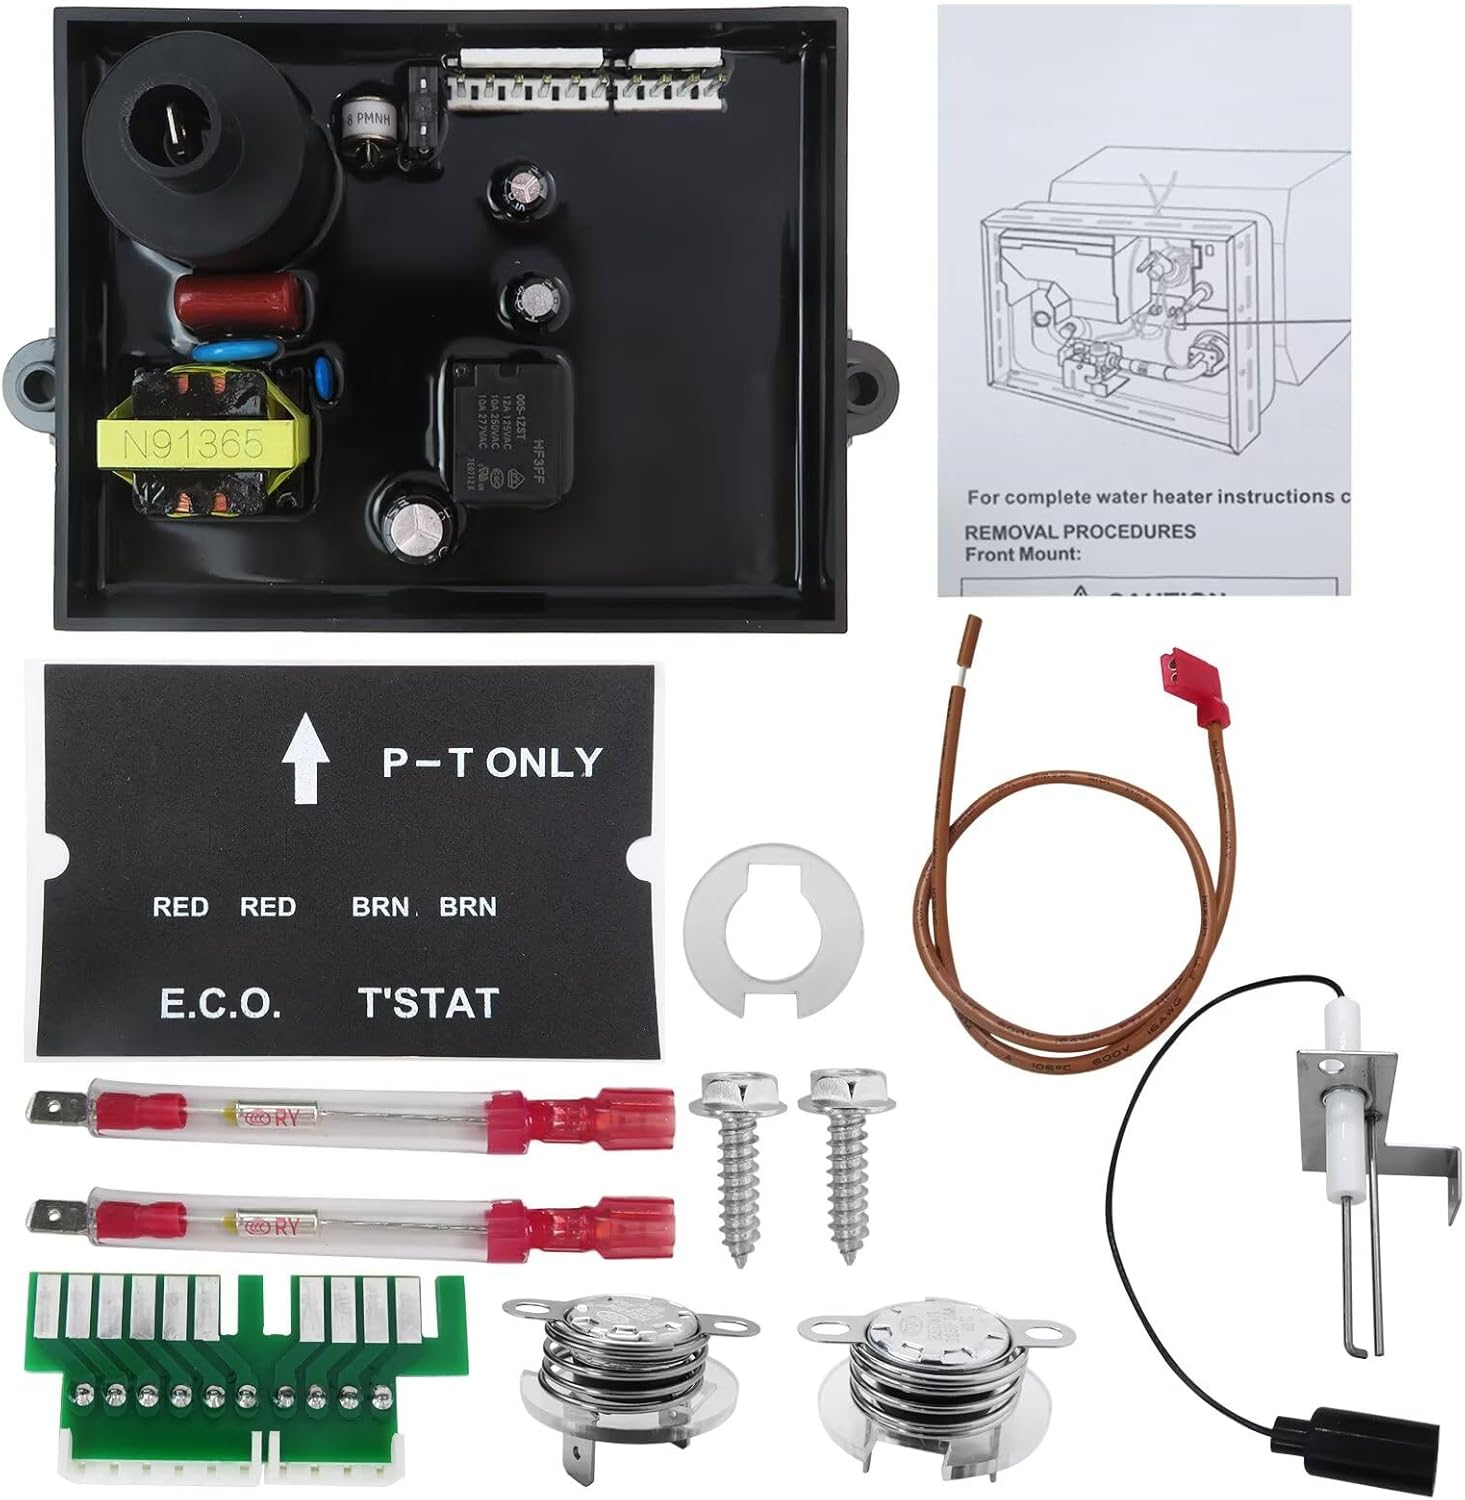
Figure 2: Detailed view of each component in the repair kit, including the circuit board, thermostats, igniter, and small parts.
Compatibility
This repair kit is compatible with various Atwood/Dometic gas/electric 12 VDC RV water heater models, including but not limited to:
- XT Series: G9-EXT, G16-EXT, GE9-EXT, GE16-EXT, GEH9-EXT, GEH16-EXT
- Other Models: GH6-3E/4E/6E/7E/8E; GCH6-3E/4E/6E/7E; G6A-2E/3E/4E/6E/7E/8E; GC6A-7E; GCH6A-7E/8E/9E/10E; GC6AA-7E/8E/9E/10E; G10-1E/2E/3E; GC10-1E/2E; GC10A-2E/3E/4E; GH10-1E/2E/3E; GCH10A-2E/3E/4E; G610-3E; GH610-3E
- Replacement Part Numbers: Replaces 91365/91226/91365MC/93305/93851 (Circuit Board), 91447/93866 (Thermal Cut-Off Kit), 93868 (Igniter Electrode).

Figure 3: Chart illustrating the wide compatibility of the repair kit with various Atwood and Dometic RV water heater models.
Product Components Overview
This kit includes three primary components essential for RV water heater functionality:
1. RV Water Heater Control Circuit Board (Part #91365)
This board controls the ignition sequence and overall operation of the water heater. It manages the gas valve, igniter, and safety features.

Figure 4: Detailed view of the 91365 RV Water Heater Control Circuit Board.
2. Thermal Cut-Off & ECO Thermostat Kit (Part #91447)
This kit includes the ECO (Emergency Cut-Off) thermostat and the T'STAT (Operating) thermostat. The ECO thermostat is a safety device that trips if the water temperature exceeds a safe limit, preventing overheating. The T'STAT thermostat regulates the water temperature during normal operation.

Figure 5: Close-up view of the ECO and T'STAT thermostats included in the 91447 kit.
3. Spark Sensor Igniter Electrode (Part #93868)
The igniter electrode creates the spark necessary to ignite the gas burner. It also acts as a flame sensor to confirm successful ignition.
Setup and Installation
IMPORTANT: If you are not comfortable performing electrical or gas appliance repairs, seek assistance from a certified RV technician. Incorrect installation can lead to serious hazards.
Pre-Installation Checklist:
- Ensure the RV is level and stable.
- Disconnect all power sources (shore power, battery disconnect).
- Turn off the propane supply at the tank.
- Drain the water heater tank completely and allow it to cool.
- Gather necessary tools: screwdrivers, pliers, multimeter (for testing), wire strippers/crimpers (if needed).
General Removal Procedures:
- Access the water heater compartment.
- Carefully disconnect all wires from the existing circuit board, noting their positions or taking photos for reference.
- Remove the mounting screws holding the circuit board in place.
- Locate and disconnect the wires from the existing thermal cut-off and thermostats. Remove these components.
- Disconnect the igniter wire and remove the old igniter electrode from its mounting bracket.
General Installation Procedures:
- Install the new Spark Sensor Igniter Electrode (93868) into its bracket, ensuring proper gap and alignment with the burner. Connect its wire.
- Mount the new Thermal Cut-Off & ECO Thermostat Kit (91447). Ensure the thermostats are properly seated against the tank surface for accurate temperature sensing. Connect the wires as per your reference photos or the water heater's wiring diagram.
- Install the new RV Water Heater Control Circuit Board (91365) using the provided screws. Reconnect all wires to their correct terminals on the new board. Double-check all connections for security and correct placement.
- Once all components are installed and wired, visually inspect all connections.
Operating Instructions (Post-Installation)
After installation, follow these steps to test the water heater's operation:
- Close the drain plug and fill the RV water heater tank with water. Open a hot water faucet inside the RV to purge air from the system. Close the faucet once water flows steadily.
- Restore 12V DC power to the RV.
- Turn on the propane supply at the tank.
- Activate the gas ignition switch for the water heater inside your RV. Listen for the igniter sparking and the burner igniting.
- Observe the flame through the inspection port (if available). The burner should ignite within a few seconds.
- Allow the water heater to run for several minutes to ensure it heats water to the desired temperature.
- If the water heater fails to ignite or operate correctly, refer to the Troubleshooting section.
- If using the electric heating element (if applicable to your water heater model), restore 120V AC power and activate the electric heating switch.
Maintenance
Regular maintenance helps ensure the longevity and efficient operation of your RV water heater components:
- Annual Inspection: Annually inspect the circuit board for any signs of corrosion or damage. Check all wire connections for tightness.
- Thermostat Check: Ensure thermostats are clean and firmly seated against the tank. Dust or debris can affect temperature sensing.
- Igniter Cleaning: Periodically clean the igniter electrode with a soft brush to remove carbon buildup, which can interfere with sparking. Ensure the igniter gap is correct according to your water heater's specific manual.
- Fuse Check: If the water heater stops working, check the fuses on the circuit board and in your RV's fuse panel. Replace blown fuses with ones of the correct amperage.
- Ventilation: Ensure the water heater compartment has adequate ventilation to prevent overheating of components.
Troubleshooting
This section addresses common issues you might encounter after installing the repair kit.
Issue: Water Heater Does Not Ignite (Gas)
- No Spark: Check connections to the igniter electrode (93868) and the circuit board (91365). Ensure the igniter gap is correct. The igniter may be faulty if connections are good.
- Spark but No Ignition: Verify propane supply is on and tanks are not empty. Check for obstructions in the burner tube. The gas valve might be faulty (not part of this kit) or the circuit board (91365) may not be sending the correct signal.
- Intermittent Ignition: Clean the igniter electrode. Ensure all electrical connections are secure.
Issue: Water Heater Overheats or Does Not Heat
- Overheating: The ECO thermostat (part of 91447) may be faulty or improperly seated, failing to cut off power at high temperatures. The T'STAT thermostat (part of 91447) may also be faulty.
- No Heat: Check if the ECO thermostat has tripped (a small reset button may be present on some models, or it may require replacement if it's a one-time thermal fuse). Ensure the T'STAT thermostat is properly connected and functioning. The circuit board (91365) might not be sending power to the heating elements or gas valve.
Issue: Fuses Blow Repeatedly
- This often indicates a short circuit. Carefully inspect all wiring for pinched or exposed wires. A faulty component (e.g., circuit board 91365) could also cause this.
For further troubleshooting, consult your specific RV water heater's original service manual or contact a qualified technician.
Specifications
| Component | Part Number | Function |
|---|---|---|
| Control Circuit Board | 91365 | Manages ignition and overall heater operation |
| Thermal Cut-Off & ECO Thermostat Kit | 91447 | Safety (ECO) and operating (T'STAT) temperature regulation |
| Spark Sensor Igniter Electrode | 93868 | Ignites gas burner and senses flame |

Figure 6: Dimensions of the 91365 RV Water Heater Control Circuit Board.
Warranty and Support
For warranty information or technical support regarding your YTXXDEUS 3-in-1 RV Water Heater Repair Kit, please refer to the contact information provided by the seller or manufacturer at the time of purchase. Keep your purchase receipt as proof of purchase.