crosson 2.2L Commercial Airpot Coffee Brewer
crosson 2.2L Commercial Airpot Coffee Brewer Instruction Manual
Model: 2.2L Commercial Airpot Coffee Brewer
1. Important Safety Instructions
Please read all instructions carefully before operating this appliance. Failure to follow these instructions may result in electric shock, fire, or serious injury.
- Electrical Safety: Ensure the power outlet voltage matches the appliance's requirements (120 Volts AC). Do not immerse the brewer unit, cord, or plug in water or other liquids. Always unplug the appliance when not in use and before cleaning.
- Hot Surfaces: The brewing plate and other parts of the brewer become hot during operation. Avoid contact with hot surfaces. Use handles and knobs.
- Hot Liquids: Exercise extreme caution when handling hot coffee and the thermal airpot. Hot liquids can cause severe burns.
- Children: This appliance is not intended for use by children. Keep the appliance and its cord out of reach of children.
- Damage: Do not operate any appliance with a damaged cord or plug, or after the appliance malfunctions or has been damaged in any manner. Contact customer support for assistance.
- Proper Use: Use this appliance only for its intended purpose of brewing coffee. Do not use outdoors.
2. Product Overview
Familiarize yourself with the components of your crosson Commercial Airpot Coffee Brewer.

Figure 2.1: Overall view of the crosson 2.2L Commercial Airpot Coffee Brewer. This image shows the complete brewing unit with the thermal airpot carafe in place, ready for operation.

Figure 2.2: The 2.2L Thermal Airpot Carafe with its integrated pump dispenser. This carafe is designed to keep coffee hot for extended periods and allows for easy dispensing.
Components:
- Brewer Unit: The main body of the coffee maker, housing the heating element and water reservoir.
- Brew Basket/Funnel: Holds the coffee grounds during the brewing process.
- Thermal Airpot Carafe (2.2L): Insulated carafe designed to keep coffee hot for up to 24 hours.
- Airpot Lid with Pump: Features a lever-action pump for dispensing coffee.
- Power Cord: For connecting the brewer to an electrical outlet.
3. Setup
Follow these steps to set up your coffee brewer for the first time.
- Unpack: Carefully remove all components from the packaging. Retain packaging for future transport or storage.
- Placement: Place the brewer on a stable, level, heat-resistant surface, away from water sources and direct heat. Ensure adequate clearance around the unit for ventilation.
- Initial Cleaning: Before first use, wash the thermal airpot carafe, brew basket, and airpot lid with warm, soapy water. Rinse thoroughly and dry. Wipe the exterior of the brewer unit with a damp cloth.
- Power Connection: Plug the power cord into a grounded 120V AC electrical outlet.
- First Brew Cycle (Cleaning): To clean the internal components, fill the water reservoir with clean water (do not add coffee). Place the empty thermal airpot carafe under the brew basket. Initiate a brew cycle as described in Section 4.1. Discard the hot water after the cycle is complete. Repeat this process once more.
4. Operating Instructions
This section details how to brew coffee using your crosson Commercial Airpot Coffee Brewer.
4.1 Brewing Coffee
- Prepare Airpot: Ensure the thermal airpot carafe is clean and empty. Place it securely on the brewer's base.
- Add Coffee Grounds: Insert a standard coffee filter into the brew basket/funnel. Add your desired amount of ground coffee. For optimal flavor, use approximately 2 tablespoons of medium-ground coffee per 6 ounces of water.
- Add Water (Manual Water Inlet): Open the water reservoir lid. Carefully pour cold, fresh water into the reservoir up to the desired fill line. The maximum capacity is 2.2 liters. Close the reservoir lid.
- Start Brewing: Press the brew button or activate the brewing cycle according to your specific model's controls. The brewer will heat the water to an optimal temperature of 195℉ to 205℉ and dispense it over the coffee grounds.
- Brewing Complete: The brewing process for a full 2.2L airpot typically takes about 10 minutes. Once the water has stopped flowing into the airpot, the brewing cycle is complete.

Figure 4.1: The brewing process, showing hot water raining over coffee grounds in the funnel, ensuring full extraction of flavor.
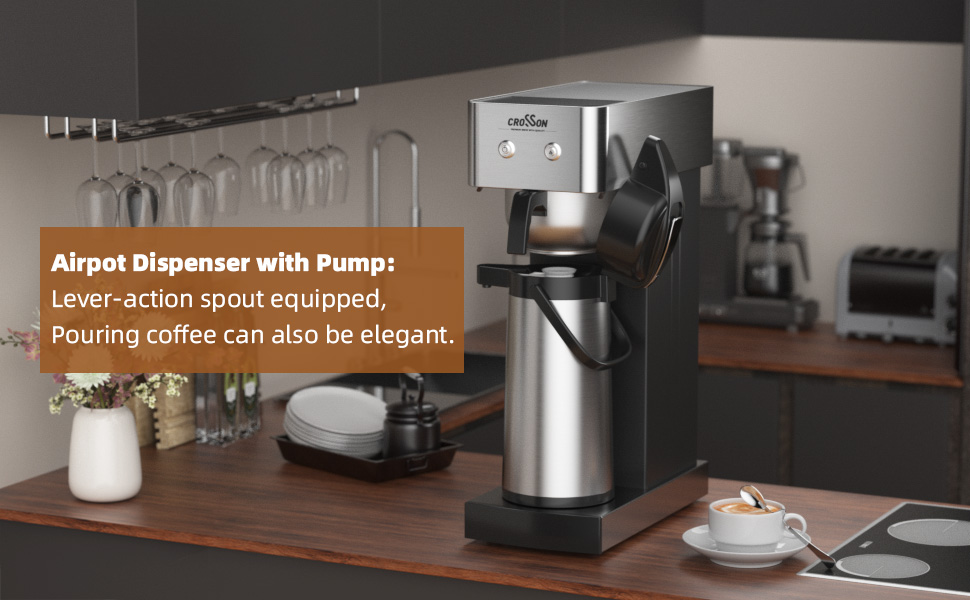
Figure 4.2: Illustration of optimal flavor extraction, highlighting the ideal temperature range for brewing coffee.
4.2 Dispensing Coffee
The thermal airpot carafe is designed for easy and elegant dispensing.
- Position Cup: Place a cup or mug directly under the airpot's spout.
- Press Lever: Firmly press down on the lever-action pump located on the airpot lid. Coffee will dispense from the spout.
- Release Lever: Release the lever to stop the flow of coffee.
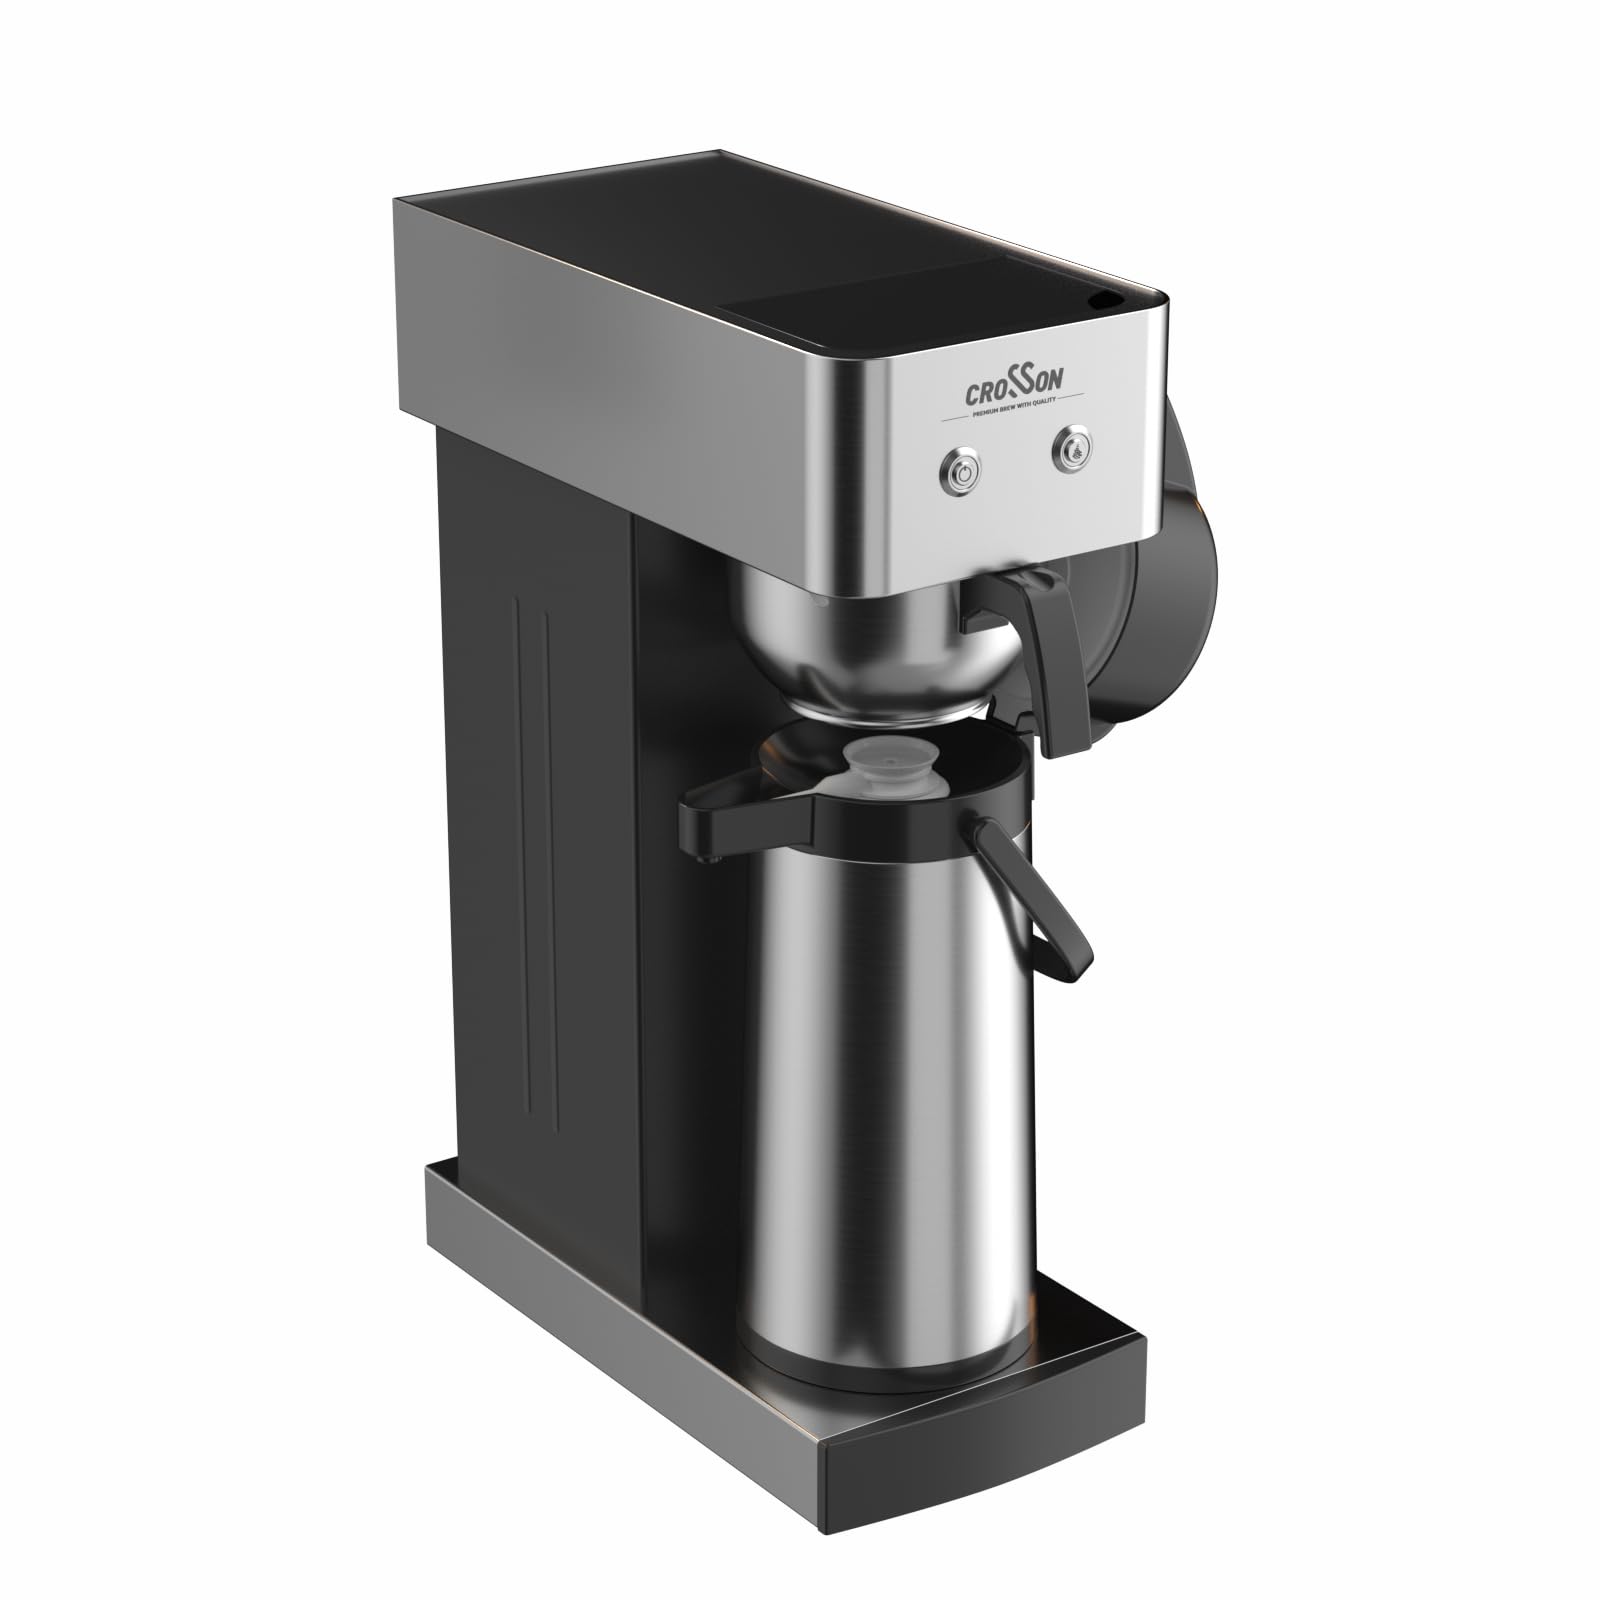
Figure 4.3: A hand pressing the lever on the airpot lid to dispense coffee into a cup. This demonstrates the pump action for serving.
4.3 Thermal Retention
The 2.2L thermal airpot carafe is designed to maintain coffee temperature for extended periods.
- Coffee can remain at an optimal serving temperature for several hours.
- For best results, pre-heat the airpot with hot water before brewing.

Figure 4.4: A graph illustrating the thermal retention capabilities of the airpot, showing how coffee stays hot over 24 hours and beyond.
5. Cleaning and Maintenance
Regular cleaning ensures optimal performance and longevity of your coffee brewer.
5.1 Daily Cleaning
- Unplug: Always unplug the brewer from the power outlet before cleaning.
- Brew Basket/Funnel: Remove the brew basket and discard the used coffee filter and grounds. Wash the brew basket with warm, soapy water and rinse thoroughly.
- Thermal Airpot Carafe: Empty any remaining coffee. Wash the interior and exterior of the airpot with warm, soapy water. Use a bottle brush for the interior if needed. Rinse thoroughly.
- Airpot Lid/Pump: Clean the lid and pump mechanism with warm, soapy water. Ensure no coffee residue clogs the pump. Rinse well.
- Brewer Exterior: Wipe the exterior surfaces of the brewer unit with a damp cloth. Do not use abrasive cleaners or scouring pads.
- Dry: Ensure all parts are completely dry before reassembling or storing.
5.2 Descaling (Monthly or as Needed)
Mineral deposits from water can build up over time, affecting brewing performance. Descale your brewer regularly.
- Prepare Descaling Solution: Mix a descaling solution according to the manufacturer's instructions, or use a solution of white vinegar and water (e.g., 1 part vinegar to 2 parts water).
- Run Cycle: Pour the descaling solution into the water reservoir. Place the empty thermal airpot carafe under the brew basket. Run a full brew cycle.
- Soak: After the cycle, let the solution sit in the airpot and brewer's internal components for 15-30 minutes.
- Rinse Cycles: Discard the descaling solution. Run at least two full brew cycles with fresh, clean water to thoroughly rinse out any remaining solution.
6. Troubleshooting
Refer to this section for common issues and their solutions.
| Problem | Possible Cause | Solution |
|---|---|---|
| Brewer does not turn on. | No power, loose plug. | Ensure the brewer is securely plugged into a working 120V AC outlet. Check circuit breaker. |
| Coffee is not brewing. | No water in reservoir, brew button not pressed. | Fill the water reservoir. Press the brew button to start the cycle. |
| Coffee is not hot enough. | Airpot not pre-heated, mineral buildup. | Pre-heat the airpot with hot water before brewing. Descale the brewer (see Section 5.2). |
| Slow dispensing from airpot. | Pump mechanism clogged with coffee residue. | Clean the airpot lid and pump thoroughly (see Section 5.1). |
| Water leaks from brewer. | Overfilled reservoir, improper placement of components. | Do not overfill the water reservoir. Ensure the brew basket and airpot are correctly seated. If leaking persists, contact customer support. |
7. Specifications
Technical details for the crosson 2.2L Commercial Airpot Coffee Brewer.
- Brand: crosson
- Model: 2.2L Commercial Airpot Coffee Brewer (Manual Water Inlet)
- Capacity: 2.2 Liters (approximately 15 cups)
- Voltage: 120 Volts (AC)
- Operation Mode: Manual
- Coffee Maker Type: Drip Coffee Machine
- Product Dimensions: 23.8"D x 8"W x 16.5"H
- Item Weight: 17 pounds
- Included Components: Lid, Thermal Airpot Carafe
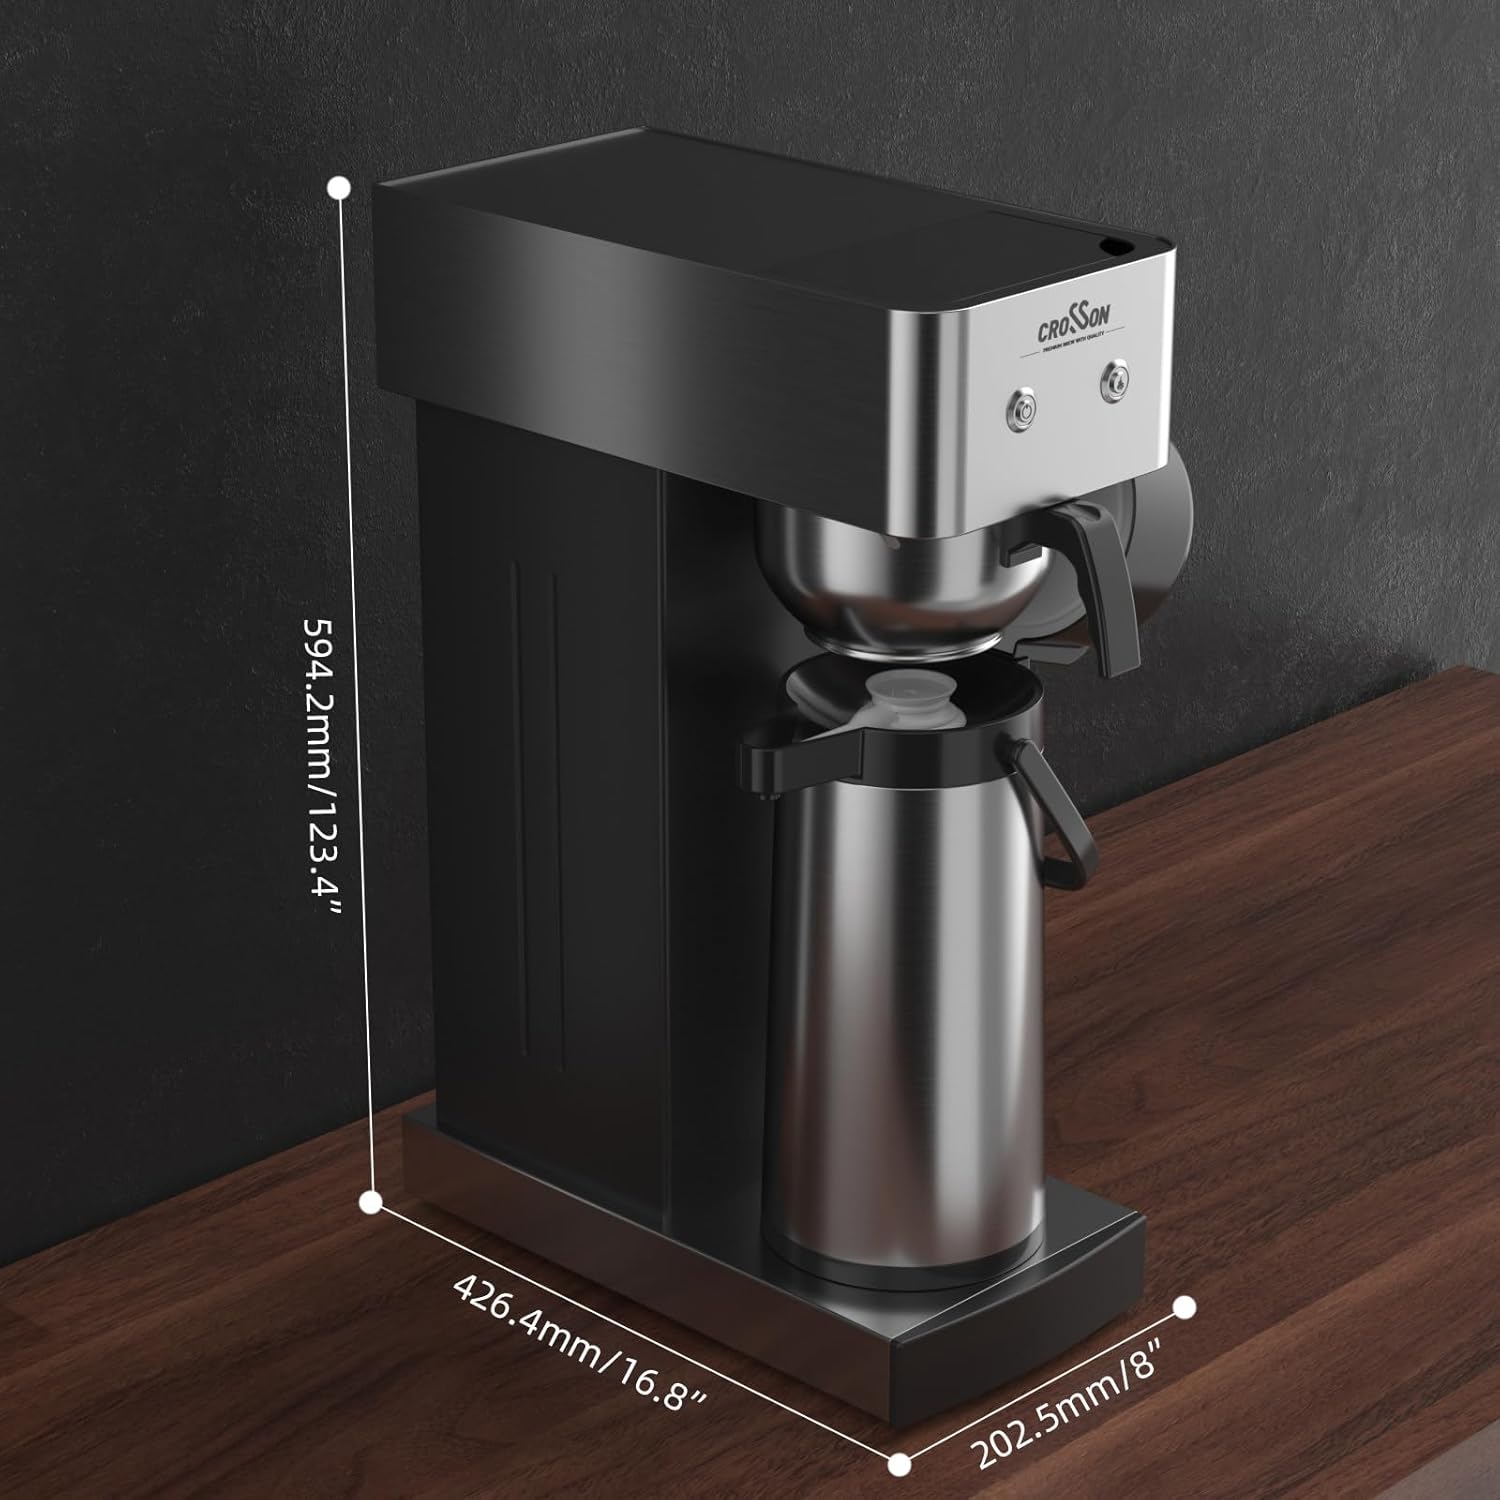
Figure 7.1: Diagram showing the dimensions of the crosson 2.2L Commercial Airpot Coffee Brewer.
8. Warranty and Support
For warranty information and customer support, please refer to the documentation included with your purchase or contact the manufacturer directly.
- Customer Service: If you encounter any issues not covered in this manual, or require replacement parts, please contact crosson customer support.
- Online Resources: Visit the official crosson website for additional product information, FAQs, and support.
Ask a question about this manual
Ask about setup, troubleshooting, compatibility, parts, safety, or missing instructions. Manuals+ will review the question and use this page’s manual context to help answer it.