
Introduction
This manual provides detailed instructions for the safe and efficient operation of your Sweetcrispy Countertop Ice Maker Machine. Please read all instructions carefully before use and retain this manual for future reference.
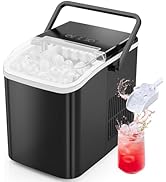
The Sweetcrispy Ice Maker is designed for convenience, producing bullet-shaped ice cubes quickly and featuring a self-cleaning function. Its compact and portable design makes it suitable for various settings.
Important Safety Information
DANGER – Risk of Fire or Explosion:
- Flammable Refrigerant Used.
- Do Not Use Mechanical Devices To Defrost Ice Maker.
- Do Not Puncture Refrigerant Tubing.
- To Be Repaired Only By Trained Service Personnel.
- Dispose Of Properly In Accordance With Federal Or Local Regulations.
Always ensure the unit is placed on a stable, level surface away from heat sources and direct sunlight. Do not immerse the appliance in water or other liquids.
What's in the Box
- Sweetcrispy Countertop Ice Maker Machine
- Ice Scoop
- Removable Ice Basket
Product Specifications
| Specification | Value |
|---|---|
| Brand | Sweetcrispy |
| Model Number | BKIMGJJ20 |
| Product Dimensions | 11.6"D x 8.8"W x 12.5"H |
| Net Weight | 15.4 Pounds |
| Capacity | 26.5 Pounds (per 24 hours) |
| Wattage | 77 watts |
| Voltage | AC 110-240V |
| Refrigerant Type | R600a |
Setup
- Unpacking and Placement: Carefully remove the ice maker from its packaging. Place the unit upright on a flat, stable surface. Allow the unit to rest for at least 2 hours before plugging it in to allow refrigerants to settle.
- Initial Cleaning: Before first use, clean the interior of the ice maker. Remove the ice basket. Fill the water reservoir with clean water up to the MAX line. Run the self-cleaning cycle (see Maintenance section). After the cycle, drain the water using the drain plug at the bottom of the unit (see Maintenance section) and wipe the interior dry with a soft cloth. Discard the first few batches of ice produced.
- Adding Water: Open the transparent lid. Pour clean, potable water into the water reservoir up to the 'MAX' fill line. Do not overfill.


Video demonstrating the unboxing and initial setup of the ice maker, including adding water and preparing for first use.
Operating Instructions
- Power On: Plug the ice maker into a grounded electrical outlet. Press the 'ON/OFF' button to turn on the unit. The 'POWER' indicator light will illuminate.
- Select Ice Size: Press the 'SELECT' button to choose between 'SMALL' or 'LARGE' bullet-shaped ice cubes. The corresponding indicator light will illuminate. Small cubes are ideal for chilling drinks quickly, while large cubes melt slower.
- Ice Production: The ice maker will begin producing ice. The first batch of 9 ice cubes can be ready in as little as 6 minutes. Subsequent batches may take slightly longer.
- Indicator Lights:
- ADD WATER: This light illuminates when the water reservoir is low. Refill with water to continue ice production.
- ICE FULL: This light illuminates when the ice basket is full. The unit will automatically pause ice production until some ice is removed.
- POWER: Indicates the unit is powered on.
- Collecting Ice: Use the provided ice scoop to remove ice from the basket. If not used immediately, transfer ice to a freezer for storage, as the ice maker does not function as a freezer.

Video demonstrating the ice maker producing a batch of ice in approximately 6 minutes, highlighting the speed of production.
Short video clip showing the ice making process and the ice being dispensed into the basket.
Maintenance
- Self-Cleaning Function: To activate the self-cleaning cycle, ensure the water reservoir is filled with clean water. Press and hold the 'ON/OFF' button for 5 seconds. The 'CLEAN' indicator light will illuminate, and the unit will perform a 15-minute cleaning cycle. After the cycle, drain the water.
- Draining Water: When cleaning or storing the unit, ensure all water is drained. Locate the drain plug at the bottom of the ice maker. Place the unit over a sink or use a container to catch the water, then remove the plug to drain. Reinsert the plug firmly after draining.
- Exterior Cleaning: Wipe the exterior of the ice maker with a soft, damp cloth. Do not use harsh chemicals or abrasive cleaners.
- Interior Cleaning: Regularly clean the interior components, including the ice basket and water reservoir, with a mild detergent and warm water. Rinse thoroughly.
Video detailing the self-cleaning process and demonstrating how to drain the water from the unit.
Troubleshooting
| Problem | Possible Cause | Solution |
|---|---|---|
| Ice maker not turning on | Not plugged in; Power outage | Ensure unit is securely plugged into a working outlet; Check power supply. |
| 'ADD WATER' light is on | Water reservoir is empty or low | Fill the water reservoir with clean water up to the MAX line. |
| 'ICE FULL' light is on | Ice basket is full | Remove ice from the basket. The unit will resume production automatically. |
| Ice production is slow or ice is too small | Room temperature too high; Water temperature too high | Ensure unit is in a cool environment; Use cold water for faster ice production. |
| Unusual noise during operation | Normal operation sounds (fan, water pump); Unit not level | Some operational noise is normal (below 40dB). Ensure the unit is on a stable, level surface. |
Warranty and Support
For warranty information or technical support, please refer to the contact details provided with your purchase or visit the official Sweetcrispy website. Keep your purchase receipt as proof of purchase.