Netzu P338PB
Netzu Projection Alarm Clock (Model P338PB) User Manual
Comprehensive instructions for setup, operation, and maintenance.
Introduction
This manual provides detailed instructions for the Netzu Projection Alarm Clock, Model P338PB. Please read this manual thoroughly before using the product to ensure proper operation and to maximize its features. This device is designed to display time and temperature, project time onto surfaces, and function as an alarm clock with adjustable settings.
Setup
1. Power Connection
The Netzu Projection Alarm Clock operates via a corded electric power source. Connect the provided USB power cable to the clock's DC input port and plug the US adapter into a standard wall outlet.

Image: The alarm clock connected to a power source. The image shows the USB cable and US plug included for power.
Note: The clock is USB powered only. The battery compartment is for memory backup only and will not power the clock for regular operation.
2. Battery Memory Backup (Optional)
To retain time and alarm settings during a power outage, install 2 AAA batteries (not included) into the battery compartment located at the bottom of the clock. This ensures your settings are saved, but the display will not be active without external power.

Image: The alarm clock with its battery compartment open, indicating where to insert AAA batteries for memory backup.
Operating Instructions
1. Setting Time and Date
To set the time, press and hold the "SET 12/24Hr" button. Use the "+" and "-" buttons to adjust the hours and minutes. Press "SET 12/24Hr" again to confirm each setting. You can also switch between 12-hour and 24-hour time formats by short-pressing this button.

Image: The clock showing both 24-hour and 12-hour time displays, illustrating the time format selection.
2. Display Brightness Control
The main display offers 4 adjustable brightness levels, plus an OFF setting. Short press the "SNOOZE / Brightness" button to cycle through the brightness levels to suit your preference.

Image: The clock display demonstrating its 4 brightness levels and an off state.
3. Projection Function
The clock features a 180° rotatable projector that can display time and temperature onto a wall or ceiling. The optimal projection distance is between 1.6ft and 11.4ft.
- Activate Projection: Short press the projection button (often indicated by a projector icon).
- Adjust Projection Angle: Manually rotate the projector lens 180° to direct the display.
- Adjust Projection Brightness: Short press the projection button to cycle through 4 brightness levels.
- Flip Projected Image: Long press the projection button to flip the projected image 180° if needed.

Image: The clock's projector showing its 180° rotation capability and effective projection range.

Image: A step-by-step guide on how to operate the projection feature, including angle, brightness, and image flip.

Image: The clock projecting time and temperature onto a surface, demonstrating the four levels of projection brightness.
Video: Demonstration of the projection alarm clock features, including time projection.
4. Temperature Display
The clock displays the indoor temperature and can project it alongside the time. To switch between Celsius (°C) and Fahrenheit (°F), short press the "°C/°F" button.

Image: The clock displaying temperature, with an option to switch between Fahrenheit and Celsius.
5. Alarm Settings
To set the alarm, press and hold the "Alarm" button. Use the "+" and "-" buttons to adjust the desired alarm time. Short press the "Alarm" button to activate or deactivate the alarm.
- Volume Adjustment: The alarm offers 3 selectable volume levels. Press the "Volume" button to cycle through L01 (low), L02 (medium), and L03 (high).
- Snooze Function: When the alarm sounds, press the large "SNOOZE" button to activate a 9-minute snooze.
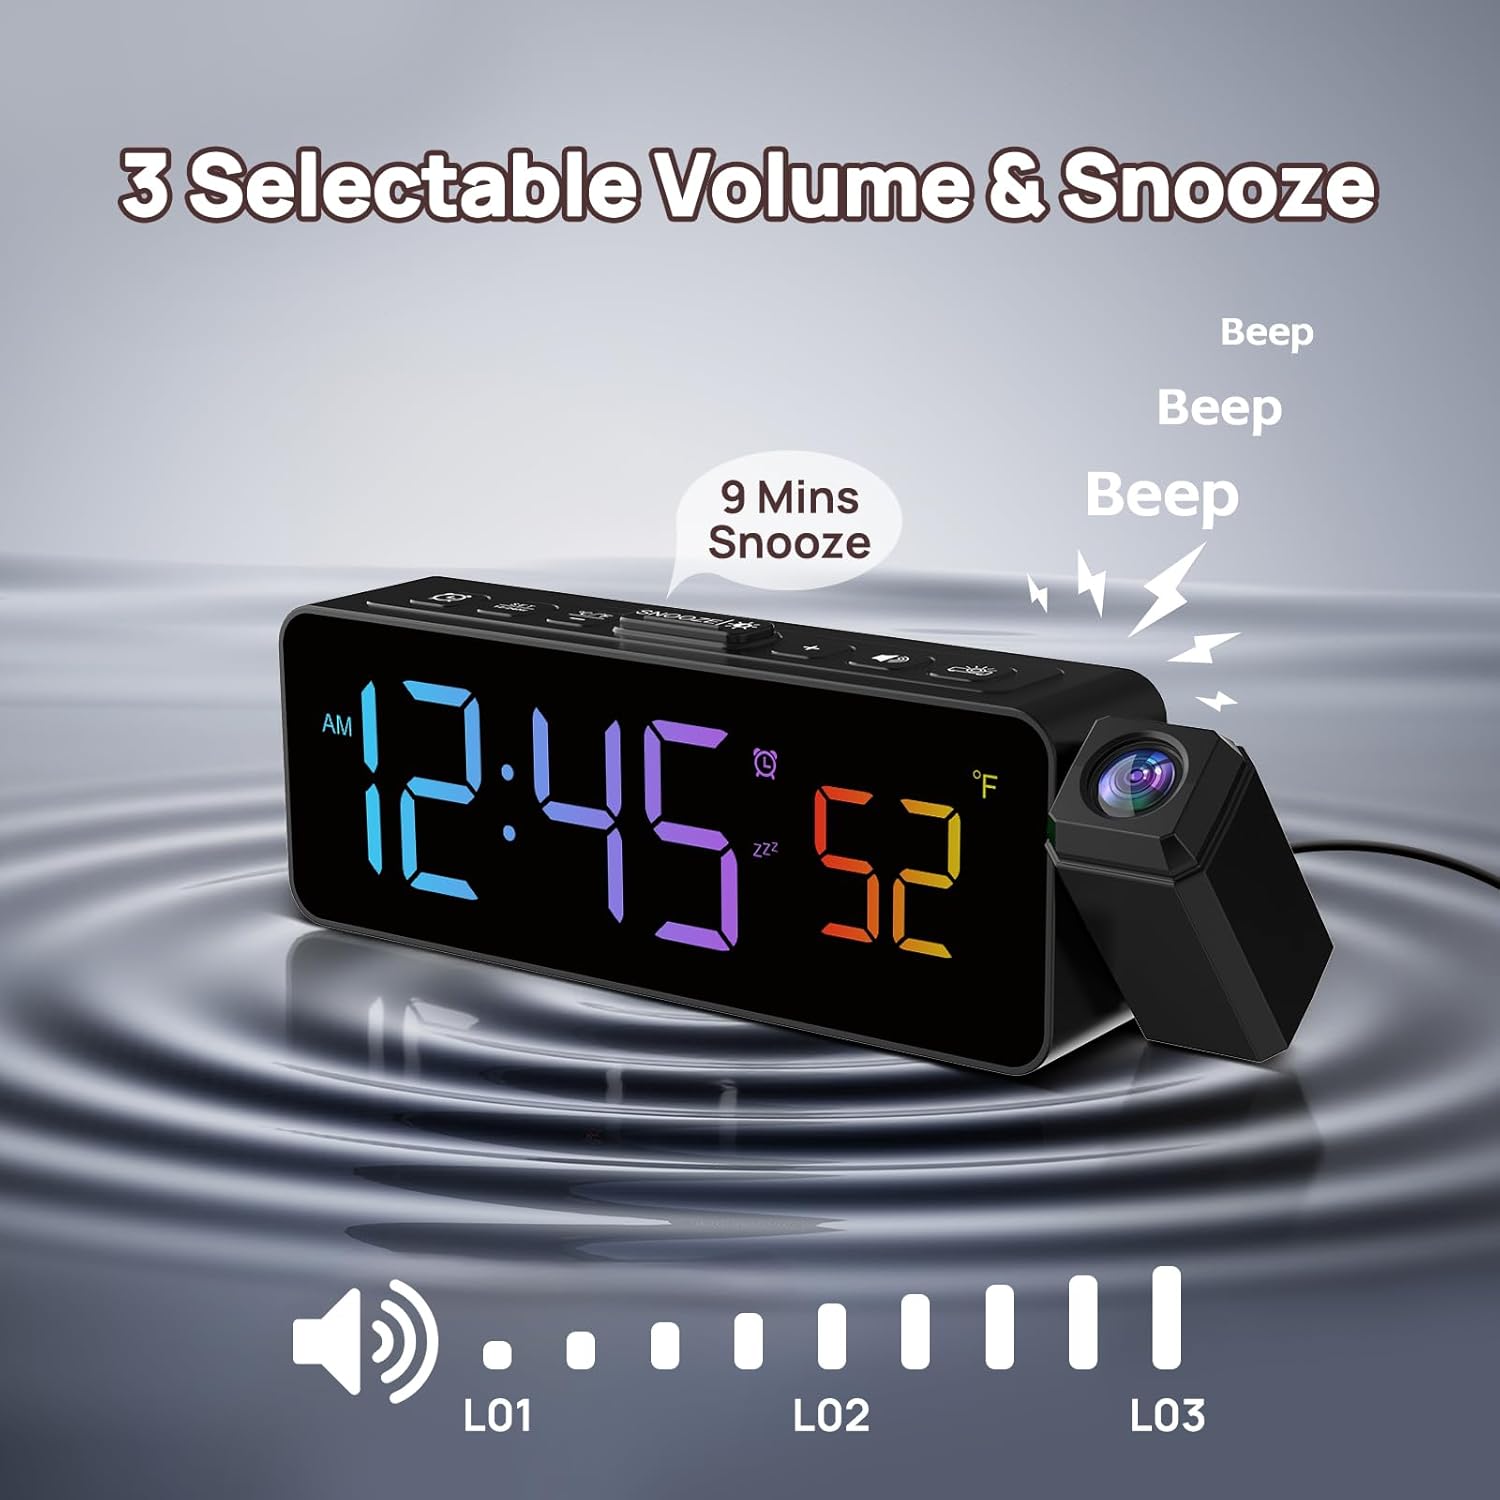
Image: The clock illustrating the three volume levels for the alarm and the snooze button.

Image: A hand pressing the snooze button, highlighting the 9-minute snooze feature.

Image: The clock displaying the three available volume levels for the alarm.
6. RGB Display Colors
The clock features an RGB display, offering a variety of vibrant color combinations for the time digits. Use the "COLOR +" button to cycle through the available color options.
Video: Demonstration of the RGB color changing feature of the clock display.
Maintenance
To ensure the longevity and optimal performance of your Netzu Projection Alarm Clock, follow these simple maintenance guidelines:
- Cleaning: Gently wipe the clock's surface with a soft, dry cloth. Avoid using abrasive cleaners or solvents, as these can damage the finish and display.
- Dust Removal: Periodically clean the projector lens with a soft, lint-free cloth to maintain clear projection quality.
- Power Disconnection: If the clock will not be used for an extended period, unplug it from the power outlet and remove the backup batteries.
Troubleshooting
| Problem | Possible Cause | Solution |
|---|---|---|
| Clock display is off. | Not connected to power, or display brightness is set to OFF. | Ensure the clock is properly plugged into a working power outlet. Short press the "SNOOZE / Brightness" button to adjust display brightness. |
| Time/settings reset after power outage. | No backup batteries installed or batteries are depleted. | Install 2 new AAA batteries for memory backup. |
| Projection is blurry or unclear. | Incorrect focus or projection distance. | Adjust the focus ring on the projector lens. Ensure the projection distance is within 1.6ft to 11.4ft. |
| Alarm does not sound or is too quiet. | Alarm is not activated or volume is set too low. | Short press the "Alarm" button to ensure the alarm is active. Press the "Volume" button to increase the alarm volume. |
Specifications
- Brand: Netzu
- Model Number: P338PB
- Display Type: Digital LED (RGB)
- Power Source: Corded Electric
- Product Dimensions: 6.93"W x 2.17"H
- Item Weight: 8.4 ounces
- Special Features: Adjustable Brightness (Display & Projection), Adjustable Volume (Alarm), 180° Rotatable Projector, Snooze Function, Temperature Display (°C/°F), 12/24-Hour Time Display.
- Room Type: Bedroom, Home Office, Kid's Room, Living Room, Study Room
- Material: Plastic
- Mounting Type: Tabletop
- Batteries: 2 AAA batteries required for memory backup (not included)
Warranty and Support
For warranty information or technical support, please refer to the contact details provided with your purchase or visit the official Netzu website. Keep your purchase receipt as proof of purchase for any warranty claims.
no relevant documents