1. Product Overview
The M.Y.Z. Wanderer Solar Rechargeable LED Camping Lantern (Model L1) is a versatile and portable lighting solution designed for various outdoor and emergency situations. It features dual charging options (solar and USB-C), multiple lighting modes, and a built-in power bank function.
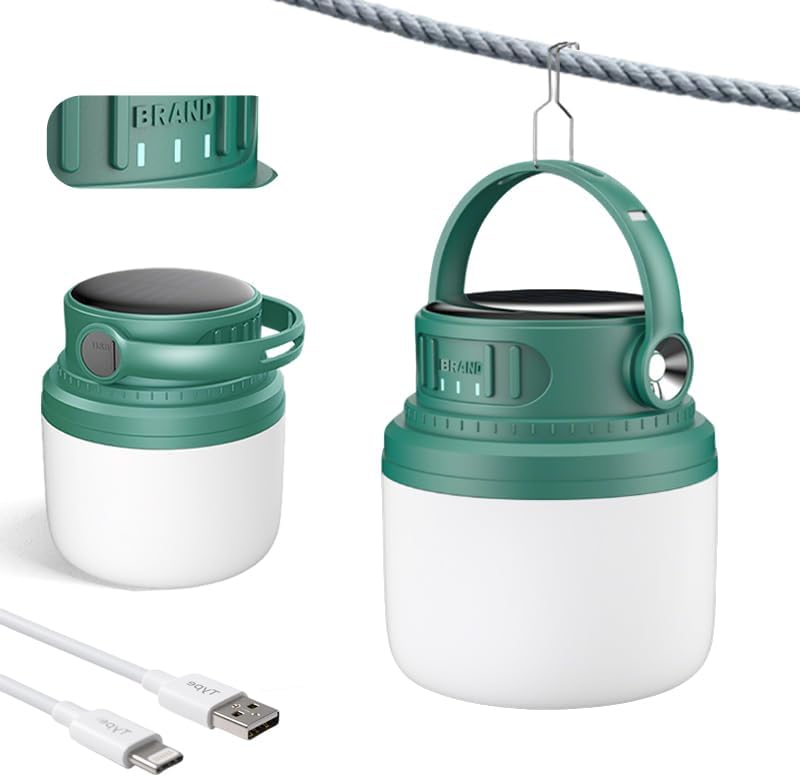
Image 1.1: The M.Y.Z. Wanderer Solar Rechargeable LED Camping Lantern, showcasing its compact design and included USB-C charging cable.
2. Package Contents
- 1 x M.Y.Z. Wanderer Solar Rechargeable LED Camping Lantern (Model L1)
- 1 x USB-C Charging Cable
- 1 x User Manual (this document)
3. Setup and Initial Use
3.1 Initial Charging
Before first use, it is recommended to fully charge the lantern using the USB-C port.
- Locate the USB-C charging port on the side of the lantern, usually protected by a rubber cover.
- Connect the provided USB-C cable to the lantern's charging port.
- Connect the other end of the USB-C cable to a compatible USB power source (e.g., wall adapter, power bank, computer USB port).
- The battery indicator lights will illuminate to show charging progress. Charge until all indicator lights are solid.

Image 3.1: Detail of the USB-C charging port and power button.
3.2 Solar Charging
The lantern can also be charged using its integrated solar panel. This method is ideal for maintaining charge during extended outdoor use.
- Place the lantern with the solar panel facing direct sunlight.
- Ensure no obstructions block the solar panel.
- Solar charging is slower than USB-C charging and is best for supplementary power or trickle charging.

Image 3.2: Detail of the solar charging panel on the top of the lantern.
4. Operating Instructions
4.1 Power On/Off and Light Modes
The lantern features a single power button to control its functions.
- Power On: Press the power button once to turn on the lantern. It will typically start in White Light mode.
- Cycle Modes: Press the power button repeatedly to cycle through the available lighting modes: White Light → Neutral Light → Warm Light → Strobe → Flashlight.
- Power Off: After cycling through all modes, pressing the button one more time will turn the lantern off. Alternatively, a long press (approximately 2-3 seconds) on the power button will turn off the lantern from any mode.

Image 4.1: Visual representation of the different lighting modes available.
4.2 Dimming Function
The lantern supports a dimming function for adjustable brightness.
- While the lantern is on in any of the continuous light modes (White, Neutral, Warm), press and hold the power button.
- The brightness will gradually increase or decrease. Release the button when the desired brightness level is reached.
4.3 Using as a Power Bank
The lantern can provide power to other devices via its USB-A output port.
- Locate the USB-A output port, usually next to the USB-C input port.
- Connect your device's charging cable to the USB-A output port on the lantern.
- The lantern will begin charging your device.
4.4 Battery Indicator
The lantern is equipped with LED indicators to display the remaining battery charge.

Image 4.2: Battery charge level indicators.
4.5 Versatile Placement
The integrated handle and hook allow for multiple placement options.
- Portable: Use the handle for easy carrying.
- Suspension: Hang the lantern from tent poles, tree branches, or other structures using the built-in hook.
- Tabletop: Place the lantern on any flat surface for ambient lighting.

Image 4.3: Examples of the lantern's versatile usage, including hanging and portable options.
5. Maintenance
5.1 Cleaning
- Wipe the lantern with a soft, damp cloth.
- Do not use abrasive cleaners or solvents.
- Ensure the charging ports are free of dust and debris.
5.2 Storage
- Store the lantern in a cool, dry place away from direct sunlight when not in use.
- For long-term storage, charge the battery to approximately 50-75% every 3-6 months to prolong battery life.
5.3 Battery Care
- Avoid fully depleting the battery frequently.
- Regularly use both USB-C and solar charging to maintain battery health.
6. Troubleshooting
- Lantern not turning on:
Ensure the battery is charged. Connect to a USB power source to confirm charging. - Lantern not charging via USB-C:
Check the USB-C cable for damage. Try a different USB power adapter or port. Ensure the cable is fully inserted into the lantern's port. - Lantern not charging via solar:
Ensure the solar panel is clean and exposed to direct sunlight. Solar charging requires significant direct sunlight and may take longer than USB-C charging. - Light appears dim:
The battery may be low. Recharge the lantern. The dimming function might be active; try pressing and holding the power button to adjust brightness. - Device not charging from lantern (power bank function):
Ensure the lantern has sufficient charge. Try a different charging cable for your device.
7. Specifications
| Feature | Specification |
|---|---|
| Model Number | L1 |
| Dimensions (L x W x H) | 4.33 x 2.95 x 4.33 inches |
| Item Weight | 14.1 ounces |
| Battery Capacity | 7200mAh (3 Nonstandard Battery batteries included) |
| Charging Input | USB-C, Solar Panel |
| Power Output | USB-A (for charging external devices) |
| Light Modes | White Light, Neutral Light, Warm Light, Strobe, Flashlight |
| Material | Plastic |
| Included Components | Charging cable*1 |
8. Warranty and Support
8.1 Warranty Information
Specific warranty details for the M.Y.Z. Wanderer Solar Rechargeable LED Camping Lantern (Model L1) may vary by region and retailer. Please refer to the warranty card included with your purchase or contact your point of sale for detailed information regarding warranty coverage and terms.
8.2 Customer Support
For technical assistance, product inquiries, or support, please contact the retailer from whom you purchased the product. You may also visit the official M.Y.Z. Wanderer website for additional resources or contact information, if available.


