
1. Introduction
The SPECILITE DWC Hydroponics Grow System with Top Drip Kit is designed to provide an efficient and effective method for cultivating plants using Deep Water Culture (DWC) and top drip irrigation. This system supports healthy plant development by ensuring roots receive ample oxygen and nutrients. It is suitable for various environments, including indoor gardens, balconies, and greenhouses.
This manual contains essential information for the proper assembly, operation, and maintenance of your hydroponic system. Please read it thoroughly before use to ensure safe and optimal performance.
2. Safety Instructions
- Always unplug the air pump and any other electrical components before performing maintenance or handling water.
- Ensure all electrical connections are dry and protected from water exposure.
- Do not operate the system with damaged cords or components.
- Keep the system out of reach of children and pets.
- Use only food-grade nutrients and water suitable for hydroponic use.
- Place the system on a stable, level surface to prevent tipping.
3. Package Contents
Verify that all components listed below are present in your package:
- 2 x 7-Gallon DWC Buckets
- 2 x Square Rolling Bases
- 2 x Triangular Lids
- 2 x 6-inch Net Cups
- 1 x Air Pump (8W, 120V/60Hz)
- 2 x Air Stones
- 1 x Black Air Tube (6m)
- 2 x Water-Level Tubes
- 2 x Drip Rings
- 2 x Water Inlet Tubes
- 2 x Air Flow Regulators
- 2 x In-line Check Valves
- 5 x A/B Nutrients (with refill packs)
- Clay Pebbles
- Seal Rings
- User Manual

Image: All components included in the SPECILITE DWC Hydroponics Grow System with Top Drip Kit, including buckets, lids, net cups, air pump, air stones, tubing, nutrients, and clay pebbles.
4. Assembly Guide
Follow these steps to assemble your hydroponic system:
- Prepare the Buckets and Bases: Place each 7-gallon DWC bucket onto its respective square rolling base. Ensure the bucket is securely seated.
- Install Water Level Tubes: Insert the water-level tubes into the designated slots on the side of each bucket. Ensure the floating indicator moves freely.
- Connect Air System:
- Connect the black air tube to the air pump.
- Attach an air flow regulator to each air tube line.
- Connect an in-line check valve to each air tube line, ensuring the airflow direction is correct (towards the bucket).
- Attach an air stone to the end of each air tube line.
- Place the air stones at the bottom of each DWC bucket.
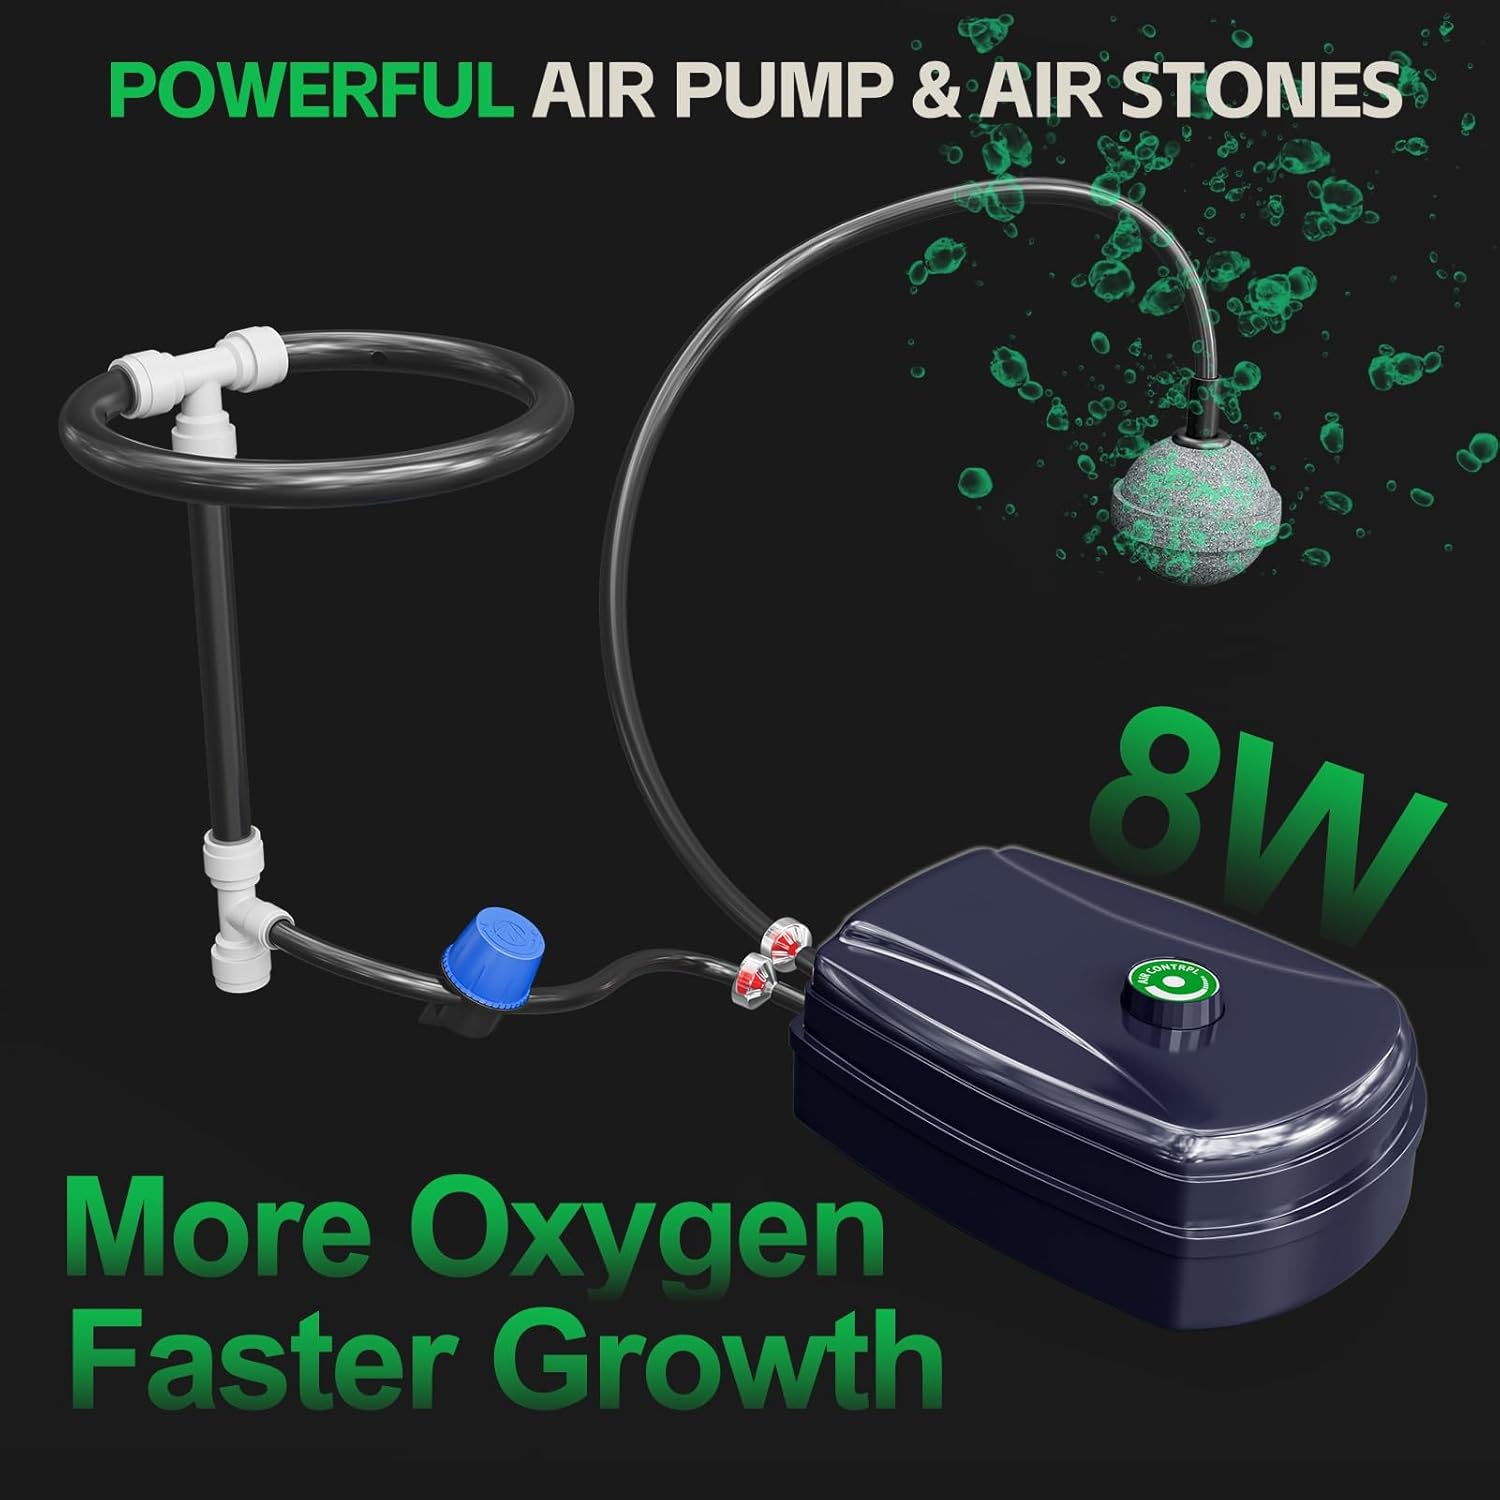
Image: Illustration of the 8W air pump connected to air stones via tubing, emphasizing oxygen delivery for faster plant growth.
- Install Drip Rings and Net Cups:
- Place the 6-inch net cups into the openings of the triangular lids.
- Connect the water inlet tubes to the drip rings.
- Position the drip rings inside the net cups, ensuring they are stable.

Image: A 6-inch net cup made of high-tenacity PP material, designed to support lush plants and promote efficient water absorption by roots.
- Add Clay Pebbles: Rinse the clay pebbles thoroughly to remove any dust. Fill the net cups with the rinsed clay pebbles, leaving enough space for your plant.
- Secure Lids: Place the triangular lids with the assembled net cups and drip rings onto the DWC buckets. The triangular design allows for easy water refilling without disturbing the plants.
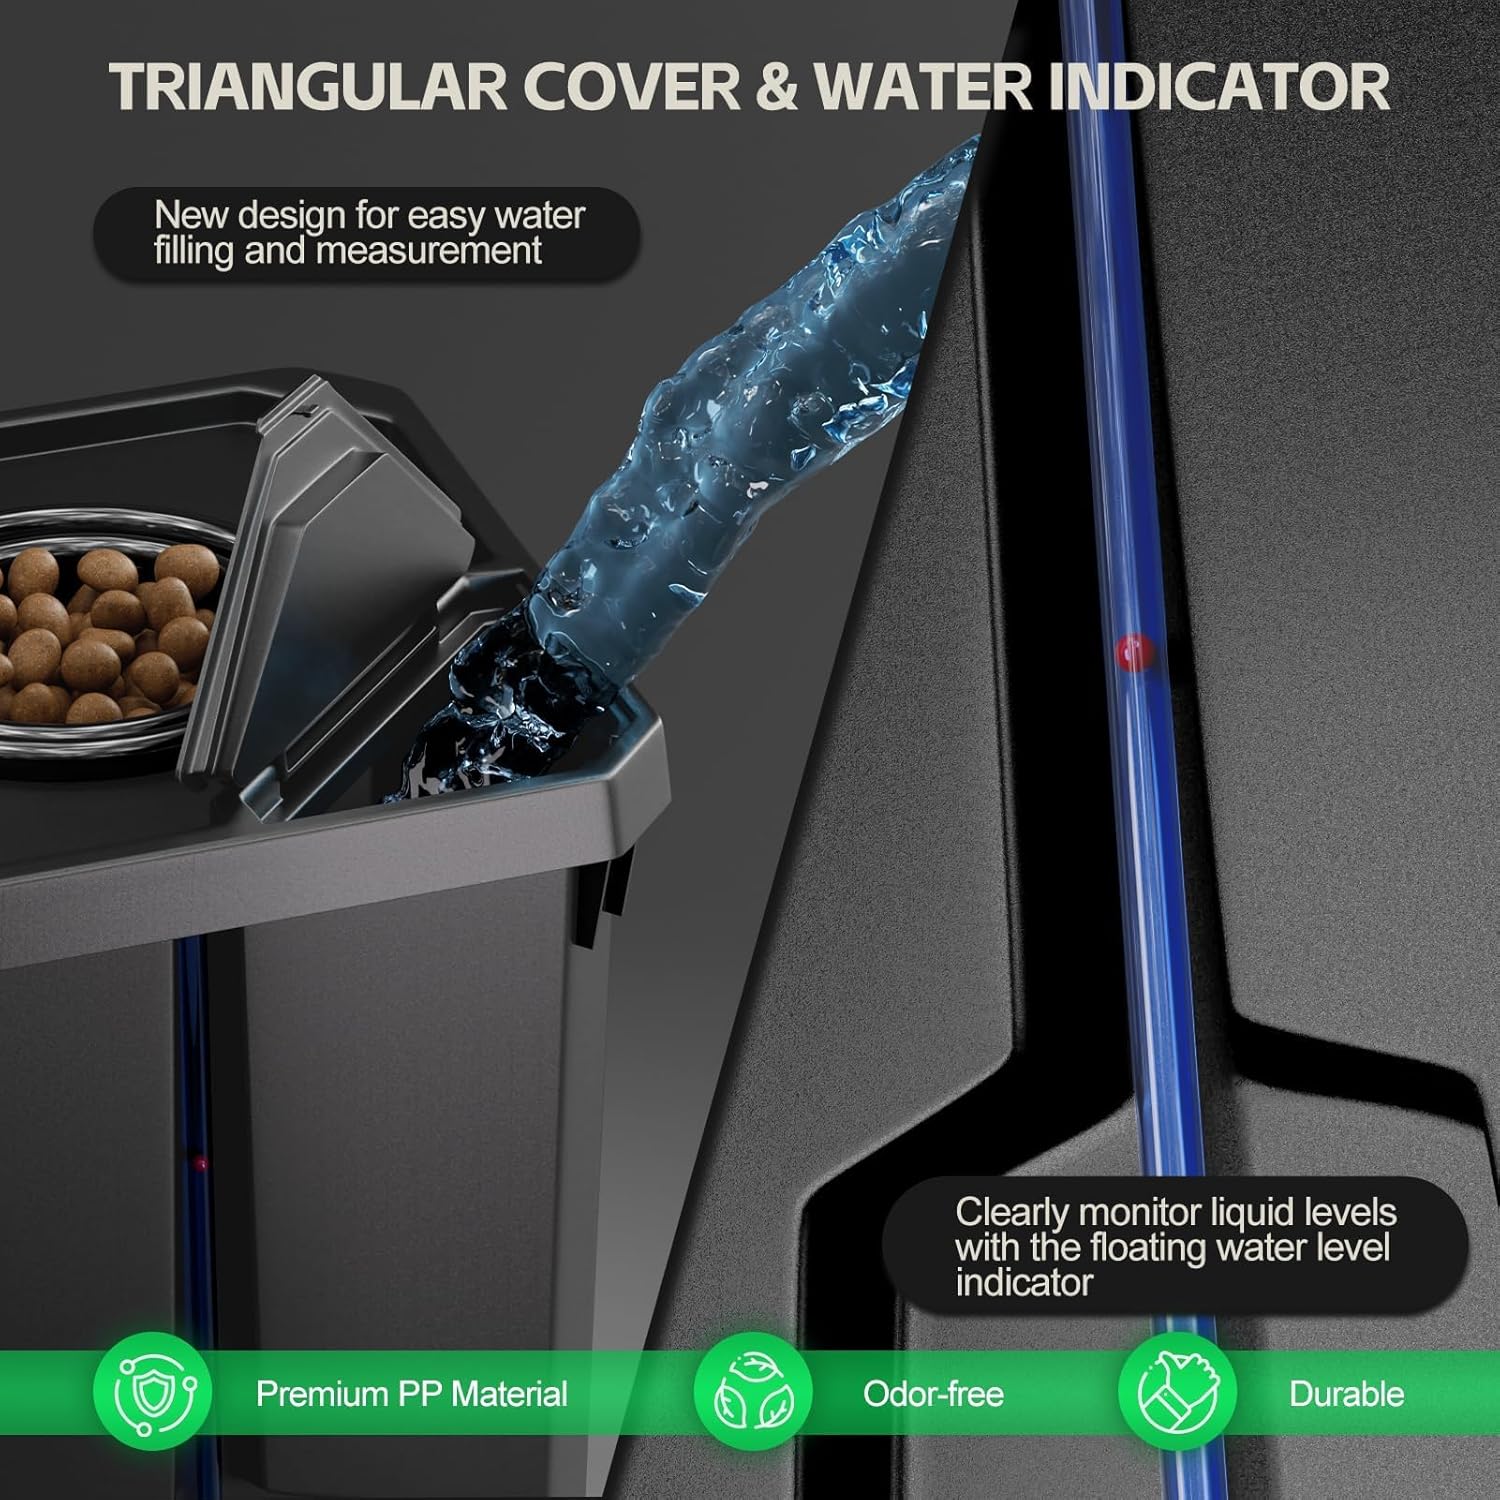
Image: The triangular cover design facilitates easy water filling and features a floating water level indicator for clear monitoring of liquid levels.
5. Operation Guide
5.1 Initial Setup and Nutrient Solution Preparation
- Rinse Components: Before first use, rinse all buckets, lids, net cups, and tubing with clean water.
- Prepare Nutrient Solution: Fill each 7-gallon bucket with water. Add the provided A/B nutrients according to the instructions on their packaging. Stir well to ensure complete dissolution.
- Check Water Level: Ensure the water level is sufficient to reach the bottom of the net cups, allowing the clay pebbles to wick moisture to the plant roots. The external water level tube provides a visual indicator.
5.2 Planting
- Seedlings/Clones: Gently place your seedlings or clones into the net cups, ensuring their roots extend into the clay pebbles.
- Secure Plants: Add more rinsed clay pebbles around the base of the plant to provide support.
5.3 System Activation
- Plug in Air Pump: Connect the air pump to a power outlet. Ensure the air stones are bubbling vigorously, providing oxygen to the nutrient solution.
- Adjust Drip System: If using the top drip feature, ensure the water inlet tubes are connected to a separate pump (not included) or a gravity-fed system if desired. Adjust the flow to provide intermittent or continuous dripping onto the clay pebbles.

Image: A visual representation of the user-friendly design, highlighting ceramsite clay pebbles for airflow, check valves to prevent backflow, and ample oxygen for faster root growth.
5.4 Water Level Management
- Monitor the water level daily using the external water level tube.
- Refill the buckets as needed, adding fresh water and adjusting nutrient concentration if necessary. The triangular lid allows for easy refilling without removing the net cup.

Image: A diagram illustrating the 7-gallon large capacity bucket, showing its dimensions (15.75in/40cm height, 9.65in/24.5cm width) and continuous water supply capability.
6. Maintenance
6.1 Nutrient Solution Changes
- It is recommended to change the entire nutrient solution every 1-2 weeks, depending on plant size and growth stage.
- Drain the old solution, clean the buckets, and refill with fresh water and nutrients.
6.2 Cleaning Components
- Regularly inspect and clean the air stones to prevent clogging and ensure efficient oxygenation.
- Clean the net cups and clay pebbles between growing cycles to remove any algae or root residue.
- Wipe down the buckets and lids as needed to maintain cleanliness.
6.3 Air Pump and Tubing
- Ensure the air pump is free from dust and debris.
- Check air hoses for kinks or blockages that could impede airflow.
7. Troubleshooting
| Problem | Possible Cause | Solution |
|---|---|---|
| Air pump not working | No power, clogged air stone, kinked hose | Check power connection, clean air stone, straighten hose |
| Low oxygen bubbles | Clogged air stone, weak pump, air leak | Clean/replace air stone, check pump, secure hose connections |
| Water level dropping too quickly | Evaporation, plant uptake, leak | Refill water regularly, check for leaks, ensure proper lid seal |
| Plants showing nutrient deficiencies | Incorrect nutrient concentration, pH imbalance, old solution | Adjust nutrient dosage, check/adjust pH, change solution |
| Algae growth in buckets | Light exposure to nutrient solution | Ensure lids are fully sealed, minimize light exposure to water, clean buckets |
8. Specifications
- Bucket Capacity: 7 Gallons (26.5 L) each
- Air Pump: 8 W, 120 V/60 Hz, 4x63.4 GPH
- Tubing Length: 6 meters
- Operating Temperature: 41 °F–113 °F (5 °C–45 °C)
- Material: Food-grade PP (UV-resistant, heat-tolerant)
- Special Feature: Automatic Watering (via top drip kit)
- Uses: Indoor, Outdoor
- Net Cup Size: 6-inch mesh cups
9. Warranty and Support
For warranty information, technical support, or assistance with your SPECILITE DWC Hydroponics Grow System, please refer to the contact details provided with your purchase or visit the official SPECILITE website. Keep your proof of purchase for any warranty claims.