Introduction
This manual provides detailed instructions for the installation, operation, and maintenance of your ACEMO 3MP Wired Outdoor Security Camera System. Please read this manual thoroughly before using the product to ensure proper functionality and safety.
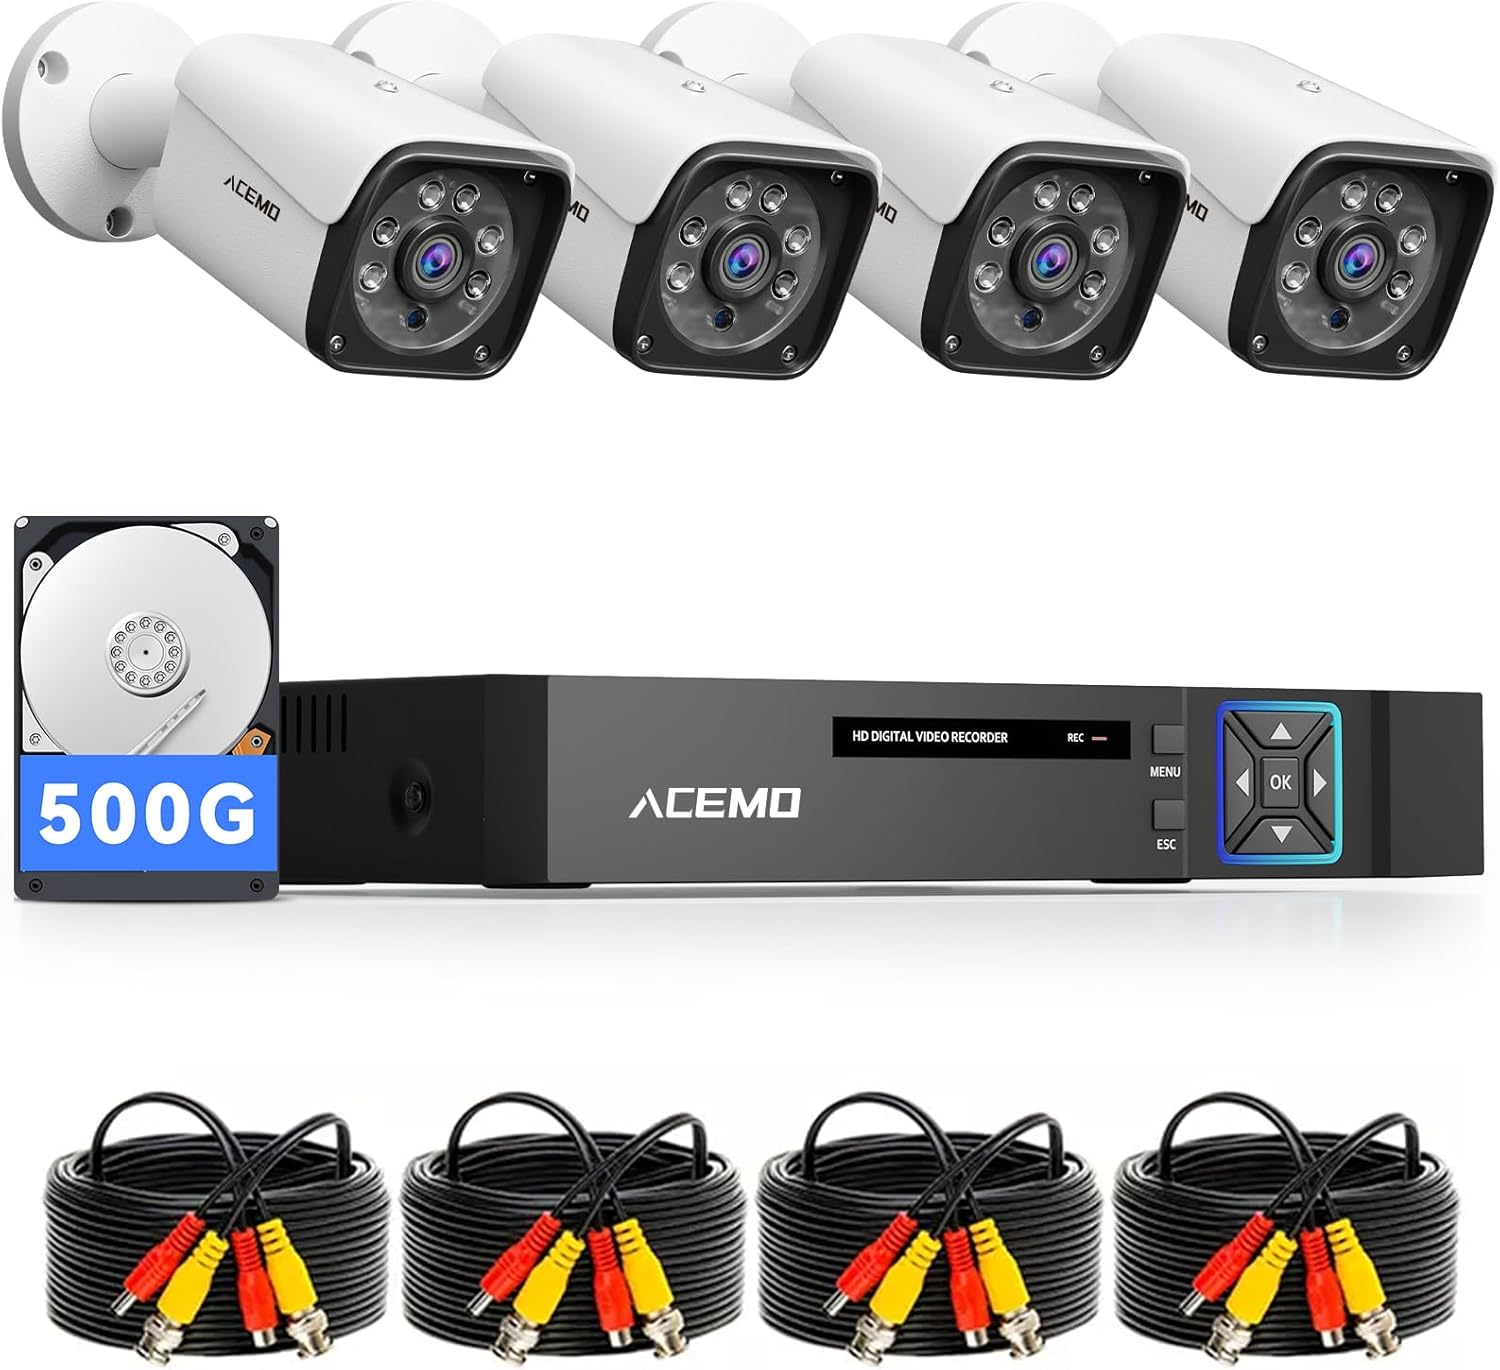
Figure 1: ACEMO 3MP Wired Outdoor Security Camera System components including DVR, cameras, and cables.
Video 1: A product introduction video demonstrating the features and capabilities of a similar security camera system.
Package Contents
Verify that all items listed below are included in your package. If any items are missing or damaged, please contact customer support.
- 4-Channel 5MP Lite DVR Recorder with 500GB HDD (x1)
- 3MP AHD Cameras (x4)
- 18m BNC Coaxial Cables (x4)
- Power Adapters (x2)
- 1-to-4 Power Splitter Cable (x1)
- USB Mouse (x1)
- Mounting Screw Sets (x4)
- Japanese Instruction Manual (x1)

Figure 2: Visual representation of all items included in the ACEMO Security Camera System package.
Video 2: Unboxing video for an AHD bullet type 4-camera set, demonstrating the package contents and initial setup steps.
Video 3: Unboxing video for a black AHD bullet type 4-camera set, showing the components and accessories included in the box.
Setup
1. DVR and Camera Connection
The cameras connect to the DVR using BNC coaxial cables. Simply connect the BNC cable to the camera and the DVR, then power on the system. The wired connection ensures stable video transmission without interference from Wi-Fi or network issues.

Figure 3: Diagram illustrating the connection of cameras to the DVR using BNC coaxial cables and power adapters.

Figure 4: Step-by-step visual guide for connecting the security cameras to the DVR and power sources.

Figure 5: Overview of the DVR's rear panel ports (HDMI, VGA, LAN, USB, Audio In/Out) and camera connection points.
2. Camera Installation
The cameras feature a robust metal body and an adjustable bracket, allowing for flexible installation outdoors or indoors. They can be mounted on walls or ceilings.

Figure 6: Examples of camera installation on both wall and ceiling surfaces.
Video 4: A demonstration of the camera setup method, including physical installation and initial configuration steps.
Operating Instructions
1. Recording Modes
The system supports various recording options:
- 24/7 Continuous Recording: The built-in 500GB HDD allows for long-term, continuous recording without monthly fees. Older footage is automatically overwritten when the disk is full.
- Smart Motion Detection: The system detects human movement, minimizing false alarms caused by environmental changes like wind or light. You can configure notifications for specific movements or areas.
- Scheduled Recording: Set specific times for recording to optimize storage and focus on critical periods.

Figure 7: Illustration of motion detection triggering recording and different recording options (24/7, scheduled).

Figure 8: Comparison highlighting the benefits of wired systems like stable connection and no internet requirement for recording, versus wireless systems.
2. Remote Monitoring
Connect the DVR to your router using the included LAN cable. Download the free smartphone application to easily set up remote viewing. Once configured, you can view live footage and recorded videos from your smartphone or tablet anytime, anywhere.

Figure 9: Screenshot of the smartphone application showing live camera feeds and remote monitoring capabilities.

Figure 10: Visual guide demonstrating the process of installing the app, logging in, and viewing video remotely.

Figure 11: Depiction of viewing camera feeds on multiple devices including smartphones, tablets, laptops, and desktop monitors.
3. Night Vision
The 3MP high-resolution cameras provide clear, detailed images during the day. At night, infrared LEDs enable black-and-white night vision, capturing clear footage up to approximately 30 meters even in complete darkness.

Figure 12: Image demonstrating the camera's infrared night vision, showing clear visibility in low-light conditions.
Maintenance
1. Weather Resistance
The cameras feature an IP66 waterproof and dustproof metal casing, ensuring stable surveillance in harsh weather conditions such as rain, snow, wind, and dust. They operate reliably in temperatures ranging from -20°C to 60°C, providing year-round performance with minimal maintenance.
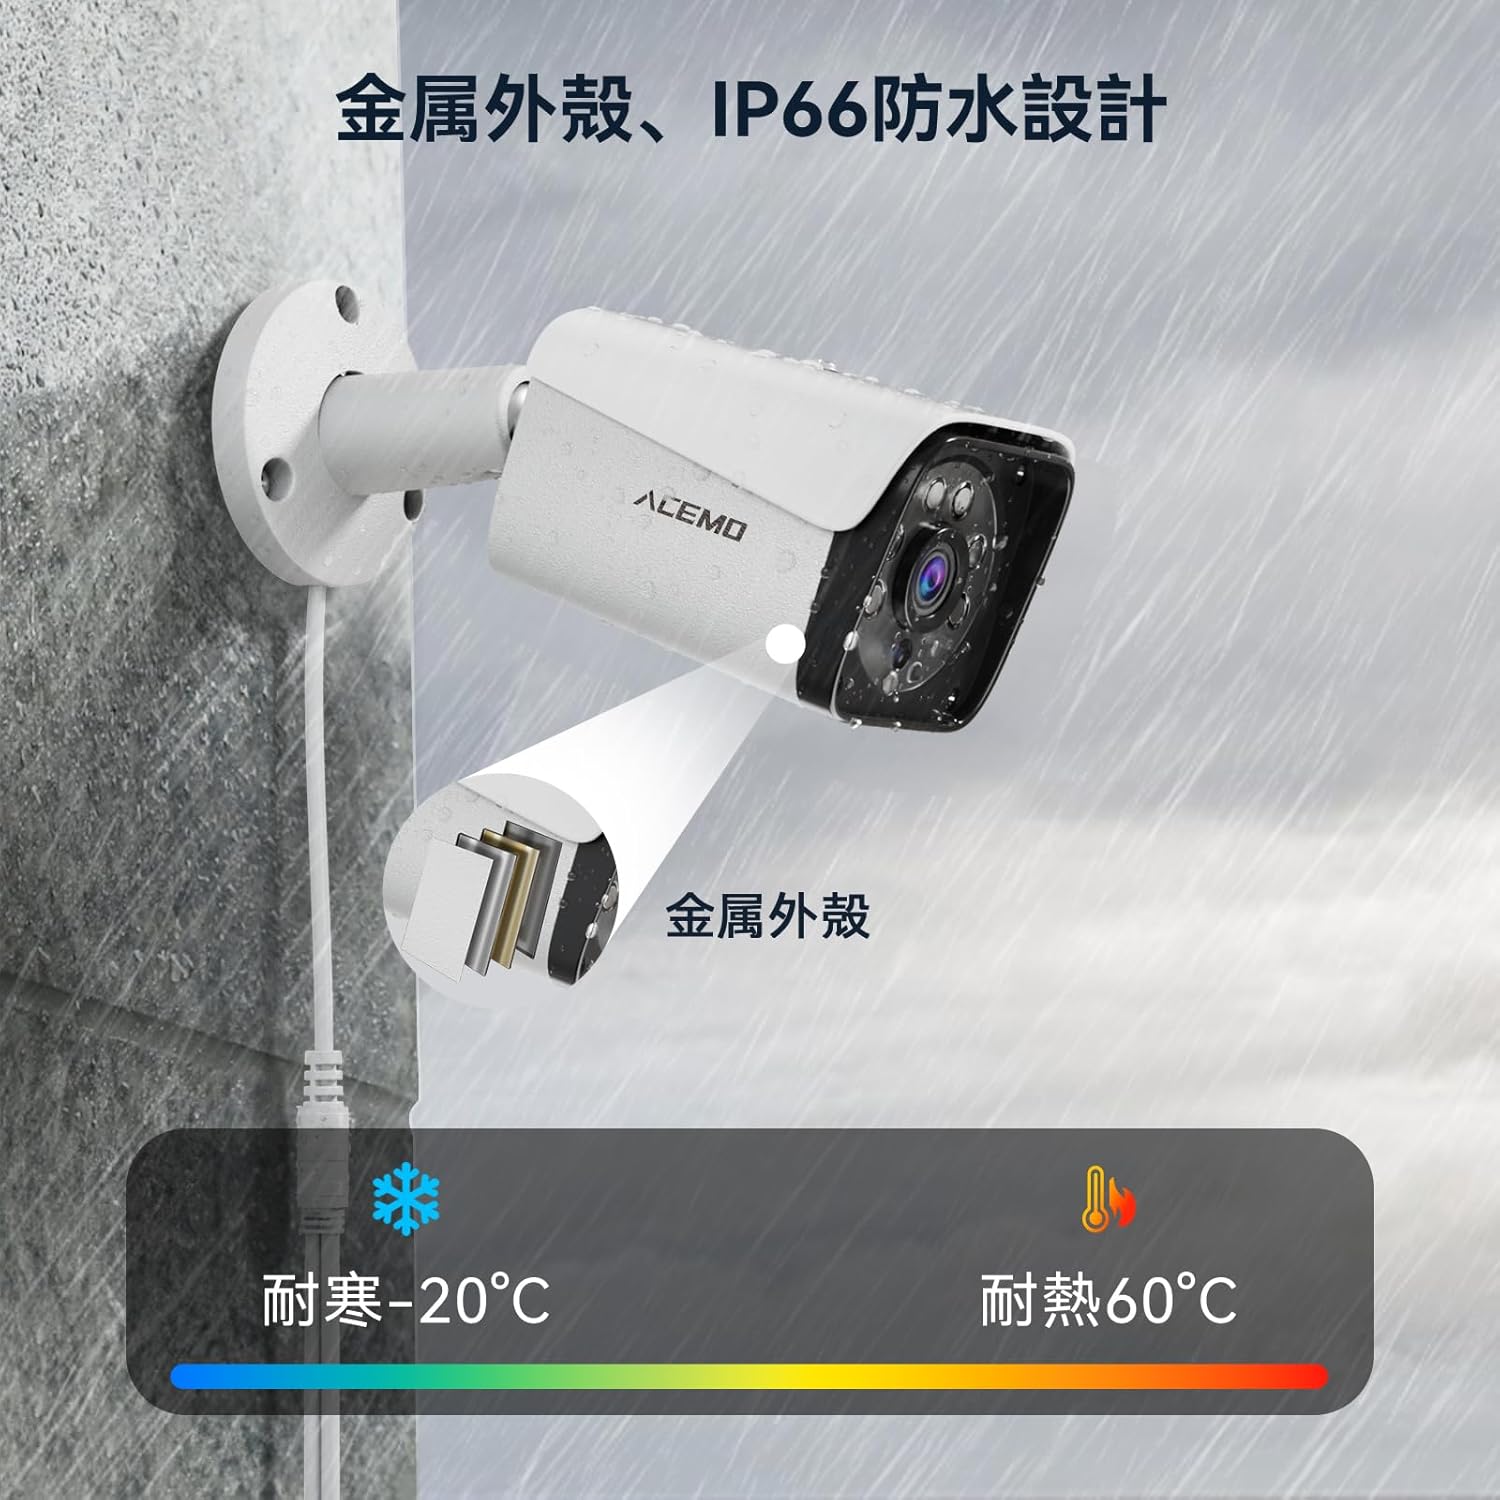
Figure 13: Close-up of the camera highlighting its metal casing and IP66 waterproof design, suitable for outdoor use.

Figure 14: Illustration showing the camera's durability against rain and snow, emphasizing its metal housing and IP66 rating.
Troubleshooting
If you encounter any issues with your ACEMO Security Camera System, please refer to the following common troubleshooting steps:
- No Video Signal:
- Check all BNC cable connections between the cameras and the DVR. Ensure they are securely fastened.
- Verify that all cameras and the DVR are receiving power. Check power adapters and outlets.
- Ensure the correct input channel is selected on your monitor/TV.
- No Remote Access:
- Confirm the DVR is connected to your router via the LAN cable and has internet access.
- Check your router's internet connection.
- Ensure the remote monitoring app is correctly configured and the device is added.
- Verify that the app has the necessary network permissions on your smartphone/tablet.
- Motion Detection Not Triggering:
- Adjust the motion detection sensitivity settings in the DVR menu or app.
- Ensure the detection zones are correctly configured to cover the desired areas.
- Check for any obstructions in the camera's field of view.
- Poor Image Quality:
- Clean the camera lens if it is dirty or smudged.
- Ensure the camera is properly focused (if adjustable).
- Check cable integrity for any damage or loose connections.
For further assistance, please contact ACEMO customer support.
Specifications
| Feature | Detail |
|---|---|
| Brand | ACEMO |
| Model | 4CH 5MP Lite DVR |
| Video Resolution | 3MP (Cameras) |
| DVR Channels | 4 |
| Storage Capacity | 500 GB HDD (Built-in) |
| Connectivity | Wired (BNC Coaxial) |
| Weather Resistance | IP66 Waterproof |
| Night Vision | Infrared (up to 30m) |
| Operating Temperature | -20°C to 60°C |
| Features | Smart Motion Detection, Remote Monitoring (App/Email Alerts), Continuous Recording, Scheduled Recording |
| Included Accessories | DVR, 4 Cameras, 4 BNC Cables, 2 Power Adapters, 1-to-4 Power Splitter, USB Mouse, Mounting Screws, Manual |
Warranty and Support
Warranty Information
This ACEMO Security Camera System comes with a 5-year warranty. Please retain your proof of purchase for warranty claims. The warranty covers manufacturing defects and malfunctions under normal use conditions.
Customer Support
For technical assistance, troubleshooting, or warranty inquiries, please contact ACEMO customer support through the retailer where you purchased the product or visit the official ACEMO website for contact details.