
VOWNER VOWNER-630
VOWNER Vanity with Lighted Mirror - Model VOWNER-630 User Manual
Comprehensive instructions for setup, operation, and maintenance of your VOWNER Vanity Desk.
Introduction
Thank you for choosing the VOWNER Vanity with Lighted Mirror. This manual provides detailed instructions to ensure proper assembly, safe operation, and effective maintenance of your new vanity desk. Please read all instructions carefully before beginning assembly or use.
Important Safety Information
- Always follow the assembly instructions provided.
- Do not exceed the weight capacity of the vanity.
- Be cautious of pinch points during assembly.
- Keep electrical cords away from heat sources and do not overload outlets.
- Unplug all electrical components when not in use.
- Ensure the vanity is placed on a stable, level surface to prevent tipping.
- Keep small parts away from children during assembly to prevent choking hazards.
Setup and Assembly
This section guides you through the assembly process for your VOWNER Vanity Desk. It is recommended to have two people for assembly. Please ensure all parts are present before starting.
Assembly Video Guide
This video provides a visual step-by-step guide for assembling your VOWNER Vanity Desk. It covers the entire assembly process from start to finish.
Step-by-Step Assembly Instructions
- Prepare the Side Panels: Attach the drawer slides (CL and CR) to the side panels (6, 7, 8, 9) using screws (E). Ensure correct orientation for left and right sides.

Image showing drawer slides being attached to the side panels of the vanity desk.
- Assemble the Base Units: Connect the prepared side panels using dowels (P) and cam locks (B) to form the two base units for the drawers.

Image illustrating the assembly of the vanity's base units, showing dowels and cam locks.
- Construct the Center Section: Attach the shelves (18, 19) to the center support panels using screws (F). Ensure the cable management hole (O) is correctly positioned on the right side.

Image depicting the assembly of the vanity's center section, including shelves and cable management.
- Attach the Mirror Frame: Secure the mirror frame (5) to the top of the assembled base and center sections using screws (A) and cam locks (B).

Image showing the mirror frame being attached to the main vanity structure.
- Install Power Outlet and Hair Dryer Holder: Mount the power outlet (K) into the designated slot using screws (E). Attach the hair dryer holder (N) using screws (J).
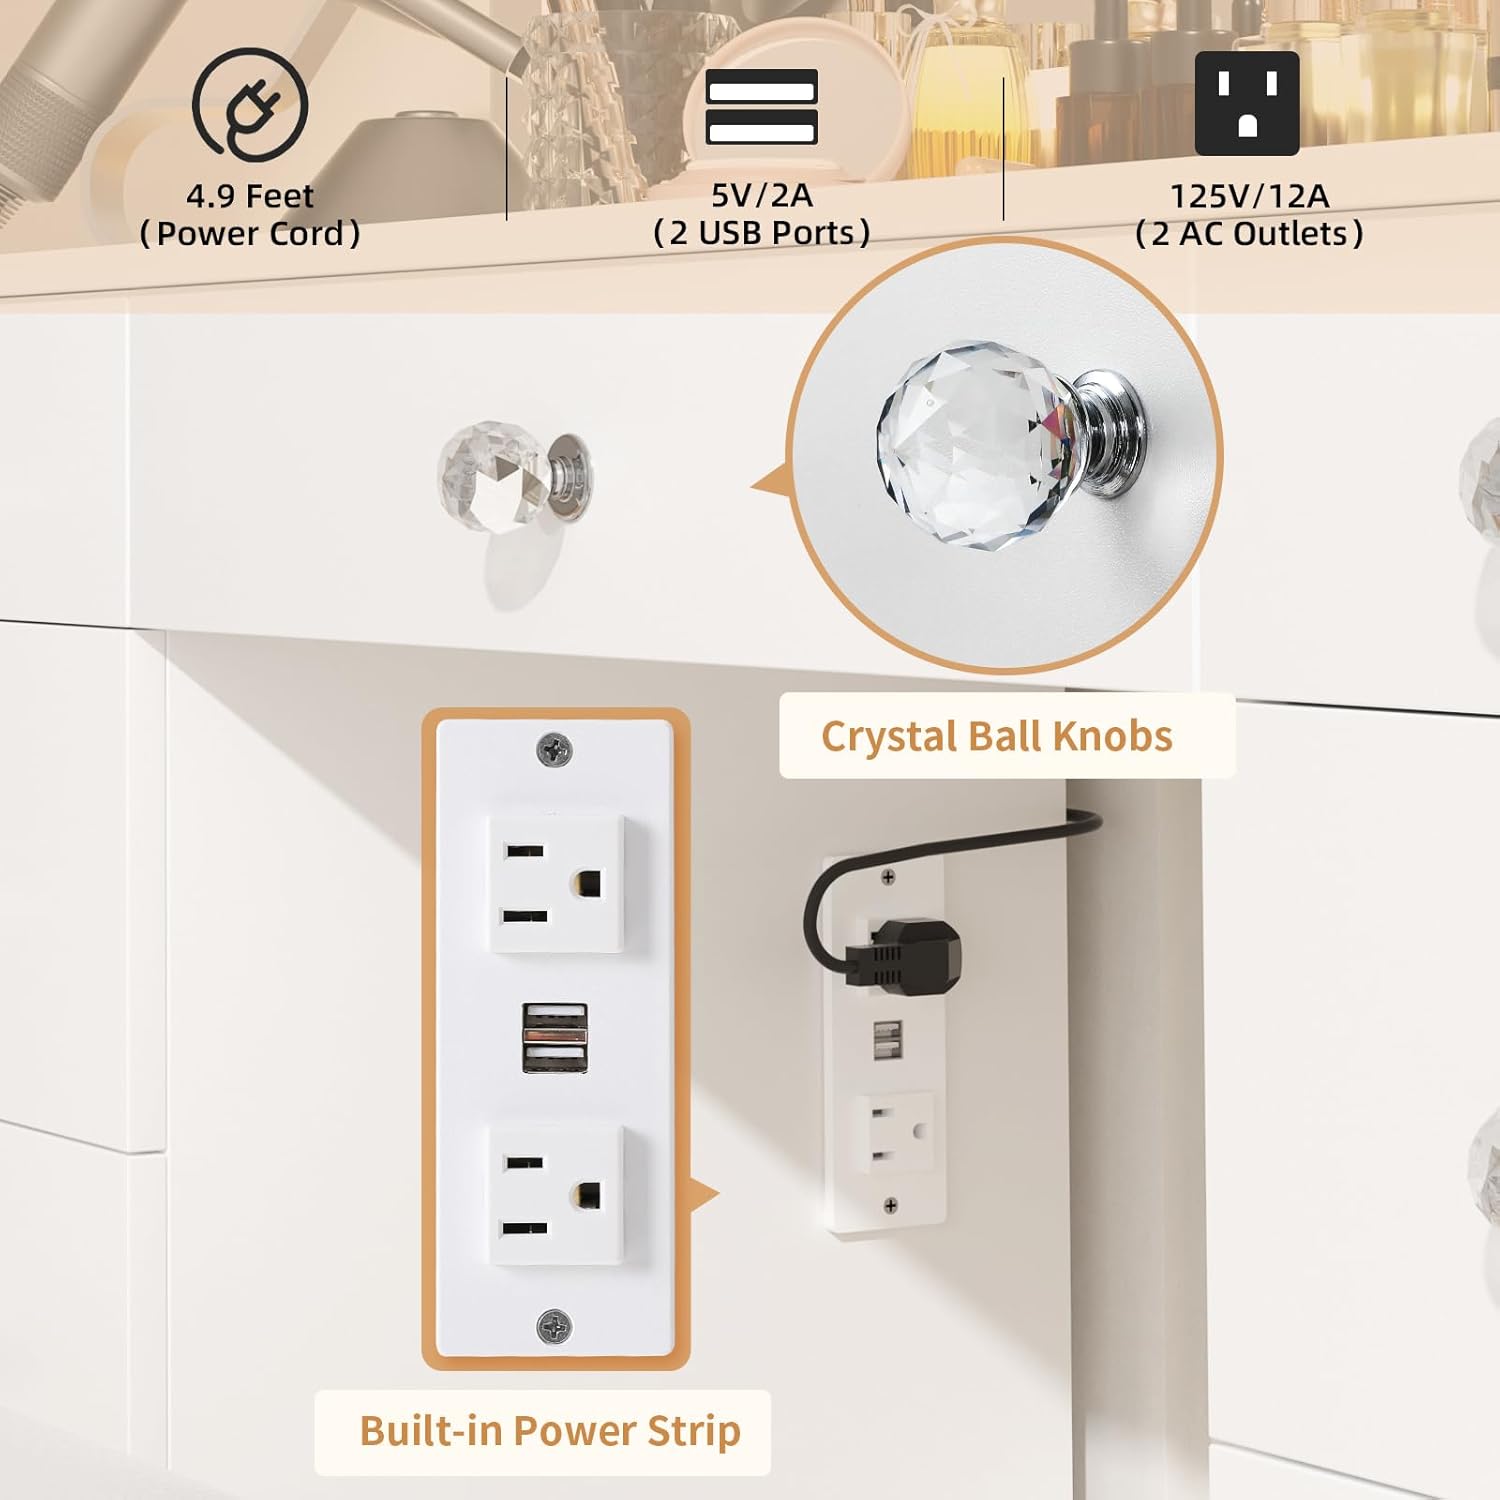
Image demonstrating the installation of the built-in power outlet and the hair dryer holder on the vanity desk.
- Connect Mirror Lighting: Connect the wiring for the mirror lights (I) to the main power source. Ensure all connections are secure.

Image showing the electrical connections for the lighted mirror.
- Assemble Drawers: Assemble the drawer boxes (10, 15, 20) using screws (E) and attach the crystal ball knobs (Q). Install the drawer slides (DL, DR) onto the drawers.

Image detailing the assembly of the vanity drawers, including attaching knobs and slides.
- Insert Drawers: Carefully slide the assembled drawers into their respective slots in the vanity frame.

Image displaying the vanity desk with multiple drawers open, illustrating its extensive storage capacity for various items.
- Assemble the Stool: Attach the side panels (30, 31) to the stool base (33) using screws (F). Secure the top (32) with hinges (H) and screws (W).

Image illustrating the assembly of the cushioned stool that accompanies the vanity desk.
- Final Touches: Apply the cover stickers (L) over exposed screw heads (T) for a clean finish.
Operating Instructions
Lighted Mirror Operation
The integrated LED mirror features adjustable lighting to suit your needs.
- Power On/Off: Locate the touch sensor on the mirror surface. Tap once to turn the lights on or off.
- Change Color Mode: With the lights on, tap the touch sensor repeatedly to cycle through the three color temperature modes: Warm White, Natural White, and Cool White.
- Adjust Brightness: To adjust brightness, press and hold the touch sensor. The brightness will gradually increase or decrease. Release when the desired brightness is reached.

Image demonstrating the three color light options (Warm White, Natural White, Cool White) and the adjustable brightness feature of the vanity mirror.
Power Outlet Usage
The vanity desk includes a built-in power outlet for convenience.
- AC Outlets: Two standard 125V/12A AC outlets are provided for powering hair dryers, curling irons, or other beauty devices.
- USB Ports: Two 5V/2A USB ports are available for charging mobile phones or other USB-powered devices.
- Safety Note: Do not overload the power strip. Ensure devices are unplugged when not in use.
Image showing the integrated power strip with two AC outlets and two USB ports for convenient device charging.
Storage Features
The vanity desk is designed with ample storage to organize your beauty essentials.
- Nine Drawers: Utilize the nine spacious drawers for storing makeup, brushes, accessories, and other items.
- Spacious Desktop: The large desktop provides sufficient space for daily use and display.
- Stool Storage: The included stool features a lift-top seat for additional hidden storage.
Image displaying the vanity desk with multiple drawers open, illustrating its extensive storage capacity for various items.
Maintenance and Care
- Cleaning: Wipe the vanity surfaces with a dry, soft cloth. Avoid abrasive cleaners or harsh chemicals that may damage the finish.
- Spills: Immediately wipe up any spills to prevent staining or damage to the engineered wood.
- Mirror Care: Clean the mirror with a glass cleaner and a lint-free cloth. Do not spray cleaner directly onto the mirror; apply it to the cloth first.
- Electrical Components: Ensure all electrical components are unplugged before cleaning. Do not expose electrical parts to water.
Troubleshooting
| Problem | Possible Cause | Solution |
|---|---|---|
| Mirror lights not turning on. | Power cable not connected; loose connection; faulty bulb/LED. | Ensure the power cable is securely plugged into a working outlet. Check all wiring connections. If issues persist, contact customer support. |
| Power outlet not working. | Power cable not connected; circuit breaker tripped; faulty outlet. | Verify the main power cable is plugged in. Check your home's circuit breaker. Avoid overloading the outlet. |
| Drawers do not slide smoothly. | Improper installation of drawer slides; obstruction in the slides; misaligned drawer. | Recheck drawer slide installation as per assembly instructions. Ensure no objects are blocking the slides. Adjust drawer alignment if necessary. |
| Vanity feels unstable. | Loose connections; uneven floor. | Tighten all screws and cam locks. Ensure the vanity is on a level surface. Use shims if the floor is uneven. |
Product Specifications
| Feature | Detail |
|---|---|
| Brand | VOWNER |
| Model Name | VOWNER-630 |
| Product Dimensions | 15.7"D x 47.2"W x 53.5"H |
| Color | White |
| Material Type | Engineered Wood Desktop |
| Item Weight | 112.5 Pounds |
| Number of Drawers | 9 |
| Lighting Modes | 3 Color Temperature Modes (Warm White, Natural White, Cool White), Adjustable Brightness |
| Power Outlet | 2 Standard AC Sockets (125V/12A), 2 USB Ports (5V/2A) |
| Product Care | Wipe with Dry Cloth |

Diagram illustrating the detailed dimensions of the VOWNER Vanity Desk.
Warranty and Support
For warranty information or technical support, please refer to the documentation included with your purchase or contact VOWNER customer service directly. Details can typically be found on the manufacturer's website or through your retailer.
Optional protection plans may be available for purchase. Please check with your retailer for details on extended coverage options.
Ask a question about this manual
Ask about setup, troubleshooting, compatibility, parts, safety, or missing instructions. Manuals+ will review the question and use this page’s manual context to help answer it.